Covering walls with MDF panels: doing it right. Do-it-yourself wall finishing with MDF panels Installation of lathing under MDF
- Preparing for work
- How to install the panels?
- Frame making
- Panel installation
MDF panels have many positive properties, thanks to which they are becoming increasingly popular and widespread. Among others - low cost and environmental friendliness. Almost anyone can install these panels themselves. It's pretty simple work, which requires only sufficient care. You can decorate walls using MDF panels without having any special professional skills in repair or woodworking.
Diagram of fittings for plastic panels.
What are MDF panels for walls?
Wood processing industry waste is used to produce MDF. However, they differ significantly from fiberboard and chipboard both in their manufacturing method and in their characteristics. No binders are used in their production; the production technology is based on the method of hot and dry pressing of wood. The use of this processing method ensures that the fibers and tubes of lignin that make up the wood, under the influence of high temperature and pressure, adhere to each other due to the resulting plasticity. In its structure, MDF resembles a kind of wood felt.
In its mechanical properties, MDF is inferior to most similar materials; their trump card is environmental friendliness, which is achieved by refusing to use binders chemical substances during their manufacture. This perfect material For interior decoration. When working with this material, you must adhere to the same rules as when working with wood. To glue MDF panels, the same glue is used as for wood. However, liquid nails are an adhesive specifically developed for MDF. This glue contains sawdust, so it can be used not only for gluing, but also for filling various defects, such as cracks. In addition, this glue can be used to seal the heads of self-tapping screws.
When purchasing materials, pay attention to the consistency of the color of the glue and the decorative finish of the MDF panels. Otherwise the glue may damage appearance finishing.
Return to contents
Preparing for work

Installation diagram of MDF panels.
Installation of panels is carried out mainly using ordinary household tools that are found in every home. From specific devices you will need a plumb line, which you can make yourself. To do this, simply tie a fishing line or strong thread tightly around the nut. In addition, stock up on a building level, a tape measure and a drill attachment that allows you to screw in self-tapping screws. You will need the latter if you do not have a special screwdriver. You may need a metal square with sides of different thicknesses, also called a bench square. You will need it to simplify the cutting of panels for the design of slopes. It is used like this: the cut is made based on a leg of smaller thickness, and a thicker leg is used as a stop.
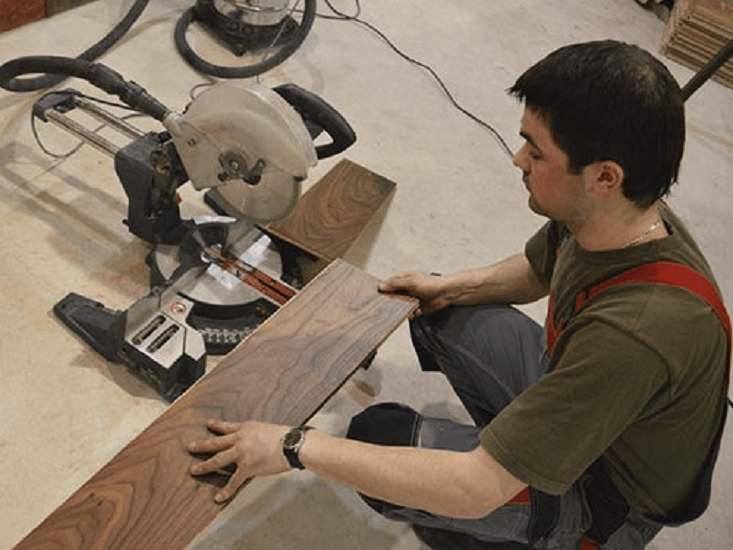
You can cut the panels electric jigsaw or manual circular saw. If you have to buy these tools, then keep in mind that the cost of a saw with a cutting depth of 12 mm is significantly higher than the cost of a jigsaw. However, you should also consider the versatility of the saw. When replacing blades, it can be used to cut a wide variety of materials. In addition, the saw is compact and easy to use.
Return to contents
How to install the panels?
Before installing MDF wall panels, they must be calculated and purchased in required quantity. Determining how much material is needed is quite simple. To do this, it is enough to calculate the surface area that will be covered and add 15% in reserve.

Installation diagram suspended ceiling from PVC panels.
Inspect the room before starting work. If it has ever become damp, the wall covering is swollen or cracked, the plaster has noticeable unevenness, or the thickness of the plaster layer is less than 1.2 cm, then careful surface preparation is necessary. To do this you need to completely clean main wall from the plaster and remove the skirting boards.
There are 2 ways to install MDF. The first involves the installation of a sheathing on which the panels will be attached, and the second will require special galvanized profiles.
Installing wooden sheathing is easier than installing profiles.

Scheme of additional profiles.
It will require less hardware for fastening, but its cost is higher than the cost of profiles. When making wooden sheathing, slats or slabs must be soaked in a special antifungal composition, and also treated with materials that will protect them from rot and mold.
It is not recommended to use the lathing in brick houses and in damp areas, since ideal conditions are created for pests in the space between the wall and the cladding. You won't notice that the finish is damaged until mold or mildew appears, and when this happens, it will have already spread widely. Harmful particles can penetrate the sheathing through the pores of the brick.
For the manufacture of metal frame you will need U-shaped profiles: guides and regular ones (UD and CD, respectively). The main difference between them is the cross-sectional configuration.
Return to contents
Frame making
Dowels or self-tapping screws are used to attach the wooden sheathing to the wall. For metal sheathing, only self-tapping screws are used. The diameter of the fastener should be from 4 to 6 mm, depending on the strength of the base wall: the stronger, the smaller the diameter. Fastening element must be driven into the base wall by at least 3 cm. That is, if the thickness of the MDF panel is 1.6 cm, the thickness of the lathing element is 4 cm, and plaster is applied to the wall with a layer of 1.2 cm, then it is permissible to use screws or dowels with a length of at least 10 cm.
Installation of wooden sheathing begins with the installation of vertical posts. They are placed in each corner in pairs, so that an angle is formed between them. Also vertical racks located on the sides of door and window openings to the entire height of the room. They must be positioned strictly vertically. You can check this with a plumb line.
First, the place for fastening the racks is marked on the wall with a pencil, then in it and in the wall, places are marked for making holes for fasteners that correspond to each other. The distance between the holes should be from 50 to 70 cm. Next, the racks are fastened with screws or dowels. Horizontal sheathing elements are installed in the same way.
Lathing made of metal profiles is made according to the same principle as wood. UD profiles are installed vertically, and CD profiles are installed horizontally. It is best to cut profiles into the required length elements with a circular saw or a small grinder.
How to mount MDF panels to the wall, and on what basis, the decision must be made taking into account the characteristics of the wall geometry, the size of the room, the presence of communications and constant heating. Despite their enormous popularity, MDF wall boards are quite picky about operating conditions, so you should not fasten them with the first method that comes to hand, so as not to re-lay the finish a second time.
Dimensions of MDF panels
Often, consultants of trading companies present MDF boards as a lightweight version of particleboard panels, especially if you decipher the English abbreviation. Accordingly, it is recommended to fasten them in the same way as in the case of using chipboard. In fact, MDF panels in structure and production method differ significantly from particle board, which allows you to fasten the material at lower costs and at higher speeds.

There are only three main differences:
- Thin MDF boards are made from recycled cellulose fiber, which contains virtually no polysugars - a staple food for bacteria, fungus and rodents. Chipboard uses ordinary chips filled with phenol-formaldehyde resin, so they are secured with special tongues;
- The boards are made by pressing wood fiber mass with the addition of hydrogen peroxide. At a temperature of 250 o C, lignin and part of the cellulose are welded by the remains of caramelized polysaccharides into a dense fiber mass. In thick slabs, the MDF core is additionally impregnated polymer resin, which makes it possible to fasten without the risk of material delamination;
- The bending strength of the panel is only slightly inferior to plywood with greater ductility and resistance to moisture. Most brands of MDF can be mounted on walls even in rooms with low levels of ventilation.
The difference, at first glance, is insignificant, but it is the strength and elasticity of the cellulose fiber base of the MDF panel that makes it possible to fasten the cladding slabs using end locks.

Even with a strong temperature difference, the MDF panel shows a level of expansion that is significantly lower than that of plastic or conventional wooden lining, so the material can be fixed with smaller gaps, which is especially important for boards of medium and large thickness.
What sizes are most popular?
Three size groups are used for wall cladding:
- Thin slabs, size group 5-9 mm thick, width 153, 198, 200,325 and 2070 mm;
- Medium MDF panels, thickness 10-18 mm, width 2070 mm;
- Oversized slabs, thickness 19-38 mm, width 2070 mm.
There are no restrictions on external dimensions, and the maximum thickness of the slabs is limited by the pressing capabilities of up to 40 mm. Double-layer MDF panels with a maximum thickness of up to 60 mm are also produced, used for the manufacture of reusable formwork and roofing lining. But the quality outer surface The number of such slabs is quite low, so they are not used for wall decoration.
Installation of MDF panels
Pressed cellulose fibers retain heat and absorb noise much better than plastic or wood. In addition, the MDF panel has a certain anisotropy of properties; it can be cut and processed in almost any order. Attaching the panels is easy and even a novice tiler can do it.
For home purposes, panels can be mounted in three ways:
- Lay the slabs on the glue;
- Mount the cladding on a wooden or metal frame;
- Installation of MDF panels using the hanging method.
The latter case is used as an exceptional way of cladding walls in a house made of timber or rounded logs. It is necessary to mount MDF boards on a ceiling-mounted suspension profile with a small gap between the floor and the lower edge of the board. The cladding is suspended on the profile, and as it shrinks MDF walls sags together with the timber material.

It is clear that for wooden house It would be more preferable to use narrow slabs, 190-200 mm wide, while MDF is better fasten in a vertical direction. If it is not known exactly about the planned amount of wall shrinkage, then it is best to attach the decorative trim with a gap increased by 2-3 cm. Firstly, this ensures that if excessive shrinkage occurs, the floor will not tear the slabs off the walls, and secondly, the gaps will ensure a normal level of ventilation and ventilation of the space between the panels and the wall.

Installation on a metal frame
Installing panels on a supporting frame made of galvanized profile is recognized by experts as the most rational and reliable way of fastening any cellulose-fiber materials. Even heavy slabs with a density of up to 1.5-1.8 g/cm 3 can be attached to a metal frame without any problems. The metal will not suffer from condensation or soaking of the walls as a result of burst pipes, water leaks in the apartment on the floor above or a break in the roof.

Frame assembly begins with installation starting profile and side strips. MDF panels are light in weight, so it is enough to install a number of vertical profiles No. 50 in increments of 40-50 cm. Using a galvanized U-profile makes it possible to attach MDF to the walls of a room approximately two to three times faster than any other method.
Two or three drops of silicone applied to the profile will even out the load on the wall and will prevent the cladding from flapping in a strong wind if there is a ventilation gap behind the decorative MDF lamellas.
Installation on a wooden frame
The easiest way is to mount MDF panels on a wooden frame. There are two options for wall cladding using cellulose fiber panels. It all depends on the size of the room and the condition of the walls.

If a slight reduction in space due to the sheathing is not critical, a frame made of wooden slats sewn onto walls using metal hanger holders. For small and small rooms, most often it is necessary to partially cut and knock down a layer of plaster in order to level the surface along a vertical plumb line and make it as smooth as possible.

In any case, the starting strip is initially laid on the floor and under the ceiling. Using a long building level, the installation points of the hangers are marked on the wall and the minimum required overhang of the side lobes of the fasteners is determined.

If you plan to install horizontal MDF slats, the supporting strips are mounted vertically. To install full-size panels with a width of more than 200 mm, the walls are sewn in both directions. Each wooden plank of the sheathing is aligned along the starting guides and fixed with suspension petals using self-tapping screws and a screwdriver.

For relatively level and dry brick, concrete or block walls, the sheathing can be attached directly to the wall using dowels. In this case, more work is added, since each plank before fastening has to be adjusted for a long time using shim washers in order to maintain a single vertical plane. But you can save 3-4 cm internal space, which can be very useful, for example, when decorating the walls of a small bathroom or corridor.
Glue installation
Using lathing or a load-bearing frame always eats up an additional 3-7 cm of space on each wall. Usage frame system counts good decision, but it is not at all necessary to fence a frame jungle if the walls of the room are for future cladding MDF panels turn out to be smooth, without serious defects or deviations from the vertical.

In this case, it is enough to clean the walls, prime them with acrylic primer and apply a thin layer of insulating putty. The lime sublayer will help to further level the walls and improve the adherence of MDF boards to the supporting surface.
Laying panels on walls using glue is carried out in two options:
- Each MDF is glued to the wall with one lamella, from ceiling to floor, with fixation along the end edge using self-tapping screws and plastic plugs;
- The material is laid on the wall in horizontal stripes from corner to corner after assembling and gluing in the corner and edge parts.
If the slats are glued directly to the wall, then the end joints are not glued or treated with sealing materials. Most often, fairly large panels, 40-60 cm wide, are laid on walls using glue. This method is more advantageous from a technological point of view, since the load from the considerable weight of the MDF panel is distributed not over several clamps or staples, but over the entire surface of the slab and walls. What does this give? Greater reliability, if the top row of MDF lamellas breaks, the middle and bottom rows will hold the entire structure.

Before fixing the MDF panels to the wall, reverse side covered with small portions of glue. These can be dots, spirals, short stripes. The main thing is that the adhesive material is evenly distributed over the wall surface.
As glue, it is best to use automotive sealant, polyurethane adhesives and homemade adhesives based on a mixture of acetone and polystyrene foam. Acrylic and polyvinyl acetate adhesives hold MDF panels rather weakly.
For your information! The MDF sticker on the sealant makes it possible to trim and remove the panel from the wall if necessary without damaging the surface. Stiffer alkyd, polystyrene and acrylic adhesives can tear off part of the back surface.
Fastening MDF panels to the wall
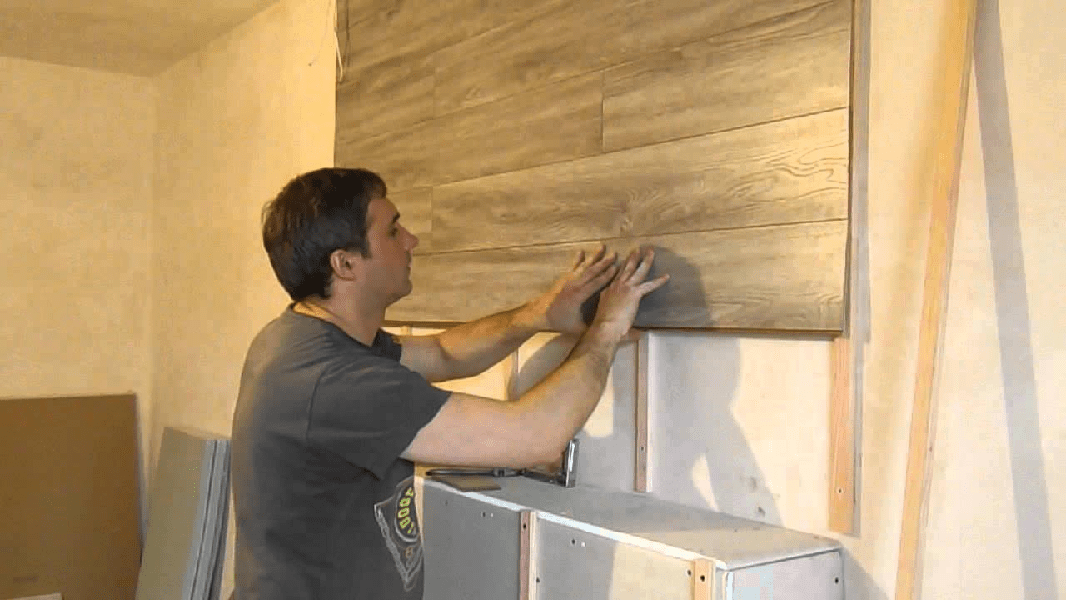
The process of installing cellulose fiber panels is relatively simple and easy to understand, even for a beginner. If a horizontal installation method is used, then install first the bottom panel or a lamella directly resting on the starting strip of the frame. It needs to be laid on glue, aligned construction level and secure with a stapler or self-tapping screw.
Before laying the next panel on the wall, it is necessary to install the corner or edge cladding elements, fix them on the wall, and only then proceed with laying the next parts of MDF.
How to fasten MDF panels to a bar or profile is selected individually in each specific case, based on the fastening conditions and the size of the material. Relatively thin, 6-9 mm lamellas are snapped into place with tongue-and-groove locks, after which the free end is sewn to the beam with staples and self-tapping screws. If it is assumed that it is possible to periodically remove the MDF cladding from the wall to inspect communications or wiring laid behind the decorative trim, then the panels are installed with clamps.

Thick slabs are mounted directly on the walls using glue and dowels, sealing the joints with acrylic putty and then gluing wallpaper or PVC film.
A difficult option on how to install MDF on walls with insulation
MDF boards are much simpler and more convenient to handle than heavy plasterboard, plywood or plastic, while the strength of the panels is enough to build two or even three-layer cladding options from a fiber composite with insulation as an intermediate layer.
For example, cold external walls made of profiles, siding or concrete blocks are hemmed from the inside with HDF class MDF boards, with a density of 800-1800 kg/m3. The thickness of the slabs is 25-40 mm. The laid panels are stitched at the joints with oblique screws and staples, and the seam itself is rubbed with polymer mastic.
The material is treated with impregnation, which ensures good vapor transmission with high resistance to surface condensate. The slabs are fastened to the external walls “cold” - using steel dowels and carpentry screws. WITH inside The slab cladding is sewn on with wooden slats or strips cut from slabs.
A steam membrane is stretched over the laid thermal insulation and hammered in with horizontal slats with a cross-section of 20x20 mm. The last step is to sew the lungs onto the slatted sheathing. decorative panels MDF class LDF with wood texture, natural stone or veneered.
Due to the low density of LDF, 200-600 kg/m 3, MDF panels perfectly transmit steam, which is removed through the ventilation gap and the ceiling ventilation seam. In this way the walls are sheathed in summer kitchens, balconies, verandas, any premises with frame-type walls.
Features of finishing with MDF panels
Most professional finishers prefer to work with MDF, since there is no dust and dirt, as is the case with drywall, installation is faster, and there are much fewer problems.
Assembly and installation of MDF on walls is in many ways similar to laying laminate floors, the only difference being that there are more options for choosing patterns decorative design premises and a much more complex arrangement of corner and slope sectors of the walls.
Slopes
The arrangement of door or window slopes is no different from plasterboard options. If the slats were laid vertically on the walls, then to design a window or doorway it is enough to cut a panel of the required height and width and stick it to the slope plane with mounting foam or sealant.
If the walls in the room are protected by horizontal panels, then the slopes will have to be assembled from sections with self-tapping screws and plastic plugs.

Corners and crevices
Between the laid additional elements and the main part of the cladding, cracks and gaps always form. They have to be eliminated with the help of special decorative corner trims and decorative skirting boards.

All auxiliary decor is glued to “Titanium” or “Mounting Moment for MDF”, a small amount of glue is applied to the edge along the gap, after which a corner strip is installed at the joint. To prevent the decor from coming off, the corner is temporarily fixed with tape.
Sockets and switches
Every room has at least a couple of outlets and one switch. In order not to dismantle them during the installation of MDF, proceed as follows: measure the coordinates of the location of the socket on the wall, after which a hole of the appropriate shape and size is cut out with a ring drill or jigsaw. When installing an MDF panel, the size and position of the hole is specified and trimmed with a sharp knife.
All that remains is to install the panel, secure it to the wall, and close the remaining gap with a decorative frame.
Conclusion
The details of the process, how to attach MDF panels to the wall, must be thought out and planned in advance, before work begins. decorative finishing premises. The process itself is not particularly difficult, but in any room there are many problem areas where you almost have to invent the fastening method on your own. In this case, it is better to draw the details and method of fixation on the diagram, so that you do not have to rack your brains and waste time during the work process.
The decoration of any room should be carefully thought out. The design must be not only beautiful, but also functional. For example, MDF panels can subsequently be washed; they will not quickly become dirty and age. In addition, this material has additional advantages.
The ideal finish would be one for which MDF is used. Do-it-yourself installation is quite simple. No special knowledge is required here. So even a non-professional can handle the job.
What is MDF?
For the production of which very small shavings are used. For production it is necessary high pressure and temperature. In order for the chips to stick together into one mixture, urea resins are added to it, which are considered a connecting link.
MDF wall panels (even an amateur can do the installation themselves) are used for cladding vertical surfaces in residential and office premises. Other types of material can be used for making furniture, arranging partitions, laying flooring. Very often they are made from slabs Acustic systems. The thickness of the material reaches 4 mm. There are some conditions for storing these products: humidity - no more than 70%, temperature - no higher than 25 degrees.
Material advantages

Covering with MDF panels has some advantages:
1. High level of moisture resistance. Some types of materials can even be used to decorate the bathroom.
2. Good strength. The slabs are well pressed.
3. Low cost. You can buy them at any hardware store at a reasonable price.
4. Resistance to temperature changes and biological effects. Mice will not be able to chew through such cladding.
5.Easy to handle and use. You can cut the material with a regular jigsaw or circular saw.
6. Good soundproofing qualities.
7. Products retain heat well, and they can also be painted, laminated, and varnished.
8. Possibility of creating an original design.
9. Easy cleaning of panels.
MDF wall panels, which can be installed by hand only after assembly necessary tools, made from natural material, therefore they are environmentally friendly.
Disadvantages of the product

Among the disadvantages of this material are the following:
Combustible.
Quite a large mass. This feature does not allow the use of shields for all walls.
The presence of synthetic resins in the product. Although they do not evaporate and are not harmful to health.
These disadvantages are not significant when correct operation material.
What types of slab fastenings are there?
Before that, you need to understand the connection methods. They are like this:
- Tenon and groove. This is the simplest type of locking elements. Laying is done joint to joint. A feature of this installation is the need for a base made of metal profiles or wooden sheathing.
- Groove-groove. Here, too, special training will be required. The wall will need to be reinforced with U-shaped profiles.
- Glue. This method is used quite often. However, the panel should be light in weight and the wall should be perfectly flat. The work requires a special adhesive composition. Naturally, dust and dirt await you during the installation process. But if you have a small room and the availability of free centimeters is essential, then it is better to choose this method.
- Profile. It allows you to level the base and attach large-format products.
What tools are needed for the job?

If you purchased MDF wall panels, you should do the installation yourself only after all the necessary material and fixtures are ready. You will need:
- Building level.
- Slats for the construction of sheathing.
- Bench square for correct definition corner.
- Plumb.
- Drill as well special nozzle for tightening screws.
- Hammer and pliers.
- for cutting panels.
- Special fasteners.
- Screw, self-tapping screw in the required quantity.
These tools should be sufficient to install the panels. Other equipment may be required to prepare the surface.
Types and features of panels

In order for the finishing to serve for a long time and with high quality, it is necessary to choose the right facing material. There are these types of panels:
- Regular. They are highly durable, but do not have special protection from moisture. Therefore, such products can be used for wall cladding in dry rooms: hallways, living rooms, bedrooms.
- For rooms with high humidity levels. Such MDF panels are suitable for the kitchen. It is in this room that moisture often accumulates and temperature changes occur.
- Heavily loaded. They can be installed in bathrooms, as they have the most high level protection from the harmful effects of moisture.
Naturally, one should not lose sight of the decorative properties of MDF boards. Thanks to different drawings And color design you can do miracles. For example, to make a room seem larger, use light or white panels. To get an original and unique interior, you should pay attention to material with an individual design pattern.
Naturally, when choosing, you should pay attention to the technical characteristics and quality. Buy material only from licensed stores. It is better to choose those manufacturers who have good reputation and customer reviews.
Features of surface preparation
Before doing this, you must prepare the base. In principle, this is not difficult to do. First, remove the previous finish or its fragile parts. If the basis for fastening the slabs is a wooden sheathing, then there will be no need to level the wall. It should be pre-marked.

The adhesive method requires a perfectly flat surface. If the defects or level differences are small, then a regular plaster solution can be used. Naturally, the walls will then need to be primed in order to maximize adhesion to the glue.
Most often, wooden sheathing is used. It's not difficult to do. The slats are installed vertically and horizontally. The distance between them should not exceed 30-40 cm. To fasten the slats, a screw, self-tapping screw or nail is usually used. Please note that everything wooden elements should be treated with a special antiseptic.
If metal profiles are used for the sheathing, then the space that remains between them can be filled mineral wool or other insulation. In addition to retaining heat, you can provide additional sound insulation.
Installation features

Interior decoration with MDF panels has a certain sequence:
- Fastening the first panel. She's screwed on internal corner using self-tapping screws. If necessary, the slab is trimmed to length. Since each panel has a ridge, it will have to be ground down a little. Metal fasteners are used for additional fixation.
- The next planks need to be screwed close to the previous ones. On the side of the groove, the product is fixed with additional fasteners.
- Installation of the last panel. If necessary, it is cut to width. This element is attached to the sheathing with self-tapping screws.
- Next, you need to repeat the above steps for each wall. After completing the work, a narrow plinth should be installed along the upper edge. It is fastened with nails or self-tapping screws.
As you can see, you can handle this work yourself.
MDF panels are in very high demand. However, improperly installed material can worsen the interior of the room. Therefore, try to follow the recommendations of experts.
For example, when laying slabs, always use a plumb line and this will help you attach the products evenly.
You can sew up the entire wall or part of it with this material. For example, you can only attach panels to half the height of the base. This will make it possible to use additional Decoration Materials, as well as diversify the interior.
If there are small irregularities on the wall, then small pieces of plastic can be placed under the wooden slats. They will strengthen the sheathing. That's all. Let your home be beautiful and unusual. Good luck!
The option of surface cladding using MDF panels is currently gaining popularity. The reason is that with their help you can quickly carry out facing work on large area. An additional plus is that when working with them, the wall will not require additional finishing in the future. It is also worth noting that decorating walls with panels yourself is doubly economical.
An important advantage of the panels is that their installation is simple and understandable to everyone, and anyone can install them.
The easiest way to have a beautiful front lawn
Of course you saw perfect lawn in the cinema, on the alley, and perhaps on the neighbor’s lawn. Those who have ever tried to grow a green area on their site will no doubt say that it is a huge amount of work. The lawn requires careful planting, care, fertilization, and watering. However, only inexperienced gardeners think this way; professionals have long known about the innovative product - liquid lawn AquaGrazz.
MDF - what is it?
MDF - fine faction From this faction are being manufactured wall panels for interior decoration. The manufacturing stages are as follows: wood shavings, fine in composition granules, are sent under a dry press. An important point is processing using high temperature and high pressure.
In order to bind the particles together and make the panel monolithic, special resins (usually urea) are added to it, which are modified with melamine.

An undoubted advantage in choosing MDF panels is that they belong to the class of highly environmentally friendly materials. According to the principle of installation and installation, use in home interior finishing using MDF panels is reminiscent of the process of working with lining. However, such panels are cheaper in price.
Installation is usually carried out in two ways - by mounting on a lathing, which acts as a frame, or by mounting on a wall using various adhesives or “liquid” nails.
Such compositions are used when installing wooden materials, as well as when sealing various holes and cracks, because their structure contains filler in the form of sawdust.
The main thing is to choose an adhesive composition that matches the color, since otherwise the areas of “grease” will stand out inharmoniously against the general background.
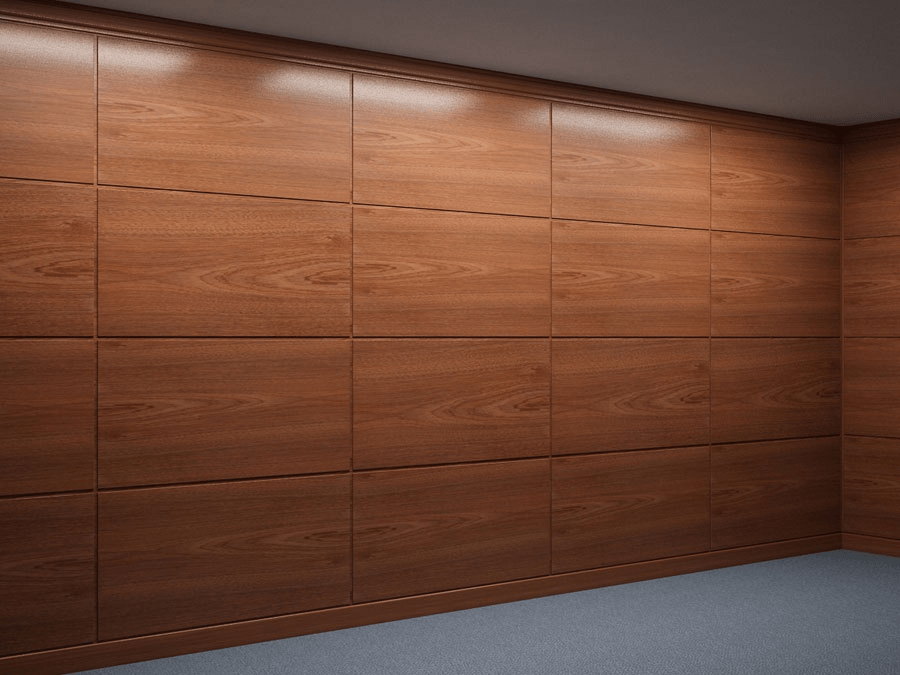
It should also be noted that MDF plates are made in a huge range of colors and tones and can have patterns of different relief structures. You can find imitation stone. All this suggests that such panels can be suitable for almost any interior. Their undeniable advantage is that during installation the panels can be combined in both vertical and horizontal positions.

It is worth noting that often, when the room seems not high enough, the vertical arrangement of the panels on the wall will help to visually “grow” the finished wall. For tall ones, but narrow rooms- all recommendations are exactly the opposite.
It is important to take into account when choosing that such panels are produced in different formats (length and width), so first of all we need to decide what result we want to see in the end.
Required Tools
For convenience and ease of implementation finishing works It is recommended to prepare in advance and collect the tools necessary for the work. They will speed up the installation of panels and make it quite easy. So, we need:
- A jigsaw or a special saw that will allow you to cut vertically.
- Ordinary bubble level.
- Measuring tools – rulers, angles, pencils and markers.
- Drill or ordinary screwdriver.
- Stapler (preferably a construction one).
- Hammer.
- Pliers.

Main rules for installing panels
Installation of MDF panels on any surface is carried out in two ways - using adhesives and installing a frame.
Both of the installation options can easily be used for finishing MDF panels in both private houses and simple residential apartments. When working with adhesive compositions, it is important to take into account one important nuance - the surface of the wall for cladding must be perfectly flat and smooth. In this case, it is recommended to first carry out the work using plasterboard or using plasters or putties.
When installing panels using adhesive compounds as additional materials Only adhesives or “liquid” nails and some elements of fittings will come out.
For cases where it is necessary to hide communications under MDF panels or insulation, it is better to use the option of installing lamellas on a frame base. In addition, such a frame can be made from any, even the most uneven surface an ideal plane that will become an important foundation for reliable installation MDF panels.
The frame itself can be assembled from bars (wooden) or profiles (metal). It should be noted that attaching panels to a wooden frame is much easier than to a metal one. In the case of wood, regular nails or staples from a construction stapler will do. A metal frame will require self-tapping screws, which makes it necessary to use additional tool- screwdriver.

When a frame is used, a gap is formed between the wall and the cladding; wires, pipes can be removed into it, or insulation materials can be laid. However, it should be understood that such gaps, dark and sometimes damp, are attractive to fungal colonies such as mold. So it is very important to dry the wall before the installation process, if it is wet, and additionally treat it with special protective compounds, in order to avoid the formation of fungi.
So, to build the frame we will need:

Preparing the surface
You can start preparing the surface only when it has been previously dried (of course, if such a measure is required and the wall in the room is damp). We have already emphasized earlier why this is important. The main thing is to never carry out facing work on top of a damp wall.
The process of preparing the walls itself consists of the following simple steps:
- Cleaning the wall. When the surface is covered with wallpaper, it is important to remove it, because in a confined space old wallpaper will become a very attractive environment for the appearance and proliferation of fungi and mold, and sometimes insect pests. If the wallpaper is glued well enough, you will first have to wet it or steam it using the same clothes iron; then removing it will not be difficult if you use an ordinary spatula. In rare cases, it may be necessary to use a special composition that will help get rid of the wallpaper layer. In case the wall is plastered or well painted water-based paints, cleaning work can be skipped.

- Surface treatment. In cases where your wall has already been attacked by mold or other types of fungi, or perhaps insects, it is recommended to thoroughly treat it. It is advisable to use compositions such as “anti-mold” or “whiteness”. Before the processing process, you can scrape the surface with a spatula. After applying antiseptics and healing compounds to the wall, it is recommended to go over the wall again with a spatula, and then repeat the treatment process. Ideal option will be like this when the affected surface is cleaned to the ground: all traces of fungi or insect activity are completely removed.
It is important to understand that it is better to carry out such work when using means personal protection such as respirators or masks. Indeed, in case of unintentional inhalation of plaster particles or suspensions affected by fungus, unpleasant health consequences can occur.
- Treatment of cracks. If, after removing the wallpaper layer or poorly applied plaster, cracks are found on the surfaces, it is recommended to carry out work to eliminate them. This procedure is especially important if it is planned to place under MDF panels thermal insulation materials or soundproofing. It is important to understand that unsealed cracks can become “bridges” for the entry of cold into the room, creating factors favorable for the formation of mold, such as dampness and darkness. In order for the layer of plaster or putty to adhere well, it is recommended to widen the crack a little and, if possible, deepen it. Next, you should get rid of traces of old plaster and use a primer deep penetration treat the crack. After the primer has dried, the cracks are sealed with putty or plaster. It is important to fill the crack to its full depth.

- Application of primer. When the first three steps are completed, you should start priming the entire surface. It is important to choose soil compositions so that they contain antiseptics. This choice will help prevent the formation of mold and fungi and protect against insects settling under the panels. In case of cladding wooden walls it is necessary to select a soil that also includes special fire retardants. They are designed to increase resistance to fire effects. It is important to remember that the primer is applied in two or three layers, each previous one must dry thoroughly before applying the next.
- Installation of insulation. We go through this stage if the MDF is installed on the lathing. Penofol is ideal for this purpose; it is usually glued to a primed surface.
Frame installation process
It is important to install the frame correctly and correctly. First you need to decide how the frame elements will be installed - vertically or horizontally. For horizontal orientation, the guides are installed vertically, and vice versa for vertical orientation.
The frame is attached to a layer of insulation. You should choose a step between the guides of 5-6 centimeters. It is important to observe and control the evenness of the installation.
In order to determine the vertical (ideal), a plumb line is used. An ordinary level is suitable for determining horizontal lines. After marking it, it is not difficult to install our guides for future sheathing. It is important to consider that it is better to install the first guide in the corner of the room or along the floor area.

Installing MDF panels on a frame
When the frame is ready, and the communications are installed and hidden properly, we begin the most important process - installation of the panels.
This work begins with the preparation of the panels themselves. With help measuring instruments A marking is made along which a cut is made using a jigsaw or an ordinary hacksaw.
It is important to remember that:
- The first MDF panel must be mounted at a level for ideal horizontal or vertical, otherwise the cladding and installation of other subsequent elements will be crooked and uneven.
- The starting panels are installed with tenons in the corners and secured with self-tapping screws. When using a metal frame, the clamps are secured with small self-tapping screws with a small head.
- The tenon of each new panel fits closely to the groove of the already installed one. Next, it is important to adjust the position of the panel using a level.
- Thus, the paneling is carried out to the end of the surface. It is recommended to fix the final panel using self-tapping screws. We will hide them in the future with the help of decorative corners.

Installation with adhesive solution
It is worth immediately noting that this option for installing panels is much simpler and lighter than the first, frame fastening method.
Particular attention should be paid adhesive compositions. They must meet certain requirements. Among them:
- The plasticity of the glue must be maintained even after its initial drying, otherwise deformation of the MDF panels is likely. It is important to choose a composition that is not afraid of moisture and temperature changes.
- The consistency of the composition should be thick in order to be able to apply it in a thin layer or a thicker layer.
“Liquid” nails, which can easily be found in any hardware store, ideally meet these requirements.
So, let's begin. Apply glue to the inner surface of the panel in a thin layer or in waves. After this, the panel is pressed tightly against the wall, torn off, left for 5 minutes, and then pressed again to the required location. It will take half a minute to hold it in this position for secure fixation.

The finishing panel, if necessary, is measured and cut to fit right size. Last panel fixed with a self-tapping screw.
At the end of the work, we install the fittings. We attach pre-prepared corners and baseboards at the joints of planes and at doorways.
Advantages and disadvantages
Decorating walls with MDF panels yourself is good, but you should take into account the nuances.
Pros: ease of installation, variety of colors and textures, the ability to install communications when choosing a frame installation method, no additional finishing in the future, ease of maintenance, accessibility.

Minuses: the presence of protrusions and gaps, when choosing a frame, the formation of gaps between the wall and the lamella, which reduces the area of the room, and also provides an opportunity for the development of fungus and mold - if the wall is not carefully treated, insufficient mechanical strength, minimal moisture resistance.
Bottom line
Now that you are so familiar with features of MDF panels and the intricacies of their installation, all that remains is to make your choice of the most suitable lamellas for the design. Wall decoration with MDF panels - a good choice for your home. Good luck! And let your home be beautiful and cozy.
When traditional natural materials begin to deplete, as happened with wood, natural desire to minimize losses and put even production waste into use.
This is how analogues appeared wooden shields based on sawdust and shavings - chipboard and fiberboard. From the "Mason gun" fibreboard was produced, which later received the name MDF.
Types of material
According to the density of the facial layer fibreboards are differentiated by marking:
- LDF from 200 to 600 kg/m³;
- HDF - over 800 kg/m³.
According to the regulations of the standard:
- general purpose (MDF);
- moisture resistant (MDF.H);
- structural (MDF.LA).
Based on the type of front surface, the slabs are distinguished:
- embossed (milled);
- flat.
According to covering capabilities:
- rack (stacked) - width from 150 mm, length up to 3700 mm;
- tiled (composited) - within the range: 30x30 and 98x98 cm;
- sheet - 122x244 cm.
By finishing method:
- laminated - covered with polyvinyl chloride film (plain color, with a pattern, glossy, matte, imitating natural materials);
- veneered - with a front layer of valuable wood veneer;
- painted - coated with paints and enamels (by pouring method), creating an elastic layer, using the printing method.
In addition to synthetic films, films based on paper based and paper laminates.
Film coating not afraid of cleaning agents, resistant to mechanical stress, resistant to direct sun rays, but raises the cost of the material.
Advantages and disadvantages
 The raw materials used for the production of MDF panels give them properties of natural wood, and even superior in mechanical properties.
MDF panels, like any material, have their pros and cons.
Obvious advantages of MDF:
- Strength.
- Moisture resistance.
- Frost resistance.
- Uniformity of structure.
- Large selection of decorative finishes.
- Imitation of expensive natural materials.
- Long-term preservation of product geometry.
- Easy to install.
- Availability of fragmentary repairs.
- Economical.
- Ease of transportation.
- Relatively long service life.
- Sound insulation properties.
- Environmental Safety.
Flaws:
- Self-weight value.
- Not suitable for fastening with nails.
- Processing waste in the form of dust.
- Vulnerability to open fire.
- Swelling at high humidity.
- Susceptibility to deformation due to mechanical impact (impact, fall).
How to choose?
Accounting for technical characteristics material and right choice tools are the key to success when working with this type of facing slab.
Selecting panels for interior wall decoration depends on many conditions:
- What material resources do you have?
- What problems can be solved by the covering capabilities of the material.
- What decorative load will the cladding bear as part of the design project?
- How important will the premises be? additional properties slabs: moisture resistance, fire resistance.
- Does the protective (decorative) coating of the slab matter for compliance with hygiene standards?
Optimal choice - wall panel (780 kg/m³), in type and assortment, meeting the tastes and capabilities of the owner.
Scope of application
In rooms with constant humidity - bathrooms, indoor swimming pools - the material exhibits increased fragility.
MDF panels found their application in various fields, in construction, for the manufacture of cabinet furniture, in interior design, the manufacture of arches, partitions and much more.
Application of MDF panels:

Do-it-yourself methods for attaching MDF wall panels
The most common technique leveling and simultaneous decoration of walls- cover them with MDF boards.
Wall slabs can be attach to the wall in two ways:
- By frame technology(to a metal profile or on a wooden sheathing);
- installation with glue (liquid nails).
On a wooden sheathing
On wooden sheathing panels are fastened from slats with a cross-section of 20x40 mm along horizontal joists using tongue-and-groove locks. Why hammer small nails into the corner of the lock groove? To ensure accuracy of work, a metal striker is used, which allows you to drive the nail right up to the head.

On a metal profile
In order to install the panel on a metal profile you will need the following consumables:
- SD profile (3m) for racks;
- UD profile (3mm), guide;
- straight suspension;
- additional strips and corners for joints;
- corrugation (self-extinguishing) for electrical wiring.
Walls under MDF do not require special preparation, except, if necessary, to additionally insulate them.
The position of the sheets (composite slabs, slats) on the wall is determined.
Implemented marking a wall using a level, self-tapping screws and nylon thread for the UD guide profiles. Sections of exposed wiring are removed into the corrugation.
A frame is constructed from a metal profile under MDF:
- The UD profile is attached with dowels to the ceiling and floor (wide side to the surface);
- suspensions for LED profiles are fixed on the walls with a “quick installation” fastening;
- SD profiles are attached to the ends of the UD profile of the floor and ceiling; fixed in suspensions in increments of 60 cm; the vertical position is verified with a plumb line;
- additional horizontal profiles are installed using crab joints on vertical posts in places of probable impacts: 60-70 cm from the floor, and between them.
Installation of MDF panels on the frame using clamps and small self-tapping screws, in the sequence: panel, groove at the end, fastening with self-tapping screws to the profile. Corner joints closed with additional parts from PVC.
First panel additionally secured with self-tapping screws in places that will be hidden after completion of work: to the floor (under the baseboard) and the ceiling (under the decorative overlay).
In this video clear example How to decorate a wall with MDF panels with your own hands.
Without frame
Mounting panels without a frame using “liquid nails” is even easier. The consistency of the glue should ensure elasticity of adhesion and filling in uneven walls. To successfully follow the technology, the instructions on the tube are enough.

Primer - required condition process. Glue is applied to the panel pointwise and in a checkerboard pattern.
It is necessary to glue in two stages: after the initial pressing to the wall, the panel is torn off (to air out the glue), and a second time (after about five minutes) it is necessary to glue the panel completely. The entire process is controlled at the construction level.
The panels must be cut evenly and carefully to ensure aesthetic articulation at the joints.
To prevent damage front surface when cutting a slab, it should be placed on the work table with the glossy side up.
For joining in wall corners use an additional element, commercially available - a special corner for external or internal corners.
Decorating walls with MDF panels is not a difficult task for someone who has experience working with tools and is not afraid to acquire new skills. The result will please you and your household.


