Materials for insulating the ceiling of a private house. The cheaper it is to insulate the ceiling of a house. What is the best way to insulate a ceiling? Necessary tools and materials. The best materials for external insulation
Insulation of ceiling structures in a private house is one of the stages of arranging the ceiling, and far from the most difficult. All that needs to be done to complete this work is to understand the structure of the thermal insulation layer, select the optimal insulation for a particular situation and install it correctly. This article will discuss how to properly insulate a ceiling in a private home.
Choice of insulation
There is no need to think long about whether it is necessary to insulate the ceiling, because the answer is obvious. Thermal insulation is intended not only to retain heat within the building, but also to reduce heating costs. The fact is that thermal energy tends to leave the house, and the largest leaks always occur through ceiling and floor structures. The insulation of interfloor ceilings can be mediocre, but the ceiling, behind which there is an unheated attic, must be protected very well - otherwise most of the heat will escape through the roof.
When choosing insulation for the ceiling in a private home, you need to take into account a whole range of parameters, including:
- Thermal conductivity level - the lower this indicator, the less heat loss will be;
- Moisture absorption coefficient - the decrease in this parameter is directly proportional to the volume of moisture that can be absorbed into the insulation;
- Weight and density - the lower, the more convenient it will be to install the material;
- Flammability class - it is advisable to select products of category G1;
- Environmental friendliness.

For the manufacture of floors in private houses, either concrete or wood is used. Insulation of concrete structures can be carried out using bulk and sprayed materials, as well as slab products. Any type of insulation is suitable for working with wooden floors, as long as they have minimal thermal conductivity. Methods for installing insulation may differ, so each case must be considered individually.
Methods of ceiling insulation
Ceiling insulation in a private house can be done in two ways:
- Internal;
- External.
The methods are quite different, and each of them has a number of characteristic features. Both insulation options can be used either separately or together (in the latter case, the greatest efficiency is achieved). To insulate the ceiling in a private house with your own hands, it is worth considering both methods in more detail and understanding their inherent nuances.
Internal
When insulating the ceiling in a room, it is necessary to mount a frame on which the thermal insulation materials will be supported. This method not very profitable - firstly, the useful volume of the room after installing all the elements is reduced, and secondly, installing the system under the ceiling is quite inconvenient, so the whole work will take more time and effort.

In order for the ceiling insulation inside the house to function normally, it is necessary to install a vapor barrier layer. The thing is that steam inevitably moves upward and tries to go outside the room. If this does not happen, then moisture vapor will lead to rotting of the insulation, as a result of which it will lose its properties.
External
With external insulation the situation is much simpler. In this case, there is no need to mount the frame, and any materials with a low degree of thermal conductivity can be used as insulation - sawdust, slag, ecowool, expanded clay, etc. This method of insulation is especially relevant for attic spaces that are not planned to be used as residential premises.

When arranging an attic in the attic, external insulation will be one of the stages of floor installation. Of course, this increases the complexity of installation - you will have to assemble a frame for the floor structure, which will later (after laying the insulation) be sewn up from the outside. You can sheathe the floor with any materials that are used to cover the floor - boards, durable plywood or OSB boards.
Installation of internal insulation of a concrete ceiling
It is much easier to install thermal insulation for concrete floors from the attic side - it will be quite convenient to carry out each stage of the work. However, this is not always possible, so you have to insulate the ceiling in the house from the inside, forming a frame for thermal insulation materials under the ceiling.
For installation you need to prepare the following set of tools in advance:
- Hammer or drill (for drilling holes in the ceiling);
- Screwdriver and set of drills;
- Building level;
- Cord and marker for marking.

Also, even before insulating the ceiling, you need to purchase all the building materials:
- A sufficient number of metal profiles for drywall (wooden blocks would be a good alternative square section 40x40 mm);
- Hangers for profiles;
- Fastening elements (crabs are best suited for suspended ceilings);
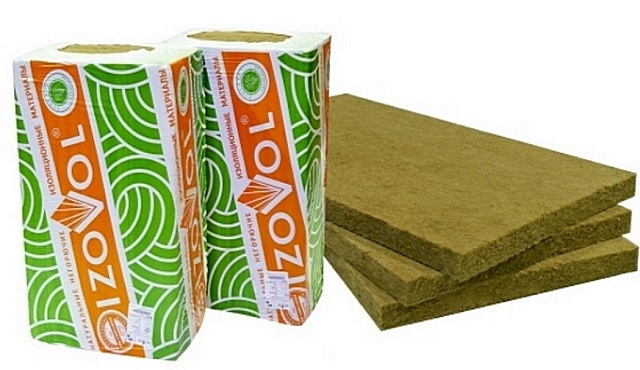
- Thermal insulation material (foam boards or mineral wool, or roll insulation);
- Sheets for external cladding frame (plasterboard or plywood);
- Vapor barrier film.

Insulation of the ceiling from the inside in a private house is as follows:
- First you need to apply markings. In order for the structure to ultimately be in its place, the markings must take into account the characteristics of the frame and the room. The frame itself consists of transverse and longitudinal posts, which are attached to each other using “crabs” and held on the ceiling by suspensions.
- To simplify the work, it is worth mounting the longitudinal posts in such a way that the pitch between them coincides with the width of the selected insulation. However, an excessive increase in pitch (over 80 cm) will also not lead to anything good - as a result, the rigidity of the structure will be insufficient.
- The marking itself is applied to all the walls along which the frame will be installed. The markings are applied in accordance with the cord, which is pulled between the corners and checked for alignment with a level. Having marked the walls, you need to go to the ceiling and make all the necessary marks on it.
- Now you need to mount the profiles. First of all, a guide metal profile is installed, which must be positioned in accordance with the markings on the walls.
- The next step is installing the hangers. These elements are usually located on the ceiling in increments of about 80-90 cm. Having decided on the mounting points, you need to drill the required number of holes in the ceiling.
- Now it’s time to form the frame by installing the longitudinal and transverse posts. Of course, when installing these profiles you need to follow the markings.
- The selected insulation is installed into the assembled frame. To keep it in place, you need to bend the edges of the hangers - they will ensure the fixation of the material during installation.
- Next you need to install a vapor barrier layer. You need to work with the film very carefully - it has a fragile structure and is very easy to damage with anything sharp. The vapor barrier film is carefully stretched between the frame posts and secured with double-sided tape.
- The last stage is covering the frame. Sheathing sheets must be fastened in such a way that there is a minimum gap between them. Optimal location sheets - perpendicular to the guides. The sheets are connected to each other in the middle of the profile. For fixation, self-tapping screws are used, the heads of which need to be slightly recessed into the thickness of the material. The distance between the screws for reliable fastening should be about 30 cm, and about 3-4 cm should be retreated from the corners of the sheet.

When insulating the ceiling with your own hands from inside the house, you need to ensure that there is a gap of at least 1 cm thick between the sheathing and the heat insulator. This gap is necessary to ensure normal ventilation of the structure.
Installation of external thermal insulation
External insulation of floors can have either a single-layer or multi-layer structure. However, regardless of the design of the insulation, you need to try to reduce its total weight, and this is true for any type of floor. If we are talking about bulk materials, then you also need to correctly determine the required layer thickness. For example, sawdust will require about 25 cm, and expanded clay will require high-quality insulation a layer 15 cm thick is enough.
To move around the attic, you should assemble a simple frame and place boards or slabs on it. It is best to mount the frame from wooden boards or beams. The latter will be ideal option, if the final structure will have a small thickness.

The installation algorithm includes the following steps:
- First you need to decide on the installation step of the frame elements. It is best to start from the width of the selected insulation so that it is convenient to install.
- Next you need to decide exactly how the transverse and longitudinal elements of the frame will be installed.
- The boards, in accordance with the finished diagram, are installed with their ends in place and fixed using metal corners and self-tapping screws.
External insulation can be performed using a variety of thermal insulation materials - mineral wool, polystyrene foam or bulk insulation. You have to choose the material individually, depending on your financial capabilities and requirements. It is worth considering several options in more detail.
Styrofoam
Insulation with foam plastic boards is the simplest option. The foam has fixed dimensions, which allows you to avoid trimming by pre-assembling the frame taking this parameter into account. There are no special requirements for the dimensions of the slabs themselves - standard sheets can be a meter or half a meter wide, and this difference will not affect the quality of insulation.

Another thing is the brand of foam. If we are talking about insulating the attic floor, then the best option would be C25. The density of this brand is quite high, due to which low thermal conductivity is achieved. If necessary, you can purchase more expensive C35 foam or polyurethane foam - these materials are considered the most reliable.
Minvata
Another good option is materials based on mineral fibers. All these materials have excellent performance, but they also have a common drawback - mineral wool is very hygroscopic. This suggests that when moisture gets in, the material absorbs it and loses most of its properties.

It is because of this drawback that the possibilities for using mineral wool are limited. However, this limitation can be circumvented, for which you will have to take care of high-quality waterproofing of the attic and ceiling so that the material does not have the opportunity to come into contact even with moisture vapor, not to mention direct contact.
Sawdust
One of the answers to the question of how to fill the ceiling in a house is sawdust. Sawdust is the cheapest thermal insulation material that is suitable for external insulation. However, low cost can be called perhaps the only advantage of this material. Sawdust is an organic material that can rot, so it must be mixed with lime before use.

You can also mix a solution consisting of 10 parts water, one part water and one part sawdust. When the ceiling is insulated with sawdust, the mixing process looks exactly the same as when mixing concrete. The resulting composition is used to completely fill the space in the frame. Before covering, the material must be left for some time to dry.
Expanded clay
The most convenient bulk insulation is expanded clay. It is a granular material having particles different sizes. To maximize the insulation efficiency, when backfilling you need to alternate small granules with large ones - as a result, there will be fewer voids in the layer, and this will improve the quality of thermal insulation.

The insulation technology when using expanded clay is no different from any other bulk materials. First you need to install the formwork (frame), and then fill it with an even layer of granules.
Ecowool
The raw materials for the production of ecowool are not environmentally friendly materials, as the name might suggest, but various waste - newspapers, bags or cardboard. The components are treated with acid, due to which ready material has minimal flammability and is well protected from biological influences.

Among the advantages of ecowool, it is worth noting, first of all, its low thermal conductivity, which provides good insulation, and the ability to transmit steam, due to which the material is not susceptible to fungus and mold. In addition, this material is very easy to install and is quite suitable for do-it-yourself insulation.
Insulation of the ceiling with ecowool in a private house can be carried out dry, wet and glue method. The first method is quite simple - the material is simply placed in a frame and compacted. For the second and third methods, you need special equipment that allows you to spray ecowool on the desired areas.
Polyurethane foam
IN modern construction Polyurethane foam is very popular, which, among other purposes, is also used for insulation. This material is available in the form of foam, which can be applied to any type of surface. A distinctive feature is the absence of the need for any fastenings - this insulation for the ceiling inside a country house independently sticks to everything it comes into contact with.
Among the main advantages of polyurethane foam, the following qualities are worth noting:
- Low flammability;
- No toxic emissions;
- Good chemical resistance;
- Low hygroscopicity;
- Long service life.

Sprayed polyurethane foam forms a solid layer that has no cracks or gaps, thereby achieving low thermal conductivity. However, steam can easily pass through the pores of the material, so there is no need to install a vapor barrier. To apply this insulation to the coating, it must first be dried (for concrete floors the permissible moisture level is 4%, and for wooden floors - 12%).
Areas that should not be insulated must be well covered before work (plastic film or thick fabric is quite suitable). Polyurethane foam is applied in layers, subject to constant control of the spray thickness. The next layer can be applied only after the previous one has completely hardened. Being the most expensive insulation, polyurethane is very easy to apply and perfectly performs its functions.
Conclusion
Ceiling insulation in a private house can be done in several ways. In some cases you will have to put in more effort, in others it will be easier, but you will have to pay more. The main thing is that for any conditions you can choose the best option that will be quite profitable and effective.
When installing good insulation The ceiling in a residential building with a cold roof saves heating costs and reduces heat loss. For this purpose, thermal insulation is used construction products, different in type of manufacture and composition. It is important to know which insulation materials are most effective and how to properly insulate the attic floor to increase the thermal efficiency of the building.
The need for insulation for the ceiling
Insulating the ceiling of a house allows you to raise room temperature indoors, however, condensation may occur in the attic. As warm air rises, it comes into contact with cold air, condensing droplets of moisture. As a result of this process, the thermal insulation material becomes saturated with water and begins to actively rot with the formation of fungus and mold. To avoid this phenomenon, it is necessary to change the physical conditions in attic floor.
Concrete ceiling
Since concrete has a high thermal conductivity, it consumes heat energy but remains cold. As a result, condensation forms, which can destroy the structure of the material when freezing. Therefore, the insulation of the attic floor on a reinforced concrete slab requires the mandatory use of vapor-permeable insulation to remove moisture to the outside.
If it is not possible to insulate the ceiling from the outside, then you will have to lay the material from the inside, but then it must be impenetrable to steam in order to protect the concrete from moisture. A layer of vapor barrier will also be required for additional protection.

Wooden ceiling
Wood is susceptible to rotting and exposure to various bacteria. If not properly organized thermal regime the ceiling will become wet and rapidly deteriorate. In this case, insulation wooden ceiling can be carried out both from the inside and outside. With the external method, you can significantly save room space, but with the internal method, impermeable high-quality material is required. It is also recommended to install a vapor barrier between the ceiling and the insulation for greater protection.
Types of vapor barrier
When insulating the floor of a cold attic, installing a vapor barrier layer is an important process, because without it, the entire procedure will be impractical. After installing the insulation from the inside, the condition of the ceiling will be unknown, and all possible impacts on it will be hidden. In the future, this may be the reason for partial or complete restoration of the ceiling. Most effective way Its protection is the installation of a vapor barrier.

Vapor barrier
It is a regular polyethylene film as a sealed barrier to wet vapor. To save money, you can use a simple polyethylene sleeve, since it has the same properties as other polyethylene materials. Laying is carried out in strips with an overlap of 15-20 cm and an overlap of up to 15 cm on the wall structures. The joints must be taped to achieve tightness.
When installed from inside the room, the film is laid only on top of the impermeable insulation; the same applies for installation on a concrete floor. If insulation is carried out in the attic, then polyethylene is located between the wooden structure and the heat insulator.

Membrane
It is a film where only one side is permeable. It prevents moisture from penetrating, but does not prevent it from coming out. They are used to protect heat-insulating material from getting wet and deteriorating.
If the attic floor is insulated over wooden beams with mineral wool, then the vapor barrier membrane will ensure the free release of steam, but will protect the insulation from external moisture, maintaining its performance properties.

Features of cold roofs
To protect a residential building from external influences, a cold-type roof is installed. There are many heat-insulating products that help reduce heat loss. The temperature inside and outside the attic should vary within 4°C, so the air through ventilation ducts should go directly into the attic, and not into the space under the roof. Then the humidity and temperature indicators will correspond to the street ones. Otherwise, the imbalance of regimes will lead to destruction truss structure and roofing.

The advantages of a cold roof are:
- Easy to maintain. The roof has free space for access to any point, so repair and maintenance activities are carried out without difficulty.
- Good waterproofing. A warm attic involves the use of add-ons that violate the integrity waterproofing material. When installing a cold roof, no additional elements are required.
- Beneficial use. Despite the fact that the temperature in the attic is lower, it can be used as a temporary warehouse, and later converted into additional space.
- Minimum heat transfer surface area. Heat loss is only possible through the ceiling.

Entry and exit ventilation holes work as efficiently as possible at a great distance from each other. When they are installed under the wind board along the entire length, complete air exchange is ensured throughout the attic space. The inlet openings are located in places of greatest pressure, thereby increasing the intensity of blowing.
Read also: Stages of building a foundation with your own hands
A cold roof is installed on various types of buildings with a height of 1-5 floors. Therefore, installation of thermal protection on the ceiling is carried out with a calculated thickness depending on the material and region of location (climatic conditions). It is often laid in a layer of 20-50 cm. It is equally important to take into account the exit areas of ventilation and chimney pipes through the attic floor. It is these zones that contribute to maximum heat transfer to the outside.
Advantages of insulating the ceiling area
Roof insulation should be calculated at the stage of building a house. But often this question arises when finished building where thermal insulation was not previously provided. When insulating a reinforced concrete or wooden ceiling in a house with a cold roof, you can get the following benefits:
- Maintaining a microclimate by preventing the penetration of heated air from the street in the summer.
- In winter, it will protect the room from serious heat loss through the ceiling.
- The insulation additionally has soundproofing properties. Therefore, there will be no discomfort during heavy rain, wind or extraneous noise on the street.

Effective ways to insulate the ceiling
There are several types of attic floor insulation: from the inside by nailing the insulation to the ceiling, and from the outside, using a rolled product and rolling it over the attic surface. Both methods are very practical, the main difference being the choice of appropriate products and installation method.
Working indoors
When insulating from the inside, you can use mineral wool due to its high heat-insulating and vapor-permeable properties. Often it is placed inside a suspended structure made of metal profiles and covered with plasterboard. However, it is forbidden to compress it, since it has air gaps. When compressed, they disappear, and thermal performance indicators sharply decrease.
Important! Despite their effectiveness, mineral and basalt wool are recommended to be used only for external insulation. Due to their low strength, microfibers separate and, if ingested, cause side effects and serious illness.
Other materials can also be installed on the frame or screwed directly to the ceiling, taking into account the laying of the vapor barrier layer.

Working outside
On the attic side, it is recommended to lay roll or slab material, since it does not require careful fixation or frame manufacturing. This is a practical method, since the insulation does not take away the useful height of the room. Before carrying out work, the surface should be thoroughly cleaned of foreign debris. Laying can be carried out in one or two layers 30-50 cm thick using polyurethane foam to fasten them.
If attic space will not be used in the future, then additional coatings are not required. If it is equipped for storing things, then the insulation is covered with plank flooring or sheet moisture-resistant plywood. Using bulk materials Also no covering is required, but this does not apply to dry leaves or sawdust.

- thickness should be calculated according to the region of residence and type of material;
- based on the selected product, you should know how to properly insulate a ceiling with a cold roof to ensure maximum effect;
- when laying several materials on top of each other, the vapor barrier indicators should increase from bottom to top (the other way around is not possible);
- mineral wool should not be covered with expanded clay or vermiculite to avoid it being pressed through;
- It is forbidden to lay a vapor barrier on both sides of the heat insulator, so as not to trap moisture and spoil the material;
- All joints connecting steam and heat insulating materials must be sealed to eliminate cold bridges. For this, adhesive tapes, polyurethane foam, a special solution or glue are used.

Required Tools
To carry out thermal insulation work, you will need tools such as: fasteners (self-tapping screws, screws, dowels, anchors, liquid nails), construction staples, tape measure, hammer drill for working with concrete, screwdriver, hammer, construction knife for cutting sheet products.
The material used is insulation, vapor barrier film or membrane, metal profiles to create a frame, wooden blocks 3x3 cm or 5x5 cm.

Which insulation is better for the ceiling in a brick house
To effectively insulate the ceiling in a house with a cold roof, the following types of material are used outside and inside:
- Monolithic - has high density and water resistance, while the dew point goes in any direction without deteriorating the properties of the insulation. These include extruded polystyrene foam.
- Fibrous or porous - produced in the form of rolled material or mats. They are highly susceptible to moisture saturation and lose their characteristics, so they are used only in conjunction with a vapor barrier. The following types are distinguished: mineral wool, slab and sheet polyurethane foam.
- Bulk or sprayed - the first option is laid manually, and the second only with the help of special equipment.
From the outside, insulation along the wooden beams of the attic floor is carried out using lightweight rolled or bulk materials (sawdust, leaves). For concrete slabs you can lay a dense monolith, slabs or heavy bulk material (expanded clay).

Features of insulation for outdoor use
Work from the attic side can be carried out with the following materials:
| Material | Description |
| Slab and roll | |
| Reed | It consists of mats that are laid in two layers. Is environmentally friendly with high thermal properties. Disadvantages: increased fire hazard, susceptibility to attack by rodents and insects, rotting in high humidity. |
| Seaweed | Popular material in coastal regions. Refers to environmentally friendly and effective heat insulators. They are laid in one layer outside the attic and covered with plank flooring. Not susceptible to moisture, insects and rodents. |
| Penoplex | It is a type of extruded polystyrene foam (EPS) with high strength. Not used for wooden floors due to complete vapor tightness. Before laying the insulation, the concrete base is leveled and covered with a vapor barrier film. After insulation, the material is poured cement-sand mortar up to 50 mm thick. During operation, you can move along the surface. |
| Mineral wool | The most common material, which is produced in slab and roll versions. It is recommended to lay mineral wool in the form of mats between wooden joists, and for concrete floors - in a roll type. To use the base as a floor, a flooring made of boards is required. |
| Sprayable | |
| Polyurethane foam | It has a number of advantages, however, due to its absolute vapor tightness, it can disrupt the indoor microclimate. It is applied using special equipment under high pressure, so independent insulation is impossible. The foam layer with optimal thermal performance is up to 12 cm thick. |
| Ecowool | A modern thermal insulation material that is laid on a wooden and concrete base without the use of vapor barrier products. However, experts still recommend laying it to avoid insulation getting into the room through joints and cracks. Can also be installed using an installation that provides monolithic coating with filling of all ceiling defects. The layer thickness is 25-40 cm depending on the region. Can be used independently or applied to a surface. |
| Bulk | |
| Sawdust | They are most popular in conditions where they can be obtained for free or at an extremely low cost. For a ceiling with a cold roof, the layer thickness is 15-30 cm. The disadvantage is the increased flammability, so they are additionally covered with a slag layer. Before laying, a layer of carbide and slaked lime is laid as protection against rodents and insects. Sawdust is often used in conjunction with cement or clay. |
| Expanded clay | Relatively lightweight, used for insulation of different fractions: 0-5 mm, 5-20 mm, 20-40 mm. In cold regions, the thickness of the embankment layer is 40-50 cm, for temperate climates - no more than 20 cm. If the attic is not used, the material does not require additional coating; otherwise, you can make a plank floor or fill it with a layer cement-sand screed up to 5 cm. |
Read also: Finishing the base with plaster: features of various types of finishing, step-by-step methodology

Insulation for indoor use
Insulating the ceiling in rooms is not recommended, but if there are no other options, it is possible. Since the house is quite warm and humid, the material may be susceptible to mold and mildew. To avoid this, it is necessary to create a ventilation gap between it and finishing up to 3 cm thick, which will take up even more room height.
The following products are used as insulation for the ceiling in a private house:
- Penofol is a double material made of foil and polyethylene foam. It is used in areas with temperate climates, as it has average thermal insulation. It can be used as an independent layer or combined with other types.
- Expanded polystyrene - practical for concrete floors. It is placed in a lathing with a depth of about 3 cm and covered with finishing material (lining, plasterboard, Armstrong, suspended ceiling).
- Plaster mortars – they are characterized by high moisture resistance, fire resistance and decorative appearance. The mixture is used only for concrete foundations and includes thermal insulation components.
- Cork - cork material It is moisture resistant, therefore it is used without vapor barrier. It is environmentally friendly and can serve not only as insulation, but also as a finishing material in a certain room design.
When choosing a heat insulator, you should pay attention to the material of the ceiling and financial capabilities. It is recommended to insulate wooden ones with dry products, and concrete ones with slabs or coat them with special compounds.

Methods for internal insulation of a cold attic floor
Before carrying out external or internal insulation, it is necessary to calculate the thickness of the material using the formula R=δ/λ, where:
- R – heat transfer resistance (according to the region of residence, for Moscow – 4.7 m² °C/W);
- δ – thickness of the insulation layer;
- λ – thermal conductivity coefficient of the material (according to regulatory document GOST).
Work begins with thoroughly cleaning the surface of debris, dust, cobwebs or moisture. When laying the product on the ceiling, be sure to leave a ventilation gap to protect against mold and moisture accumulation.

Using penofol
Penofol consists of foamed polyethylene and a foil layer; it is used for buildings with a low level of heat loss due to low thermal insulation performance. To install insulation on the ceiling, it is necessary to create a sheathing. The product is rolled out over the surface of the frame and fixed with nails. The foil layer should face the inside of the room.
The creation of ventilation gaps on both sides requires the presence of additional sheathing, which will later be covered with sheet finishing coverings or a suspended ceiling. Most efficient use penofol is possible together with penoplex to increase the thermal insulation properties.

Using penoplex from the inside
The material is practical for both external and internal use for thermal insulation of ceilings with a cold roof. Warming is carried out according to the following scheme:
- The lathing is made from wooden beams with a thickness exceeding the thickness of extruded polystyrene foam by 0.3-0.4 cm. The pitch between the slats is equal to the width of the insulation sheet minus 1-2 mm.
- The material is installed in the cells, and if the frame is assembled correctly, the slabs should fit tightly with little effort.
- The lathing is covered with plasterboard, suspended or suspended ceiling.
Attention! To increase reliability, penoplex can be fixed to the ceiling using umbrella-type dowel nails. The wide cap allows you to press it tightly without pushing through the fasteners.

Polyurethane foam and plaster mixtures
Polyurethane foam is one of the modern highly efficient products and allows you to create an ideal thermal insulation layer to reduce the heat transfer coefficient. The advantages when used on ceilings are:
- resistance to insects and bacteria;
- fire resistance;
- high sound and waterproofing;
- high adhesive properties With various types coatings;
- resistance to temperature changes.
Ceiling insulation in a private house - guarantee warm rooms in winter and cool climate in summer. You need to take care of this even at the stage of building a house. But if you got the house ready-made, you can still insulate the ceiling with minimal effort.
School knowledge of physics can still be useful in life. So, due to convection, when cold air goes down and hot air goes up, all the heat accumulated in the room will penetrate through the uninsulated ceiling into the unheated attic. Because of this, you have to increase the boiler power and, as a result, incur additional heating costs.
For the same reason, ceiling insulation requires a more serious approach than wall insulation - due to air flows, heat loss from a wooden ceiling can reach 3 W/m2/K. For brick or concrete floors the figure is even higher. At the same time, there is no need to insulate the ceilings between living spaces if the temperature in them is the same. It is enough to take care of sound insulation and save money on thermal insulation of the attic and roof.
In summer, it is also better to have an insulated ceiling - the roof heated by the sun transfers heat into the room, negating the operation of air conditioners. Having spent once on thermal insulation, you can enjoy a comfortable microclimate in your home for many years.
What to look for when choosing insulation?
First of all, you need to decide where to install the insulation - inside or outside the living rooms. The first option is extremely undesirable for several reasons:
- ceiling height decreases;
- it is impossible to use bulk insulation;
- the cooling point moves closer to the inside of the ceilings;
- inevitable repairs due to dismantling the old ceiling.
Attic insulation is devoid of all these negative traits. But if an attic is not provided, or the project includes an attic floor, the roof must be insulated immediately.

Choosing materials for insulation with your own hands
Polystyrene foam or EPS, as well as mineral wool and its analogs are suitable for insulation from the inside and outside. Such materials are laid between beams or in a specially constructed frame and covered with plasterboard, OSB boards or clapboard.

But if there is a sauna in the house, then it is better not to insulate the ceiling above it with polystyrene foam - due to high temperatures, it can begin to release substances harmful to humans.
Aerated concrete slabs are also excellent for internal insulation due to their low weight and ease of installation. Their thickness of up to 10 cm will not “eat up” very much height, while additional cladding not required. Polystyrene board adhesive is applied to the boards with a notched trowel and pressed against the ceiling.

The insulation is puttied and painted.
Bulk insulation materials such as shavings, ecowool or expanded clay are quite economical. True, having high hygroscopicity, they require good waterproofing. Such insulation is poured between the beams on the attic side in a layer of about 15 cm, and for ease of movement in the attic it is covered with OSB boards.

True, having high hygroscopicity, they require good waterproofing.
What kind of insulation is not chewed by mice?
Mice chew any insulation. But not as food, but to expand their moves. You may hear claims that mice eat styrofoam. This is not entirely true - they gnaw through it and build nests in it. But the same fate will befall mineral wool, albeit a little later.
Due to its flowability, ecowool can help a little - but rodents will simply endure it until they can settle and move normally in the insulation. The most rodent-resistant expanded clay is strong “pebbles”, large enough so that mice and even rats cannot carry them away, and at the same time small enough to fill their passages.
But there is a catch here - mice will make “beds” there. Therefore, the only way to protect the insulation is to prevent rodents from entering it in principle. Everything else is only a temporary and very unreliable solution.
How to insulate an attic ceiling?
Do-it-yourself insulation from the attic side is quite simple. First, space is freed and completely removed flooring(if there was one). The work is carried out step by step:

To insulate a concrete floor, the technology is exactly the same - it is enough to lay logs on top of the concrete. You can also use sprayed materials, but this requires special equipment and certain skills.

How to insulate a ceiling from the inside?
By using suspended ceiling You can insulate the room from the inside. For this:

Due to the lack of ventilation, it is undesirable to use spotlights in an insulated ceiling - they heat up and quickly fail. And upon contact with polystyrene foam, the insulation may begin to melt.
There are three ways to solve the problem. The first is to use only hanging chandeliers and wall lamps. The second is to remove the layer of thermal insulation around the lamps built into the ceiling. At the same time, do not forget about the vapor barrier - it should cover the mineral wool without gaps. And the third is to lower the ceiling a few more centimeters, sufficient to install spotlights.
How to insulate the attic floor and the ceiling of the attic floor is described in detail in the video:
A very significant part of the heat generated in the house escapes through the cold ceiling and attic if the ceiling does not have reliable insulation. Therefore, high-quality thermal insulation of this structure is extremely necessary. Warm air always tends upward. And if a cold obstacle is encountered on its way, it will rapidly cool down. And this means, firstly, that the heating system will partially work on unnecessary heating of the uninsulated floor, that is, waste expensive energy resources. And secondly, meeting a cold barrier leads to condensation of water vapor, which is always contained in the atmosphere of the premises. Well, who would like that the ceiling is constantly wet? And this has a very negative effect on the durability of the finish and the ceiling itself.
In a word, the ceiling, or rather, the overlap between living rooms and a cold attic must be insulated without fail. Moreover, if previously it was difficult to find suitable material, then today the market offers a very wide range of different insulation materials for “different tastes and budgets.”
To begin with, the table lists some of the main characteristics of the insulation materials listed above:
| Name of insulation | Thermal conductivity, W/m×K | Flammability group | Environmental friendliness of the material |
|---|---|---|---|
| Glass wool | 0.038÷0.046 | NG - G3 | contain phenol-formaldehyde resins |
| Basalt wool | 0.035÷0.042 | ||
| Slag wool | 0.046÷0.050 | ||
| Cork boards | 0.03÷0.05 | NG | natural |
| Ecowool | 0.038÷0.045 | G3-G4 | natural |
| Linen mats | 0.037÷0.04 | G4 | natural |
| Thermal insulating peat blocks | 0.052÷0.064 | G3-G4 | natural |
| Foam glass | 0.045÷0.07 | NG | natural |
| 0.032÷0.035 | G1-G3 | capable of releasing toxic substances, especially during thermal decomposition | |
| Spray polyurethane foam | 0.028÷0.030 | G2 | the original components may pose a danger before they are mixed, foamed and polymerized |
| Expanded clay | 0.16 | NG | natural |
| Slag | 0.29 – boiler room; 0.15 - granular | NG | may contain substances hazardous to human health |
| Sawdust | 0.06÷0.08 | G4 | natural |
Mineral wool
Mineral wool can be made from different materials- these are basalt rocks, glass raw materials and slag. Materials have different characteristics, and therefore products made from them differ in some parameters.
Mineral wool of any type is produced in mats and slabs of different densities, and the spread is quite large: from 25 to 200 kg/m³. Low-density products are used mainly for thermal insulation of horizontal surfaces. Denser options are produced in slabs and are suitable for insulating facades, roofs, floors, etc. To thermally insulate the ceiling (that is, the attic floor), there is absolutely no need to pursue increased density.
Basalt (stone) wool
This type of material has the best performance characteristics of all mineral wools. True, it costs more.
You may be interested in information about what kind of insulation
In production stone wool from the melt of rocks of the gabbro-basalt group. Microscopic fibers are drawn from the molten mass, which are then formed into mats and slabs.
Thanks to the special processing of high-quality products, they have a low moisture absorption coefficient, sometimes reaching almost complete hydrophobicity. This suggests that the insulation does not lose its thermal insulation properties throughout the entire period of operation.
High-quality basalt wool can withstand high temperatures. Many products are completely non-flammable, that is, they belong to the NG group. The advantage is the increased flexibility and elasticity of the fibers. It is easier to work with such material, and there is practically no tendency for shrinkage in high-quality basalt wool.

The disadvantages of this material include the content of phenolic resins, which serve as a binder for the fibers. If you decide to purchase such insulation, then you should pay attention to products labeled “ECO”. Such materials, of course, have a higher cost, but the manufacturer guarantees their environmental friendliness, since the binder for the fibers in them is acrylic resins that are not dangerous to humans.
Glass wool
Glass wool is made from broken glass, sand, soda, limestone and borax - all of them are safe for human health and the environment. These components also melt and turn into fibers. However, the binders for them are the same phenol-formaldehyde resins, which is one of the “disadvantages” of this material. Moreover, evaporation of these substances can occur throughout the entire operation of the insulation.

Glass fibers are much more fragile compared to basalt fibers. They can cause superficial damage to the skin, enter the respiratory tract, and pose a danger to mucous membranes, especially if they get into the eyes. Therefore, when installing glass wool insulation, you should always use protective equipment for exposed areas of the body (overall clothing), eyes (glasses) and respiratory organs (respirator).
The positive characteristics of this material, manufactured without violating technology, include the following qualities:
- Quite high fire resistance.
- Low thermal conductivity.
- Frost resistance.
- Inert to chemical reagents.
- Affordable price - glass wool will always be cheaper than its basalt counterpart with the same performance characteristics.
In terms of thermal insulation qualities, glass wool sometimes even surpasses its basalt “counterpart”. But due to the insufficient elasticity and strength of the fibers, it is still subject to shrinkage, which reduces the heat-insulating properties of the material. It also has worse hygroscopicity indicators, that is, it is much easier to wet the insulating layer.
Slag
Slag is produced from blast furnace slag. The material consists of fibers (again, drawn from the melt), slag dust and solid particles, although the presence of the latter indicates low quality insulation.
Since waste from metallurgical production is used, it is absolutely possible that the slag wool may contain substances hazardous to humans. In addition, such a “chemical bouquet” can lead to rapid development of corrosion on metal structural elements in contact with the insulating material.

Today, this insulation is practically not used in individual construction. There are too many risks that do not justify the affordable price. Yes and others significant shortcomings enough:
- High hygroscopicity - slag wool absorbs moisture well.
- Over time, the material shrinks greatly, and its thermal insulation qualities decrease.
- The presence in the material not only of formaldehyde binders, but also of other substances hazardous to human health.
- The material is brittle, the fibers are coarse, that is, it is slag-like and very uncomfortable to work with.
So, basalt wool seems to be the optimal choice. However, high-quality products made from glass wool (in many of them its disadvantages are minimized) are also quite suitable for insulating floors. It is better not to even consider slag as a possible option.
With all the advantages of mineral wool, it also has a serious “minus”

Although very often manufacturers claim that mineral wool does not attract rodents, it is impossible to agree with this. Mice feel great in both basalt and glass wool, as well as slag insulation. They make nests in slabs and gnaw passages, and this happens especially often if the insulation is closed. This means that you will have to take some protective measures, for example, surround the thermal insulation layer around the perimeter with a fine metal mesh in order to, in principle, exclude the possibility of mice entering it.
Cork boards
Slabs made of natural cork (agglomerate) can be called a unique material. They are made from cork oak bark, and natural wood adhesives serve as a binder for the crushed chips. They are activated when raw materials are processed under certain conditions of temperature and pressure (pressing). Therefore, cork boards can be safely classified as environmentally friendly insulation materials.

Due to the characteristics of natural raw materials, the heat insulator has excellent performance characteristics, namely:
The disadvantage of this material, perhaps, is only one factor - its cost, which significantly exceeds the price of any type of mineral wool.
Ecowool
Ecowool is made from cellulose fibers, as well as waste from cardboard and paper production. This material is sold in packages - in bulk or in the form of molded slabs of a specified size.

The loose version of the material is used in dry form to fill cavities left for insulation, or in moistened form, using the spraying method. The most convenient and cheapest installation is slab material, since the insulation process does not require additional equipment.
The advantages of insulation materials based on ecowool include the following qualities:
- Enough high level soundproofing.
- Low thermal conductivity.
- High vapor permeability, which means that moisture will not be retained in the insulation layers if the installation rules are followed.
- The material creates a monolithic seamless coating, which eliminates the occurrence of “cold bridges”.
- Quite affordable price.
Ecowool also has its disadvantages:
- High level of hygroscopicity.
- Over time, the thermal insulation qualities of the material decrease due to its shrinkage. Therefore, it may be periodically necessary to add ecowool to the initial layer.
- It is difficult to apply ecowool using the “wet” method, since this purpose requires special equipment and skills to work with it.
- Ecowool receives treatment against the excessive flammability inherent in cellulose. But it still cannot be called a completely non-flammable material.
Extruded polystyrene foam
Expanded polystyrene is a modern board material that can have different thicknesses and densities. This insulation is used for both internal and external insulation of residential and non-residential buildings.
The insulation consists of 98% air, therefore it has very high thermal insulation capabilities.

The advantages of this material include the following qualities:
- Low thermal conductivity, one of the lowest among all insulation materials..
- Ease of processing and installation, along with high strength and stability of shape throughout the entire service life.
- Long service life without loss of thermal insulation properties.
- Almost complete absence of moisture absorption.
- The high-quality material contains flame retardant additives that prevent polystyrene foam from catching fire in extreme situations.
- Chemical stability, resistance to biological damage.
The disadvantages of extruded polystyrene foam are:
- With prolonged exposure to an open flame, the slabs still ignite and melt, and the molten mass can spread, spreading the fire. But what’s even worse is that when burning, extremely toxic smoke is released, deadly to human life.
- Extruded polystyrene foam is not vapor-permeable, that is, it is not a “breathable” material. This should be taken into account when planning the “insulation pie”.
Let us clarify one point: the article deliberately does not discuss the “close relative” of extruded polystyrene foam, namely ordinary white polystyrene foam. Simply because it has much more serious shortcomings, and using polystyrene foam for internal insulation of a house or apartment is a very risky business. Extruded polystyrene foam is still much safer.
Spray polyurethane foam
This insulation is produced directly during its application using special equipment by mixing two initial components. When stirred, these components react, resulting in the formation of a foam-like substance. It is sprayed onto the surface in a relatively thin layer and begins to expand, filling all the surrounding free space, forming a monolithic coating.
After expansion, the solidification phase begins, and a durable thermal insulating coating is obtained, which is a homogeneous porous mass with isolated gas-filled cells.

Polyurethane foam is one of the most effective, reliable and durable insulation materials. This is what he says whole line its advantages:
- Very low thermal conductivity. And the solidity of the applied layer eliminates the occurrence of “cold bridges”.
- Quite high strength of the frozen layer with a low specific density.
- Completely resistant to moisture - the material is impenetrable to either water or water vapor.
- High adhesive properties with almost any building materials.
- High noise insulation qualities.
- The material does not settle and does not lose its thermal insulation qualities over time.
- High speed of thermal insulation work on structures of any complexity.
Disadvantages of sprayed polyurethane foam:
- The material is not “breathable”, but in some cases this can be regarded as a positive quality.
- Low resistance to ultraviolet radiation– insulation requires absolute protection from sunlight.
- Flammability of the material during prolonged exposure to open fire. True, its rapid self-extinguishing is observed if the flame source is removed. In addition, the material does not flow when exposed to fire, and charring upper layers prevents further spread of the fire.
- Very high cost of material, taking into account the invitation of a master with equipment. Disposable kits for self-application have appeared on sale, but their price still seems frighteningly high.
Expanded clay
One of the options for ceiling insulation is the use of expanded clay of various fractions. This is a natural material made from clay through special heat treatment.

Expanded clay has a number of positive qualities:
- Ecological cleanliness. The material does not contain or emit toxic substances.
- Quite low thermal conductivity. Expanded clay does not lose its thermal insulation properties throughout the entire period of operation.
- Good noise insulation abilities.
- Low moisture absorption.
- High vapor permeability.
- Expanded clay is a non-combustible material.
- High frost resistance.
- Inert to temperature changes.
- The biological stability of the material, that is, pathogenic microflora does not form on it, rodents avoid it.
- Ease of use.
But, despite its many advantages, expanded clay also has its disadvantages:
- In terms of thermal insulation, it is almost three times worse modern insulation materials such as mineral wool or expanded polystyrene. That is, for complete, high-quality insulation of the floor, you will need a very thick layer of expanded clay, which is not always possible.
- Since a lot of expanded clay will be required, this can lead to a significant increase in the cost of the floor insulation project. Moreover, taking into account the transportation of large volumes of material and lifting them to a height.
- The material is loose and quite dusty, especially if a variety with a small fraction of expanded clay is used. This affects the structure of the “insulating pie”.
Sawdust
Sawdust is one of the oldest insulation materials for thermal insulation of private houses. The thermal conductivity of sawdust is perhaps slightly higher than that of modern materials However, the combination of all characteristics often looks more advantageous than the use of synthetic insulation.

So, sawdust has both positive and negative qualities. The first include the following characteristics:
- Affordable cost of material. Sometimes it even comes for free.
- Low thermal conductivity, although for sufficient thermal insulation you will have to lay a thicker layer of material.
- Excellent vapor permeability. Sawdust is a “breathable” heat insulator that does not retain moisture. They have unique properties absorb excess moisture, and when air humidity decreases, release it into the environment.
- Long service life. Properly prepared sawdust will serve as a heat insulator for 50 years or more.
- Environmentally friendly material.
The disadvantages of sawdust insulation include its following characteristics:
- Flammability. However, if a wooden house is insulated with them, it itself has the same characteristics. When burned, sawdust does not produce toxic smoke.
- The need for special treatment to prevent biological degradation or damage to the material. That is, sawdust will last a long time without losing its original thermal insulation qualities only if it is properly prepared.
Ceiling insulation using sawdust is done in three ways:
Filling of floor cavities with treated boric acid, lime, antiseptics and fire retardants, sawdust;
Filling with a solution of gypsum sawdust, cement, clay or PVA glue;
Formation of insulation boards from sawdust and clay.
In any case, it will take a lot of time for high-quality insulation with sawdust. Such labor intensity often scares off the owners of private houses, and they prefer ready-made materials that are easier to install.
Installation of different types of insulation for thermal insulation of the ceiling
As mentioned above, there are slab, roll, backfill and spray insulation. Some of them use very similar technology. Therefore, this process will be considered in this way.
Use of slab and roll insulation
If you choose slab or roll insulation, then when carrying out the work you usually follow the diagram presented below. However, the use of mineral wool and extruded polystyrene foam has own nuances, since materials differ in their density and rigidity.

The layout of materials for insulating the ceiling from the attic side is as follows:
- Floor beams.
- Windproof membrane.
- Insulation material.
- Vapor barrier membrane.
The insulation process step by step is as follows:
- If slabs or rolls of mineral wool, linen slabs or other vapor-permeable material are used, then the first step is to cover the ceiling surface with a vapor barrier membrane.

The material goes around the floor beams and is laid loosely between them, then attached to the wood using a stapler and staples. A vapor barrier will protect the insulation from evaporation from the premises of the house - there the water vapor pressure is always higher, especially in the cold season. When laying the membrane, you must follow the markings on the film. The manufacturer indicates which side it should be laid down.
The membrane is laid in strips with an overlap of 100 mm between each other. The joint line is sealed with moisture-resistant tape.

- If you use foam plastic for insulation (although, to be honest, it is better not to use it at all) or extruded polystyrene foam, before installing it you will have to level the surface between the floor beams - usually a rough ceiling liner is filled. If mineral wool takes the shape of the base due to its elasticity, then rigid foam boards will simply break when pressure is applied to them. That is why the base must be level. In fact, there is no need to install a vapor barrier at all under extruded polystyrene foam, since it is vapor-tight and non-hygroscopic, that is, it does not absorb vapors and moisture.
- The next step is to lay slab or roll insulation on the vapor barrier film between the floor beams.

Installation of slab or roll insulation is a simple process. Usually, such a step between the beams (lags) is already provided in advance so that the slabs or rolls are laid out sideways.
If polystyrene foam or other rigid slabs are laid, they should be cut exactly to the width of the step between the beams or slightly less. If after installing this insulation there are gaps between the beams and slabs (and this, one way or another, cannot be avoided), they must be filled with foam.
- After laying the insulation, the entire surface of the attic floor is covered with a windproof membrane, which is secured with staples to the beams.
- Further, if you plan to install a floor in the attic, a compressed or plywood flooring is laid on top of the wind protection. In this case, it is advisable to leave a ventilation gap so that it is easier for moisture from the insulation to evaporate into the atmosphere.
- When using insulation with a foil layer, the resistance to heat loss will be increased. In this case, the insulation is laid with the foil side down.
- If the floor beams are recessed into the backfill, then logs are fixed perpendicular to them with a “clear” pitch of approximately 550 mm. After this, a vapor barrier is fixed to the surface, and then the insulation is laid.
It is not necessary to lay thermal insulation from the attic side, although it is probably easier this way. Sometimes the installation of the “insulating pie” is carried out from the side of the room. But the location of the membranes remains the same. That is, after laying the insulation, it must be covered with a vapor barrier from below, and only then the ceiling is hemmed. This will be discussed in detail below.
Laying backfill thermal insulation
In order to insulate the ceiling from the attic side with backfill material, it is necessary to prepare the base.

You can prepare the grounds in two ways:
Lay a material that will preserve backfill insulation V required area, not allowing you to get into the cracks between the boards of the rough ceiling cladding;
Seal the gaps between the boards, as well as between the boards and floor beams, with a solution of clay and lime.
The second option requires more time to work, but the amount allocated for covering material will be saved.

Roofing felt, glassine, or the same vapor barrier membrane can be used as a covering covering for loose insulation. The canvases are overlapped by 100÷150 mm and taped with wide moisture-resistant tape. If roofing material is used, then its joints are glued with bitumen mastic.

If a backfill material such as sawdust is chosen, then the base for it should be prepared by coating it with a clay-lime mixture. For ecowool, it would be better to use a vapor barrier membrane.
When filling the floor with ecowool, it must be compacted well, otherwise it will shrink over time.
When the ceiling is completely covered with insulation, the entire surface is covered with a diffuse membrane, so that moisture from above (for example, when the roof leaks) does not enter the thermal insulation layer, but can freely evaporate from it. Again, it is recommended to leave a ventilation gap.
Well, then the attic floor is laid.

Sometimes, in cases where the attic does not become a usable space, and there is no doubt about the reliability of the roofing, they do without a top membrane at all, and even without plank flooring.
Video: insulating the ceiling of a private house with expanded clay
Insulating the ceiling from inside the house - step by step
It is clear that it is more convenient to insulate the floor from the attic side. But it also happens that the roof slopes are located at a very slight angle, and there is no possibility of free work in the attic.
As an example, the process of such insulation will be shown step by step - from the side of the room. However, some processes may still require penetration under the roof. How the master solved this problem in this case will also be presented in the instructions for laying insulation.
To begin with, it’s worth determining a list of everything needed to carry out the work:
- Insulation material. In this case, it is Isover Profi mineral wool in a roll, but you can also purchase a slab version.
- Windproof membrane "Isover".
- Vapor barrier membrane "Isover".
- Beam with a section of 50×50 mm.
- Boards 120×15 mm for lathing under the ceiling cladding.
- Antiseptic impregnation for wood processing.
- Nylon or polypropylene twine.
- Material for outer skin- plasterboard, lining, Qwick Deck boards, etc.
- Self-tapping screws of different lengths.
- Screwdriver.
- Electric jigsaw.
- Scaffolding or a reliable, stable ladder (horses).
- Stapler and staples.
- Building level.
- Stationery knife.
- A respirator to protect the respiratory tract, gloves and clothing that completely covers the surface of the skin.
| Illustration | Brief description of the operations performed |
|---|---|
 | So, in a room with an area of 9 m² it is necessary to arrange and insulate the ceiling. As you can see in the photo, so far only floor beams made from 200x50 mm boards are attached to the Mauerlat. |
 | To complete the work, you will need a beam with a cross-sectional size of 50×50 mm. The timber must be smooth and clean. Therefore, if black stains of mold are found on its surface, it is recommended to clean them, for example, using an electric plane. |
 | Then the wooden parts are treated with an antiseptic solution - fire retardant. It is best to use solutions that have a peculiar tint - then the treated areas will be immediately visible. It is convenient to coat the timber with an antiseptic by placing the parts in a row. Having applied the composition to one side of the wood, the bars are turned on the other side - and so on until all the material has been processed. |
 | The next step is to attach the prepared beam along the perimeter of the ceiling, under the floor beams, to the end of the mauerlat. |
 | Next, for the convenience of laying the windproof film, temporary retaining boards are laid on top of the floor beams. They are not fixed as they will move. A windproof membrane is laid on top of the boards. In this case, the hydro-wind barrier “Isover HB Light” was chosen. |
 | The membrane is first fixed on the outer beams, as well as on the end boards (mauerlat) installed on the concrete frame of the walls. Fixation is carried out using a stapler and staples. Adjacent membrane sheets are overlapped by 150 mm. |
 | Next, the work is carried out from the attic side, since it is necessary to fasten the wind protection to the upper ends of the floor beams. To ensure safe movement on the beams, the master laid support boards 150÷170 mm wide and 25 mm thick on top of the membrane perpendicular to the beams. |
 | The next step is to supplement the previously fixed bars framing the ceiling with sheathing crossbars. They seem to line up in frames. These lintels will provide good support for mineral wool blocks when they are laid between the beams, and will subsequently serve as lathing for the ceiling cladding. The pitch is chosen so that the insulation strips fit tightly between the crossbars. That is, since a roll with a width of 600 mm is used, then there should be approximately 550 mm of clearance between the beams. |
 | The master chose Izover Profi mineral wool, sold in rolls, as insulation. Material thickness - 100 mm. It is more convenient to purchase thermal insulation material in a roll because it can be cut into slabs of the required width. This way, less waste can be generated. |
 | The first step in working with insulation is to cut strips from it to seal the gaps between the Mauerlat and the windproof membrane along the entire perimeter of the ceiling. The width of the strips should be 40÷50 mm. |
 | Next, the mineral wool from the roll is cut into slabs of the required length and, if necessary, width. Calculations carried out in advance showed that an insulation layer of 200 mm would be required. This was foreseen - the height of the floor beams is exactly 200 mm, that is, two layers of insulation 100 mm thick will be required. |
 | Prepared fragments of mineral wool are laid between the floor beams. Each layer is carefully distributed in space and carefully pressed against the windproof membrane. |
 | Then a second layer of insulation is laid below. In this case, the place where the mineral wool blocks of the upper layer were joined is covered with a whole slab in the lower one. |
 | To speed up the work, you can immediately form a 200 mm mat from two pieces of insulation 100 mm thick and lay it under the timber crossbars attached to the floor beams. |
 | However, do not forget that when laying insulation in this way, it is necessary that the joints of the slabs of the upper and lower layers be separated from each other by approximately 250÷300 mm. This arrangement will completely remove the issue of possible “cold bridges” in the insulation layer. |
 | If there are a lot of scraps left, then you can assemble the inner (top) layer from them, and make the bottom one from solid pieces. |
 | To prevent the insulation from sagging down between the jumper bars, it should be reinforced with plastic twine, securing it to the ends of the floor beams using a stapler and staples. |
 | For this purpose, ordinary inexpensive, for example, nylon or polypropylene twine is used. You will need quite a lot of it, since the very bottom layer of insulation still needs to be tied up. It is not recommended to spare the twine. Let everything be safe. |
 | The last, outer layer of thermal insulation material is mounted along the padded bars Its thickness should correspond to the thickness of the timber, that is, 50 mm. To do this, cut slabs 100 mm thick must be divided into two thicknesses. Here, when laying each slab, it must immediately be fixed with twine, aligning it to the bars. |
 | Next, the thermal insulation structure should be covered from below with a layer of reliable vapor barrier material so that moisture from inside the house does not penetrate the insulation. This material should not be confused with a windproof membrane! What is important here is that the couple be provided with a reliable barrier. If moisture accumulates inside the mineral wool, it will lose its thermal insulation qualities. And overmoistening the wooden parts of the structure does not benefit them. |
 | The master uses the vapor barrier membrane “Isover VS 80”. It will be more convenient to work if you choose a material equipped with an adhesive strip, which makes it easier to fasten two adjacent canvases. The adhesive strip is covered with a protective film, which is removed before bonding the sheets. |
 | After the second canvas is secured overlapping with the first by a width usually indicated on the canvas itself by a line, the protective film is removed from the edge of the first canvas. After this, it is enough to run your hand along the joint of the canvases so that they are securely connected to each other. |
 | If the connection does not seem strong enough, it can be glued with tape. For this purpose, it is best to use reinforced plumbing tape, which is moisture resistant and has good adhesive properties with almost any surface. In any case, it holds up perfectly on any membranes. |
 | The membrane is cut to the size of the ceiling and secured on three sides. Then, holding the canvas with a piece of metal profile or building level, the membrane is tightened and finally fixed on the beam using staples. |
 | To make it easier to work at heights, it is recommended to use reliable scaffolding or sawhorses. If you work from them, both hands of the master remain free, and it is also possible to cover a fairly large work area. With an ordinary stepladder you can get into a lot of trouble. |
 | When securing the last side of the vapor barrier material, it is better not to stretch it, but to assemble it into an “accordion”, in order to compensate for the linear expansion of the material when temperatures change. To keep the accordion in the required position, it should be secured with tape. |
 | The joint between the wall and the vapor barrier should be sealed with sealant. To do this, the edge of the canvas is raised up, sealant is applied to the wall, then the edge of the material is lowered and pressed against the wall. |
 | The main task of using sealant is to prevent moisture from penetrating into the insulation during the operation of the premises. The remaining folded down edge of the vapor barrier membrane can then be mated to the wall vapor barrier if required. |
 | Next, on top of the vapor barrier, sheathing boards are attached to the bars, perpendicular to them, for subsequent cladding of the ceiling. In this case, the step between them is 600 mm, but if desired, they can be installed more often, depending on the chosen decorative material. Self-tapping screws, of course, will make holes in the vapor barrier, but boards securely pressed in these places to the bars will not allow steam to penetrate into the insulation. If the vapor barrier film is accidentally pierced during work, the hole should be immediately sealed with plumbing tape. |
 | The result of the work done was an insulation sealed with membranes on both sides, enclosed between the floor beams and supported by sheathing boards. Boards stuffed underneath are not only a frame for finishing the ceiling. They also set the necessary ventilation gap between the vapor barrier membrane and the finishing layer. If this is not provided for, condensation may begin to accumulate on the ceiling surface. |
 | The ceiling can be covered with plasterboard or clapboard. But in this case, the master chose moisture-resistant “Quick Deck” sheets. To fasten the sheets, it is necessary to choose self-tapping screws of such a length that they do not pierce through the sheathing boards and do not break through the vapor barrier. To make it easier to fix the sheathing on the sheathing, it is recommended to pre-install self-tapping screws along the edges of the slab. |
 | Before attaching the casing, you must remember to run the electrical cable for the ceiling lighting fixture. It must be insulated in a special corrugated tube. Next, the sheets are fixed to the sheathing boards using self-tapping screws, the heads of which should be recessed into the material of the boards to a small depth (about 1 mm). This can easily be solved by correctly adjusting the tightening torque of the screwdriver (ratchet). |
 | It is necessary to leave a small gap between the wall and the sheathing slabs for thermal expansion of the material when the temperature and humidity in the room changes. If necessary, additional marking, cutting and adjustment of sheets is carried out. |
 | “Quick Deck” panels are equipped with a tongue-and-groove lock, so when they are installed, the connection is tight and even. In this case, the lock itself already provides a temperature gap. First, the slabs are grabbed in several places and then secured with additional screws. |
Thanks to precise markings and well-fitted parts, the ceiling turned out smooth and neat. Further? the surface is puttied and painted or covered with decorative material. But this is already - Finishing work, but we have, in fact, completely figured out the insulation of the ceiling.
As you can see from the description presented, it is quite possible to insulate the ceiling yourself, without involving professional builders. True, working extremely carefully, strictly observing the sequence of installation of the layers of the overall “pie” /
And one more important question remains unclear to us - how thick should a sufficient insulation layer be? Let's consider it in the appendix to the article.
APPENDIX: What thickness of ceiling insulation will be required?
To determine this parameter, you will have to make a small thermal calculation. You shouldn’t be afraid of this right away - with our calculator it won’t be difficult to perform the necessary calculations.
The calculation itself is based on the fact that the total thermal resistance ceiling structure under a cold attic (or without it at all, for example, when flat roof) must be no less than the normalized value established by SNiP. And this total resistance consists of the indicators of each of the layers of the structure. Thus, knowing the materials of manufacture and thermal conductivity indicators, having a clear plan for further cladding of the ceiling and attic floor, it is easy to calculate which layer and which insulation will provide the required value of thermal resistance.
And you can find out the normalized value of heat transfer resistance for your region using the proposed diagram map. A small nuance: for walls, ceilings and coverings it is different - that’s why the values are highlighted in the diagram different colors. In this case, we are interested in “for floors” - these indicators are highlighted in blue.

We will not overload the reader with formulas, but rather immediately offer an online calculator. Directly below it will be a number of explanations that may be necessary for a quick and accurate calculation.
In this article, I will tell you in detail how to insulate the ceiling in a private house yourself, what is the best way to insulate this part of the house, and where treacherous pitfalls await you. Saving heat in any home is an extremely important task, and in a private home it is especially acute, since there is no heated room above and you need to think about everything yourself.
A warm ceiling is the key to maintaining heat in the house.
Choosing insulation
First, let's look at the question of how to insulate the ceiling in a private house.
Today the market offers 3 types of material suitable for do-it-yourself ceiling insulation:
- Bulk insulation – expanded clay, vermiculite, ecowool, sawdust and coal slag;
- Rolled insulation – linen mats, glass wool and mineral wool, which in turn is divided into soft mats made of slag wool, basalt wool, as well as “Isover” and “Ursa”;

- Slab insulation - presented in three categories. These are high-density mineral wool boards, natural cork and styrene-based boards (foam plastic and extruded polystyrene foam).
There is also self-leveling thermal insulation. In this niche, polyurethane foam and penoizol are widely used. But we will not touch them, since it is unrealistic to equip such insulation with our own hands. They require expensive special equipment and professional skills, but now we are talking about independent installation.

Bulk insulation
The most famous and affordable insulation from mass-produced materials is expanded clay. Each of us has seen light, durable, round brown granules, and this is the same expanded clay.
It is made from a special type of clay, it is brought to a boil, and then cooled. The technology has long been known and quite simple, so the price of expanded clay is quite reasonable, now it fluctuates around 1000 rubles per 1 m³.

The thermal insulation characteristics of expanded clay are average, so for a good result you need a layer of at least 200 mm. One of the advantages is high strength; this material can easily withstand concrete screed.
But at the same time, expanded clay is afraid of moisture and, compared to its competitors, has quite a decent weight. Accordingly, to insulate with expanded clay, you need to have a durable ceiling.
Vermiculite is a rock from the same family as mica. After firing, the material becomes porous and retains heat well. Vermiculite is not afraid of humidity. As for weight, it is lighter than expanded clay, but heavier than the same mineral wool.

In my opinion, of all the bulk insulation materials currently presented, vermiculite is the most the best option. It does not burn, does not get wet, does not cake and allows air to pass through, which makes it possible to use vermiculite for insulating ceilings in both block and wooden ceilings.
Ecowool, which recently appeared on the market, is a product of recycling waste paper. To prevent cotton wool from burning, borax is added to it. It, of course, absorbs moisture, but not as much as mineral wool.
Unlike the two previous options, ecowool shrinks, but only slightly, about 15%. But this is perhaps the lightest material; the weight of such insulation can withstand any ceiling.

Next we have “folk” thermal insulation - coal slag and sawdust. To be honest, compared to factory options, the only undeniable advantage of folk insulation is the free price.
The weight and thermal conductivity of coal slag is equal to expanded clay, and accordingly it will have to be poured at least 200 mm deep. But slag produces a lot of dust and dirt, plus it is capable of collecting moisture.

Sawdust will also cost a penny, but there are nuances here. The material must be kept in a dry room for at least a year. Plus, to protect sawdust from rodents and fungi, they need to be mixed with slaked lime fluff in a ratio of 10:2 (sawdust/fluff). In addition, you can make insulating blocks from sawdust, but I will talk about this technology a little later.

I think you understand that insulating the ceiling in a private house with bulk materials can only be done from the attic side. Step-by-step instruction the technique of such insulation will be given in the corresponding chapter, but for now let’s move on to rolled materials.
Roll materials
May the manufacturers of Ursa, Izover, glass wool and other soft insulating mats forgive me, but I am absolutely disappointed in this material. At the beginning of the 2000s, I insulated the ceilings in my dacha and garage with such mats. I didn’t take glass wool, I spent money on Ursa, but as it turned out, the result was the same.
No more than 5 - 7 years passed and in the dacha ceiling what was not trampled by mice shrunk on its own and the insulation began to look like an old blanket. There was practically no sense from it and everything had to be done again.

If anyone decides to purchase and install soft mats, keep in mind: to work with similar materials you need to buy a good, thick overalls, a respirator, gloves and goggles. Dust with small particles of glass is very dangerous for mucous membranes and skin.
Linen mats are purely Russian know-how. Our people finally remembered that in Rus' houses were always insulated with flax, moss, hemp and other similar materials. In appearance, linen mats somewhat resemble mineral wool.
They can even absorb moisture, but after drying, unlike cotton wool, the volume of linen mats is restored. I don’t know what they are impregnated with, but mice do not live in this insulation and it does not support combustion.

Plus, there's no harmful dust with glass particles, which means there is no need to defend yourself so radically. As for manufacturers, the most famous are Termolen, Ecoteplin and Ecoterm. The price depends only on the manufacturer’s ambitions and transportation overhead costs.
Slab insulation
Slab insulation is a universal thing. It is suitable both for insulating the ceiling from the outside and for insulating suspended ceiling from the inside. The choice here depends on what your house is built from and the type of room.
For wooden houses, as well as for insulating floors in the kitchen or steam room, mineral wool is more suitable basalt slabs with a density of 100kg/m³. They, of course, absorb moisture, but if you wrap them in a vapor barrier, they hold their shape quite well and for a long time. By the way, the higher the density, the longer the thermal insulation will last.

If you need to insulate the ceiling from the inside in a block house with reinforced concrete floor slabs, then I recommend taking inexpensive PSB-S25 foam plastic.
Extruded polystyrene foam is a good thing, but it is 2 - 3 times more expensive than polystyrene foam and it makes sense to spend money on it only if you want to pour a reinforced concrete screed on the side of the attic floor. The same Penoplex (manufacturer of extruded polystyrene foam) will perfectly withstand such weight.
Extruded polystyrene foam is considered an absolute waterproofer. Although polystyrene foam is vapor-permeable, its coefficient is so small that it can be ignored.
This is why such slabs in wooden houses must be installed very carefully, so as not to clog the wood in the waterproofing, where it will begin to deteriorate.

Styrene-based boards have a common disadvantage: at temperatures above 70 ºС they begin to decompose and release harmful carcinogens.
And if in an ordinary living room warm air simply accumulates under the ceiling, then in the kitchen, and even more so in the steam room, this air is already hot. That is why neither polystyrene foam nor its extruded counterpart are installed from the inside in such rooms.

As for cork, this environmentally friendly and very effective insulation costs incredible amounts of money. And to be honest, those people who can afford such luxury are unlikely to glue it to the ceiling with their own hands.
In addition, there is an option to make slabs from sawdust yourself. After disappointment with soft cotton mats, I insulated the ceiling at the dacha homemade slabs from sawdust. The instructions and the recipe itself are available to everyone, plus the cost of this material is cheap.

To 10 parts of dry aged sawdust, add 1 part of M500 cement and 1 part of slaked fluff lime. All this is mixed in a concrete mixer until dry, after which water is added, about 2 parts and mixed again.

According to the instructions, boric acid or copper sulfate is added to the water, but at one time I was advised to dissolve gelatin in water instead of boric acid. With boric acid, the slabs become brittle after hardening, and gelatin acts as an elastic binder.
This solution can be poured into homemade molds, then you will receive slabs with clear dimensions. Or fill it directly between the joists from the attic side. In this case, you will get the same slab, only large and monolithic, with a tight fit to all contact surfaces.

Ceiling insulation equipment
Now let's talk about how to make the ceiling in a private house warm. There are 2 arrangement options. This is insulation of the ceiling from the outside, that is, from the attic side, and insulation of the ceiling from the inside, from the side of the rooms.
Internal installation
Insulating the ceiling from the inside is frankly not the best option. Firstly, it is not suitable for rooms with low ceilings. Indeed, in the best case scenario, your ceiling will drop by 50 - 70 mm, and in the cold regions of our vast homeland, the insulation will take 150 - 200 mm.
Secondly, you will have to work using various kinds a scaffold and stepladders, which in itself is already quite difficult.

And then, no matter what thick and high-quality insulation you choose, the floor structures in a cold attic will freeze in any case. But mice certainly won’t get to your insulation from the inside.
In theory, the insulation technique is not complicated. This is often how reinforced concrete floor slabs are insulated. Although no one is stopping you from attaching insulation boards to a wooden ceiling.
As you understand, in this case only slab material is suitable for us.
If you happen to insulate reinforced concrete floor slabs, then first of all you need to check how well the round cavities inside these slabs are sealed. If you haven’t installed the plugs, make them yourself. Sprinkle polyurethane foam along the edge, and when it hardens, cut off the excess and seal the holes with cement-sand mortar.

- As far as I have come across, the minimum for polystyrene foam is 50 mm, for extruded polystyrene foam 30 mm, and for high-density mineral wool boards 100 mm. The insulation boards are glued to the ceiling with construction adhesive and additionally fixed to it with umbrella dowels, at least 5 fixation points per 1 m²;
- For styrene-based boards, I use Ceresit CT83 construction adhesive; it was originally developed specifically for this material. And dense basalt slabs can be glued to almost any tile adhesive;

- All elements are glued apart. That is, according to the principle brickwork, with a shift between rows. Although the glue holds well, the insulation needs to be additionally fixed while hanging. To do this, directly through the insulation layer, we drill through “blind” holes in the ceiling to a depth of 50 mm. Next, we drive the umbrella dowel into them and hammer the central spacer rod into this umbrella;
- If we talk exclusively about insulation, then this is enough. But such a ceiling will look, to put it mildly, mediocre. Therefore, even before starting work, you need to think about how you will attach the finishing cladding;

- There are 2 exits and both are quite simple. You can take wooden blocks a little thicker than the insulation and secure them with anchors to the ceiling. The step between the guides should not exceed 70 cm. After that, insulation is installed between the bars. The method is fast, but it is suitable for even horizontal planes. If any of the corners is heavily blocked, you will have to put wedges under the bars, and this is time-consuming and inconvenient;

- For curved ceilings there is another, no less simple way. The same markings are made on the ceiling as for the installation of wooden blocks. After this, along lines with increments of about a meter, metal hangers are attached and the “wings” in them are immediately bent down. Next, insulation is glued to the ceiling, and holes are cut in the slabs with a knife under the bent down wings of the hangers.
When the insulation is installed, either wooden planks or ceiling CD profiles for plasterboard are attached to the hangers strictly horizontally, checking for planeness.

By the way, in order to glue the insulation to the reinforced concrete floor slab from below, this slab must be clean and primed. So if your ceiling is whitewashed, then the whitewash will need to be washed off and walked a couple of times with deep penetration soil, for example, concrete contact.
External insulation of ceilings through the attic
Insulating the ceiling from the outside is much simpler and more effective than the option described above.
True, the arrangement of reinforced concrete floor slabs and wooden structures is somewhat different:
- When you're dealing with reinforced concrete slab, you can do it in two ways. First, the slab is covered with a waterproofing film; the cheapest option is to use technical polyethylene. Although some people lay foil-foamed polyethylene foam (penofol) and seal the joints with foil tape. This is relevant for wooden structures, but I personally don’t see much point in covering concrete with penofol;

- For bulk materials in which the filling thickness starts from 150 mm, mounted wooden joists so that the depth of the cells is about 200 mm. Expanded clay, vermiculite, coal slag and sawdust are simply poured between the joists;
- But with ecowool you will have to tinker a little more. This material is poured out of the bag, after which it is fluffed using a construction mixer or an electric drill with a mixing attachment. As a result, the insulation increases in volume by approximately 3-4 times;

- In addition, expanded clay, vermiculite and coal slag are hard materials and they practically do not shrink. While sawdust and ecowool need to be poured just above the joists, this tolerance is needed for shrinkage;
- In principle, the insulation itself is ready. But if you leave it like that, then walking around the attic will be, at least, uncomfortable. That's why I always recommend putting a floor on top.
If you don’t have enough money for a tongue-and-groove floorboard or thick plywood, then buy a regular one. unedged board and sew it up. There may be gaps there, but at least this way you can easily walk around and use the attic as a storage room;

- There is one more point that most amateur craftsmen miss. Bulk insulation, especially such as expanded clay and coal slag, have a fairly large fraction and in order to ensure good efficiency It is advisable to cover them with a vapor barrier membrane (thermos effect).
And don’t forget to put this membrane on the right side, the steam moves from bottom to top. Excess moisture should come out of the insulation freely, and the membrane on top will protect the insulation from getting wet; - Wooden floors are initially based on ceiling joists, so the technology for their arrangement is similar. Only in this case, instead of waterproofing, the bottom is covered with a vapor barrier membrane or kraft paper;

- There is another way to insulate reinforced concrete floors; it is usually used in. In order to insulate the slab from above, a layer of polystyrene foam with a density of at least 30 units is glued to the floor, but it is better to take extruded polystyrene foam;
- Next, a metal sheet is laid on top of the insulation reinforcement mesh with a cell of about 50 mm and a screed with a thickness of 20 - 30 mm is poured onto it. As a result, you get a full floor and a warm ceiling below. In general, foam plastic is not placed under the screed, but there are no large loads in the attic floor or attic and this rule can be neglected;

- This method of arrangement also has a lightweight, roughly speaking, cheap option. Instead of extruded polystyrene foam, a layer of expanded clay is poured onto the floor. And the screed is already poured onto the expanded clay. It turns out, of course, cheaper, but there is a lot more work, the cake turns out heavier and its thickness only starts from 200 mm.

Conclusion
Now it will be much easier for you to navigate insulation materials, especially those characteristics that sellers usually keep silent about. And most importantly, you can decide which method from the above is suitable specifically in your case. The photos and videos in this article show the main points of insulation in practice. If you still have questions after watching, write them in the comments, I will try to help.


