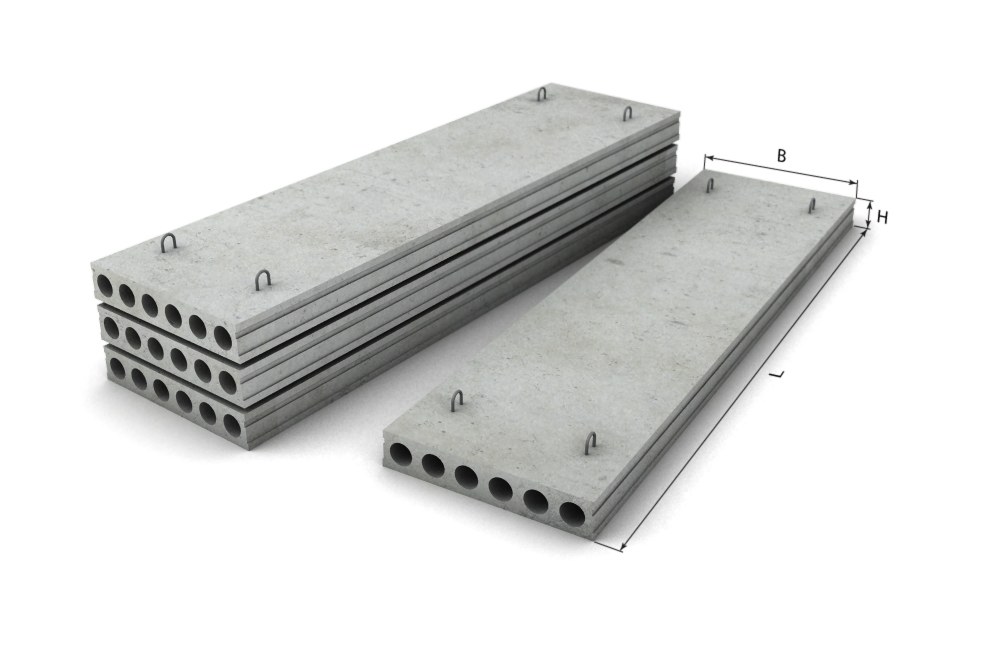
Homemade hollow core slab. Pouring the floor slab with your own hands.
Which you can make yourself. In addition, it is one of the most durable, as it is a monolithic reinforced concrete slab. In this article we will look at how you can make a monolithic floor with your own hands and what is needed for this.
How to make a monolithic reinforced concrete floor with your own hands
In order to construct a monolithic ceiling during the construction of a private house, it will be necessary following materials and tools:
- To make formwork:
- waterproof plywood or board 40 mm thick;
- board (50-70x150-200 mm) or timber (80-100x100 mm);
- telescopic racks, uniforks and tripods or homemade supports made of timber, round timber, pipes or channel.
- For reinforcement:
- fittings with a diameter of 12-20 mm;
- knitting wire;
- supports for fittings (protection);
- Bulgarian.
- To prepare and pour concrete:
- cement, crushed stone, sand or screenings;
- concrete mixer;
- concrete pump or pouring crane;
- You can also use ready-made concrete, but only if a “mixer” can be reached at the construction site.
- - arrangement of formwork;
- -laying of reinforcement;
- -preparation and pouring of concrete.
Now let's look at them in more detail.
Formwork
Formwork for monolithic ceiling is a horizontal “deck” made of moisture-resistant plywood, 18-25 mm thick or edged boards 40 mm thick, which is installed on supporting horizontal beams made of wooden beams (80-100x100 mm).
Horizontal beams are supported by vertical posts, which can be ready-made, special (telescopic) or made independently from 100x100 mm timber, round timber, 80-100 mm in diameter, as well as metal pipes or channel.
In order to decide on required quantity materials for formwork, it is necessary to calculate the area of the ceiling and its thickness, which can be from 10 to 20 cm, depending on the width of the span and the load that it will experience during operation.
Formwork for a monolithic floor must have the strength to easily support the weight of concrete and reinforcement without deformation. It is necessary to take into account that 1 m 2 of concrete with a thickness of 20 cm has a weight of up to 500 kg. It is better to make it from plywood 20 mm thick, regular or laminated. In order to determine the installation height of the formwork, it is necessary to mark along the perimeter of the span over which it will be installed horizontal level, corresponding to the bottom of the future floor. This can be done using a water level or level.
In the case of using telescopic stands, they are first installed at the edges, with tripods and uniforks (crowns). They are installed longitudinal beams with a distance between them of about 2 m. After this, all intermediate racks with and without tripods are installed. Typically, tripods are installed on 30-40% of the racks. The distance between them depends on the power of the racks themselves and the thickness of the ceiling. On average, one rack, designed for a load of 900-1200 kg, should be per 1 m 2 of formwork.
Fig.1 Formwork for a monolithic plywood floor: 1 - stand; 2 - tripod; 3 - longitudinal beam; 4 - cross beam; 5 - unifork; 6 - sheets of plywood; 7 - board side.
When using homemade racks, their length must be adjusted to the installation height of the bottom of the longitudinal beams. They must be installed in increments of at least 1 m on a flat and solid base or on scrap boards 50 mm thick.
Transverse ones are laid along the longitudinal beams, in increments of about 0.5 m, and sheets of plywood are laid on top of them. The upper plane of this structure must be strictly horizontal and correspond to a pre-marked level.
When using board formwork for the “deck”, they must be fitted tightly, and a dense polyethylene film or roofing felt.
Along the perimeter of the formwork, a side of the same height corresponding to the thickness of the ceiling is arranged from boards. At the corners it must be securely connected.
Reinforcement
 After the formwork is ready, we begin to manufacture the frame from the reinforcement. The frame can be made of one layer of reinforcement or two. In the first case, it is necessary to use reinforcement with a large cross-section (16-20 mm), in the second, you can use reinforcement with a diameter of 12-14 mm.
In any case, the reinforcement is laid in the form of a grid with cells 20x20 cm. In this case, first, the first row of reinforcement is laid on plastic crackers-stands (protection) in increments of 20 cm. Plastic stands with a height of 25-30 mm are necessary so that the concrete, when pouring, covered the reinforcement from below and it did not corrode during operation of the ceiling. The reinforcement is laid so that there is a distance to the side of at least 25 mm - the same protection against corrosion.
If it is necessary to splice pieces of reinforcement (if their length is less than the span being overlapped), then to ensure the reliability of the frame in this place, their overlap should be at least 70-80 cm. It is tied with knitting wire in 2-3 places.
On the first row of reinforcement, perpendicularly, a second row is laid, also in increments of 20 cm (see in the first photo). At the intersection, the reinforcement is tied with soft steel tying wire. It is best to do this with a special crochet hook for crocheting reinforcement.
 If the frame is two-layer, then special supports – “chairs” made of reinforcement (pictured on the left) are laid on the reinforcement of the first layer and tied with knitting wire, and the second layer is laid on them in the same way as the first. You can even make such stands yourself, from pieces of reinforcement. The height of the “chairs” should be such that there is a distance of at least 2.5-3 cm between the top row of reinforcement laid over them and the concrete pouring level.
Concrete for pouring a monolithic floor can be ordered ready-made (grade M400) or prepared with your own hands using a concrete mixer. Ready concrete can be supplied manually, using a concrete pump or using a crane, depending on its volume and the height of the ceiling.
Before pouring concrete, the plywood must be treated with formwork oil or at least a working oil to make it easier to remove the formwork. Polyethylene film or roofing felt is spread over the board formwork.
 Concrete must be poured at a time within no more than three hours.
After pouring, the concrete is stretched and leveled using a squeegee (mop) so that it evenly covers the reinforcement frame from below and from above. In this case, the concrete must be laid tightly. It is best to use special vibrators to compact concrete. If they are unavailable, you can use ordinary bayonet shovel or wooden beam ok, piercing and compacting freshly poured concrete with them.
Depending on the air temperature, the formwork is not removed until the concrete has completely hardened, within 20-30 days. The concrete is covered with a film on top, and in hot sunny weather it is periodically moistened with water so that the monolithic floor gradually gains strength.
You can create another type of reinforced concrete floor with your own hands - a monolithic floor on corrugated sheets. In this case, the corrugated sheet plays the role of permanent formwork, and external working fittings.
This overlap has the following advantages:
- -reducing the labor intensity of floor construction;
- -possibility of reducing the height and weight of the floor;
- -reducing the time and cost of work.
To install a monolithic ceiling on corrugated sheets with your own hands, the following types can be used:
- - for a floor span of up to 5.7 meters - corrugated sheet H75-750-0.8;
- - for a span of over 5.7 m - corrugated sheet H114-750-0.9.
Installation of formwork and frame reinforcement
 Installation of formwork for the manufacture of monolithic flooring on corrugated sheets is carried out in almost the same way as usual, but instead of plywood or boards on cross beams sheets of corrugated sheets are laid. Moreover, after the monolithic slab has hardened, the corrugated sheeting is not removed, that is, it acts as permanent formwork.
Such ceilings can be based on load-bearing walls or columns. In brick or stone houses, monolithic floors on corrugated sheets can rest on the walls, followed by embedding the supporting part. In this case, at the place of support, a “mortgage” is installed from metal corner. The corrugated sheet is attached to it using dowels.
The construction of a house and a number of other buildings requires the mandatory arrangement of interfloor or attic floors. Wood is often used to accomplish this task. Wooden floors easy to install, but if you need to provide high-quality insulation and soundproofing of the room, give preference to concrete floors. You can make a monolithic concrete floor yourself. Read the instructions and get started.
Before starting any work, it would be useful to familiarize yourself with the rules for laying monolithic slabs. The main recommendations are as follows:
If the length of one slab is not enough to cover the entire span, you can use one of two available options:
- lay the slabs end to end, leaving gaps around the edges of the room. Finally, the gaps will need to be filled with concrete blocks;
- lay the slabs not closely, but at even intervals (20-30 mm). Finally, fill the gaps with concrete, having previously secured the formwork under the ceilings so that building mixture didn't fall down.
Installation of formwork
The technology for arranging floors requires the mandatory use of horizontal formwork. You can rent ready-made formwork from a specialized company or assemble the necessary structure yourself.
The first option is simpler and more convenient. Ready-made factory formworks come complete with telescopic supports, which allows you to further save time on making supports.
The second option is more budget-friendly. For self-assembly use formwork edged board thickness of at least 2.5-3.5 cm. Can be used moisture resistant plywood thickness from 2 cm.
The boards should be knocked together as tightly as possible. If there are noticeable gaps between the boards, the formwork must be covered with a waterproofing film.
Formwork installation kit
Prepare the following equipment for assembling the formwork:
- boards;
- plywood;
- beam;
- hammer;
- hacksaw;
- level;
- nails;
- axe.
Installation of formwork


First step. Install vertical support posts. The best option– adjustable telescopic metal stands. If they are absent, they will also fit wooden logs with a diameter of 80 mm.
Install the racks in meter increments. The distance between the walls and the racks closest to them must be at least 200 mm.
Second step. Place on top support posts
crossbars. This is a longitudinal beam, due to which the entire structure placed above will be supported. Third step. Install the formwork on top of the crossbars. First, lay the transverse beams on the longitudinal beams.
wooden beams

, on them - boards or plywood. Select the dimensions of the formwork so that its extreme edges rest against the walls without the formation of cracks. Fourth step.
Top edge
formwork structure
must be strictly on the same level with the top edge of the lined wall. To meet this requirement, adjust the height of the support legs. Fifth step. Install vertical structural elements. Because the edges of the floor slab must meet the wall, place the vertical fence at an appropriate distance from the inner edges of the walls.

Sixth step.
Check the levelness of the formwork installation using a level. Correct deviations if found.


To connect formwork elements, use
convenient fastening
, for example, dowels or nails.

For the convenience of subsequent work, the formwork can be covered with waterproofing material. Telescopic stands are preferred over their wooden counterparts for the reason that metal is much more durable than wood. Each telescopic stand can withstand a load of up to 2000 kg without deformation and cracks, as can happen in the case of a wooden beam. Video - Installation of floor formwork
Second step. Lay the first reinforcing mesh at the bottom of the future monolithic slab. First lay the longitudinal and then the transverse rods. Optimal size The cells of such a grid are 120-150 mm. If the overlap has small area
, you can increase the cell size to 200 mm.
Third step.
Tie the joints of the rods with steel wire.
Fourth step.
Place a second reinforcing mesh on top similar to the first. Tie both meshes with wire. If the length of one rod is not enough, tie an additional rod with an overlap equal to at least 40 diameters of the reinforcement. That is, if you use rods with a diameter of 12 mm, the overlap should be at least 480 mm.
- Preparation of concrete
- For the initial pouring, a standard concrete mortar is prepared.
- The recipe is as follows:
- 2 parts sifted clean sand;
1 part coarse aggregate - you can use both crushed stone and gravel; 1 part cement M400-M500; water.
Add enough water so that the consistency of the solution is close to the consistency of liquid sour cream. A thin solution will fill everything perfectly
internal cavities
and cracks, thanks to which the slab will become truly monolithic.
It is most convenient to prepare the solution in a concrete mixer. Add the dry and solid ingredients first, and then gradually add water, stirring as much as possible.
If you don’t have a concrete mixer, you can prepare the solution in a large trough, but it takes too long and is quite difficult, especially if you don’t have assistants.

Pouring the slab


The process of pouring a monolithic floor can be divided into 2 stages: pouring and finishing pouring.
Spilling

At this stage, the initial layer of concrete is poured. Pour the solution evenly and slowly; sudden movements are unacceptable, as this may cause the formwork to warp.
Don't make the pour too thick. The main task of this layer is to fill all existing cavities.
“Smooth” the finished fill with a shovel over the entire surface. Do this smoothly and carefully. This will remove excess air and completely fill even the smallest cavities.
Second step.
Level the fill with a shovel as in the previous part of the instructions. Leave the concrete for a couple of days and move on to the next step.
Third step.
Prepare a solution of 1 part cement and 3 parts sand. Large aggregate is not needed at this stage. Add water to obtain a medium-thick solution.
Fourth step.

Fill the slab completely with the solution prepared in the previous step. During the pouring process, level the slab using the rule until a perfectly smooth surface is obtained.
This completes the pouring of the monolithic floor. All you have to do is monitor the condition of the pour for a while so that the concrete hardens and gains strength without unnecessary problems.
Caring for concrete after pouring
During the hardening process of concrete, a large amount of heat will be released, under the influence of which intense evaporation of moisture will begin. Lack of moisture will cause concrete to crack. Therefore, during the first few days after pouring, you will need to regularly wet the slab with water. You can pour water in buckets (2-3 buckets per session) or through a hose with a sprayer. First, you can lay old rags (preferably burlap) on the dried concrete and pour water on them. In hot weather, cover poured concrete with polyethylene, because Drying too quickly may cause the slab to become cracked. The formwork can be removed approximately 10 days after the last wetting. In general, the slab will gain strength in 3-5 weeks. After this period, it will be possible to proceed to further planned construction work.
Thus, you can independently arrange a monolithic floor. At the same time, money for the arrangement
necessary structures
you will spend much less than if you buy ready-made factory-made slabs. Follow the instructions and everything will work out.
- Happy work!
- Video - Monolithic ceiling with your own hands
- According to forum participant ontwerper, it is possible to do it on your own and cites well-known and little-known considerations for their manufacture as arguments. In his opinion, making ceilings with your own hands is beneficial for several reasons:
- Availability of technologies and materials;
Convenience and practicality from architectural and engineering points of view;
Before pouring concrete, ontwerper advises to carefully think through the entire process and, first of all, order concrete from the factory. It is better than homemade - there is control over the quality and quantity of fillers that improve the concrete and prevent it from delaminating for a long time. The composition must consist of heavy aggregates, have a strength class of B20-B30 (M250-M400), and frost resistance of F50.
Don’t be lazy and check the documents for the release parameters, grade and time until the concrete sets.
If you need to supply concrete to the second, third floor or over a long distance, you will not be able to do this without a concrete pump, and rolling concrete with shovels along endless gutters is a very difficult and inconvenient task.
IN winter time concrete can be ordered from antifreeze additives, given that additives usually increase the time of strength development, some of them provoke corrosion of reinforcement, but in general, this is acceptable if the additive is factory-made.
ontwerper prefers not to build in winter, but in any case, do not prepare the solution yourself, use factory-mixed concrete.
Formwork
The main purpose of the formwork is to withstand the weight of freshly poured concrete without deforming. To calculate the strength you need to know that a 20 cm layer concrete mixture puts pressure on square meter formwork with a force of 500 kg, to this you need to add the pressure of the mixture when it falls from the hose, and you will understand that the structure must be reliable.
To make it, ontwerper recommends using 18-20mm laminated (coated) or plain plywood (but it sticks more strongly). For beams, crossbars and formwork posts, timber with a thickness of at least 100x100 mm should be used.
After assembling it, it is necessary to check the horizontalness of all structures. Otherwise, you will waste a lot of time and money fixing errors in the future.
Reinforcement
The lower one is along the span, the lower one is across the span, the upper one is across the span, the upper one is along the span.
span– the distance between the supporting walls (for a rectangular slab on the short side). The lowest row is placed on plastic crackers specially designed for this; their height is 25-30mm. Top row - across it and knit with wire at all intersections.

Then next in line is the mesh separator - a part made of reinforcement with a certain pitch, it can be made according to your desire. On the dividers - knit the top one across, - knit the top one along it, - knit with wire at all intersections. The top point of the frame (top of the upper rod) should be 25-30 mm below the top edge of the formwork wall, or the thickness of the concrete is 25-30 mm above the top reinforcement.
After the reinforcement is completed, the frame should be a rigid structure that should not move when concrete is poured from the pump. Before pouring, check that the pitch and diameter of the reinforcement correspond to the design.
Pouring concrete
After all the preparation, you need to take and distribute the concrete over the entire area and vibrate it. It is best to fill the slab entirely at one time; if this is not possible, install cutouts - intermediate walls inside the formwork contour that limit concreting. They are made from steel mesh with a cell of 8-10 mm, installing it vertically and attaching it to the frame reinforcement. Under no circumstances should you make cuts in the middle of the span and do not make them from boards, PPS.
Curing
After pouring the slab, it must be covered to prevent precipitation, but at the same time constantly water the outer surface to keep it moist. After about a month, you can remove the formwork, and in case of emergency, this can be done no earlier than after a week and only remove the panels. To do this, you need to carefully remove the shield and back up the slab with a stand. The racks support the stove until it is completely ready, about a month.
Calculation of the strength of a monolithic floor slab
It comes down to comparing two factors:
- Forces acting in the slab;
- The strength of its reinforced sections.
In this case, the first must be less than the second.
Constant loads on a monolithic floor slab
Own weight with a load safety factor of 2.5t/m3 x 1.2 =2.75t/m3.
- For slab 200mm - 550kg/m3
Own weight of a floor with a thickness of 50mm-100mm – for example a screed – 2.2t/m2 x 1.2= 2.64t/m3
- for floor 50mm - 110kg/m3
Bring partitions made of 120mm brick to the area of the slab. Weight 1st linear meter partitions with a height of 3m 0.12m x 1.2x1.8 t/m3 x 3m = 0.78t/m, with a partition pitch of, for example, 4m it turns out to be approximately 0.78/4 = 0.2t/m2. Thus, the reduced weight of the partitions = 300 kg/m2.
Payload for 1st group limit states(strength) 150 kg/m3 - housing, taking into account the reliability factor of 1.3, we will accept. Temporary 150x1.3= 195kg/m2.
The total design load on the slab is 550+110+300+195=1150kg/m2. So, for sketch calculations we will accept a load of - 1.2t/m2.
Determination of moment forces in loaded sections
Bending moments determine 95% of the reinforcement of flexural slabs. Which sections are loaded? – the middle of the span, in other words – the center of the slab.
Bending moments in a square plan slab of reasonable thickness, hingedly supported - not restrained along the contour (for example, on brick walls) along each of directions X,Y can be roughly defined as Mx=My=ql^2/23. You can get some values for special cases.
- Slab in plan 6x6m - Mx=My= 1.9tm;
- Slab in plan 5x5m - Mx=My= 1.3tm;
- The slab is 4x4m in plan - Mx=My= 0.8tm.
These are forces that act both along and across the slab, so you need to check the strength of two mutually perpendicular sections.
Checking strength to the longitudinal axis
When checking the strength to the longitudinal axis of a section by bending moment (let the moment be positive, i.e. belly down), it is assumed that the section has compressed concrete on top and stretched reinforcement on the bottom. They form a power couple that perceives the momentary force coming to it.
Determination of effort in this pair
The height of the pair can be roughly determined as 0.8h, where h is the height of the slab section. We define the force in the reinforcement as Nx(y)=Mx(y)/(0.8h). We get a representation of the 1 m width of the slab section.
- Slab in plan 6x6m -Nx(y)= 11.9t;
- Slab in plan 5x5m - Mx=My= 8.2t;
- The slab is 4x4m in plan - Mx=My= 5t.
For these efforts, select reinforcement of class A-III (A400) - a periodic profile. The calculated tensile strength of the reinforcement is R=3600kg/cm2. cross-sectional area of the reinforcing bar with diameter Ф8=0.5cm2, Ф12=1.13cm2, Ф16=2.01cm2, Ф20=3.14cm2.
The bearing capacity of the rod is equal to Nst=Ast*R Ф8=1.8t, Ф12=4.07t, Ф16=7.24t, Ф20=11.3t. From here you can obtain the required reinforcement spacing. Step = Nst/ Nx(y)
- Slab in plan 6x6m for F12 reinforcement Step=4.07t/11.9t=34cm;
- Slab in plan 5x5m - for F8 reinforcement Step=1.8/ 8.2=22cm;
- Slab in plan 4x4m - Ф8 Step=1.8/5=36cm.
This is strength reinforcement in each of the X and Y directions, i.e. a square grid of rods in the tensile zone of concrete.
In addition to strength, it is necessary to reduce the formation of cracks. For slabs of residential premises with a span of up to 6 m, 200 mm thick, supported along the contour (i.e. on four sides) at any a/b ratio, as a rule, you can take lower working reinforcement from A III rods in two directions with a step of 200x200 with a diameter of 12 mm, the upper (constructive) - the same from F8, thinner and smaller should not be.
All this is a special case common approach, demonstrating the specifics of the task, but to implement it it is necessary to contact specialists.
Posted by forum member ontwerper
Editor: Adamov Roman
Comments:
- Pouring a slab with concrete
Typically, in stone houses, floors are made from ready-made reinforced concrete blocks. But sometimes you need to make a floor slab yourself.
These may be relatively common cases when, for example, the use of a crane or other construction equipment, without which installation of slabs is impossible. You have to choose the option of making the ceiling with my own hands also in the case when architectural project assumes non-standard layout premises.
But in any case, home-made slabs must clearly meet all the technological requirements that apply to industrially produced reinforced concrete blocks.
Therefore, there is reason to consider in more detail the technology for producing such slabs away from reinforced concrete products plants.
Some advantages of making a floor slab Self-filling monolithic concrete slab
overlaps are carried out not only when there is physically no other way out. Sometimes architectural, technological, design, and environmental feasibility comes to the fore. It is worth noting that it is in such cases that the advantages of this method are especially clearly noticeable.

When choosing the option of producing a monolithic slab with your own hands, the manufacturer, first of all, does not have to worry about the problems caused by the presence of parallel joints between factory-made reinforced concrete slabs. The seamless pattern of the ceiling, which is guaranteed by pouring a monolithic surface, allows for a uniform load on external walls
, internal partitions and building foundations. In addition, this method of arrangement makes it possible to plan quite freely inner space
rooms, to make rooms of various sizes and configurations, which do not depend on standard slabs hanging over them, but rest on randomly mounted vertical columns. Finally, when constructing a balcony in conjunction with monolithic slab
There is no need for an additional base plate.
Return to contents
Materials, tools and devices necessary for the manufacture of floors

- wood hacksaw;
- axe;
- hammer;
- building level;
- level;
- nails;
- wooden beams for making supports for formwork (at the rate of 1 support per 1 m2);
- wooden boards (50x150 mm);
- plywood sheets 20 mm thick;
- steel reinforcement (diameter 10-12 mm);
- device for bending reinforcement;
- clamps for fittings;
- concrete grade M350 (you can make it yourself by mixing cement, sand, crushed stone and water).
There is no need for an additional base plate.
How to make a floor slab with your own hands: general rules
Before proceeding directly to the actual installation of a monolithic slab, you should carefully study all the nuances of this operation. Like any work, it is impossible without drawing up an initial project.

It can be ordered from one of the specialized companies for the preparation of design documentation for the construction of buildings. This option looks preferable to manual calculations, since only specialists can calculate the effect of a bending moment on the slab under the maximum possible load.
But you can do this part of the work yourself, by turning, for example, to the necessary formulas and recommendations posted on the Internet. In particular, there you can find a description of the technology for producing slabs for a house with a span of up to 7 m and a floor thickness of 180-200 mm - one of the most popular among builders country houses options for installing interfloor floors.
The schematic diagram of product production includes the following components:
- Main steel reinforcement. Provides bearing capacity the entire structure. It can be laid in one direction (parallel to the short side of the slab) or in two directions (crosswise). In the second case, the thickness of the slab will be greater than in the first option.
- Support reinforcement. Installed in the wall part of the slab, it protects the ceiling from cracking.
- Concrete pouring. Creates functional surface ceiling (base for floor/ceiling installation) and protects internal reinforcement. Minimum thickness top layer – 6 cm.
- Crown. It is an essential component of any ceiling. Passing through the load-bearing walls of the building, it is connected to the reinforcing bars of the slab.
In addition to the design design, the installation of the floor involves the installation of formwork, the reinforcement process, the operation of pouring and compacting concrete.
There is no need for an additional base plate.
Formwork installation for the manufacture of a monolithic floor slab

Installation of formwork (deck) includes several successive stages. First, support structures are placed throughout the entire area of the room. vertical racks given height. They can be either wooden or metal. The distance between them should not exceed 1 m, and those that are closer to the wall should be located no further than 20 cm from it.
To hold the formwork, a wooden beam is placed on top of the racks ( I-beam or channel), after which a horizontal deck is laid on the mounted crossbars. In this case, it is necessary to ensure that the edges of the horizontal formwork rest tightly against the walls (slots are not allowed).
Then all the required vertical formwork elements are installed. At the same time, the vertical fencing is made from the inner edges of the walls at a distance of 150 mm, since this is exactly the length of the monolithic slab with its edges extending onto the wall.
Upon completion of the deck installation, using a level, you must carefully check how level and horizontal its elements are.
There is no need for an additional base plate.
Floor slab reinforcement stage

After completing the installation of the formwork, they begin to manufacture the reinforcement frame, which should consist of two metal mesh. A steel rod with a diameter of 10-12 mm is used for these purposes. A mesh with a mesh size of 200 mm should be knitted with wire with a diameter of 1.2-1.5 mm. If, to make a mesh, you have to increase the length of reinforcing bars, you must ensure that at the joints the overlap of one bar on another is at least 40 cm.
It is also necessary to comply with another standard - the overlap of the reinforcement mesh on the wall of the house should be 150 mm ( Brick wall) and 250 mm ( aerated concrete wall). In this case, the distance between the ends of the reinforcing bars and the vertical formwork along the perimeter of the slab should be 20-25 mm.
As mentioned above, a full-fledged one involves laying two metal meshes - lower and upper. They should be located in the thickness of the slab at a distance of 20-25 mm, respectively, from the lower and upper planes of the slab.
In order to ensure correct location bottom mesh, under which special plastic fasteners are placed. They must be located strictly at the intersection points reinforcing bars, and the distance between the clamps should be about 1-1.3 m.
The correct distance between the upper and lower mesh (120-125 mm) is ensured using special fixing supports. They are made by hand using a bending device from a metal rod with a diameter of 10 mm. The height of all such clamps must be the same and equal to 120 mm. They should be placed on the surface of the formwork in a checkerboard pattern in increments of 1 m.
After this, end clamps are mounted at the ends of the frame in increments of 400 mm. To strengthen the reinforcement, both reinforcement meshes are fastened with connecting rods with bent hook-shaped ends.
Comments:
- Formwork reinforcement
Before you make a concrete floor with your own hands, you need to prepare the following list of materials and tools.
- plywood or board at least 40 mm thick;
- board or timber;
- racks or supports made of pipes or channels;
- reinforcing bars;
- knitting wire;
- protective stands for fittings;
- level, level;
- Bulgarian;
- cement;
- crushed stone;
- sand;
- concrete mixer;
- pump or tap for pouring concrete.
Exactly concrete floor is considered the most reliable, since it is a monolithic slab of reinforced concrete, with mandatory reinforcement.
Do-it-yourself formwork for the ceiling
For a monolithic concrete floor, formwork is made by laying horizontal surface moisture resistant plywood. Plywood or boards of similar diameter are installed on the beams supporting them, laid horizontally on supports. These supports or stands for beams and formwork can be found in finished form

called telescopic or assemble it yourself from timber, angles, pipes. In order for the proportion of materials taken to be correct, it is necessary to calculate the area of the future floor and its volume. The volume or thickness depends on the span area and the load experienced during the process. To support weight over time reinforced concrete
, the formwork must be strong and not deform. Therefore, plywood or boards for manufacturing are taken that are quite strong and thick. To determine at what height from the floor the formwork will be installed, you need to measure the perimeter of the span horizontally with a level to the height that corresponds to the bottom of the planned self-leveling floor. The most convenient way to do this is to use a construction tool laser level
or level.
If homemade racks are used, it is necessary to adjust their length to the height at which the bottom of the first layer of beams will be installed. The distance between such racks should be at least 1 m³; they should be installed on a flat, solid floor. Further on longitudinal beam They are laid transversely, the laying step is approximately 0.5 m, and the formwork sheets are already laid on them. The upper plane of the resulting structure is checked with a level, since it must be strictly horizontal.
If boards are used instead of plywood for formwork, they are adjusted one to another, and a moisture-proof material is laid on top. Along the perimeter, the formwork must be fenced with a side of the same height, which corresponds to the thickness of the concrete layer. It must be connected at the corners securely so that it does not collapse due to the solution.
There is no need for an additional base plate.
Formwork reinforcement

Floor reinforcement scheme: 1 – main mesh; 2 – additional reinforcement of the main grid; 3 – U-shaped reinforcements of the edges of the slab; 4 – L-shaped reinforcement of the corners of the slab; 5 – load-bearing walls.
When the formwork is ready, you need to prepare a reinforcement cage, consisting of reinforcement in 1 or 2 layers per formwork. For a single-layer frame, reinforcement of a larger diameter is used. Reinforcing cages with cells 20x20 cm are laid, the initial row is laid out on a special protection, which is necessary for uniform penetration of concrete under the reinforcement. The height to the side should be 20-25 mm. If two pieces of reinforcement need to be spliced, the overlap should be at least 70-80 cm.
To ensure that the proportion is maintained, a second row is placed on top of the first row of reinforcement with the same step of 20 cm, only perpendicularly. The reinforcement at the intersection points is tied with soft steel wire with a special hook for knitting reinforcement. If the frame is made of two layers, then special supports-chairs made from pieces of reinforcement are laid out on the first row and then tied, and the second layer is laid out on them in the same way as the first. The distance between layers should be at least 2.5-3 cm.
There is no need for an additional base plate.
Do-it-yourself pouring of floors
Before making a concrete floor, it is necessary to prepare the concrete. It can be taken ready-made or made with your own hands. To make it, a concrete mixer is used and the correct ratio of ingredients is required. Concrete can be poured in buckets or using a concrete pump, as well as a special tap. The method depends on the height of the floor and the volume of concrete that needs to be laid on the formwork. It is recommended to treat the formwork boards with special formwork oil immediately before pouring concrete to make it easier to remove the formwork later. If polyethylene is already spread over the formwork, this is sufficient and no additional preparation is required.
The concrete is poured all in one go, the total work time should not exceed 3 hours. After completing the work, be sure to level the concrete using a special squeegee mop so that the concrete is distributed evenly above and below. Density is also very important. To compact it, special vibrating machines are often used, but if there is none, you can pierce the concrete with the handle of a shovel or a piece of timber.
The formwork is not removed until the concrete has completely hardened, i.e. 20-30 days, and the top is covered with a film so that it does not dry unevenly.
Thank you for your feedback


