How to decorate the walls of the attic. Interior decoration of the attic - making a cozy room. Cladding the attic with clapboard
An attic is essentially an attic space. It differs from an ordinary attic in that it is located in a building with pitched roof, consisting of: one flat and the other steep part. They give the house additional space that can be used for living space.
This roof design was developed by an architect from France named Mansart, from which the word “attic” was derived.
In those days, these premises were the abode of students, poor creative intelligentsia, and servants. And all because the attics were not insulated and were poorly protected from moisture.
But the situation has long changed: thanks to the development of the construction industry and the latest design developments, the attic space has become a full-fledged addition to a residential building. Now you can arrange almost any room in the attic space, even a kitchen and a bathroom.
Naturally, the methods of finishing attics and the choice of materials will depend on this. But before finishing the attic from the inside, you need to consistently perform several preparatory works, which we will tell you about now.
A well-made roof of a building does not guarantee that the attic will be warm and dry. To achieve this, all its surfaces need to be insulated.
The technology for this work will depend on whether external thermal insulation of the roof was performed during the construction of the house:
- If so, then it will be easier to additionally insulate the slopes: you can simply line them with fiberboard, clapboard or plasterboard, laying a thin layer of polyethylene foam or isolon under the sheathing. It is better to use foil options, they prevent the formation of condensation.

- Well, if the roof slopes were not insulated, you will need to do this work from the inside. Then insulation and finishing of the attic will require the sequential laying of several layers, the first of which will be a waterproofing membrane.

- The waterproofing film is fixed with counter-battens directly to the wooden roof sheathing. Only after this will it be possible to lay the thermal insulation.
To insulate roof slopes, it is better to choose soft, and as thick as possible, roll insulation. - Slab materials are not very suitable for this, especially if the roof is hipped or has another complex configuration. They are best used for wall insulation.

- The method of attaching the thermal insulation layer depends on the roof structure. If there is a small step between the rafters, you can choose a material whose width is slightly larger than this distance.
Then the insulation fits tightly between the rafters and does not require additional fastening.

- When the distance between the rafters is large, bars with a small cross-section are used to attach the insulation. In this case, first a wire is pulled between the rafters, fixed with self-tapping screws, and insulation is already laid on it.
The best way is to watch a video on this topic. - If you use ordinary mineral wool, then you will need to stick a vapor barrier film on top of it, and only then secure this entire structure with bars. It is much easier to use a material with a ready-made vapor barrier layer.

- When insulating attic walls, you can do without a waterproofing layer, but only if you use polyurethane foam materials as insulation.
- Mineral wool tends to get wet and rot. It is better not to use polystyrene foam for this, because it is highly flammable and quite toxic when burned.
- It is very good if there is a gap between the waterproofing and the insulation to ensure ventilation of the insulation. When doing the work with your own hands, do not forget that all wooden structural elements must be treated with an antiseptic composition.
- If your house has external thermal insulation of the walls, then the attic gables will not need to be insulated. But it’s still better to insulate the floor, especially if there is a sleeping area in the attic.
- For floor insulation it is better to use bulk insulation: Expanded clay or expanded polystyrene crumbs are very convenient, and the penny price of the material allows you to significantly save your budget.
- The floor is covered with plastic film and installed wooden joists, and fill the resulting cells with insulation. It is filled with liquid cement mortar on top, in which the reinforcing mesh is embedded.
You can find more on the Internet detailed instructions on the construction of such a floor.

When the solution has set, it will be possible to make a screed, and the floor will be ready for further finishing.
This method of floor insulation creates excellent sound insulation, as well as reliable waterproofing of the room. You can even install a bathroom or kitchen in the attic without fear that water will leak down.
Finish example attic floor under the bathroom in the photo above.
Decorative finishing of the attic
Naturally, the interior decoration and insulation of the attic depend on how you will use this room. Most often, in the attic space they arrange living room: bedroom or children's room, although there are exceptions.
Wood in attics
Reflecting on the question: “What is the best way to decorate the attic?” – you start going through all the possible options. And the first thing that comes to mind is a tree.
Most likely, this association occurs because load-bearing structures the roofs are made of this material.
- In addition, finishing the attic with wood creates additional thermal insulation, as well as a unique microclimate filled with woody aroma. No other type of finishing material can compete with the remarkable properties of natural wood - that’s a fact.

- Clapboard, which is most often used for finishing works, is the simplest cladding option.
There are five types of profiles of this board, and several standard sizes. Its installation can be done in various ways. - The location of the board on the surface can be horizontal or vertical, diagonally, in a circle, or herringbone. This creates a specific pattern and breaks the monotony of the surface.

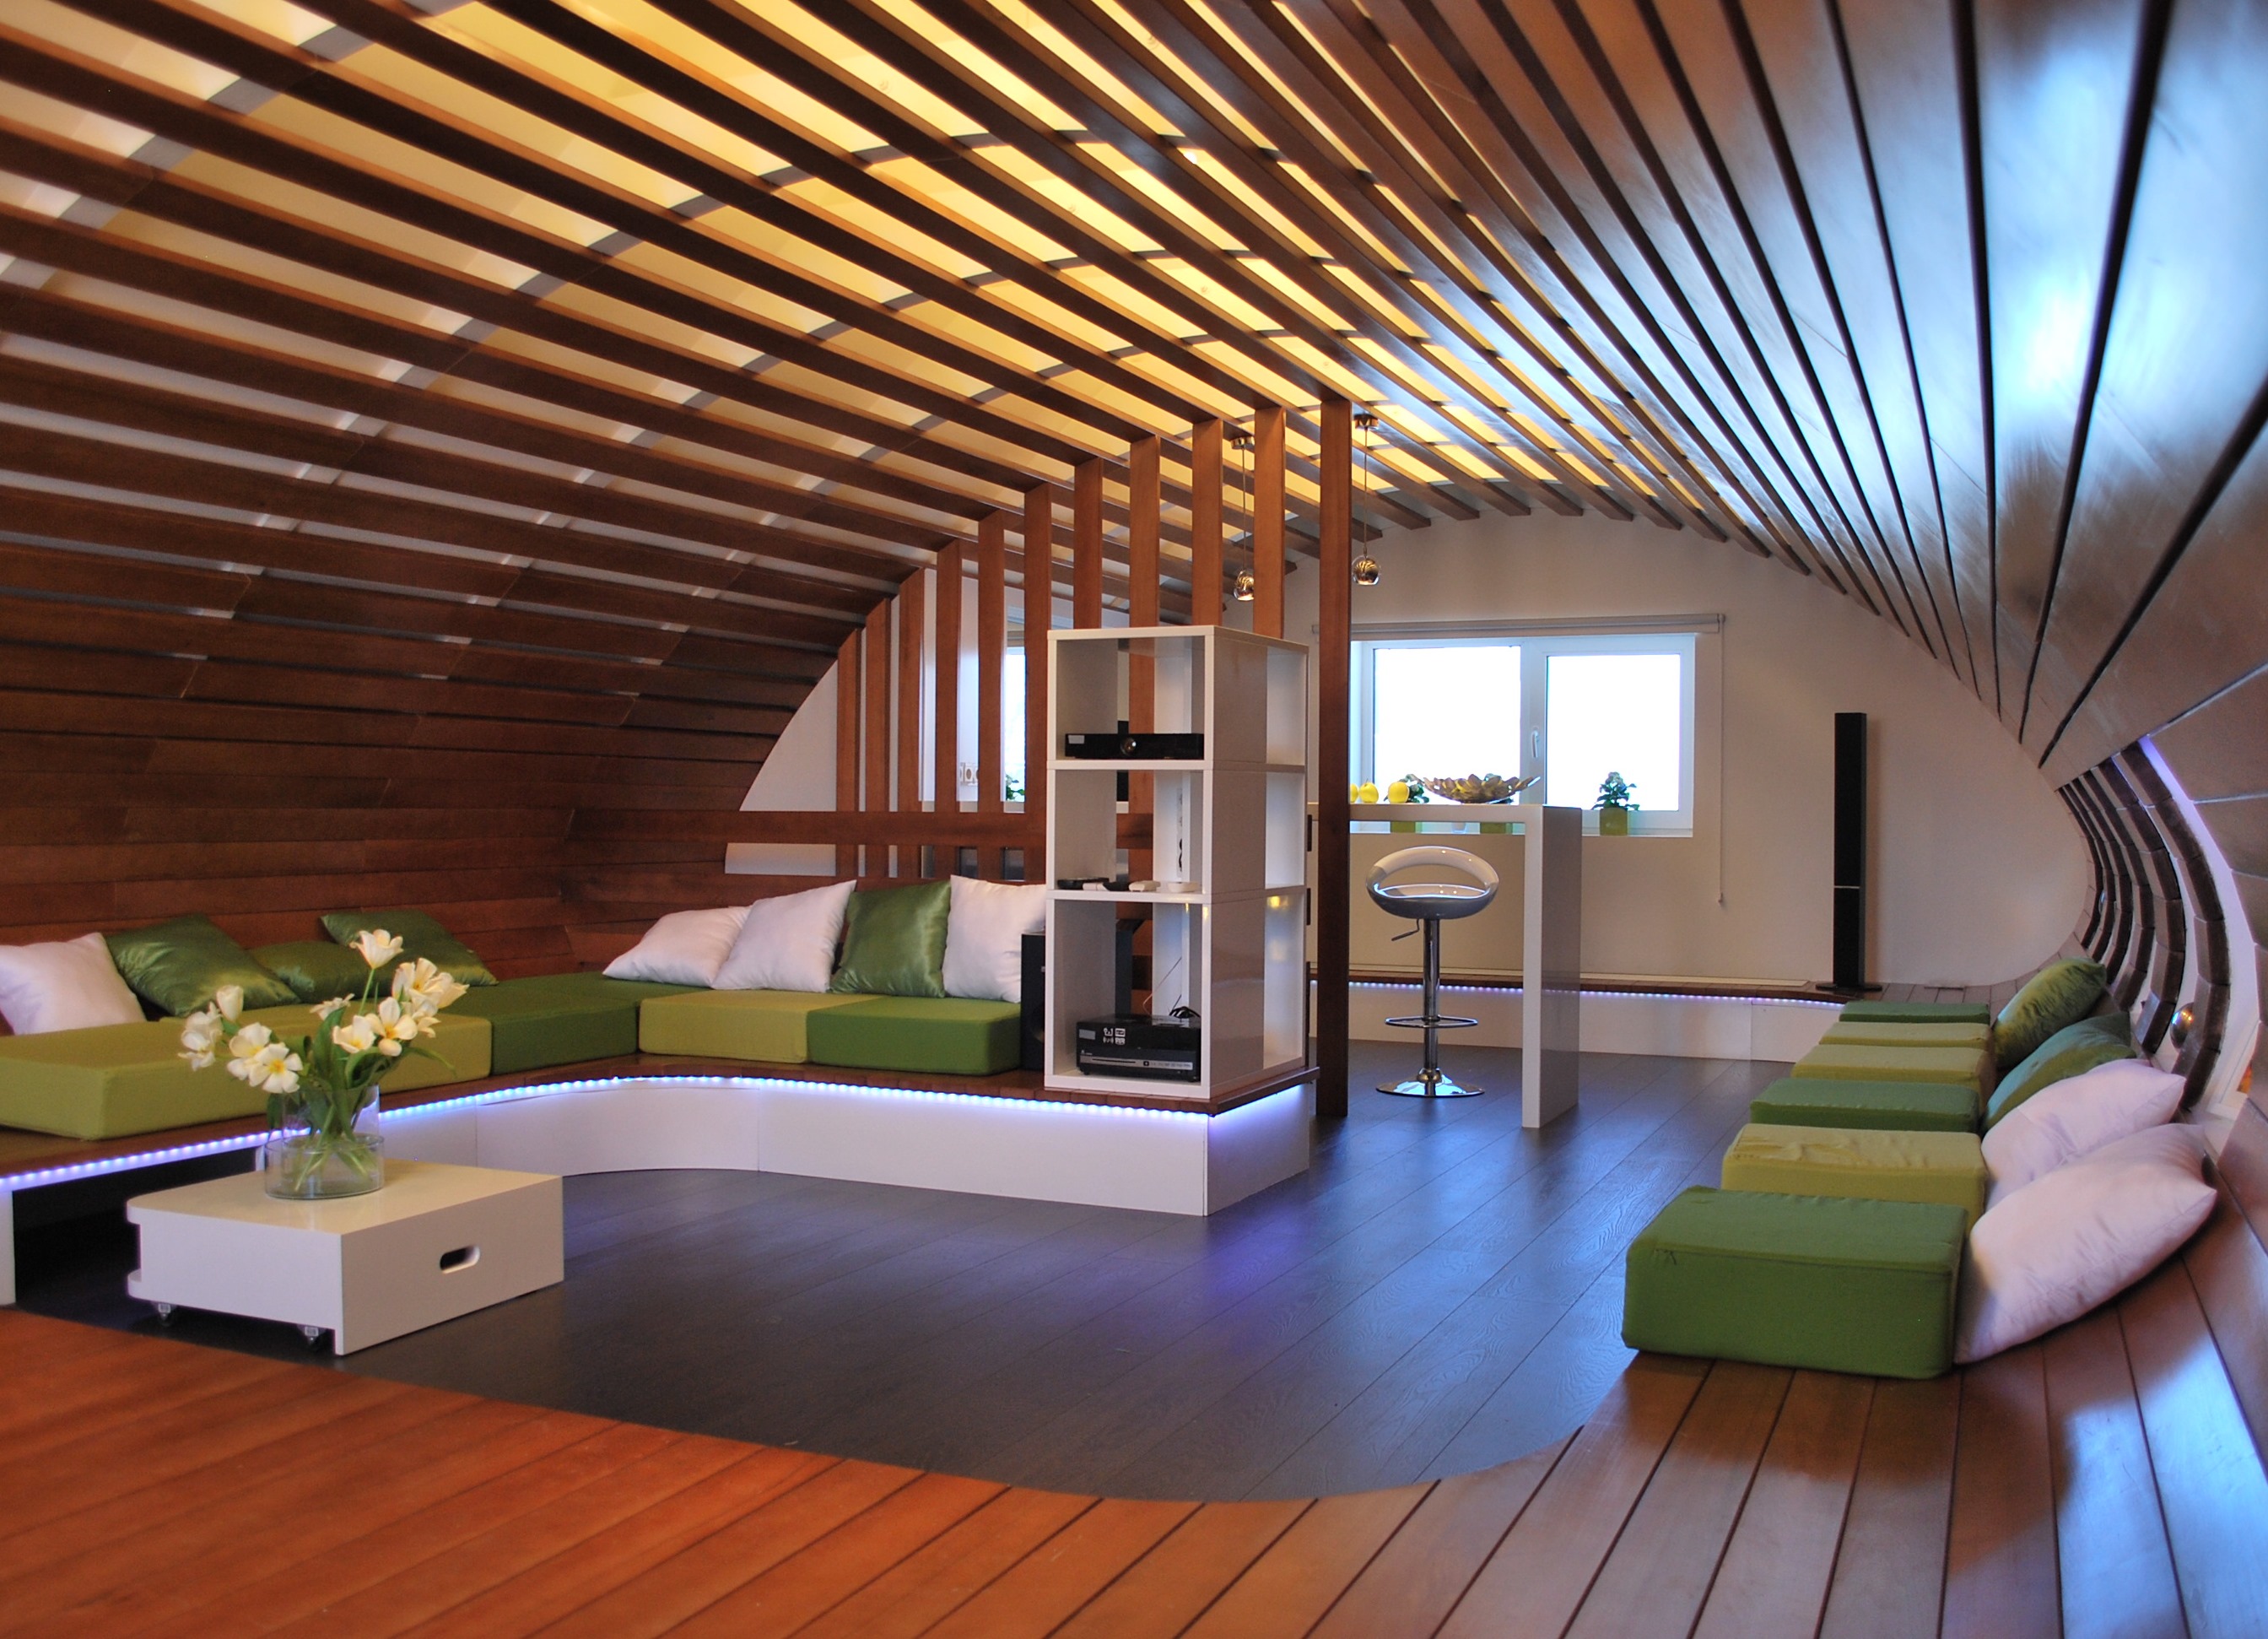
- Using lining as a finishing material, you can zone the attic by painting each zone in its own color. The picture above is a very good example of such an interior solution.
Columns with beautiful decoration also play a significant role in this.

- Finishing the attic with wood can be done in another way - using wooden panels. They can be made either from solid wood or in the form of stacked slatted panels from the same lining.
- It could be MDF options covered with wood or bamboo veneer. As a budget option, laminated and veneered fiberboard panels are used.
Wooden panels are good both for wall decoration and for installing suspended ceilings. - The attic is finished with MDF panels if this room is used as an office or sports room. It is not customary to do such cladding in bedrooms - the interior will be associated with some kind of office.
Therefore, they are combined with other types of finishing, such as wallpaper, decorative plaster and painting.

Few people know that a new finishing material has appeared on the construction markets - wooden wallpaper. They are a set of panels made of profiled wooden elements glued to a base.
For the production of this wallpaper, mainly coniferous wood is used. Their thickness does not exceed two centimeters, with a width of 1.2 meters and a length varying from two to six meters.
Such panels are glued to the wall, like regular wallpaper, and allow you to quickly and beautifully decorate a room with wood.
Ceiling beams
The main decoration of the attic interior can be ceiling beams. Depending on the roof structure, these beams may be load-bearing, rather than hollow false beams that are used in ground floor rooms.

So:
- Rafters can also play this role - just decorate them carefully. The examples we have given of finishing the attic floor, using ceiling beams, clearly show how beautiful and original it is.

At the same time, the decorative decoration of walls can be the simplest - all attention is attracted to beam structures, which always have a contrasting color in relation to other surfaces. Original pieces also play a big role in such an interior. ceiling lights harmonizing with the beams.
Plasterboard structures
As we have already said, there is nothing in the attic space that could interfere with the implementation of any structure: partitions, columns, arches, suspended ceilings. The main thing is that it is spacious.
You can divide the room into zones using any of these elements.

So:
- The final finishing of attics lined with plasterboard can be a painted surface acrylic paint, covered with wallpaper. Often the attic has good height– this is what most apartments in multi-storey buildings lack.
- Sometimes it even needs to be hidden, so suspended ceilings made of plasterboard can have several levels and deviate from the base surface not by 10-12 cm, but much more.

- IN design projects, in the attic there are even suspended ceilings. In the top photo, walls are made of plasterboard and tension glossy ceiling milky color, create a wonderful living room interior.
Good things contribute to this natural light attics. - Not all attic spaces have a sufficient number of windows. If there are no windows in the roof slopes, but only small windows on the gable walls, in terms of lighting you have to rely more on lighting fixtures.

That is why the finishing of the attic is clean, done mainly in light colors. Only some interior elements can be dark.
The example above shows a very popular technique for finishing a wall as an extension of the ceiling. It looks like this: along the head of the bed, which faces the wall, a strip of wallpaper with a thick pattern is pasted.
The pattern usually contrasts with a light surface and visually elongates the room in height.
Other types of finishing
Designers constantly come up with ideas that may seem unusual. But that’s what’s different designer finishing.
And often, for interior design attics, use those materials that are intended for exterior finishing facades.

So:
- This includes materials such as vinyl and aluminum siding, various types of composite panels, plastic panels HPL. Some manufacturers even offer complete options designed specifically for finishing the attic.
- Such kits are made for a specific object, according to preliminary measurements - this is called custom design. In this case, the finishing of the attic is the assembly of a certain structure, which is done quickly and without unnecessary dirt.

- Attic walls lined with HPL panels look especially good. These anti-vandal facade panels made of plastic high pressure, have extraordinary strength, dielectric and thermal insulation properties, and practically do not absorb moisture.

- The production of this material is carried out simultaneously with the pressing of the top decorative layer. As a result of this technology, compact, non-porous, hygienic panels with a strict geometric shape are obtained.
There are options with double-sided finishing, and different ones. So the surface design can be created by simply turning the panel one way or the other.
We told you about the most interesting options finishing the attic space, but the choice, of course, is yours.
Almost every owner of a private house has an attic space. Sometimes it is used as a warehouse for various things, sometimes it sits completely empty. But when the issue of expanding living space arises, many people think about the attic. After all, there is no need to add anything to the house - it is enough to insulate and equip the attic floor, and carry out the interior decoration of the room.
In this article we will demonstrate the most common options for finishing the attic floor, and also introduce you to full technology performance of work.


To avoid unpleasant consequences, it is better to think through the insulation and finishing of the penthouse at the stage of designing the house. This will help to correctly organize the sequence of preparatory work. Unlike construction and insulation work attic floor, which should be carried out by specialists, it is quite possible to finish the attic with your own hands.
How to finish the attic inside: preparatory work
Before finishing the attic with your own hands, you should insulate the end walls of the attic space, as well as heat and vapor barrier the roof slopes.
Advice: The comfort of this room in the future depends on the quality of insulation and insulation. If a mistake is made at this stage, it can negate the entire cladding of the attic.Selection of finishing materials
When the attic floor is reliably insulated, the question arises: how to decorate the attic from the inside? Materials for covering the room construction market there are many - let's look at the most popular ones.
Lining
Plastic lining is one of the most inexpensive and popular materials for internal lining buildings. It can also be used to decorate the attic. The material provides ample opportunities in the implementation of room design, in the choice of color and pattern. Sheathing with plastic lamellas is done very quickly and does not require special installation skills. To the disadvantages plastic lining Its fragility should be taken into account - the material can crack from an impact.

Cladding the attic with clapboard (plastic)
Note: If you want to give the attic floor special energy and comfort, use wooden lining to decorate it.Advantages of natural wood lining: unique colors, natural texture, environmental friendliness. Decorating the attic walls with wood allows you to create a beautiful and “warm” room that is pleasant to be in.
Among the disadvantages of wood: poor resistance to moisture and temperature changes. Therefore, use wooden lining for cladding the attic only if you are sure that the room is reliably insulated and insulated.

Beautiful attic decoration with clapboard: photo example
Recommendation: When working with any cladding material, strictly adhere to its installation technology. The better the work is done, the longer the finish will last.Blockhouse
A good idea is to cover the house with a block house. Such a mansion will resemble a fairy-tale mansion, because the material creates an imitation of timber. Externally, the cladding of a house with a blockhouse looks like a real one log house. But this material has one advantage over natural wood - cracks do not form on such cladding over time. Blockhouse finishing is not afraid of moisture, and it does not require regular cosmetic repairs. The sloping shape of the blocks is already a decoration in itself, and the panels are tightly adjacent to each other.
The only drawback of a blockhouse is that such cladding “steals” several centimeters of attic space.

Elegant attic decoration with a blockhouse, photo
Plywood
If the question is how to sheathe the inside of the attic cheaply, then plywood is quite suitable for these purposes. As a rule, this material is used to level surfaces for finishing, but it can well serve as an independent cladding. Among the advantages of plywood are lightness, ease of installation, cost-effectiveness, and strength.
Attention: plywood can be used for finishing attic room only if the humidity level and temperature comply with the standards established for residential buildings.Covering walls and ceilings with plywood is an excellent basis for wallpaper and textile finishing. And if plywood is used as an independent finishing material, then in order to protect it and enhance the decorative effect, you can coat the material with varnish or paint.

Varnishing plywood sheathing will highlight the texture of the material
Drywall
Many owners of private houses use finishing the attic floor with plasterboard. Among the advantages of covering with this material: its lightness, non-flammability, low cost. Using sheets of plasterboard, you can quickly level any surface, be it walls or ceilings. But, since in the attic there may be high humidity, then it is better to use moisture-resistant material for its finishing.

An example of what multi-level structures can be built - finishing the attic with plasterboard, photo
Advice: often for plasterboard sheathing hide wires and various communications. But if the attic is located in a country house where you rarely visit, then it is better to lay the wires in special boxes. This way you can always get to them, and they won’t be damaged by rodents.Plasterboard sheathing can be covered with wallpaper, putty, or decorated with ordinary or decorative plaster.

The illusion of floating in the clouds will be created by beautiful photo wallpapers - an option for finishing an attic, photo
Ideas for arranging different types of attics
To make the attic space original and different from hundreds of similar projects, you should use various decorative techniques in its decoration. Using simple design techniques, possible disadvantages attic structure turn into advantages.
Features of finishing the attic floor of a wooden house
An attic in a wooden house requires a more careful approach to its finishing. But if you properly prepare the ceiling and wall surfaces, you can use almost any material for cladding. Photos from our gallery will demonstrate more clearly how the interior decoration of an attic can be done in an original way.


The interior of an attic in a wooden house can be designed not only in country or Provence style. You can also use bold decisions, for example, decorating an attic in a loft style. But how to cover the attic from the inside?
As for finishing the attic wooden house or a dacha, it either consists entirely of wood or includes wooden elements.

A combination of several materials for covering a room looks impressive.
Since the room under the roof contains a certain amount of romanticism, fabrics will look appropriate in its design. These can be draperies with motifs that repeat the pattern upholstered furniture, or a canopy over the bed in the attic bedroom.

Textiles in the decoration of attic rooms, photo
Ceiling design methods
Depending on the design mansard roof, the ceiling in the attic can have a different shape, slope, and sometimes it can be completely absent. Therefore, it is difficult to select materials for its cladding. They may be the same as for wall decoration, or they may differ.
Add volume and beautiful view attic room possible using stretch ceiling. Sheathing with plasterboard allows you to create a multi-level structure that diversifies the interior of the room.

Using a stretch ceiling you can create the effect of a starry sky
You can make the attic at your dacha unusual by painting wood paneling ceilings and walls in different colors. They can be plain or with ornaments.

Painting a room in which no more than three colors are used looks harmonious.
Attic cladding: cost of the issue
When asked what is the best way to decorate an attic to make the room look luxurious, there is only one answer - natural wood. And plywood and lining will help save money on covering the attic floor.
Finishing the attic with plasterboard: step-by-step instructions
You can finish the attic floor yourself. In this section we will describe how to cover an attic with plasterboard.
Since the attic space is located directly under the roof, it is often exposed to atmospheric influences: rain, wind, snow, scorching sun. Therefore, before finishing the attic inside, you need to take care reliable vapor barrier and insulation of the structure, paying special attention to the thermal insulation of the roof.
- To cover the attic with plasterboard sheets, you need to build a frame. For this, wooden blocks or metal profiles are used. They are installed in increments of 40-60 cm.

The first profile is fixed level
- After the horizontal profiles are installed, begin marking and fixing the vertical ones.

CD profiles are attached in increments of 40 cm
Note: in a small attic space, finishing the attic with plasterboard can be done without installing a supporting frame.- If there is a horizontal roof, they first start covering the walls and gables, and finally the ceiling. If the roof is sloping, the slopes are sheathed first. To do this, screw the sheets of drywall to the frame with self-tapping screws, which are screwed in at a distance of approximately 25 cm from each other.

To securely fasten cladding material, each self-tapping screw must fit into the slab at least 1 cm
- After all surfaces are covered, the gaps between the sheets of drywall are puttied.

An additional reinforcing mesh can be applied to the joints between the plates, and the joints with other materials are treated with acrylic putty
After covering the attic with plasterboard, they begin its finishing. This can be puttying and painting, wallpapering.
More details about finishing the attic with plasterboard - video:
Bottom line
The space under the roof can become additional living space in the house. There are many options for its use - as an office, a bedroom, a nursery... Depending on the purpose for which the floor is intended to be used, the interior lining of the attic is selected, which will give the room a complete aesthetic appearance, making it cozy and comfortable for living.
Inexpensive in terms of financial investment, the interior decoration of the attic makes it possible to quickly transform the attic space of a private house into an additional living room, a cozy library, your own office or a small gym.
Preparing the room for cladding is a mandatory stage of work.
Attic is an attic-type room. In it, the ceiling and walls serve as the roof of the house. In many private houses, the attic occupies the entire top floor. Therefore, many owners of buildings with such an attic space decide to turn it into a full-fledged room where they can sleep, have fun, relax, and play sports. . Before you start directly finishing the unused for the time being top floor, follows:
- take care of its insulation;
- install special partitions necessary for zoning the premises;
- carry out high-quality steam and heat insulation of roof slopes.
Wall insulation is best done by mineral wool, although you can use polystyrene foam or other modern thermal insulation materials. First of all, you need to lay a layer of waterproofing. It is attached to the slats with small nails, screws or staples using a construction stapler. The moisture-proof material is laid in an overlapping manner. After this, you can work on thermal insulation. It is installed from the inside of the room. It is also worth taking care of the moisture protection of the roof slopes. Just attach to them waterproofing film and fix it securely.
Now we proceed to dividing the attic space into several functional zones (if, of course, the attic area is large enough). Everything is simple here:
- draw up a schematic zoning plan;
- install a board about 20 mm thick and 100–150 mm wide from the ceiling to the floor surface;
- place horizontal wooden blocks;
- cover the structure with boards of suitable thickness (up to 15 mm), leaving small (up to half a centimeter) gaps between them;
- lay a moisture-proof layer on the partition, and insulation on top of it.
Now you are all ready to implement various options for finishing the attic. What they are like will be discussed in the next section.
Finishing the attic space - what materials are used?
How to sheathe the inside of an attic to get an aesthetic and functional interior, without spending a lot on finishing materials? The choice is huge. Most often, sheathing is performed:
- plastic or wooden lining;
- drywall;
- block house;
- plywood.

Lining is an inexpensive material that makes it possible to equip an attic space in any modern style. Plastic products are available in different color options with all kinds of patterns and designs. This material can be installed without any problems. The disadvantage of plastic panels is that they can crack if subjected to a strong impact. Wood paneling is more expensive. But it is more durable and gives the room special comfort. Finishing the attic with wood paneling is carried out only in cases where you have well protected the room from moisture and insulated it according to the previously described method. Always remember - natural wood is sensitive to temperature changes and the negative effects of moisture.
Drywall (gypsum board) is inexpensive, characterized by high fire safety, low weight, which simplifies the independent installation of sheets. Such products can be easily finished with decorative or simple plaster, puttied, or covered with wallpaper of your choice. Behind sheets of this material, in addition, you can hide a variety of communications and electrical wiring. To finish the attic room, use moisture-resistant plasterboard.
Finishing any attic with a block house gives the new room a truly chic look. Visually, this material is similar to natural wood, but unlike it, cracks will not appear on the described products during operation. Plywood is the simplest and inexpensive way improvement of previously unused attic space. It is recommended to decorate the attic with it in cases where the temperature and humidity in the house are constantly at normal levels. Experts also advise covering the sheets of finishing material with moisture-resistant varnish or painting them. It is advisable to cover the top of the plywood with textiles or wallpaper.
Some home craftsmen decorate the attic space with OSB boards. They have a relatively high cost when compared with the prices of plastic lining and plywood. But the process of installing OSB products is much faster, because they can be attached not to a pre-constructed frame, but directly to the rafters. OSB boards are sheathed with fabric on top, wallpaper is glued to them, and treated with oil or acrylic paint. Before finishing the product, it is recommended to prime and putty with a latex-based composition.
Landscaping the attic - how to do everything right?
The finishing technology depends on what kind of cladding material you decide to use. If you have been selected plasterboard sheets, the order of work will be as follows. First you build the frame using metal profile and timber bars. The guide elements are mounted in increments of approximately 0.5 m. The very first horizontal profile is installed strictly according to the level. Then mount the remaining guides horizontally. Then mark the places for attaching the vertical profiles.

If the roof of the house is sloping, plasterboard covering begins from the slopes.
Screw the gypsum boards to the frame using self-tapping screws, maintaining a distance between the individual fasteners of about 0.25 m. If there is a horizontal roof, the installation of sheets begins with the gables and wall surfaces, and the ceiling is sheathed last. It is advisable to leave small gaps (up to 50 mm) between individual plasterboard products. Then the attic will easily withstand adverse weather conditions - loads from snowfall, strong winds. All gaps between the gypsum boards are puttied with acrylic compound, and then the surface can be finished with wallpaper or paint.
Covering the attic with wood clapboard is even easier. In this case, you don’t have to bother with the frame. Enough to cut wooden products according to the required dimensions and attach them to the base using nails. Pay attention! After each installed product, you should check the verticality and horizontality of its installation. If you are too lazy to use a level, you will definitely end up with a finish with clearly visible distortions. After completing the installation work, be sure to apply a protective varnish to the finishing material.
Plywood is installed on the frame. There are several nuances here. Installation of plywood sheets always begins with gables and slopes, the ceiling is sheathed last. In the central part of the product, it is necessary to fasten it so that there are gaps of 0.3 m between them. Professionals recommend using sheets of plywood that are minimal in length and width (1.52 and 1.25 m, respectively) with a thickness of at least 4–5 mm.
Make the attic in your home cozy and beautiful using our tips!
Finishing the attic inside (photo shows the variety design solutions) can be done using a popular and easy-to-work material like plywood, which is made from wood veneer and has an ideal structure for use in any premises. Plywood's flexural strength makes it ideal for sheathing walls and rafter system. The use of any material with a wood base requires the installation of materials for heat and vapor barrier. But it doesn’t hurt to know some installation nuances:
- The gaps that appear between the plates are best hidden under color-matched moldings;
- traces of the heads of fasteners can be hidden with putty of a suitable color;
- furniture varnish covering plywood will become reliable protection wood surface.

The attic is a special room, as it is located directly under the roof. Accordingly, the humidity here is too high, so moisture-resistant drywall must be used. First you need to calculate the amount of material, and it depends on the area of the surfaces that you plan to cover. As part of the preparatory work, you need to clean the old coverings and analyze the condition of the roof: any “weak” spots need to be repaired and improved. Beams and rafter systems require no less attention: they must meet the requirements of strength and resistance to rot and moisture.
A modern attic is not a banal box covered with yellowish clapboard, but a stylish and cozy space for living. Owners of private houses no longer try to make the attic look like an ordinary room, but boldly open the slopes and highlight the floor beams. But how can you decorate the slopes so that they turn from the main drawback of the room into a highlight?
Exterior decoration of the attic
From the outside, the attic most often looks like an integral part of the house, so appearance The pediment corresponds to the design of the facade walls. Finish the attic gable:
- facade decorative plaster;
- siding;
- decorative bricks;
- clinker tiles.
These options are suitable for cases where the pediment is built from the same material as the walls of the house.
Photo gallery: houses with attics in the color of the facade
False timber made of wood has such qualities as environmental friendliness, durability, low cost and ease of installation.  The high frost resistance of clinker tiles makes this building material indispensable in the harsh climatic conditions of Russia
  Walls finished with decorative plaster have increased sound insulation and resistance to dust and dirt
  Before applying decorative plaster to the walls, they must be additionally cleaned and processed, and high-quality plaster is quite expensive
  Brick attic, like the house itself, requires major insulation
  According to experts, siding is considered one of the most durable finishing methods in the budget price segment.
Video: finishing the facade and pediment with “grated fur coat”
How to cover the outside of an attic
Sometimes the pediment is finished with a contrasting material to visually break up the house horizontally and emphasize the height of the lower floors. Among the materials used:
- corrugated sheeting of a contrasting or harmonious color (a popular option among those who initially did not plan to insulate the attic);
- false timber or other wood (looks best on wooden houses and when simulating an alpine house).
Contrasting finishing implies the use different materials for floors of a house, for example, below - stone, above - wood
Such solutions are used when renovating a house, when the gable is built simultaneously with the roof.
Video: covering the pediment with clapboard
Attic interior decoration
Since the truss system of houses is made of wood, the finishing materials of the attic have to be attached to this unreliable base. Even well-dried wood absorbs moisture from the air and tends to slightly change its geometry. Therefore, if such walls are simply covered with plasterboard and putty, the putty will inevitably crack over time. When decorating the attic interior, it is necessary to mitigate this design flaw. This is done in two ways: using wood or fabric in the design, or creating an internal “box” of durable materials connected to the rafters with movable clamps.
Large windows and bright lamps give total wooden attic modern features
Before you begin the interior decoration of the attic, it must be thoroughly insulated. Otherwise, all your efforts will go to waste - the finishing materials will deteriorate due to seasonal temperature fluctuations.
The decoration of the attic walls can imitate natural stone, this solution will look quite stylish
Today, the walls of the attic can be finished with any materials, but some of them will require a larger investment of money and sophisticated technology. For the floor in the attic, wood (from cheap boards to type-setting parquet) or laminate is most often used. The ceiling usually visually merges with the wall, so materials of similar texture and color are selected for their design.
Stretch ceilings should not be used in the attic. Although they will give the room visual height, in the specific climate of the attic floor they tend to emit more harmful substances and can cause damage to the rafters due to disruption of the microclimate above the film.
Using lining for interior decoration
Wooden lining is exactly the material whose characteristics perfectly match the properties of the rafter system, so it does not crack or weaken the fastenings due to seasonal changes in temperature or humidity. In addition, no one doubts the safety and environmental friendliness of this traditional solution. Many even believe that it is the lining that gives country house comfort and rustic charm. If you also do not intend to deviate from proven solutions, then you can install the lining in the attic yourself.
The grade of lining depends on the presence of knots, cracks, rot, etc. on the surface of the wood; the more defects, the lower the grade
Save the hint picture to your phone so that you don’t overpay for lower-grade material when purchasing.
In addition to the type of lining, it is important not to make a mistake with the material. Panels from the following species are available on the market:
- larch is an elite material with a high price and large decorative properties, she is not afraid of pests, rot, fungi, moisture;
- Scandinavian pine is a beautiful wood of a pinkish hue and practically without knots, it is softer than larch and cheaper;
- Siberian cedar - a material with an unusual texture and a healing effect (releases healing substances);
- oak is a durable, dense and heavy wood of a peculiar dark shade, it costs a lot, but also lasts more than 50 years;
- linden - soft, light and very light, well suited for lightweight structures, self-assembly, and decorating panels with do-it-yourself carvings;
- domestic pine is a budget option, but high grades of this wood are quite durable and beautiful.
Wooden lining is universal material, which is suitable for both internal and external finishing work
The better the room is thermally and waterproofed, the less resistant wood you can use.
Video: how to choose the right lining
Installation of lining on attic walls
Please note: before starting work, the lining must lie in the attic for 4–7 days so that its humidity and temperature are balanced with the characteristics of the room. If you do not allow the material to “get used” to the room, it will quickly deform.
If you plan to impregnate the wood with fire-retardant and antifungal additives, this should be done before installation in order to be able to thoroughly treat the panels on all sides. Try to use compounds that are as safe as possible for humans. There is no need to save on this point; it is better to take cheaper wood and cheap varnish than to risk the health of future attic residents.
After preparing the material, choose the best mounting method for you. You can fix the lining:
- using wood screws into the groove of the lining (the wood from below is deformed, but the fastening is simple, inexpensive and reliable);
Please note: the screw must go deep at an angle
- clamps and self-tapping screws - special metal brackets-adapters (the bar does not suffer, it can be reused, but additional costs for clamps are required);
The clamps provide the wood with a little freedom, which prevents cracking of the dies.
- staples from a construction gun into the groove (suitable only for soft, light wood, you will need to stuff a lot of staples);
The main advantage of using a pistol is that there is no need to use large physical strength, fastening with staples is always very strong, reliable, durable, but at the same time the staples can always be removed, and the material will not be irreversibly damaged
- nails with decorative heads (used in masculine stylized interiors when it is necessary to emphasize the brutality of the finish).
It’s easy to hide the head of a regular self-tapping screw behind the large heads of decorative nails
The first three methods allow you to create a completely invisible mount.
The instructions for finishing an attic with clapboard are simple: you need to fix the planks to the wooden sheathing on the walls and slopes. If you want to install the lining in a different direction, first the sheathing is attached to them (perpendicular to the lining), and then the planks themselves. The work of covering the walls with a block house (imitation timber) is completely similar, except that they are more difficult to attach alone due to the large thickness and weight of each panel.
Please note: you can’t do without self-tapping screws when installing lining
If you do not want to hide the texture of the wood, you can add variety to a lining wall due to the width and type of planks. Buy panels of 2-3 options, with decorative milling, embossing and combine them with each other. When purchasing, be sure to make sure that their tongue-and-groove fastenings fit together.
Lining with decorative embossing, diluted with ordinary smooth, looks very harmonious and unusual
In order for the clapboard walls to look harmonious, the floor will need to be finished with either a tongue-and-groove board or a laminate similar to the clapboard in color or pattern (an exact match is not necessary, but something should unite them). The choice depends on financial capabilities and the condition of the ceiling. If it is finished with chipboard, gypsum fiber board or other board material, you can safely glue laminate or even vinyl tiles. If the ceiling was decorated with a rough board, it is better to finish it with boards as well. But if you wish, you can lay slab material over the subfloor and attach laminate, carpet, tiles (vinyl or ceramic in wet and hot areas) to it.
Painted floorboards look very appropriate in the attic
Video: errors when installing lining
Decorating the attic floor with plasterboard
Drywall is most often used when owners want to move away from traditional lining and timber towards a more urban interior with smooth walls. The environmental friendliness of drywall also plays an important role. Since it is pressed from gypsum without glue and finished with paper, the material is not capable of causing harm to human health or releasing any hazardous substances. In addition, the technology for installing drywall is familiar to most people who have done their own repairs, which makes it possible to save on the work of craftsmen.
Drywall will create an excellent base for smooth background walls and help visually raise the slope
The disadvantage of drywall in the attic is its low elasticity - when the wood “plays”, the gypsum board is not able to follow it. Therefore, methods such as gluing the sheet to the base or fastening it with self-tapping screws to the wall while simultaneously adjusting the position under the roof are not applicable. You need a strong steel sheathing that will be attached to the tree with metal hangers that can compensate for the movement of the rafters.
If it was not possible to choose the correct corrugation size, you can take a cable channel with a rectangular cross-section
If there are often mice in the house, use stone wool for insulation, and place the wiring in durable corrugation. This will help avoid rework and eliminate unattractive external wiring.
Instructions for finishing an attic with plasterboard
Finish the attic with plasterboard as follows:
- Assemble the frame for plasterboard using guides (PN) and rack (PS) profiles with a wall thickness of 0.7 mm (it is better not to use thinner galvanized steel, it may not withstand the load). In this case, you can attach the profiles directly to wooden elements lathing, which was made when insulating the attic. If the weight of the sheathing is too large, you will need to install additional racks, fastening them not only to the wooden frame, but also to metal guides through hangers.
If you want to cut off the space under the ridge, you should provide access to it from another room
- Lay the wiring in corrugated sleeves and take a few photos so that after covering it will be easier to find the cable exit points. Fix the mortgages in the places where the chandeliers are attached.
The mounting for the chandelier is attached to metal racks using self-tapping screws
- Start the sheathing from the top of the slopes, if possible, trying to position the sheets so that the seams run parallel to the flow of light from the window. Then minor flaws when filling joints will not be visible. The fastening step is 25 cm. Be sure to widen the seams and maintain an expansion gap of 3–5 mm.
Please note: moisture-resistant plasterboard is used in the attic
- Make holes for the wires in the places where the lamps are attached and make sure that none of them are damaged during work. While the walls are not covered with plasterboard, it is possible to extend a corrugated cable with an additional or spare wire.
To avoid incidents with holes for wires, try to coordinate the pitch of the sheathing with the location of the lamps in advance
- Cover the attic walls with plasterboard and make holes for sockets and switches.
The socket boxes should be installed in the drywall before the putty begins.
- Prime the seams, fill them with elastic putty and seal them with special tape. After the putty has completely set, smooth the seams with emery cloth so that they do not protrude above the main surface. Treat the attachment points in the same way.
The seams between the plasterboard slabs must be completely aligned.
Further work depends on the effect you want. If you plan to cover part of the walls with decorative panels, no further preparation is required. Under the wallpaper you will need a layer of rough plaster and its leveling. Preparation for painting is the most difficult: a layer of rough putty, a layer of fiberglass (can be glued directly to the putty, it will help avoid cracks), a layer of finishing putty, sanding the walls. If you want to apply a thin layer of decorative plaster, you should also play it safe with fiberglass, but you no longer need to putty completely.
In a low, small attic, smooth plasterboard walls look most harmonious
Drywall is only suitable for walls and slopes; when using it, the attic floor will have to be finished with a different material. The same methods apply as in the case of lining. But if you chose plasterboard because of its environmental friendliness, the most logical solution would be to use gypsum fiber sheets.
Video: installing drywall on the attic ceiling
Chipboard in the attic design
Chipboards are now used not only for the manufacture of furniture, but also for dry leveling of walls/floors/ceilings in wooden houses and attics. Most often, non-laminated panels with moisture-resistant impregnation are used. This allows you to subsequently prime and putty the surface for painting or wallpaper. In the final version, the wall looks the same as plasterboard or plastered. But, thanks to the many times greater thickness of the chipboard, you can safely mount it on hanging shelves, modular storage system, TV bracket and other weighty items (subject to the use of special fastening).
Chipboard has a number of advantages: strength, durability, resistance to high temperatures and exposure to direct sunlight, as well as relatively low cost
The technology for installing chipboard sheets is simpler than plasterboard, since they can be attached directly to rafters and wooden sheathing. Solid wood and particle boards interact well with each other, therefore metal fastenings not needed. But a compensation gap of 1–2 mm between the sheets is required if you do not want cracks to appear later. The seams are puttied with an elastic compound and taped with a special tape, so they will be invisible in the future. After this, the surface becomes flat, smooth and suitable for finishing. As a decorative layer, you can use thin laminated chipboard or MDF panels with a machined end.
A combination of mirror and laminated strips can be easily mounted on a chipboard base
GVL (gypsum fiber sheets, aqua panels) or glass magnesite sheets are similarly used for finishing. The installation technology, weight, durability and possible decorative effect are practically indistinguishable from chipboard. Final choice It depends only on which material is suitable for the price and which one is more convenient for you to work with.
Moisture-resistant chipboard for flooring with one-sided laminate - reliable flooring in minimal time without loss of height
It's convenient that slab materials you can finish all surfaces at once - from the slope to the floor.
Finishing the attic with HPL panels
HPL panels appeared on our construction market back in the mid-90s, but so far they are widespread only in administrative institutions. Essentially, this is an improved analogue of laminate, only HPL is pressed under more severe conditions, therefore it is not afraid of water and is most resistant to mechanical stress.
HPL panels allow you to easily create rounded corners
Manufacturers offer a palette of more than a hundred colors, as well as panels with imitation different types wood, stones, metals, leather and skins of rare animals, many options with photorealistic printing. This finish looks very impressive and rich, and, in addition, is suitable for making shower stalls (neither chipboard nor laminate could withstand such humidity) and can be used in children's rooms and institutions. Manufacturers claim that the material is completely environmentally friendly. HPL panels are used to decorate ceilings, walls, and floors; they are used to make furniture, so any scraps can be put to use.
Today there is only one disadvantage of HPL panels - high cost
Manufacturers additionally decorate HPL sheets with decorative embossing, milling, and perforation. You can use it to make openwork shutters or partitions in the attic.
Several fastening systems have also been thought out, from the simplest to self-tapping screws (even the least experienced can handle it) home handyman) to completely hidden. Panels with a thickness of 1 cm (maximum - 20 cm) can be mounted in the attic immediately on top of the vapor barrier and on finished walls calmly hang pictures and shelves. Thanks to this material, you can finish the attic from the ridge to the floor within one working day (if you work together in a room of up to 100 m2).
If you want to install an additional bathroom in the attic, HPL panels will help you decorate it effectively.
There is only one drawback to HPL panels - the price starts from 7 USD. e. per m 2. Considering that the thickness of the material is from 2 mm, you will have to pay a tidy sum to cover even one wall with panels 1–2 cm thick. But if you are not short on money, this material will help save a lot of time and provide an incredible decorative effect. You can safely combine “rosewood”, “white marble”, “python skin” and bright colors, without worrying about compatibility and differences in thickness of materials (and this could not be avoided when using real stone, wood and leather).
By the way, HPL panels can also be purchased as flooring. It looks like laminate, but is not at all afraid of water, which makes it more durable and safe.
Use of combined materials
If you don't want to make all the walls the same, you can use the principles of combined finishing. Paying tribute to the fashion for environmental friendliness, most designers try to use wood. But it can look different:
- lining (ultra-wide or very narrow, laid in different directions or in the form of a pattern);
A combination of wide and narrow tiles of different tones will add dynamics to the attic interior
- boards with a live edge (using a contrasting backing or two layers);
If you don’t want to give the attic the look of a hunting lodge, use an unedged board only on one of the walls or in fragments behind the sofa and TV
- panels made of laminated wood or plywood (smooth large-format slabs look best in minimalism and loft);
It is not necessary to leave the plywood in natural form, you can paint or paint it
- vertical slats made of solid wood or glued together from layers of veneer, which are attached at a distance from each other and create a dynamic pattern (they work to raise the ceiling);
Slats mounted on the wall will create a subconscious impression that there is additional space behind them
- classic panel panels (in a modern interior, eclecticism and fusion style, multi-format panels can occupy the entire wall and even extend to the ceiling);
In order not to overload the interior, panels of dark and amber colors are best mounted only from below
- wooden wallpaper - thin wooden dies assembled on a woven base (in fact, they differ little from bamboo wallpaper, but are made from types of wood more familiar to us);
Thin dies wooden wallpaper will add variety to the interior with a completely wood finish
- ceiling beams or false beams (placed under the ridge).
The sharper the angle of the slopes, the more complex beam structures you can use
At the same time, it is not at all necessary to preserve the unique pattern and color of the wood. Wooden surfaces often impregnated with tinting azures of bright shades (light green, turquoise, red) or thick opaque paint is applied.
Colored varnish helps give wood particularly interesting and unusual shades
It is also believed that in combined interior must be glossy materials. Since it is very important for the attic to expand the space upward, gloss can only be placed on the slopes.
Thanks to the glossy paint on the slopes, light will fill the attic even through a small window
The idea is realized using different materials:
- glass with photo printing, completely transparent, colored or tinted to a translucent effect, decorated with a matte pattern;
- mirrors made of clear (without greenery), ordinary, bronze or graphite glass (near such walls you can safely install furniture and hang pictures on them, this will help avoid an “overdose” of reflections);
- acrylic sheets, most often in rich colors (plastic panels are very light and thin, mounted on ordinary liquid nails);
- painting with glossy paints of any tones (the method is only suitable for perfectly aligned walls);
- wallpaper with a metal or satin effect (if the wall is made of plasterboard, gypsum fiber board or chipboard);
- glossy self-adhesive films(they also require an even, stable base, but are more reliable than wallpaper and cheaper than acrylic).
The wall for chalk drawing can be combined with the facades of the built-in wardrobe
Another important trend in the attic interior is a wall for drawing and magnets. It is interesting that designers offer this solution not only to families with children, but also to young couples, those who like to decorate the interior with their own hands, as well as people who use drawing boards as part of their profession. You can create such a highlight of the interior using:
- applying magnetic composition and chalk paint (the wall will turn out black or dark);
- alternately applying magnetic and marker paint (this way you can make a wall of any tone, but so that the markers are clearly visible, a light shade is applied on top);
- pasting the wall with self-adhesive chalk (manufacturers offer only black ones).
In the attic you just want to lie down and relax, and soft walls should contribute to this. When is it planned? sleeping place or a sitting area with a sofa, it’s rare that a designer doesn’t use this technique. You can achieve softness:
- by upholstering the wall with foam rubber and draping it with fabric that matches or contrasts with the upholstered furniture/bedspread (this is cheaper and you can do it yourself);
Velvet finishing will turn the protruding roof element into a stylish art object
- fixing soft panels on the wall (panels of the required shape and size are made to order from any fabric, customers are offered a huge variety of ties - from the usual carriage ties to fancy ones);
Soft wall panels are fixed so securely that they can be safely mounted on slopes and even on the ceiling
- using soft stickers made of polyurethane foam (they can imitate not only fabric, but also stone and brick).
Soft “stone” or “brick” - an unexpected solution for the attic interior
You can not make the entire wall soft, but only part of it in the recreation area or in traumatic places.
To add some flair to the attic interior, you can also use panels with a three-dimensional pattern. The most common are plaster, but they are heavy and require a stable base. Therefore, it is better to buy panels made of thin plastic or light acoustic “tiles”. Both options look very attractive and modern.
Acoustic panels are an excellent decor for a youth interior
The main thing is to remember that there should not be too many raisins in the interior. If the room is made in soothing tones or shades of the same color, you can easily use wooden boards, mirrors and 3D panels at the same time. But if you plan to have a lot of rich tones, you shouldn’t go overboard with textures. Make a neutral base with a practical, unobtrusive texture and choose 1-2 non-standard highlights for it.
In the light calm interior nothing will irritate you for sure
Attic in the style of “cheap and cheerful”
Beauty and environmental friendliness - important factors, but many simply do not have enough money for them. Therefore, it is worth mentioning cases when, after insulating the attic, you have to save on every screw. Let's look at how you can make the interior cheap and not boring.
Trimmings - not in the firebox
The first way is to use wood scraps left over from building the roof. From the bars and dies lying around in the corners you can make spectacular mosaic wooden panels. They may look like:
- “city of skyscrapers” - dies are cut from bars of the same or different thicknesses and laid tightly next to each other (the result looks like a city from a great height);
If desired, you can use bars different sections, but identical squares look stylish
- “complete chaos” - wooden scraps are aligned in thickness, width or length and assembled into an arbitrary pattern;
Assorted dies with different textures can also look attractive
- “anti-parquet” - cuttings of bars are split lengthwise with a hatchet and attached with the smooth side to the wall, texture outward (you will need to remove the sharpest dangerous protrusions, but the result is worth it);
The fireplace near the wood can be electric or even painted
Another budget option is to make shallow shelves from scraps and place them in them. chopped firewood. If the wall is covered only with a membrane, before doing this it is advisable to cover it with cheap fabric or agrofibre to create beautiful background for logs.
Plywood
As a rule, expensive plywood is used for decorative finishing. But experienced designers They claim that even cheap plywood can serve well and look presentable. Just don’t be shy to rummage through the stack, and you’ll definitely be able to find 2-3 sheets that don’t have any knots or dark spots on one side. Among the low-grade panels there are amazingly beautiful wood patterns that you can use to decorate accent wall in the attic. For better preservation, the plywood will need to be protected, but this can be done with an inexpensive varnish on water based. With such a coating it will seem even more impressive and more expensive.
It is not at all necessary to use plywood in large quantities; it is better to combine it with other materials
OSB boards
Oriented strand sheets are so popular and affordable in construction that you may have an entire attic sheathed in them. If this is the case, if you wish, you can simply paint the walls in suitable colors and begin moving in. But when you want to do stylish interior, it is better to combine OSB with other materials. In particular, the seams of the slabs can be decorated with rope or wooden strips in contrasting tones.
An OSB wall decorated with inscriptions looks very modern
OSB is also a good basis for thick non-woven wallpaper, but if you don’t mind the visible texture, you can create an interesting visual effect with regular paper ones.
If your attic does not have OSB, you should cover one of the walls with it. The unusual texture of the material will complement the interior well, even if you cover it with thick paint.
Plastic lining
High-quality plastic lining with wide dies and decorative patterns often costs more than wood. But to save money, there is no shame in using the simplest, white and narrow one. It will look good under the ridge, at the highest point of the attic ceiling. If you also left some of the beams open, from a distance no one will guess that your lining is inexpensive.
Choosing plastic lining is a good reason to play with color
Chintz according to grandma's recipe
IN Soviet times decorating walls and ceilings with fabric was very popular. The rich used brocade, and those who liked to save money did their best with chintz. This simple fabric with naive patterns is perfect for a nursery, as well as a Provence-style interior. Maybe it's time to take apart grandma's chest and look for pieces of fabric there? A single piece can be secured with a construction stapler directly on top of the wind- and moisture-proof membrane, and the seams can then be decorated with twine, a wooden plank or cord.
Patchwork can be made not only from fabric, but also from pieces of old unnecessary wallpaper or decorative paper
If there is no chintz among the inheritance and store prices are not pleasing, you can profitably dispose of old, but not worn, clothes. With minimal machine sewing skills, it’s easy to create a patchwork-style fabric. Undoubtedly, a wall made of denim scraps will look very picturesque and extraordinary in the attic.
It doesn’t matter what budget you have allocated for finishing your attic. The main thing is to use the suggested tips wisely and create own interior which will be convenient for you. Then your attic will undoubtedly please every guest.


