What is a coffered ceiling? Wooden coffered ceilings: design ideas and installation tips. Caissons in diagonal design
Coffered ceiling
Everything new is well forgotten old. Coffered ceilings have been part of our lives for a long time; they were used mainly in the decoration of castles and rich houses. Having reached our times, this method of finishing has become available to everyone, moreover, now it is quite possible to make a coffered ceiling with your own hands (see).
Caissons are a type of ceiling design in which square or polygonal recesses are made, made from intersecting beams. The coffered ceiling is decorated with decorative rosettes and carvings, because at all times such ceilings played not only a constructive role, but also served to decorate rooms.
It is worth noting that this ceiling design perfectly absorbs sounds, thereby improving the sound insulation of the room.
How to make a coffered ceiling
Project
- Everything needs to start with an idea and a project. Try to imagine what you will really like in the future. To do this, you can view several photos on the Internet, consult with friends or relatives. Take into account the parameters of the room, lighting, height, purpose, and only after that proceed to the selection of materials. Making a coffered ceiling with your own hands is quite a complicated task, but at the same time, it’s interesting to do it.
Sketch
- The sketch is the heart of the project. This will be the next step in your renovation, because all your thoughts need to be put together and see how they will look later. Use a regular piece of paper and a pencil. For clarity, you can add a little color to the sketch by coloring it with colored pencils.


Preparation
- When the ideas are ready and coffered ceilings laid out on the sketch, you can begin the repair itself. First of all, check the condition of your ceiling. If its surface is relatively smooth and solid, then it is quite suitable for finishing. Otherwise, smooth it with putty and let it dry thoroughly(cm. ).
- To ensure reliable fixation of materials, the ceiling surface must be primed. If the primer is very strongly absorbed, cover the surface with another layer after drying (see).
- Wallpaper should be placed under the coffered ceiling. It is advisable to choose a pattern that is monochromatic or has a slight structure. It is better to do this together; the wallpaper should be smoothed with a special plastic spatula (see).

Advice: if you buy smooth, plain wallpaper and do not smooth it out when pasting it under coffered ceilings, you get a rather interesting “crumpled” pattern. To do this, stretch the strip from wall to wall and glue it, first pressing it with your hand in several places, then casually level it across the ceiling with a board with a round end or a mop.
Installation
- Based on the sketch on the wallpaper, we mark the future caissons. At this time, you need to be very careful, and it is better to take measurements again and check the sketch.
Tip: Start marking from the center of the room, otherwise you may break the symmetry.
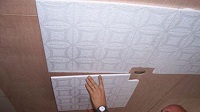
- We cut out a development from construction cardboard and, bending it along the lines, glue the beams together

- Glue the caissons to the ceiling using mounting adhesive. It is important not to stain the wallpaper during gluing.
- All joints and connections must also be covered with cardboard. This will be our main frame for the ceiling (see)
- Cover all the beams with self-adhesive film, choosing a pattern depending on how you want your ceilings to look. They can be white or marbled; they also often use a pattern that imitates the structure and color of natural wood.
- We glue decorative elements onto the finished beams. You can paint them if you wish.

Second way
Another option is coffered ceilings made of polyurethane; this option is not so difficult to work with, but is more expensive. You can buy ready-made modules in the store and glue them to the ceiling. There are also modules mounted on special hidden fastenings. Modules can be selected to suit your taste, because there is a huge selection of beams, rosettes, stucco molding, etc.


Third way
Ideal for those who do not have high ceilings. This is the use of ceiling coffers, which consist of slabs and do not require significant labor during installation. Perfect option for apartments with low ceilings - choose not too high slabs and mount them on the ceiling. There are several options for installing such slabs.
Installation
- Mounting on a special profile

- Fixing slabs to the ceiling assembly adhesive or with self-tapping screws

Coffered ceilings can be decorated with a large rosette in the center of the room, or an ornament can be drawn.. Also, a great option would be to cut out ornaments and thematic designs from wallpaper purchased for this purpose and then stick them on the ceiling. As a photo, instead of wallpaper, you can use tapestry fabric - it will look very impressive.
The ceilings will look just wonderful if you approach this issue judiciously and do not rush. After all, if you are not constantly engaged in repairs, then do not rush to create a castle right away. It's best to start with a small room and practice on it before moving on to larger projects. Then installing your ceilings will only be a pleasure.
IN last years Wooden coffered ceilings are becoming increasingly popular - they are beautiful, durable and environmentally friendly. Let's take a closer look at their advantages and features, installation method and photos of design options.
What is a caisson?
From French “caisson” is translated as box. Such ceilings look like several sections delimited by wooden beams. They suit large and airy spaces well, adding classic elegance.
Made of natural wood, the coffered ceiling looks expensive (however, as it costs), it is durable and solid. The processing features of the material allow it to be used in almost any room - from the living room to the kitchen.

This cannot be said to be an innovative solution - they were used in France back in the 17th century. But if previously they performed mainly a load-bearing function, now experiencing the second peak of popularity, they are used more often as original item interior
They are loved not only for their beauty - this coating has many other advantages:


However, it cannot be said that there were no downsides. First of all, it should be noted quite high price- Installing such a ceiling is expensive.
However, there are cheaper options - for example, coffered ceilings made of MDF or plasterboard.
These materials are also lighter, so they are well suited for rooms with not very strong floors.
They are not suitable for low rooms - The minimum height of the walls should be three meters. Otherwise, you risk getting a cramped and uncomfortable room.


It is unlikely that you will be able to carry out the installation yourself: it requires certain skills, and solid wood cannot be called an easy material - you will need the help of at least two or three people, but it is better to let the professionals do it.
Preparatory work
But, if you still decide to install it yourself, we recommend that you read these instructions very carefully - as mentioned above, the process is considered quite complicated.


The first thing you need is high-quality preliminary design. In this matter, it is better to contact the designers: they will be able to develop it, taking into account all the nuances of the room. For a classic coffered ceiling, the recommended distance between the slats is from 80 to 120 centimeters- depending on the surface area.
Interesting fact: There is an unspoken design rule - the larger the room, the more beams are needed to use it. Not only mathematical logic is involved here - in a small room a lot of even very thin beams will look clumsy, and in a large room a few thick ones will look rude, creating the effect of an unfinished room.


Place the caisson grid from the center- this way you will not disturb the geometry of the room and will be able to achieve a uniform result. Be sure to mark on the diagram the location of all lighting sources, communications outlets and wires, fireproof elements - it is better to take this into account right away than to spoil the coating later by cutting unplanned holes.
There are a couple of nuances that need to be taken into account. If you decide to install coffered ceilings in rooms with low walls, place the beams in the window and doorways- this will help expand the volume of the room.


It is better to avoid their use in dark rooms with low lighting - they will create an oppressive impression.
If you choose a white background, then the beams must fit tightly to the covering - otherwise you risk getting the effect of a falling ceiling. In general, color for caissons is very important - pay close attention to it.


For example, dark brown shades are suitable only for large rooms - they will make them visually neat and cozy.
And most importantly, the caissons must be combined with the rest of the interior. They would not be particularly appropriate in a high-tech studio: it is better to use them for classically decorated rooms.


Having completed the sketch and decided on the design, proceed to the purchase. building materials. You will need:
- Directly caissons. These can be ready-made squares or just beams of appropriate sizes. The first option can be installed much faster, but there is a risk that over time it may begin to move away from the coating. The second one takes much longer, but is more reliable. It is better to choose oak, pine or alder. Please note that conifers have a slight aroma - take this into account if you cannot stand such odors.
- Nails;
- Adhesive paint;
- High-quality wood glue;
- Angle ruler;
- Saw.


If at the preparation stage your enthusiasm has not yet died down, then it’s time to move on to the most important thing - installing the beams.
Installation of a coffered ceiling
First of all, it is necessary to carry out work to prepare the coating: thoroughly prime the surface.

When the coating is completely dry (this is important, so it’s better to wait a day or two, depending on the glue), apply markings. Take into account the location of the rail in the central part, otherwise you may end up with a skew towards one of the walls.
Important point: When marking, keep in mind that the distance from the wall to the first square element of the frame must be at least 15 centimeters.

The next stage can be called key: installation of beams, supporting structures ceiling using nails. Strictly follow the intended plan and secure them carefully, otherwise you risk creating emergency situation in your own home.

The beams must be mounted using stretched twine- it will ensure exact compliance with the project and will help not to spoil appearance coffered ceiling. Pay special attention to the corners - the slightest carelessness can nullify the effectiveness of such a finish.

Having installed all the beams, move on to the panels: secure them with construction staples and nails. Having completed one square, proceed to the next. The work is painstaking, but the result is undoubtedly worth it.
If cracks appear during installation, use the thinnest slats to disguise them- this will not only hide defects, but also add volume to the structure.

With ready-made slabs everything is much simpler: just start attaching them from the center to the walls using staples - this way you will get a neat and beautiful ceiling. As in the previous method, mask all holes with decorative strips.
Coffered ceilings in the interior
Is such a long and rather complex work worth the effort? We think you will be able to answer this question yourself by looking at the following selection of photos - we have collected for you best examples application of caissons in the interior of country houses and apartments.


IN Lately comes into fashion Scandinavian style design - airy minimalism, complete light shades and natural materials. White solid wood caissons fit the concept perfectly.
It is noteworthy that thanks to such tones, the ceiling design is well suited even for small rooms - it will visually make them more spacious and will not add massiveness to the coating.


It is better to keep the rest of the design of the living room or bedroom in the same spirit - this way you will get a complete picture that will delight you with comfort for a long time.
An original option for large living rooms, where it is pleasant to spend a family evening - brown coffers with hidden lighting. Yes, installation of the structure will cost you a lot and requires very careful planning. However, the result is worth it.


Even despite the massive beams, such a ceiling does not seem bulky - it looks very beautiful and natural, creating a fabulous impression in a classically decorated living room.
Another fashionable solution- coffered ceilings in chalet style. The “Swiss house” type of design, which came from mountainous France, has long taken root in Russia. This coating will help achieve complete compliance: soft, natural tones, natural wood, simplicity and clarity of lines.


You can decorate it with a contrasting and elaborate chandelier of a complex shape - it will emphasize the elegance of the ceiling and complement the impression. However, remember that this option looks best in large rooms - in small ones it can be a little boring.
Decoration in country style is suitable for both a private home and an apartment - almost everyone likes the cozy and warm design. There is no deliberate luxury in it, and yet it looks expensive.


Use rough, seemingly raw beams to create a more authentic effect. By the way, it is not at all necessary to install caissons over the entire ceiling area - you can use them to zone the room, highlighting, for example, an area of upholstered furniture.
A fairly expensive option that will leave almost no one indifferent is a solid solid coffered ceiling with built-in stained glass.


Installing the structure will take quite a lot of time, but the result is worth it - unusual, beautiful and impressive. However, it should be noted that the rest of the room must match - select furniture and design accessories that will not get lost in such a frame, otherwise all your efforts will be in vain.
In addition, you need to make sure that the paints on the stained glass window are heat-resistant or that the chandelier is located at a sufficient distance from them.


And, of course, this technique is not suitable for small rooms - it will either make them even smaller, or, if you choose a small glass scale, it will lose all its attractiveness.
If you want to install a coffered ceiling of dark colors in a small room (remember the main rule - the walls are not lower than three meters), you you'll have to think carefully about the lighting. Any massive chandeliers will not be very appropriate - it is better to opt for spotlights.


You can arrange them in a strict order or pretend that you placed the light bulbs randomly - it all depends on your taste. The main thing is to make sure that there is enough such light.
Don't be afraid to use decorative elements, if the size of the room allows - beautiful skirting boards, finishing, stucco. Even simple caissons look very elegant, but the use of decor fully reveals their monumentality.


Make sure it matches the rest of the room's decor if you don't want the ceiling to look like an alien element.
You can also use caissons as a frame for inserts with larger edges contrasting color. This method is good even for not very large rooms: depending on the shape of the insert element, it can expand or lengthen the room.


In this case, you will have to pay close attention to the processing of corners - any negligence will be evident.
By the way, it is not necessary to make all the caissons the same size - alternating “boxes” can look extremely impressive and add style to a room decorated as simply as possible.


We hope you are convinced that the result is worth the effort - the caissons really look very nice. If you add to this their durability, you will get a ceiling that will delight you for many years.
A coffered ceiling resembles a box design: wooden beams attached to a flat ceiling slab intersect horizontally or diagonally to create a grid. The material for such a ceiling is usually wood, polyurethane, plasterboard or wood-fiber boards. Caissons and beams are decorated with moldings, plaster rosettes and other decorative elements. Such a ceiling serves not only aesthetic purposes, but also practical ones: you can hide pipes or wires under it, or hide the imperfections of the existing ceiling.
Coffered ceilings are usually installed in rooms with high heights. In rooms with high ceilings, coffers reduce echoes and help control noise from other rooms. Small coffers will make the ceiling more textured, while large panels will give the illusion of additional space. In rooms with a ceiling height below 2.5 meters, the installation of caissons is not recommended.
Installation sequence
- ceiling design on paper;
- treating the ceiling with plasterboard, paint, wallpaper or ceiling tiles;
- grid marking for the placement of beams on the ceiling;
- installation of beam system;
- installation of ceiling plinth;
- decorative ceiling decoration.
Acceptable options: if you plan to use separate ceiling tiles for the caissons small size or ready-made polyurethane caissons, these elements will be attached after installing the beam profile (step 4), i.e. step 2 can be skipped provided that pre-treatment of the ceiling is not required.
One of the options for installing a coffered ceiling is that it can be mounted according to the principle suspended ceiling with a special type of ceiling cassettes in the form of an already manufactured caisson. In this case it is added functional advantage suspended ceiling - a damaged caisson can be easily replaced with a new one.

Materials and tools
Although installing a coffered ceiling will take time and certain skills, you can design such a ceiling yourself. Making sure you have the right tools for this project before you start will save time and avoid frustration.

Table. Use of materials and tools at every step of the installation process.
Stage 1. Ceiling design
In its simplest form, a coffered ceiling is formed by a series of beams with a baseboard, where the intersecting wooden beams directly create a grid on the ceiling, which is done quite quickly. The basic rule here is than bigger room, the thicker the ceiling beams should be. Beams are commonly used square section, but rectangular designs are also possible. Once you have decided on the size and shape of the beams, select ceiling plinth appropriate height.

Think about how the wooden beams will be positioned on the ceiling, at what pitch and what shape to give the caisson - rectangular, square or something more complex. If you are planning to install a chandelier, consider its placement in relation to the beams - whether it will be in the center of the caisson or at the crossroads of the beams, or provide a medallion for the chandelier.
Draw a proposed ceiling sketch on paper, not forgetting to indicate the size of the room and the planned location of the lamps. The required placement of recessed ceiling lights must be planned at the design stage of the ceiling design. Later, when installing the beams, you will need to prepare holes through the middle of the beam or attach a cable along the side of the beam to achieve the desired placement of the ceiling lamps.
At self-installation With a coffered ceiling, you can make its installation easier if you follow little tricks that will simplify the task.
- Make straight joints on the profile. Each end of the beam is cut at a right angle. If you want more complex shape joints, it is easier to do this in the form of a decorative element attached to an already finished ceiling than to cover up all the cracks and irregularities later.
- Use ceiling molding rather than molding. Positioned at a 45 degree angle to the beams and ceiling slabs the plinth will hide all the imperfections in the installation of the coffer box.

Stage 2. Preparation
MDF panels or plasterboard can be used as ceiling panels. If the ceiling is flat and is in good condition, you can completely abandon the use of panels, simply paint the ceiling or stick wallpaper on the ceiling, and then attach a beam mesh to it.

If you want to use ceiling panels that are directly inserted into the space between the beams, cut them into 1 cm smaller size each caisson, in order to make it easier to place them there. The gaps will subsequently be closed with ceiling plinths. When using prefabricated caissons, their size determines the size of the ceiling space between the beams.
How to attach PVC panels to the ceiling?
Stage 3. Grid marking
Use colored chalk, a tape measure and a square to mark a grid for installing beams on the ceiling. Refer to the schematic sketch made when designing the ceiling.
Step 1. Measure the length of each side of the room, dividing each measurement in half to determine the center of the room. Mark the center points with chalk and connect with a line opposite sides rooms.

Step 2. Determine in which direction the main ceiling beams will be located, mark the position of the ends of the beams on opposite walls and draw lines along the ceiling connecting these points. Extend the lines onto the walls a few centimeters lower than the final ceiling height.
Step 3. Make markings for the location of the main and cross beams. Mark full width ceiling beams to know exactly the size of the panels and beam joints. The choice of panel size, shape and quantity is up to you.
Stage 4. Installation of the beam system
This is the most critical step in installation, since its accuracy will ultimately determine general form ceiling. Beams can be made hollow, with this design it is convenient to hide electrical wiring for lamps, pipes and other things in them engineering Communication. If the beam is made of solid wood, make a channel in it for laying wires.
If you are working individually, make yourself a T-shaped support from wooden slats to the height of the ceiling minus the beam. This will hold one end of the beam against the ceiling while you work at the other end of the beam.
Step 1. Install beams around the perimeter of the room. The longest beam is installed first. If the room is square or irregular in shape, start with a beam that runs perpendicular to the support beams to create a strong connection.
Step 2. Apply glue along the length of the beam and glue it at the junction of the ceiling and floor.

Step 3. Using a pneumatic nailer, nail the beam with two nails on both sides every 30 cm, starting at one end of the beam. Do the same with the opposite perimeter beam.
Step 4. Measure the distance between the beams on each side of the room and prepare the beams for the cross sides of the perimeter. Attach them to the ceiling in the same way.
Step 5. After installing the perimeter, install the main longitudinal beams according to the markings in the same way as the perimeter beams.
Step 6. Measure the distance between the main beams and cut the cross beams. Install them similarly in the marked positions.
Step 7 Strengthen the structure - hold the nailer at a 45 degree angle close to the junction of the crossbar and main beam and drive the nail into cross beam at an angle.
If you are using pre-cut caissons or pre-cut panels for the space between the beams, insert the panels and nail them to the beams.

Alternative - coffered plasterboard ceiling
Stage 5. Installation of ceiling plinth
While the shape of the caisson and its actual depth are created by the height and placement of the beam profile, the boundary and visual depth of the caisson is created by the ceiling plinth.

Step 1. Measure inner dimensions all sides of one of the caissons. If there is a gap between the ceiling and the beam due to the unevenness of the ceiling, take this height into account in the size of the baseboard.
Step 2. Cut the ceiling plinth to the appropriate length. Using a machine, cut a 45 degree angle on each side of the baseboard.
Step 3. You can install the cut plinths directly one by one. To do this, apply glue to each part and secure it to the beams.
Step 4. Sometimes it is easier to assemble each box from the baseboard separately, and then install it entirely in the caisson. In this case, use glue to assemble the baseboard box. Make sure it fits well into the coffer and glue the baseboard.
Step 5. Secure the ceiling plinth with nails to the joists at each corner of the plinth box.

Stage 6. Ceiling finishing
The last stage is to give the ceiling a finished look and hide all working irregularities, if any.
Step 1. Use latex caulk to fill all joints and gaps between joists, baseboards and ceiling panels.
Step 2. Use wood putty and a putty knife to seal the nail heads.

Step 3. Apply two coats water-based paint. Use semi-gloss paint and a 5-7 cm wide brush to paint the molding. Then paint roller paint the beams.
Step 4. Install ceiling lamps. If you covered the ceiling with plasterboard panels, you just need to cut holes in the plasterboard under the lamps. Glue the plastic rings to the lamp hole. When you install new fixtures, they should be flush with the surface of the finished ceiling.
Decorative elements of a coffered ceiling
A standard coffered ceiling will look more interesting if you add decorative and functional elements.

Video - DIY installation of a caisson on the ceiling
A ceiling with coffers is a decorative structure made up of individual niches, cells and beams of different configurations. Archaeological research has confirmed that previously coffered ceilings were made in order to reduce the weight of the ceilings, not to create excessive load on the beams or load-bearing walls. In palaces or castles, such structures were decorated with intricate decorative carvings. In the photo you can see that the surface of the caissons was often covered with precious metals. This design not only emphasized the wealth of the owner, but at the same time hid the ceiling piles.
Now this need has disappeared, but as a decorative element, coffered ceilings are experiencing a new peak in popularity. At present, there are almost no real ceilings with coffers, since their design must begin with the start of construction of the house. And this is dear, the hard way a montage that doesn't justify itself in any way. Therefore, in modern houses mostly use imitation.
Ceiling in the family estate  Wooden beams
 Made from solid wood
  Made from polyurethane foam
  In a modern living room
Wood – natural, environmentally friendly pure material, therefore it enjoys well-deserved popularity as a finishing material even despite the high cost. Wooden caissons look unusual, beautiful, stylish, and create coziness and comfort in your home. In addition, they are practical and durable. The highlight of this solution is that the wood has its own texture, a natural pattern that is not repeated anywhere, so this finish is unique and inimitable. If the high price bothers you, you can choose inexpensive wood for the ceiling and then cover it with stain. This treatment will give the material a more respectable and elite look.
Other materials are also used to construct coffered ceilings:
- Installing caissons from MDF panels is simple and inexpensive. This material has many disadvantages: it is susceptible to moisture, is fire hazardous and is not resistant to damage. But this pays off with ease of installation and a beautiful decorative appearance;
- Polyurethane caissons are very light, have high fire-resistant properties, are indifferent to moisture, but are expensive. If you choose the right color, the look will be simply gorgeous. Exquisite decorative elements decorate the ceiling and attract special attention to it;
- An easy way to install coffered ceilings is using construction cardboard structures. It's simple, fast and inexpensive. To create an imitation of wood structure, wood can be covered with decorative film.
 Tree
Tree  Wood and drywall
  MDF
MDF  Polyurethane
  Drywall
 Suitable material for installing caissons
Plasterboard coffered ceiling – a budget option author's design. In rooms with large windows or high ceilings, this design looks elegant and stylish. When choosing a color, you need to remember that brown shades make a large room cozy, harmonious, and warm, but for a small room it is better to choose light colors. This can be clearly seen in the photo.
With the help of such a plasterboard construction, you can effectively decorate a spacious room with high ceilings (at least 2.4-2.5 m). A bonus to this design will be excellent acoustics. Coffered ceilings look good in both office and residential spaces, indicating good taste, status, security of their owners.
 Gold plated moldings
  Manufacturing
  Chandelier in the shape of a flower
  Ceiling in big room
 Cellular ceiling
 Advantages and disadvantages of plasterboard ceilings
The advantages of coffered ceilings made of plasterboard sheets much more than shortcomings. The latter, with proper use, can be reduced to zero. Positive characteristics:
- creates good acoustics;
- allows you to hide all communications, ventilation ducts, electrical wiring;
- provides wide choose for decoration with built-in lamps;
- eliminates and masks any defects, flaws, shortcomings of the original ceiling covering;
- makes it possible to carry out additional heat and sound insulation;
- creates acceptable climatic conditions;
- has a spectacular luxurious look;
- is relatively inexpensive.
Among the disadvantages, it is worth mentioning that drywall is a material that is not durable and moisture resistant. Therefore, careless attitude, high humidity in the room or flooding by neighbors can easily ruin the entire design. Hanging systems made of plasterboard significantly “eat up” the height of the room, so this must be taken into account during planning. If the ceilings are low and the room has a small area, such a design will look out of place. The presence of dark furniture and poor natural light is also not in favor of coffers, as the room will become gloomy and uncomfortable.
If plasterboard coffered ceilings become dirty, there is no need to wash or clean them, it is better to repaint them.

 Classic style
  Neoclassicism
  Large space interior
  Narrow space design
 Preparation of drawings, tools and materials
Modern parts for plasterboard ceiling coverings are lightweight, so the process of installing them can be done by anyone who can hold it in their hands. construction tool. Detailed photos process will help you cope with such work yourself.
A preliminary design drawing must be prepared in advance so that difficulties and malfunctions do not arise during the work. For inspiration, it is advisable to review two or three dozen photos. The composition must be thought out to the smallest detail, and the size of the caissons depends on the dimensions of the room. On a piece of paper you need to draw future design, coloring it with pencils for clarity.
Before starting work, prepare necessary tools and materials:
- hammer;
- spatulas;
- level, tape measure, tapping thread;
- knife and metal scissors;
- hammer drill and screwdriver;
- pliers;
- drills, screws, dowels and anchors.
If the surface of the load-bearing ceiling covering does not require overhaul, it is simply puttied once. But if the original ceiling is very uneven and has many flaws, it is better to install a two-level coffered structure.
 Tools
Tools  Drawing
  Frame elements
  Frame
Frame  Cells
Cells After drawing up the drawing and preparing the surface, you can begin marking the ceiling. This is convenient to do with a tape measure with an ordinary tapping thread. Markings on a rectangular grid begin to be made from the perimeter of the outer beams, because in these places the ceiling meets the walls. But you need to remember the center, otherwise the symmetry can easily be broken.
After this, strictly according to the markings, a frame is installed from metal profiles. Their width depends on the area of the room. UD and CD profiles are attached around the perimeter (as for a regular plasterboard ceiling). The profile is cut into required length, after which they are firmly mounted on the ceiling using suspensions. First, the long uw profiles are attached, followed by the short jumpers. After this, three cw profiles are installed in each square or rectangle: in the corners and in the middle. Then laser level Mark the ceiling plane on these profiles and cut along these marks. Next, guides are fixed on these profiles - thus creating a niche.
Sheathing with plasterboard and putty
When the frame is ready, begin covering the sides and bottom of the beams. Pieces of drywall are attached to the profiles using countersunk screws. Next they sheathe ceiling part caissons. A decorative cornice is sometimes formed not from drywall, but from plaster.
After installing the drywall sheets, you can begin decorative finishing. To reduce the risk of cracks in the corners to zero, they are protected with a mesh and counters. These protective elements are fixed with seam glue. After they have completely dried, you can begin to putty. Then all surfaces are sanded with a fine abrasive mesh and primed.
After this, you can install the baguettes. It is important that all corners are cut accurately at 90 degrees without creating gaps or cracks. Proper use of a miter box (a tool responsible for ensuring the correct angles) ensures strict geometry of the recesses. Poorly glued baguettes will ruin the entire appearance.
 Frame hiding the pipes
  Covering the frame with plasterboard
  Finishing
  Ceiling prepared for painting
  Wiring for lamps
 The final stage of work: painting
Only after installing the baguettes can you paint the plasterboard ceiling. Designers advise not to paint coffered ceilings in one color. The presented photos clearly confirm this. Designs painted in different shades look much more interesting and richer. The main thing is that the colors combine harmoniously with each other. The combination of the white top of the niches with dark brown beams looks good. You can get a lot of ideas from photos. Under sun rays a well-chosen combination of shades will look colorful and irresistible.
A variety of beams, molded rosettes, borders, plinths, cornices allows you to create unique decor in your home. Designers know a lot of techniques, the use of which helps to make the most of a room:
- How larger area rooms, the more beams there should be;
- Niches can be round, rectangular, square or oval. IN small room Small square-shaped caissons look better; in a spacious one - deep niches, richly decorated with elegant stucco. Photos of the interiors help you see it with your own eyes;
- The center should be as elegant as possible and attract attention;
- You can apply artistic painting or ornament into the polygonal recesses. As an option: use stucco or appliqués. Often a lighting system is installed in caissons.
For apartments, houses, cottages, decorated in classic style, coffered ceilings are one of the best options A modern style(high tech, pop art) do not allow the use of such a design.
Complex structures made of wood, MDF or cardboard are mounted differently. Not everyone will be able to afford wooden caissons, because this will significantly impact the budget. Coffered ceilings made of plasterboard sheets belong to the middle price category. The big advantage is that all this beauty can be made from ordinary drywall with your own hands.


Photo gallery (54 photos)


The modern market offers many options ceiling decoration, some methods have been known for a long time, but were a luxury item, and now have become available to everyone. One of these types is coffered ceilings. They have been popular among wealthy residents since ancient times, and they have not been forgotten even now. In terms of price, this type of finishing is not the cheapest, but if all the materials are available, construction markets you can do it yourself. What is a coffered ceiling, what it comes in and how to make it yourself we will look at in this article.

A coffered ceiling is a predominantly square-shaped recess that is separated by beams. Classic coffered ceilings are made of wood. When using other materials, such a ceiling is already called coffered.
This type of finishing has a number of advantages:
- Aesthetics. The beauty of such ceilings is beyond doubt. Skillfully made, they resemble works of art. You can often see this design in museums and old houses. They add luxury and pomp to the room.
- Naturalness. The ceilings are made of natural wood, which is clearly better than non-natural materials. Of course, this advantage can be discarded if you are going to use drywall instead of wood, which turns into a plus, since you can replace the materials with cheaper ones.
- Disguise. This method of cladding will mask any imperfections in the ceiling.

But do not forget that where there are pros, there are also cons:
- Very expensive to make. You will need a lot of material, and the work is not the fastest. And if you choose an expensive type of wood, the cost may not be affordable.
- Complexity of design. Completing the work will take a lot of time; if you hire a master, you will have to pay a tidy sum. You can buy ready-made cassettes, but then the ceiling will no longer look so chic and will be fragile.
- Design. Coffered ceilings will not fit into any interior. It is doubtful that they will be made in ordinary city apartments only if the entire interior is stylized as antique or contains antique furniture. But in country house they will look appropriate. This applies to the classic look; of course, plasterboard ceilings can be made in an apartment, but you should still treat them with caution and not overdo it with an abundance of details. It is not recommended to install them in rooms with low ceilings.

Wooden coffered ceilings
Wood is a classic material when creating coffered ceilings. It's eco-friendly natural material, it can even be used in children's rooms. The wood mainly used is oak, walnut, and ash. Such a ceiling will help hide all imperfections and wiring.
Wooden cassettes can be made in carpentry workshops and installed by specialists. The price of the ceiling will depend on the type of wood and the complexity of the carving.
Any wood products require maintenance. Don't forget this. Ceilings must be periodically treated with special compounds. Think about this in advance. Coffered ceilings are often installed in rooms with high ceilings. Whether you can reach them yourself or you will have to call in specialists later.

Coffered plasterboard ceiling
The most affordable of all in terms of price. This material will look impressive in tall rooms with large windows. The color range of drywall is much wider than wood. You can choose any shade. Therefore, remember that light colors increase space, while dark colors narrow it. Don't do it plasterboard ceilings dark color in small room, over time, you will even stop going there, as the room will put pressure on you.
Despite the price, gypsum products have one significant drawback- he doesn't like moisture. If you live near the road, then it is better not to install such ceilings. The fact is that drywall should not be washed often. In general, they should not be washed.

And if you have a lot of dust in your house, the entire ceiling will quickly turn black. Of course, you can periodically repaint them, but this is also extra money and wasted effort. But if you like to constantly change the interior, then such ceilings will be a joy for you, because they can and even need to be repainted periodically, changing colors.
Polyurethane coffered ceilings
Polyurethane is very light, not afraid of moisture, but it is not cheap, sometimes even more expensive than wood. You can save on cutting costs by purchasing ready-made cassettes in certain sizes. More often they only decorate the surface, rather than making the entire structure.

DIY installation of coffered ceilings
Installing coffered ceilings yourself implies that you already have ready-made slabs. Many manufacturers make these, so there will be no problems with this, but choose the material yourself based on your own funds and ease of installation.
Draw the contours of the ceiling on the drawing; the main thing to be guided by is that the center of the structure must coincide with the center of the ceiling.
The bases for a coffered ceiling can be different. The simplest one is regular wallpaper. They are glued to the ceiling before installation. Wallpaper can be of any color, but should not stand out from the overall interior. If the ceilings are low, then it is better to use light colors, this will expand the space. If the ceilings are high, then on the contrary, dark, this will give them charm. Ready-made beams and cassettes are already glued onto the wallpaper.

The beams for supporting the cassettes are made of different materials. More often it is wood or chipboard, the latter is much cheaper. If you still want wooden ones, then the cheapest option would be coniferous wood. The most budget option is beams made independently. You can use construction cardboard. Before making, check its strength; it should not bend easily. The beam is attached with glue and then covered with decorative elements.
Necessary tools for installation: saw for woodworking, manual or electric, level, ruler, square, hammer, nails, profile, as well as connectors for it, ceiling mounts, a set of screws.
Before installation, the ceiling surface is thoroughly cleaned. Remove whitewash and plaster. The surface is leveled with putty and primed. You can apply two layers.
Cut a plank along the length of the ceiling, nailing the boards along the edges, symmetrically to each other. Choose the width and height yourself.

Then it's time for the wallpaper. It is quite difficult to glue them to the ceiling, so it is better to work in pairs. If properly aligned, they will stick easily.
There is no need to glue wallpaper if you have special cassettes, as they will completely cover the ceiling.
Next comes the marking line. It must be carried out from the center of the ceiling to the edges, check the drawing, there should be no discrepancies. After marking, the beam is mounted by nailing it to the ceiling. Don't forget to check the sketch. Move from the center to the edges. Cover the beam along the edges and sides with slats. You can fasten it with nails; glue is suitable for lightweight parts.
After installing the parallel beams, the transverse beams are installed. If any gaps arise during the installation process, they can be closed with slats. After the beams, the cassettes themselves are installed.
If you are making a coffered ceiling from plasterboard, then your frame will not be wooden or cardboard, but plasterboard with gypsum cassettes.

Polyurethane coffered ceiling, as mentioned above, is an expensive option, but installing it is as easy as shelling pears. It is sold in finished form, you just need to glue it to the ceiling according to the diagram. The easiest and fastest to install.
Coffered ceiling in various interiors
The classic coffered ceiling is made of wood. Suitable for creating an office, in the design country house, billiard room or in a classic or retro style room with antique furniture.

Coffered plasterboard ceiling allows you to choose different color solutions. In this case, color contrast is often used, painting beams and cassettes in different shades. Be careful when choosing colors when good lighting You can choose any colors in the room; if not, limit yourself to light colors.

Caissons can be not only in the form of squares, you can use any shape. Ceilings in the form of honeycombs look very original.

It is not necessary to completely cover the ceiling with cassettes. Sometimes designers suggest highlighting the light zone separately.

Another original idea is the use of caissons mixed with stained glass elements. Such ceilings will fit perfectly into the Renaissance or Rococo style. When replacing stained glass with glass, they can also suit modern styles.


