Attaching the chimney to the house. Installation and installation of a chimney pipe: for a home or boiler room (diagrams, drawings). Structural elements and their features
In recent years, more and more chimneys are made from sandwich pipes. The point is the relatively low price, long term operation, quite attractive appearance. It is also important that independent installation of a sandwich chimney is possible. This is not a very simple matter - there are many nuances, but you can do it yourself, without the involvement of specialists.
What is a sandwich pipe and what are they?
The sandwich pipe was named so for its multi-layer nature: there are two layers of metal, between which there is insulation. This structure solves many problems that were inherent in a simple chimney made of metal pipe. Firstly, the insulation layer does not allow the outer metal casing to heat up to critical temperatures, and hard radiation does not emit from the pipe. More comfortable conditions are created indoors. Secondly, the same insulation significantly reduces the amount of condensation that forms when the pipe is brought outside. Thirdly, since the outer casing is no longer at such a high temperature, it is easier to make the chimney pass through the roof or wall.

A sandwich pipe is two metal cylinders, the space between which is filled with insulation.
What materials are they made from?
Sandwich pipes are made of galvanized or stainless steel. Galvanized sandwich pipes for chimneys are rarely used. Perhaps for the removal of combustion products of a low-power wall-mounted gas boiler or gas hot water heater. Can be used for insulated ventilation. For more serious heating devices they are unsuitable - at high temperatures, zinc burns out, steel quickly rusts, and the chimney becomes unusable.
Sandwich pipes for high temperature flue gases made from stainless steel. Moreover, stainless steel is used in different grades - from alloys with a small content of alloying metals, to highly alloyed heat-resistant. The thickness of the metal can also be different - from 0.5 to 1 mm, as well as the thickness of the insulation - 30 mm, 50 mm and 100 mm. It is clear that the scope of application will be different, and so will the price.
The main grades of steel that are used in the production of sandwich pipes for chimneys, their purpose and main characteristics are summarized in the table.
| Stainless steel grade | Main characteristics | Application area |
|---|---|---|
| AISI 430 | It has sufficient resistance to atmospheric influences, but does not tolerate high temperatures well | Used for outer casings of sandwich pipes |
| AISI 439 | Contains titanium, which increases resistance to elevated temperatures and aggressive environments. | Suitable for gas boilers, low-power solid fuel units (up to 30 kW) |
| AISI 316 | Alloying additives - nickel and molybdenum - provide high resistance to acids and increased heat resistance. | Optimal for gas boilers of any type. |
| AISI 304 | More cheap option AISI 316 with less alloying additives | Economy option for gas boilers of medium and low power |
| AISI 316I, AISI 321 | Withstands temperatures up to 850°C | Can be used for heating solid fuel stoves |
| AISI 310S | Increased heat resistance - up to 1000°C (and price) | For sauna and pyrolysis solid fuel stoves |
As is clear from the table, different grades of stainless steel have different purposes. Cheaper alloys are used for the outer casing, more heat-resistant and expensive ones for the internal casing. This is necessary to reduce the cost of products, and high resistance to temperatures outside the chimney is not needed. There are even more budget options— the outer casing is made of galvanized steel. Externally, these products are inferior to stainless steel, but serve normally (with normal insulation and its thickness).
Insulation and its thickness
There is insulation between two layers of metal. Most often this stone wool. The thickness of the insulation varies from 30 to 100 mm:
- With 30 mm thick insulation, the flue gas temperature should not exceed 250°C. Such temperatures are only given gas boilers small and medium power.
- A 50 mm insulation layer can withstand temperatures up to 400°C. Scope of application - any gas and liquid fuel boilers, wood-burning, provided that the chimney is vented to the street (through the wall).
- A 100 mm layer of stone wool can withstand temperatures up to 850°C. Such a sandwich chimney can be installed on any type of solid fuel boiler, in fireplaces and hearths.
In addition to the thickness of the insulation, you need to pay attention to its brand, or rather, to the temperature range in which it can operate. Not every stone wool can withstand heating up to 850°C, but only some special brands. If you need a chimney for a solid fuel boiler, you will also have to take into account the heat resistance of the insulation.

Connection types
Sandwich chimney elements can be connected to each other in two ways: with sockets and corrugated edges. A socket connection requires a slightly wider chamfer on one side. With this design, a high degree of chimney tightness is achieved. This type of sandwich pipe is well suited for gas boilers, where it is important to prevent leakage. There is also a minus: installation requires high precision.
The corrugated edge of the sandwich allows you to assemble the chimney without problems. The disadvantage of this solution is that to ensure tightness, a significant amount of high-temperature sealant is required, and it costs a lot.

It is also worth paying attention to the longitudinal seam. It can be welded or folded. If the seam is welded, it must be made in an argon protective environment (so that alloyed metals do not burn out). This type of connection is necessary for solid fuel boilers, sauna stoves and fireplaces. For all others, you can use a seam connection.
Installation methods
There are two ways to vent the chimney outside. The first is to run the pipe through the wall, and then along external wall raise to the required level. The second is up, through the ceiling and roof. Both are imperfect.
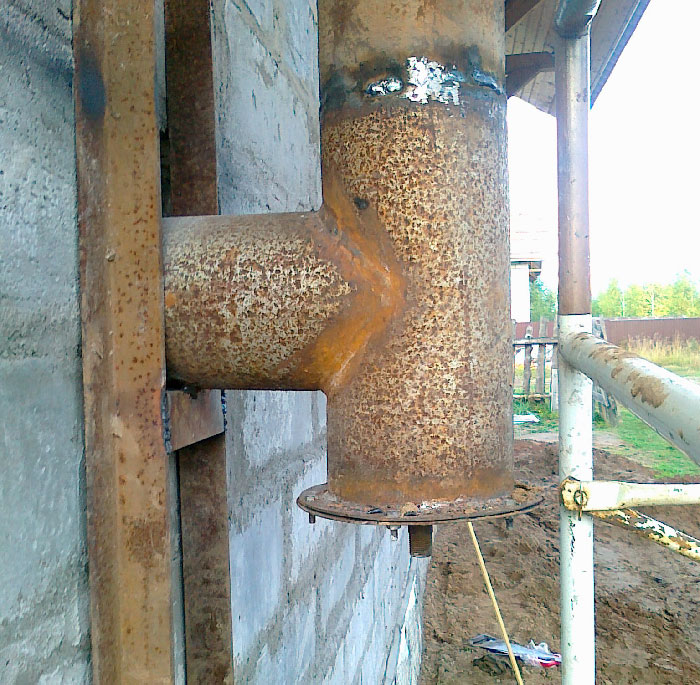
If the chimney is outdoors, condensation actively forms in it due to temperature changes. Therefore, a tee with a condensate collector (glass) and a cleaning hole must be installed in the lower part of the chimney. This unit allows you to maintain the chimney without much difficulty: the glass is unscrewed and the condensate is drained. Also, soot periodically gets knocked off without any problems - you can run a special chimney brush through the cleaning hole.

If the chimney will be discharged through the roof, several passage units will be needed - according to the number of ceilings. If the house is one-story, you will need one passage through the ceiling, and a second through the roof. You will also need a flash master or an apron for round pipe made of galvanized steel.
Installation of a sandwich chimney on the street requires only one passage unit - through the wall. But it will be necessary to attach it to the wall every 1.5-2 meters. If the walls of the building are flammable (wooden house or frame), the walls must be protected with a non-combustible screen.
By smoke or condensation

As mentioned above, one side of the sandwich pipe is slightly wider, the other is slightly narrower. Due to this difference in diameter, the modules are connected to one another. If the wider end is turned upward (in the figure on the right), the assembly is called “condensate”. With this installation method, drops of condensate flow down unhindered. The disadvantage of this method is that if the joints are not properly sealed, smoke can leak into microcracks. This type of sandwich chimney installation is used when the pipe is routed through a wall. This is where the free drainage of condensate is required, and small smoke leaks are not scary - they are not critical on the street.
If the narrower edge is turned upward, the second element is put on top of it with the wider part. This type of assembly is called “by smoke” (in the picture on the left). In this case, condensate flowing down the wall may leak through a joint that is not sealed well enough. But the smoke passes freely. This type of assembly is used if the pipe goes indoors (out through the roof). Condensate flowing through the pipe, of course, spoils appearance, but it is not as dangerous as flue gases leaking into the room. Moreover, if the joints are well sealed, condensation will not leak out.
In order for the connection of the sandwich chimney modules to be reliable, each of them is usually coated with a heat-resistant sealant and then tightened with a clamp.
Options
Sandwich chimneys are good because they have a modular structure, which allows you to assemble any configuration, with any parameters. Before you go to the store, you need to know the required chimney diameter, pipe height, and those additional elements that will be needed.
Chimney diameter
When choosing the diameter of a sandwich pipe, a simple rule applies: it cannot be less than the diameter of the boiler outlet pipe.
If your outlet pipe is 120 mm, then the internal diameter of the sandwich should be the same or larger. It may be wider, but definitely not smaller, and the narrowing cannot be done along the entire length of the chimney. If the chimney is slightly wider than the pipe, an adapter is purchased, which is placed directly at the boiler outlet, and then the working size comes next.
- If you don’t have a boiler yet, but you know its power, you can choose a chimney based on these data:
- boiler power up to 3.5 kW - internal diameter of the sandwich - 80 mm;
- from 3.5 kW to 5.2 kW - at least 95 mm;
But it’s better to buy (or at least choose) a boiler, and then decide on the chimney, because many manufacturers insure themselves by making the outlet pipes wider to improve draft.

Pipe height
The height of the chimney above the roof surface depends on the location of its outlet, but its minimum height should be 5 m. That is, if the height of the house is small, in any case, install the pipe to a height of 5 meters. If the height of the house is higher than 5 m, then the pipe should rise above roofing material to the following height:
- Should rise 50 cm above the ridge if it comes out at a distance of less than 150 cm from it.
- If the distance from the ridge to the pipe is more than 300 cm, then the pipe may be lower than the ridge level, but the angle should be no more than 10° (see figure).
- If the chimney exits at a distance of 150 to 300 cm from the ridge, its height can be at the same level as the ridge element or higher.
Under such conditions, normal traction is ensured. The smoke will go away normally regardless of weather conditions. To prevent leaves from getting into the chimney, they install special umbrellas, weather vanes, and in windy places - deflectors, which further improve draft.

If it is not possible to bring the pipe to such a height, they install a smoke exhauster - a forced draft is obtained. A fan will not be needed all the time, but in some conditions, when natural draft is not enough, forced exhaust saves the situation.
Installation of a sandwich chimney through a wall
When venting a chimney through a wall, there are two ways. The first option (pictured on the left) is to raise it in the room closer to the ceiling and take it out there. The second is to draw a conclusion at the level of the smoke pipe from the boiler. In this case, almost the entire chimney ends up on the street.

The second option is preferable - it has only one knee, which means, under equal conditions, the traction will be better. Also, with this structure there is less chance of soot plugs forming.
If the outlet of the smoke pipe is located not at the back of the stove, but at the top, the installation diagram changes slightly - a 90° elbow is added, then a straight section for passing through the wall, and then the same as in other diagrams.
The stove itself is placed on a non-flammable base, and the wall behind the stove is covered with a non-flammable screen. The easiest way is to fix a sheet of metal to the wall. It can be mounted on ceramic insulators 2.5-3 cm in height. There will be a layer of air between the sheet of metal and the wall, so the wall will be safe. The second option is to place a thermal insulation material under the metal - for example, mineral wool cardboard. Another option is an asbestos sheet (as in the photo).

A hole is made in the wall. Its dimensions are determined by SNiP - the distance from the pipe to non-combustible walls must be at least 250 mm on all sides, and to combustible walls - 450 mm. It turns out to be a solid hole, especially if we talk about walls made of flammable materials. There is one way to reduce the size of the opening for the passage of the sandwich: make the dimensions according to the standards of non-combustible walls and sheathe the opening with non-combustible material.

The opening can be round or square, as long as fire safety standards are met. Square holes are easier to make and cover, which is why they are made more often.

A passage unit is inserted into this hole - a box made of non-combustible material. The sandwich chimney pipe is inserted into it and fixed in the center. All gaps are filled with heat-resistant insulation, the hole is closed on both sides with non-combustible material. This is usually a sheet of metal.

One important point: the chimney must be designed so that there is no junction of two pipes inside the wall. All joints must be visible and serviceable.
Next, you need to make or install a ready-made support bracket that will support the entire weight of the pipe. The design may differ in details, but the main idea is the same - a support platform, which, with the help of stops, transfers weight to the wall.
Homemade support platform for an external sandwich chimney from corners 50*50 mm and 40*40 mm
A similar structure can be welded from profile pipe small section 25*25 mm or 25*40 mm.
As you can see, a tee is connected to the pipe that goes through the wall. At the bottom there is a removable glass in which condensation accumulates. Some models have a fitting at the bottom with a small tap. This is even more convenient - you don’t need to remove the glass, you can connect a hose to the fitting, drain it into some container (it is very toxic, so there is no need to drain it near the house) and drain it by simply turning the tap.
Next, the tube is brought to the required level. Since in this case the distance to the ridge will clearly be more than 3 m, it is possible that the height of the chimney should be slightly lower than the ridge - no lower than 10° relative to the horizontal line drawn from the level of the ridge.

But since this house is located in a low area, to ensure traction, the pipe was raised even higher than the ridge. It was attached to the wall with stainless steel clamps, in increments of a little more than a meter. The roof is equipped with guy wires made of steel rods with a diameter of 6 mm. To install guy wires, there are special clamps “with ears” to which the guy wires are attached.

Attaching guy wires to a chimney from sandwich tubes
Another important point that many people forget: at the place where the pipe is installed, a snow retention section must be installed on the roof, otherwise in the spring the pipe may be blown away by snow (if the pipe is not routed towards the gable, as in the photo).
How to install a chimney through the roof
When venting a chimney from sandwich pipes through the roof, it is necessary to take into account the location of the floor beams and rafter legs on the roof. It is necessary to arrange it so that the pipe passes between these elements. The minimum distance from the outer wall of the pipe to the combustible element must be at least 13 cm, and this is provided that the combustible element is protected by insulation. To meet this requirement, the pipe often has to be displaced. This is done using two 45° angles.

Please note that the installation of a sandwich chimney from a solid fuel boiler begins with a metal pipe without insulation. In the photo above it is black. After this, an adapter for the sandwich is placed, and the passage unit is already chimney with insulation.
A hole is cut in the ceiling that meets fire standards - 250 mm from the edge of the pipe, if the ceiling is protected by thermal insulation material. Having cut a hole, its edges are covered with non-flammable heat-insulating material. Minerite is best suited for this (it is nailed or secured with wood screws).

The gray material around the perimeter of the hole is mineralite
The sandwich chimney pipe is inserted into the resulting box. It should be directed strictly vertically, without the slightest deviation. You can’t fix it rigidly, you can only give it direction by installing several bars that will hold it, but it can move up/down without difficulty. This is necessary, since when heated its length increases significantly.
The remaining space is filled with basalt wool (check the temperature range). Another option is to pour expanded clay or granulated foam glass. Previously, sand was still poured in, but sooner or later, it all spilled out through the cracks, so now this option is unpopular. On the front side, all this “beauty” is covered with a stainless steel sheet, under which it is placed (between it and the ceiling) non-flammable material. Previously, it was an asbestos sheet, but since asbestos is recognized as a carcinogen, mineral wool cardboard began to be used.
There is another option. Beat the edges of the hole with mineral wool, and then insert the finished ceiling passage unit made of stainless steel. It immediately contains both a box and a decorative stainless screen.

Having brought the pipe into the attic, they make a hole in the roofing pie. All films in the passage area (vapor barrier and waterproofing) are cut crosswise. The resulting triangles are wrapped and secured with staples from a stapler. This way the damage is minimal. The exposed sheathing is cut so that it is at least 13 cm from the pipe.

How to bring a chimney through the roof - passage ceiling and roofs
In the right photo above, the passage through the roof is incorrect - the distance between the pipe and the boards is too small. In a good way, you need to cut them according to the standard, and cover them with the same mineralite. The result should be something similar to the following photo.


Master flash for a sandwich chimney - a rubber cap with a flexible “skirt”
The joint between rubber and pipe is sealed with heat-resistant sealant. The roof surface under the “skirt” is also coated with sealant.

Please note that each connection of the sandwich modules is tightened with a clamp. This is also true for the internal chimney.
The sandwich chimney owes its name to the design features of the pipe - it consists of internal and external channels, as well as a layer of thermal insulation running between them. And if you're interestedDIY sandwich chimney installation, then first familiarize yourself with the design features.
Chimneys from different manufacturers today may differ only technical parameters channels and material used for thermal insulation.

The vast majority of sandwich class pipes are equipped with an external channel made of stainless steel, while the internal channel is made of more expensive metals - for example, brass and copper. In addition, chimneys differ in the thickness of the insulating layer and the diameter of the pipes. Another criterion could be temperature regime, at which operation must take place.

In this case, mineral wool is used as insulation, which in almost all respects is identical to asbestos fiber.
Important! The thickness of the mineral wool layer usually ranges between 3 and 6 cm, which ensures resistance to temperature changes and aggressive influences of the external environment.

It is believed that sandwich chimneys can last 15 years, but practice shows that this period is usually much longer. In addition to the pipe itself, the kit includes:
- protective fungus;
- knees with an angle of 90ᵒ and 45ᵒ;
- weather vane (it will prevent reverse draft and protect the structure from the wind);
- tee;
- inspection to check the condition of the chimney;
- cone for free flow.
Important! The mushroom and weather vane are not used in case of gas heating!
Advantages and disadvantages of a sandwich chimney in

The undoubted advantages of chimneys of this type include the following properties:
- light weight;
- compatibility with all heating devices;
- the possibility of condensation is minimized;
- aesthetics;
- compactness;
- versatility, which manifests itself in the possibility of both indoor and outdoor installation;
- slight contamination with soot during operation;
- corrosion resistance;
- mobility - the chimney does not have to be straight;
- fire safety;
- no need to install an additional base.
Regarding the disadvantages, the sandwich chimney has few of them, more precisely, only two - the possibility of loss of tightness and high cost. If everything is clear with the cost, then the loss of tightness requires some explanation. The fact is that it occurs only after a long operational period, because all sections of the pipe permanently expand and contract under the influence of temperature changes.
Due to the lightness of the sandwich chimney, it can be installed without preliminary installation of the base, which is considered another advantage of the design.

Sandwich chimney dimensions
What will be required at work
In addition to standard components, take care of necessary materials and tools:
- wall brackets;
- fasteners;
- clamps;
- couplings;
- stub;
- marker;
- fireproof sealant.
Now - directly to the installation.
First stage. Preparatory work

In this case, preparation consists of protecting the places where the chimney will pass through the ceiling. In such areas, install special element, called a pass-through tube. Below is the installation procedure.
Step one. Prepare the pipe. Place a layer of thermal insulation along its walls.
Step two.

Then insulate the inner surface. Mark the installation location in the ceiling and make an opening of the required size.
Step three.

Install another layer of insulation in the place where the pipe will come into contact with the ceiling, and then install the pipe.
Step four.
Do not forget about a small gap between the pipe and the chimney for additional heat removal. Important! You cannot join chimney parts where it will pass through the ceiling. Second phase. Cutting on the roof
Step two.
Cut a corresponding hole for the pipe, preferably from the inside.


Step three.
Attach a sheet of galvanized steel to the roof, in which a hole has been previously made for the chimney. We remind you once again that joints between structural elements on cutting lines should not be allowed.
Third stage. Chimney assembly procedure
Let's look at the installation technology using the example of the most popular heating system - double-circuit. Important! Carry out installation from the bottom up, that is, from the heat generator to the pipe outlet. Step one. To begin, connect the sandwich pipe to the corresponding hole in the heating device (in most cases, the boiler), then secure it with a plug. remember, that small area the pipes near the boiler itself should be left uninsulated because the temperature is too high. Whichever
High Quality

No matter the pipe you use to build the chimney, the section near the boiler will exhaust its resources in a short time, or, more simply, it will burn out.
Step two.

Insert each new inner tube into the previous one. Then put on the outer channel. Pay special attention to ensuring that the pipes are joined to the previous ones on the narrower side, otherwise during operation the condensate that inevitably forms will flow into the seams and not flow freely downwards. Step three. After installing all chimney segments, secure the tees with pre-prepared brackets. Then seal all connections with iron clamps and additionally secure with nuts.

Step four.
If you wish, you can install special sealed couplings. They are often recommended to be installed if the system constantly operates at high pressure.
- Step five.
- After installation is complete, separate
- protective film
- from the parts and apply fireproof sealant to them. This sealant must retain all its properties even at a temperature of 100ᵒC.
- Fourth stage. Features of installing sandwich class chimneys
- No mistakes should be made during installation. The most common of them are incorrect calculations, incorrect installation of the ventilation system, and poor-quality thermal insulation.
- Finally, do not forget about installing a special inspection with a door designed to clean the chimney from combustion products.
About the cost of installation work
Of course, installing a chimney yourself allows you to save some money, however, it is still better to entrust this work to professionals. Despite the fact that the installation procedure seems simple at first glance, there are a number of nuances (we have mentioned some of them) that only experienced specialists know about. approximate cost assembly and installation of a sandwich chimney today is 1,700 rubles per meter. Yes, the amount is rather large, but in return you will get the most important thing - quality.
Of course, this figure may vary depending on the number of floors and installation method. There are two such ways.
- When installing “by smoke”, tees are used to drain condensate.
- Installation “by condensate” does not involve the use of additional elements.
In a word, installing a chimney is an important procedure, so if you decide to do it yourself, you will have to treat the issue with full responsibility and follow safety rules.

About the features of operation
When using a sandwich chimney, soot will still accumulate in its pipes, albeit in small quantities. This will eventually reduce the useful cross-sectional area, which in turn can lead to ignition. Therefore, clean the chimney at least twice during heating season, using the revision mentioned above. There is another way (the so-called glass), which involves dismantling the entire lower part of the structure.

Video - Installation of a sandwich chimney
Today, installing a stainless steel chimney is becoming more commonplace than brickwork for removing combustion products from a residential building. Popularity of prefabricated structures modular type made of stainless steel, including chimneys, due to ease of assembly, reliability and long service life. For their production, only high-quality chrome-plated material, steel sheets and galvanization, as well as alloys with different percentages of metals known for increased resistance to external environmental influences are used.
Main parameters of stainless chimneys
On modern construction market chimneys made of stainless steel and various other alloys are presented in a large assortment, and they all meet basic operational requirements. There are chimneys for various types boilers:
- diesel;
- gas;
- solid fuel;
- combined type;
- universal.

Metal chimneys vary in shape:
- straight;
- telescopic;
- stainless steel sandwich chimneys;
- corrugated flexible stainless steel chimneys.
The quality of installation not only affects the rapid formation of stable draft, but also the efficiency of the boiler and the safety of the residents of the house. Do not forget that during the combustion process, depending on the type of fuel, not only heat is released, but also:
- soot;
- volatile acid compounds;
- gaseous combustion products;
- carbon monoxide;
- volatile resins;
- ammonia and other compounds.
To protect yourself and your loved ones from any troubles, it is important to ensure that all these harmful volatile compounds are removed through the chimney, especially carbon monoxide or CO. During installation stainless chimneys It is equally important to comply with all safety measures and legal regulations. They are set out in specialized literature and legislative acts.
The essence of these standards is that it is important that the cross-section of the chimney corresponds to the power of the boiler, the height of the chimney is more than 5 m, and it is installed above the roof level in order to avoid turbulence and backdraft. And the chimney duct must have a minimum of turns and broken sections. The dimensions of stainless steel chimneys are initially taken into account by manufacturers, so industrial production takes into account these standards.

Basic requirements for the chimney:
- smooth surface and rounded shape promote stable traction;
- condensation formation is minimal;
- high levels of heat resistance and tightness;
- ease of installation and maintenance;
- fire resistance and safety.
However, all these advantages can be guaranteed only if you follow all the recommendations for assembling the structure, which are shared by experts - stainless steel chimney installation: video.
Attention: When purchasing modular stainless steel chimneys, be sure to thoroughly study the section in the instructions that deals with its compliance with the power for which the boiler or stove is designed!
In addition to proper installation, accessibility to the chimney is no less important - for its cleaning and maintenance, as well as condensate drainage, which requires a separate pipe.

Flexible stainless chimneys greatly facilitate the installation of an autonomous heating system, especially if it is impossible to maintain the straight path of the smoke exhaust system. The corrugation is also effective at high temperatures, up to 900°C, when working on fuel oil, and is also not afraid of temperature changes and quickly warms up, providing stable draft when starting the boiler. The main parts of the prefabricated structure are similar, but the chimney pipe itself is different.
In brickwork, fairly wide channels of an ellipsoidal cross-section, that is, with an oval cross-section, are sometimes used. Their shape also does not contribute to the accumulation of soot and smoke from reverse draft.
Also produced:
- single-circuit or single-wall chimneys, the so-called mono-systems (a variant of a chimney without insulation), which can withstand temperatures within 450°C, applicable inside a building, including corrugation;
- double-circuit thermal systems (with a double or triple layer of chimney) on basalt wool insulation between metal.
There is also the possibility additional insulation stainless chimney, what about we'll talk in the last section of the article. But it will only be needed for external structures.

The quality of operation of the chimney system is also affected by:
1. Wall thickness, which is calculated and specified in the standards:
- for gas boilers, the thickness of the chimney duct ranges from 0.5 mm,
- on diesel fuel- from 0.8 mm;
- for solid fuel boilers - from 1 mm.
2. Configuration. The ideal chimney is straight, and the fewer bends, turns and protrusions, the more efficient the draft and the less accumulation of soot. Smooth cylindrical pipe a chimney of sufficient cross-section contributes to efficient operation.
3. The proportions of the diameter (section), length of the pipe or height of the chimney provide sufficient draft force. Stainless steel chimneys with a diameter smaller than necessary for normal operation reduce the efficiency of the boiler, fireplace or stove. Experts also say that it should rise above the top point of the roof by at least 20 cm, and the chimney itself should be no shorter than 5 m.
Special parts solve problems with its maintenance:
- inspection with soot removal;
- condensate drainage;
- air intake for the combustion process;
- chimney for protection from precipitation.

What metal is used for chimneys
“Stainless steel” refers to a group of steel-based alloys with a small chromium content or galvanized sheet iron—more correctly, “galvanization.” Such products are distinguished by excellent anti-corrosion characteristics when interacting with oxygen, water and the aggressive environment of acidic compounds released during combustion. This provides a few microns of chromium oxide deposits, which is why the process is called "chrome plating".
Various grades of steel are used for chimneys:
- 430 - casings and other parts for low-aggression environments;
- 409 - contains titanium, used for pipes of fireplaces, solid fuel boilers and stoves;
- 316 - with the addition of nickel and molybdenum for heat resistance and resistance to acid compounds in diesel furnaces;
- 304 - with the same additives, but in smaller quantities for less aggressive environments;
- 321 - universal grade for chimney pipes with increased heat resistance, up to 850°C;
- 310 - the most heat-resistant, durable and durable chimneys for the most powerful heating equipment.
Attention: For multilayer sandwich pipes, steel of different grades is used. On the internal table it is more resistant and heat-resistant, on the external table it is cheaper and simpler, so it does not look as impressive in appearance as a single-layer chimney.

Main elements and their characteristics
The chimney consists of several elements that have different purposes and assembly order:
- tee;
- pipe elbows;
- audit;
- condensate collector.
1. The main element is a long straight chimney pipe of different lengths, and its fragments are connected like a socket without special fastening.
2. An inclined elbow (at an angle of 45°) connects 2 pipes, changing the slope of the chimney, and it is used at the junction of horizontal and vertical fragments.
3. The universal elbow (at an angle of 90°) is also used as a rotary element to change the configuration of the chimney. Several of these elements are used throughout the chimney - from the top to the junction of the boiler pipe.
4. Tees lead flue gases into the chimney and cut off condensate. They are also joined using a socket method or one-on-one.
5. The condensate drain is placed under the tee to drain excess liquid.
6. Revision - open element, which is designed to remove soot from the chimney. Mounted under a tee at the base of a vertical trunk - picture:

Installation of a stainless steel chimney
Modular chimneys are most widespread today due to their ease of assembly. This principle makes it possible not to waste time on labor-intensive fastening and sealing of the chimney. Given how extensive the selection of parts for assembling stainless chimneys is, it is possible to vary its configuration as much as possible without compromising the draft and operation of the boilers. Sometimes you can’t do without a corrugation or several bends in order to competently build a chimney with minimal reconstruction of the walls.
1. Preparation for installation involves calculations on the expected configuration of the chimney, a preliminary sketch and marking of the walls along which its fastening is planned. This will allow you to most accurately calculate the total length of the structure and select the necessary rotating parts for the pipe joint.
Attention: Do not forget to add an outer section, which should be at least 25-50 cm above the level of the roof ridge - to ensure traction in any weather.
2. Before assembling the chimney inside the pipe, the seams are supposed to be treated with a special sealant, which guarantees maximum efficiency joints. The outer and outer walls do not require this.
3. Proper installation of the chimney is done from the boiler or stove, that is, from the bottom up, sequentially connecting all the bends and pipe links. Docking according to the socket type - when the upper pipe is inserted into the lower pipe using a special latch. If it is not there, but the shrinkage depth is almost half of the outer diameter.

4. The links at the junction must be securely fixed with clamps, which are included in the kit. Finished pipe must be attached to the wall or load-bearing structures at intervals of one and a half to two meters, and separate brackets are used for mounting bends and tees.
Attention: Make sure that horizontal sections and elbows do not rest on communications. The fragments must not come into contact with gas pipes and electrical wiring!
As you can see, it’s quite easy to make stainless steel chimneys with your own hands. To do this you will need 2 pairs of working hands and 1-2 for time. If you still have questions, watch the video on chimney installation:
Tip: Make sure that condensation does not flow past the pipes, falling onto the insulation and insulation. Also carefully treat the joints with sealant. It is important to properly route the chimney through the roof, which is described in more detail in the previous article.
Chimney insulation
This is one of the important stages in completing the construction of a chimney. Without insulation, which is provided only for stainless steel sandwich chimneys, the installation will have disadvantages. With a poorly insulated chimney, ensuring stable draft when starting a boiler or igniting a fireplace is problematic. And its rapid cooling reduces the overall efficiency of the entire autonomous heating system. In addition, condensation that forms on the metal walls when there is a difference in the external and internal temperatures gradually destroys the internal walls of the chimney and reduces its efficiency.

A sandwich-like design is very popular today when installing and insulating chimneys for modern boilers:
- universal;
- solid fuel;
- gas;
- combined.
They operate in interval mode, that is, “stop-start”. Solid fuel boilers They require additional fuel loading and cleaning of the ash pan, so they do not turn off for some time. And constantly operating boilers, when the required temperature is reached when the sensor or relay is triggered, turn off on their own to avoid overheating. When the temperature in the room drops to a predetermined level, automatic heating also works automatically.
During the “sleep mode”, the temperature in the chimney also drops, a difference forms outside and inside the chimney, and condensation occurs. When the boiler warms up for a long time, it slows down the operation of the heating system, which leads to excessive fuel consumption.
A mineral filler is used as insulation - basalt wool, which is known for its excellent fire-resistant parameters. The pipe is wrapped with it in layers and such a “blanket” is secured with wire and/or clamps. These materials are not afraid of high temperatures, so the chimney can operate on any type of fuel, heating up to 1000°C. However basalt wool it is necessary to isolate from excess moisture, since dampness reduces the effectiveness of insulation.

For waterproofing, galvanized or stainless steel is used, which is attached with self-tapping screws on top of the finished “blanket”. To cope with such work, you will need metal scissors and work skills. But it is easier to order such caps of the required diameter in a specialized workshop ready-made. And at home there will be no problems in completing final stage insulation.
Attention: At the end of the installation, be sure to secure the top of the pipe so that it does not blow away during a strong gust of wind or tornado. A chimney must be installed at the top to protect the entire system from the penetration of precipitation.
The chimney is an important part of heating devices operating on gas, solid or liquid fuel. In fireplaces, stoves, baths and boilers, it is important to maintain a certain level of draft in order to clean the air from combustion products. The correct choice of chimney pipe is the basis for the safe operation of the heating device. Errors in chimney construction can lead to life-threatening situations.
Chimney pipes are made of metal, ceramics and brick. Metal pipes are currently in greatest demand. Of all the varieties of this material, it is recommended to choose steel. Steel pipes for chimneys are coated with special solutions that make the material resistant to all adverse effects of the internal environment of the chimney.
When choosing a pipe, it is necessary to take into account the parameters of the heating devices and the fuel used. The material from which the pipes are made must withstand higher temperatures than the fuel can create.
When using some types of heating devices, chemically active substances are found among the under-oxidized combustion products. They can damage a chimney that is not sufficiently resistant to chemicals. Some unburned particles can ignite, creating sparks. Therefore, the material from which the pipe is made must be fireproof.
This is interesting! When choosing a pipe, you need to pay attention to the melting point of the material from which it is made. The melting point of steel exceeds 1000 0C - the highest possible indicator encountered when operating heating appliances powered by coal.
The advantages of steel pipes are:
- Easy to install. Steel pipes do not require the installation of a special foundation; they do not require complex engineering solutions or special installation tools. You can install them yourself without prior preparation. Due to the plasticity of the material, complex technical structures can be created.
- Light weight. They are easy to transport, you can lift and move them yourself without a team of workers, which also simplifies installation.
- High temperature resistance. Steel products Suitable for appliances running on any fuel. They do not melt at maximum temperature loads.
- Chemical inertness. Steel does not interact with chemical reagents that can form as under-oxidized combustion products. These substances are not capable of destroying it.
- Corrosion resistance. This advantage applies to pipes that have a special coating and stainless steel. The material itself quickly corrodes. It is worth considering that in addition to the internal environment, the chimney pipe is affected by external unfavorable factors, for example, precipitation. Preference should be given to coated pipes.
- Smooth inner walls. Combustion products settle on the rough surface, turning into soot, which gradually reduces the clearance. This reduces the draft in the chimney. Steel is completely smooth, the risk of soot settling on their surface is minimal.
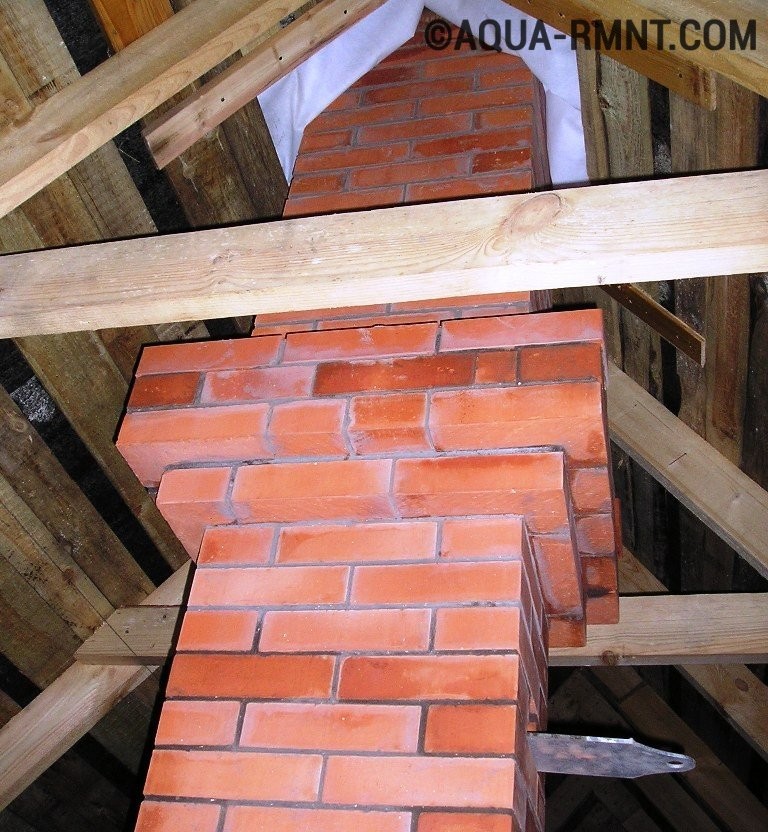
There is not a single stove without a chimney. Removal of carbon monoxide and smoke from the firebox - necessary condition proper operation of the stove. What should the pipe be made of and how to arrange it so that it lasts for a long time and does not create additional problems? An experienced stove maker will answer without hesitation - from the same material as the stove itself. This is due to the fact that different materials have different coefficients of thermal expansion. And if brick and metal are heated at the same time during the fire, then a gap will form at the point of their connection over time. Smoke begins to leak through the gap, this disrupts the smooth operation of the stove, and also poses a serious threat to the life and health of household members. Therefore, if you want to build a chimney for a brick stove, you must also do it from brick.
What is a brick chimney and where is it used?
Chimneys are used to remove gaseous combustion products in stoves, fireplaces and heating boilers. Under the influence of draft, smoke, carbon monoxide and soot are carried from the firebox into the chimney and discharged outside. As they move, they cool down, giving off heat to the walls of the chimney.

To remove combustion products from a brick stove, you need to build a chimney from the same material, i.e. brick
Unlike metal pipes, brick has:

But a brick chimney also has a rather significant disadvantage. IN country houses And country cottages there is no possibility to fold pipes cylindrical, which are ideal for the passage of hot gases. The internal cross-section of a square or rectangular shape creates obstacles to the flow of smoke. As a result of this, on internal walls A layer of soot quickly forms, which reduces traction. Accordingly, they have to be cleaned more often than metal ones.
Chimney pipe design and operating principle
The classic chimney design is a vertical tower, inside of which there is a through hole that connects the furnace firebox with the open space outside the house. According to the laws of physics, air pressure decreases with distance from the earth's surface. As a result, a draft arises inside the pipe - a desire air mass to movement from bottom to top. If the air access from below is blocked, the draft disappears. Therefore, a smoke damper or view must be installed in the chimney, with the help of which it is possible to regulate the draft.
Using the damper, you can regulate the size of the smoke channel, and therefore the draft
Since the pipe is operated in residential buildings, it should not pose a fire hazard, therefore the masonry is carried out taking into account maximum protection from possible fire. A certain terminology has become established among stove makers, which reflects the structure and functional purpose of individual pipe elements.

In some cases, a combined pipe design is practiced. The brickwork ends in the attic and then a metal or asbestos pipe is mounted to it, leading to the roof. In this case, there is no need for an otter, neck and head, which significantly saves time and money. At the same time, we must not forget that the cross-sectional area of a metal pipe should not differ from the cross-section of a brick pipe in a smaller direction. The combination of a stainless steel pipe embedded in an asbestos pipe has proven itself well.

In the upper part of the chimney, where the temperature of the flue gases is not so high, you can make a transition with brick pipe to metal
In both cases, the top hole must be closed with an umbrella (or deflector), which will prevent rain and snow from directly entering the pipe.
Calculation of main pipe parameters
All calculations for the chimney must be performed at the design stage of the stove. The project must be carried out by a qualified engineer or craftsman who is well versed in all the nuances of the furnace business. It is impossible to plan the dimensions of the pipe in isolation from the dimensions of the firebox and heat exchanger. Everything is interconnected and must correspond to one goal - the coordinated operation of the furnace equipment.
If, when building a fireplace, the “body” of the stove is missing, and the firebox is directly connected to the chimney, then the Russian stove additionally has heating ducts in the walls, and it is impossible not to make allowances for this. The presence of passages changes the draft and lengthens the path of the flue gases several times. Accordingly, the chimney must create greater vacuum so that the movement of gases is accelerated and soot does not settle inside the passage. A separate topic could be the calculation of chimney parameters in sauna stove. It is important here that the draft is not excessive, and that the burning fuel has time to transfer heat inside the steam room.
The stove maker’s task includes taking into account not only internal, but also external factors - the location of the pipe in relation to the roof, the characteristics of the local climate, and even the influence of the landscape.

The chimney draft can be affected by tall buildings and trees located nearby, as well as by incorrect choice of chimney height
For gas heating systems due to their increased fire hazard, the calculation of the chimney parameters is carried out by specialists who develop the boiler. Dimensions are indicated in technical passport and are binding.
In private construction, where combustion is carried out mainly solid fuel(firewood, coal, peat or fuel briquettes), you can adhere to the following rules that will ensure the correct operation of any stove:
- the internal cross-sectional area of a rectangular chimney in closed-type furnaces should not exceed the cross-sectional area of the blower;
- internal cross-sectional area of pipes in furnaces open type and fireplaces is calculated in a ratio of 1:10 in relation to the firebox.
It is believed that if the chimney structure has a rectangular shape, the ratio of the short side to the long side should be equal to 1:2. In this case, the minimum permissible cross-sectional size of the channel is 14 x 14 cm.

The size of the brick chimney channel wall should not be less than 14 cm
An important factor is the height of the pipe. Correct calculation allows:
- optimize the operation of the chimney and achieve better efficiency indicators for heat transfer;
- provide safe operation heating device, eliminate the leakage of harmful gases due to weak draft;
- provide fire safety- if the draft is excessive, sparks and flames may fly out of the pipe.
In general, the height is determined in accordance with SNiP 2.04.05–91:
- the minimum distance from the grate to the top point of the chimney (excluding the protective umbrella) is 5 m;
- the optimal distance is 6 m.
Such parameters ensure stable draft, i.e. the design of the chimney allows you to create a pressure drop sufficient to operate the stove at any time of the year. But in each particular case it is also necessary to take into account:

There is such an unpleasant phenomenon as reverse thrust. This term refers to the movement of smoke in the chimney in the opposite direction - from the chimney duct into the room. There may be several reasons for this, but the main one is the wrong position chimney. As a rule - underestimated.

An error in choosing the height of the chimney often leads to backdraft
Excess draft can always be eliminated by adjusting the air flow in the ash pan and smoke valves. Insufficient traction is exacerbated in several ways:
- Pipe extension.
- Cleaning the inner surface of the chimney duct.
- Installing a deflector.
The deflector not only increases draft, but also protects the chimney channel from moisture, debris and birds and bats settling in it.

According to experts, by installing a deflector on a chimney you can increase draft by 15–20%
Video: how to calculate the height of the chimney
You will learn about which pipe is best to choose for a chimney, as well as the advantages and disadvantages of materials in our material:.
Making a brick chimney with your own hands
Knowing the features of chimney construction and having in hand finished project, you can start self-construction smoke exhaust channel.
Materials and tools required for chimney construction
To build a chimney yourself, you will need the following tools:
- trowel and mason's hammer;
- hydraulic level, plumb line (or construction laser level);
- construction bucket for mixing mortar;
- building rule, jointing;
- electric mixer (optional) a regular drill with nozzle);
- measuring instruments - tape measure, ruler.

To build a chimney, standard tools from a mason's kit are required.
During the masonry process, you need to make smaller building elements from brick - brick plates, a quarter of a brick, a half, etc. An experienced mason copes with the task with one well-timed blow of a hammer. A novice stove maker who does not have such skills can use a grinder with a diamond blade. With its help, cutting of any required shape becomes easily accessible, although accompanied big amount dust.
Some stove makers successfully use a template made of wood or metal for masonry. The template allows you to strictly adhere to dimensions, which is especially important for internal hole pipes.
In addition, you will need materials:
- red brick (in no case white - silicate) solid, hollow, fireclay, clinker;
- cement mixture (can be ready-made or prepared independently from sand, cement and clay);
- a set of smoke valves or views;
- sheet metal or roofing.
Preparatory work before making a chimney
Before directly starting work on laying a brick pipe, it is necessary to carry out certain preparatory work:

During operation, hands come into contact with chemically aggressive solutions; it is recommended to use protective gloves to protect them.
When performing work on the roof, it is necessary to observe personal safety measures and also use scaffolding and rope belay.
On construction site There should always be a first aid kit with first aid supplies for wounds and bleeding. Sometimes the chimney is not located in the center of the room, but is in contact with the load-bearing wall. This situation is often observed during the construction of fireplaces. In this case, you can use wall structure chimney. It is pre-installed during the construction of the main wall. It is appropriate to note here that among stove makers there is a common classification of chimneys according to design characteristics:
- Brick overlays. Chimneys installed directly on the stove masonry.
- Brick indigenous. Pipes located separately from the furnace, standing on separate foundation. They have the shape of a riser.
- Prefabricated. Individual blocks made of refractory concrete that are stacked at the site where the chimney is installed.
- Wall. Built into load-bearing wall, significantly save space and volume of premises. However, it should be taken into account that it is not advisable to install wall pipes in external walls. Contact with cold outside air sharply reduces the efficiency of such a chimney in terms of heat transfer.
IN wooden houses the junction of the pipe with the combustible elements of the building is accompanied by a thickening of 1–1.5 bricks. To avoid fire, joints are additionally laid with asbestos or felt sheets. The felt is pre-soaked in a liquid clay solution.
Step-by-step instructions for building a brick chimney
The construction of a chimney consists of carrying out brickwork in strict accordance with the layout of the material in each row - order. This plan must be drawn up when preparing a project for the construction of a smoke exhaust duct.

Each row of chimney masonry has a strictly defined arrangement of bricks
We can only add that for the best bonding of bricks with mortar, it is recommended to adhere to the following installation settings:
- The mortar is applied in a layer of 1.5–2 cm, the brick is wetted and coated with the mortar. After installing the masonry in place, the brick is pressed down so that the final thickness of the seam is 1 cm.

When laying each brick, it is necessary to check its position horizontally and vertically, and also maintain a joint thickness of 1 cm
- As the masonry progresses (after 5–6 rows), it is recommended to do mopping - grouting the seams between the bricks inside the chimney duct. The smooth inner surface will provide good passage exhaust gases, will reduce the risk of soot deposits. Grouting can be done with a wet cloth.

Internal seams are leveled and rubbed with mortar as the masonry progresses.
- The installation of a smoke damper is usually carried out between the second and third rows of bricks. But this is not a strict rule - you can adjust the installation location depending on the situation. Immediately after installation, the valve is closed so that the cement mortar does not fall into the furnace.

A separate valve is installed for each smoke channel
- In the external masonry - on the roof - a mortar with increased strength and moisture resistance characteristics is used. To do this, the mixing proportion is changed, increasing the cement content (instead of 1/4, make 1/3). Moreover, cement is selected grade M 500 or M 600. For the head they are often used not cement-sand composition, but cement-clay. It is made by adding 1 liter of cement to 10 liters of sand-clay mortar, which is used for laying the furnace.

When using hollow bricks, the internal cavities are filled with cement mortar
- It is important to keep the solution clean. It is unacceptable for debris, especially of organic origin, to get into it.
- Straight sections of the chimney are laid out plumb. To do this, strong silk threads are pulled in each corner and aligned vertically. The right angle is controlled using a square every 4-5 rows.

It is convenient to control the vertical position of the chimney walls using cords stretched in each of the four corners
Video: DIY chimney for a fireplace
Features of the operation of brick chimneys
After the construction of the chimney is completed and the pipe is successfully put into operation, it is advisable to familiarize yourself with the features of use brick stove. In order for the heating unit to serve for a long time and without accidents, it is necessary to follow simple but important rules.
- The main enemy of brick is sudden temperature changes. It is better to heat more often, but for short periods of time. It is not recommended to make more than 2 fuel loads per firebox. This is especially true for coal, the combustion temperature of which exceeds 1000 degrees.
- Timely cleaning of the pipe from soot unlimitedly extends the service life of the chimney duct.
- If cracks occur on the stove body and chimney in particular, measures should be taken immediately to eliminate them. Neglected cracks tend to progress quickly and pose a threat not only to the integrity of the brickwork, but also to human health. Carbon monoxide, which is colorless and odorless, but poisonous to all living things, penetrates into the living space through small cracks.
- The slightest malfunction in the doors of the firebox or ash chamber (ash chamber) first significantly reduces the heat transfer of the stove, and then leads to an avalanche-like accumulation of soot on the chimney channels. If you find a door, view or valve that does not close tightly, you should immediately repair or replace it.
- At least once a year it is necessary to carry out preventative maintenance on the furnace. It is best to do this at the end of summer, before the start of the heating season. A daily preventative procedure includes opening the blower door for 15–20 minutes. This simple action will allow you to briefly create maximum draft, which will pull the soot deposited on the walls into the external environment.
- The use of damp firewood has an adverse effect on the cleanliness of smoke ducts, especially in winter time. It is more rational to use fuel briquettes, the humidity of which is much lower. Firewood should be prepared ahead of time - wood drying in a natural way- the process is long (from a year to two).
Chimney cleaning and repair
For cleaning pipes they are used as traditional ways, and modern, based on the achievements of technological progress.
From time immemorial, stove maintenance was carried out by people whose profession was called chimney sweep. Today, finding a professional chimney sweep is problematic. They were replaced chemicals, which, however, are also often called “Chimney Sweep”.
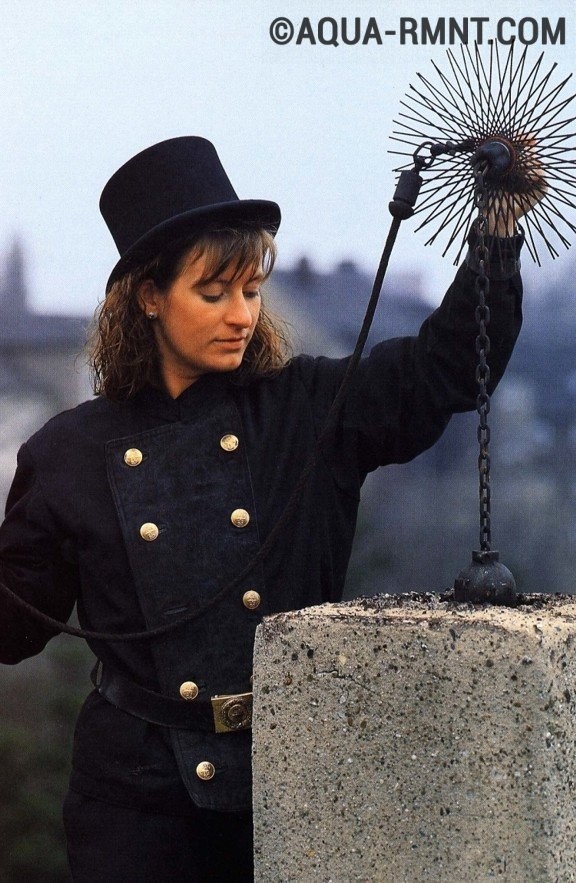
Finding a professional chimney sweep today is very difficult; this profession is a thing of the past.
Thus, a product called “Log Chimney Sweeper” has proven itself well. It contains copper sulfate salts and other active chemical compounds. Burning in the firebox, the vapors of these substances interact with carbon deposits deposited on the walls of the pipe. Under the influence of heat, the reaction continues for several weeks and leads to the fact that the solid structure of the soot crumbles and, falling back into the firebox, burns. According to manufacturers, using “miracle logs” twice a year allows you to completely remove soot from the pipe. The consequence of this is good traction and a high percentage of heat transfer from the furnace.

Manufacturers of the “Log Chimney Sweeper” product claim that its use twice a year allows you to completely clean the chimney of soot
From folk remedies the following can be noted effective ways prevention, such as burning salt or soda once every 2 months (about 0.5 kg per firebox). The powder is poured into the combustion chamber at the moment when the firewood is well lit and the temperature is at its maximum. After this, you need to close all the doors tightly, as the reaction can be quite violent.
Dry aspen firewood helps clean the chimney well. The fact is that aspen burns with a large release of heat, the flames are long and penetrate deeply into the passages.
If you don’t have aspen or soda, you can use potato peelings. To do this, you need to accumulate about half a bucket of potato peels. When burned in a firebox, the released substances bind the soot and cause it to burn to the end.

The combustion temperature of aspen firewood reaches 800 degrees, so the soot on the walls of the chimney burns out
When performing work on installing chimneys, especially in the area of installation of the neck, otter and cap, you should carefully observe safety standards. If you work carefully and follow necessary instructions and technology, brick chimney It is quite possible to fold it with your own hands.


