Repairing a one-room apartment like I did. How to renovate an apartment. I get my own practical experience
It all started in August 2004, when I decided to move into an apartment that my parents had been renting out for as long as I can remember. This is an ordinary one-room apartment, which is in a single-entrance brick tower. I decided - first I’ll do cosmetic repairs in the room, move, and then gradually update the whole apartment, because I’m in no hurry. That’s what I thought when I hadn’t seen the apartment itself, but I visualized the layout from my childhood memories when I was in this apartment last time, about 15-20 years ago.
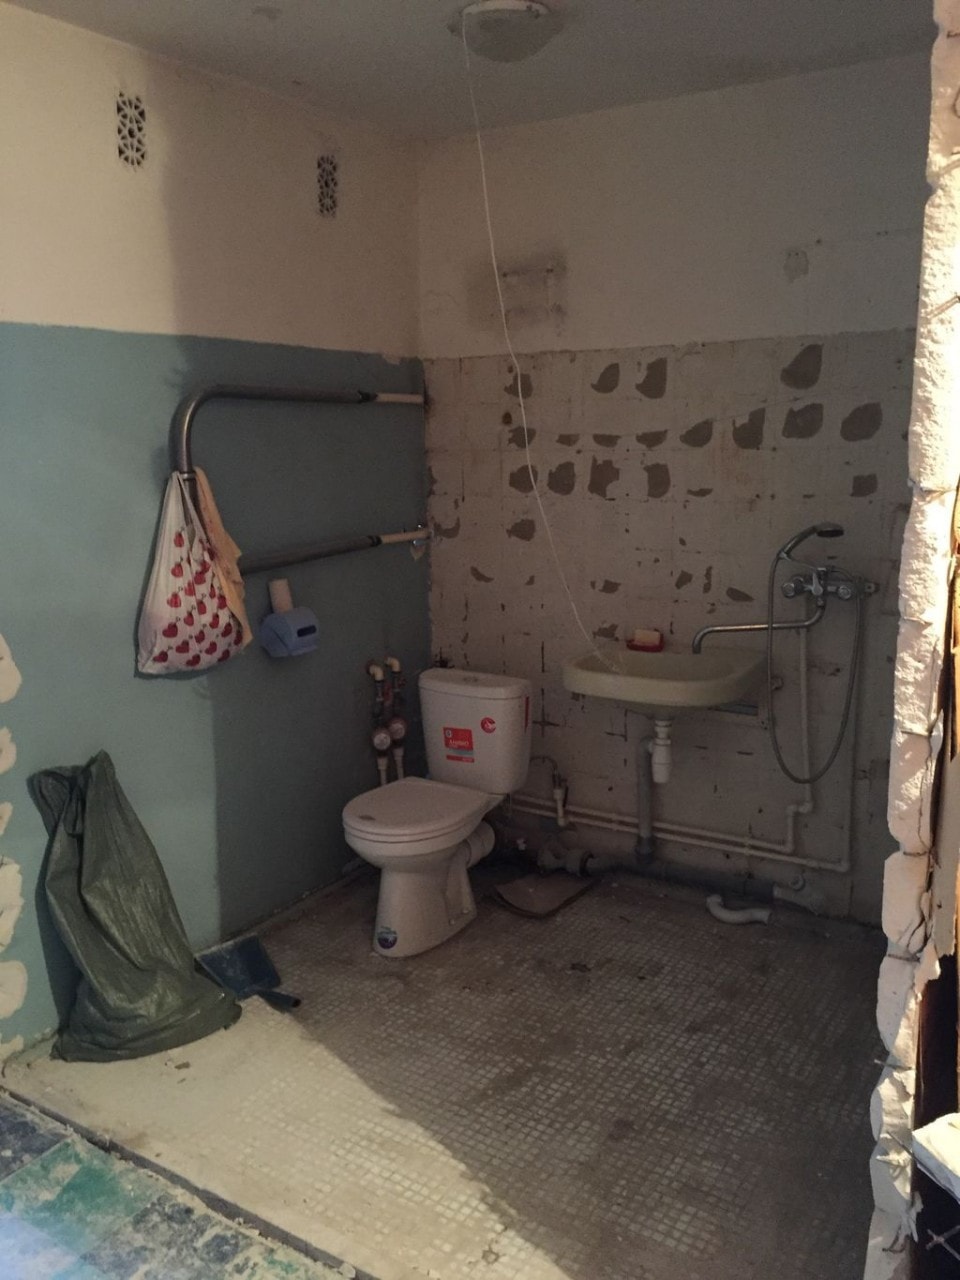
And then came the solemn moment of my meeting with the apartment into which I was going to move. God, what happened to me when I saw all this, but I felt even worse when I realized all this and estimated my expenses. I am describing the first thing I saw (for the sake of history, I captured everything in the photo).


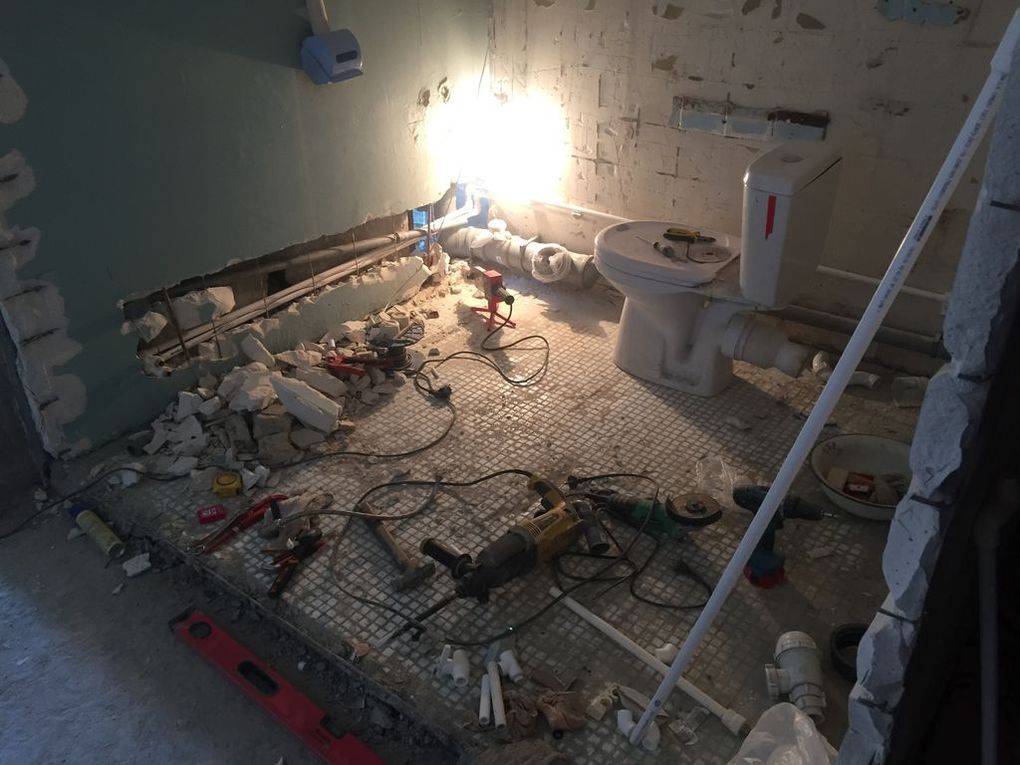
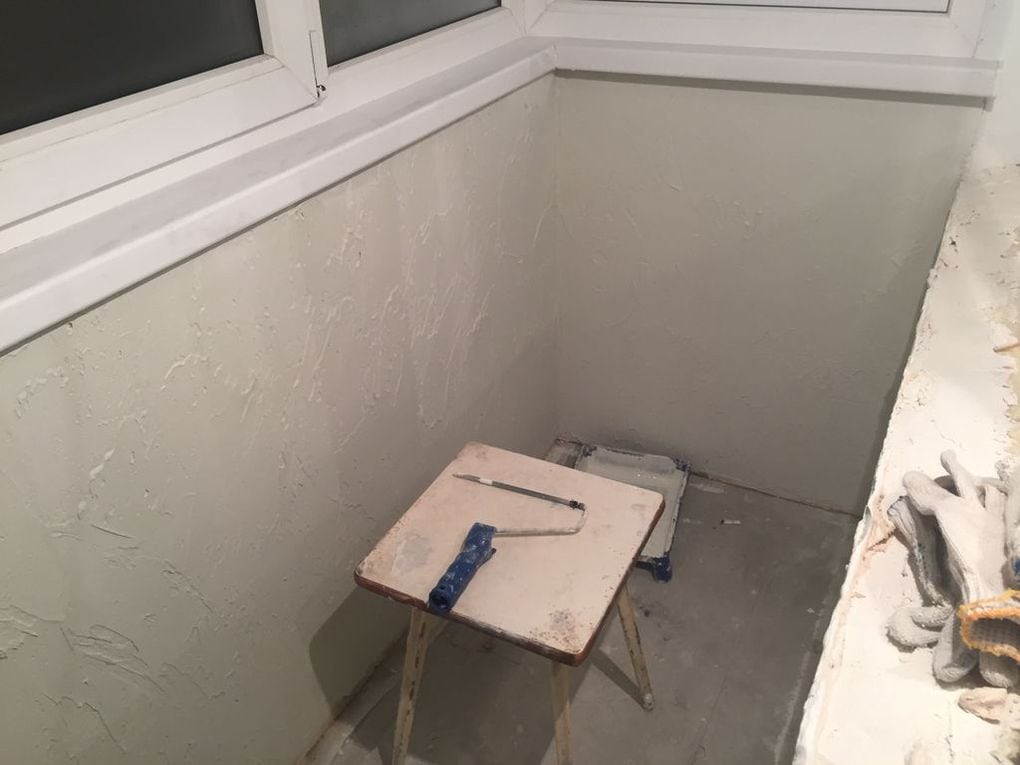
In the hallway, the linoleum looked like the sea during a storm. The wallpaper on the wall between the room and the kitchen was written on by a child and torn by a cat. Under top layer Another number of layers of wallpaper were visible. The wallpaper in the room was on the sand, I can’t say otherwise. It’s just that when they plastered the walls, they forgot to add cement to the solution. Later I found out that there had been no major renovations in the apartment for 30 years. In the bathroom, the plaster on the wall above the bathtub was rotten and there was a hole in the wall. The right wall of the bathtub was painted in green color and terrible pipes were attached to it. The toilet pleased with its yellowness and brownishness. The plaster on the kitchen ceiling was hanging in flakes. The linoleum in the kitchen was made from small squares that were peeled off on the sides and rolled up.
I figured it out......I need 5,000 tanks to put everything in order. I slowly went nuts as I drove home. Thoughts swarmed in my head that this was all very complicated, that I had never seen anything like this in my life, and that I didn’t even know what it was major renovation. And apparently, it was he who was destined for me. I mentally pulled myself together and told myself that life without problems is impossible and that everything can be solved.
I didn’t think long about where to get the money. I decided to contact the loan. Fortunately, I have already paid a large amount of money in my life and I know what it is. To begin with, it was worth deciding on the loan amount and finding out how much of my salary I could pay.
I surfed the internet and dug up a bunch of price lists from various organizations to get a little idea of the price order. I guessed it roughly on paper. I wrote a rough estimate for my apartment. I decided for myself that 250 thousand rubles. I have enough for my eyes and ears and for repairs and new furniture.
I can say that all banks give a loan, but at the same time they ask you to insure your life and pay the costs of drawing up the contract. It’s not surprising, but the cheapest loan was from Sberbank. All Required documents assembled in one day, no need to pay for anything. You just need to find two guarantors. Well, the salary must be official, and not in an envelope. I can say that don’t rely on quality of service. Sber agents will not run after you. If you want service, go to another bank.
Resigned to the idea of taking out a loan, I began looking for repairmen. To begin with, I wrote where repairs needed to be done and described what needed to be done, and sent it all to contacts in e-mail and ICQ. I called all my acquaintances and friends.
For a long time no one could help. But then a very good friend of mine called. Very good guy remodeled the renovation for her brother after some Uzbeks. His name was Evgeniy.
We decided to look at the apartment with him. He measured everything and discussed what I wanted to see as a result. He wrote everything down and said that in 3-4 days he would call and tell you the cost. But at the same time, he immediately said what material and how much would be needed for the entire repair. Here you need to write down all this and make it clear to the master that the amount of money is limited, and that if the cost of money on the specified materials exceeds 5-10%, then this will be deducted from the payment for his work.
Soon he called and told me the price - 3200 tanks for all the work without materials. Here it must be said that the total area of the apartment is 37 m2.
After meeting with the foreman and discussing all the nuances, we settled on 3,000 bucks for work without materials and without finishing windows and doors. The estimate was very approximate and was not signed by the parties. Subsequently, I really regretted it. Even if you trust your master 100%, the working conditions and estimate should be fixed on paper with the signatures of both parties. Then there will be fewer questions and problems.
It’s also worth immediately discussing what material the master buys and where, and what you buy. This is also important. I think that you should buy wallpaper, tiles, linoleum and carpet, because the master may not guess with the color and shape.
Regarding all sorts of such things, I can say that I bought all the plumbing fixtures and tiles from UMIKS Group - guaranteed low prices and you can buy everything at once. As for linoleum and carpet, you can buy leftovers or small defects at OBI at a big discount (about 20%).
It is better to buy wallpaper and all other materials at construction markets, which are located on the Moscow Ring Road or beyond it.
My friend, who does this for a living, changed the wiring for me. Everything is very high quality and conscientious. He had to pay him for the work, but much less if it was a person from the street. By the way, write, I recommend it.
Discuss with the master the schedule of his work. For example, it works from 9 to 19, all days of the week except Sunday. It is also worth clearly discussing the deadlines and establishing penalties for late payments. I called the apartment every day or every other day, and came there once a week to see that the work was moving. And for late payments, you can set a penalty interest of 0.1 to 0.5% of the amount you pay for the work.
It is worth discussing how you will pay the master for the work - in parts or all at once upon completion of the work. It turned out that I gave half of it when half of the work was not done. And after I said about the penalty interest, my master got scared and began to get impudent. He promised to finish the repairs by New Year 2005. Please note that renovations began at the end of November. On January 10, 2005, not even half of the work was done.
The most important thing here is not to lose composure. It turned out more than great for me. I really restrained myself so as not to yell at this three-story bastard and kick him out of the apartment with a kick in the ass. My conversation with him turned out to be long, but meaningful, calm and very tough. No things, documents, etc. they don't roll. Nowadays, only money rolls in and that’s all. Unfortunately, this is the latest and most powerful argument.
Well, this is all lyrics - but my repairs, with great pain, have finally come to an end. There were some minor imperfections, but they can all be fixed. Of course, I could force my master to finish all this, but I just really couldn’t wait to part with him. And if you compare it with what was before and after the renovation, then this is heaven and earth.
I wish you success in all your endeavors.
Repair in new apartment became a real test for me. There was everything from initial self-confidence to complete disappointment. Sometimes we even gave up, but in the end, the outlines of the living space gradually began to emerge from the “bare walls” of the new building. It all started with a simple dilemma - to hire a professional work crew or do most repairs on your own. Benefit self-repair and all the benefits, it seemed to me, were obvious to me:
I save a lot of money;
I get my own practical experience;
I’m not in a hurry, and I’m arranging my home myself.
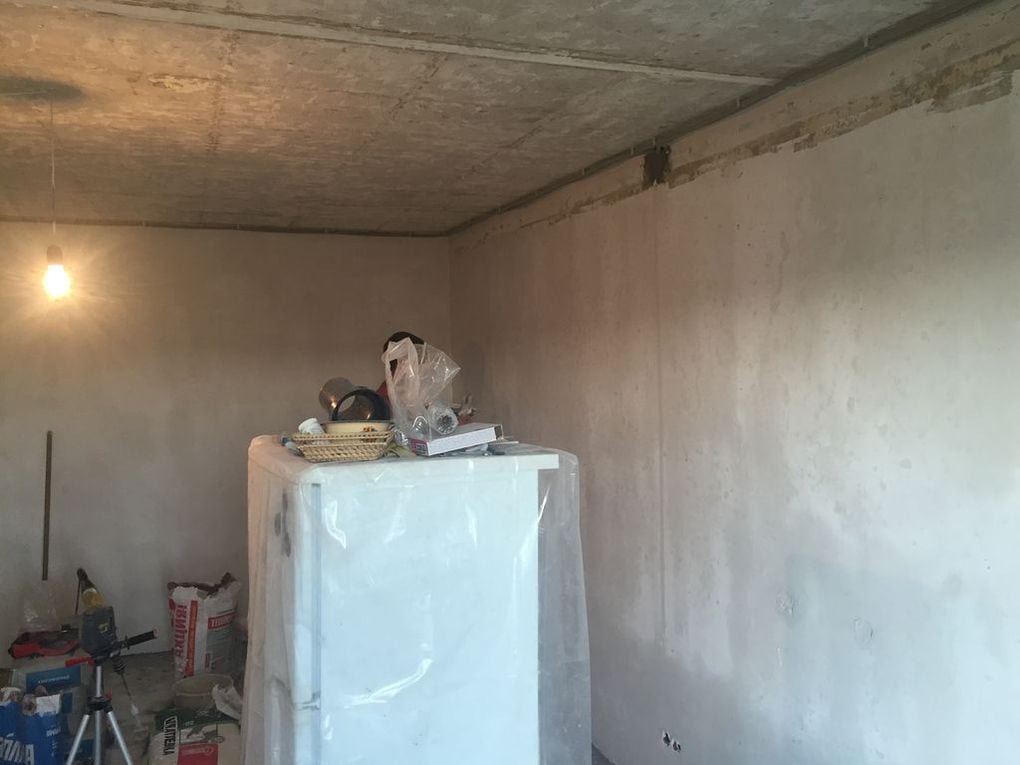
Another factor in favor of self-repair is the large amount of information on the Internet, where all work processes are clearly shown - from floor screed to installation of suspended ceilings. And judging by the videos, there really is nothing complicated. As a result, I started doing everything myself, and during the repair process I encountered a number of issues that I want to talk about and warn in advance people like me who are thinking of doing everything on their own, without experience and the necessary skills. There were no problems with the rough preparation of the surfaces; fortunately, in the new panel building the walls, floor and ceiling turned out to be quite smooth, and it took very little plaster, sand and cement to bring everything down to level. Below I will describe the main problems that I encountered when making repairs.
Electrics
It all started with planning the electrical wiring. I began to understand the importance of this stage closer to the stage finishing cladding surfaces, but first I just figured out how many sockets and switches I needed, and started installation work. The main problems that “surfaced” after the repair:
- number of sockets. I miscalculated a little and installed the minimum number of outlets - one in the hallway, one in the living room, two in the bedroom and four in the kitchen. As a result, after the renovation was completed, it became clear that this quantity was simply not enough. I had to solve the problem with the help of extension cords, but this is not practical at all, and it looks terrible. I definitely regret that I didn’t install a dozen more sockets;
- placement. I mounted all the sockets almost flush with the floor. This turned out to be quite a big problem, especially when installing skirting boards, which are almost the same level in height as the sockets themselves. Now, when I wash the floors, I always make sure that I don’t accidentally hit the sockets with a wet cloth. By the way, a lot of dust accumulates there. As a result, it turned out that the optimal option for installing sockets is approximately 30-35 centimeters from the floor;
- circuit breakers. Here I did not take into account the electricity consumption of individual devices - on the central panel I installed a machine only for the washing machine and air conditioner, and also connected a separate relay to the room. And now, in fact, you have to choose whether to use a kettle or a vacuum cleaner, because when turned on at the same time, an overload occurs and a protective shutdown is triggered. Don’t repeat my mistakes and install machines not only in each room, but also on sockets where powerful household appliances will be connected;
- I did not provide an outlet on the balcony, and now it has become an inconvenience. The ironing board is in the room and takes up a lot of space when unfolded. I had to move it to the balcony, and I constantly carry an extension cord along with the board and iron. The door from the balcony to the room, of course, does not close during ironing. When it’s warm outside, there are no special problems, but in winter, despite the insulation and glass balcony, the cold penetrates the apartment;
- I also miscalculated the width of the cable channel. It only contains wires from the meter in the hallway that go into the apartment. I was going to connect cable TV - I had to lay a new cable channel in parallel, and this clearly did not add beauty to the inside of the apartment.
Electricity - this was the most difficult and important stage of my repair. Unfortunately, I still feel the consequences of my shortcomings. It was not me who did the wiring from the panel, but an electrician I knew, but he just came and powered everything, as I told him. There is nothing to blame the electrician for, because he was just doing his job.
Floor coverings
Choosing floor coverings was another challenge during my DIY renovation. Naturally, I wanted to save money and not invest a lot of money in the floor, so the choice fell on inexpensive and more or less high-quality floor coverings. And this is what the “masters” recommended on the Internet. Here's what it turned out to be:
- linoleum in the kitchen and hallway. It seems practical, but it looks terrible, especially with a white ceiling. It feels like I have returned to the Union. I’ll wait another six months and install laminate or linoleum instead. floor tiles. In addition, the furniture began to press through the linoleum, apparently I did not calculate the strength and wear resistance class when purchasing. The construction market recommended me a particularly durable semi-industrial linoleum, but I decided to save money and bought standard option, since it turned out to be significantly cheaper;
- carpet in the hall. This was the worst mistake. I paid little money, installed it quickly, and it looks good. The problems started during cleaning. Due to the fact that the carpet has a rather high pile, the vacuum cleaner simply wouldn’t pick it up, and I’m generally silent about the broom. Over a short period of use, so much dirt and dust has accumulated inside the coating that it becomes difficult to breathe. Now “thanks” to the carpet I had to buy an expensive washing vacuum cleaner, and do a full wet cleaning at least a couple of times a week;
- bathroom floors. Everyone knows that there should be tiles there, but not everyone will answer the question which one. You should start with the color scheme. I laid a light bed, now I can see the slightest dirt, which is very annoying. The second point is the problem of gloss. Looks simply gorgeous, but barefoot wet feet it is impossible to become - very slippery. I had to buy a rubber mat and cut it to size. It doesn't look nice.
Kitchen and bathroom arrangement

For me, these two rooms turned out to be the most difficult in terms of arrangement and surface finishing. I really regret that I did not take into account some points:
- I didn’t provide outlets for the heated towel rail, now I really regret it. A damp towel and bathrobe you have to hang it on the balcony, and this is not always convenient, especially in cool times, when you come out of the bath steamed. And it takes a long time to dry;
- For a long time I could not understand why a little water sometimes accumulates near the drain hole in the bathroom. I thought that the shower head was leaking, but it turned out that there was a slight problem with the natural drainage. During installation, I installed the bath strictly parallel to the floor, but I had to tilt it at least a couple of degrees towards the drain. Outwardly, this is not noticeable at all, but the water would leave 100% without any residue and would not stagnate;
- The space under the bathroom was completely bricked up. First I used moisture-resistant drywall, and tiled everything on top. During operation, I encountered one problem - the bathroom is quite small, so there is nowhere to store all sorts of basins and other utensils, otherwise everything would fit under the bathtub. I'm afraid to think what I'll do if a blockage forms - I'll have to open and break all the beauty.
I also made a number of mistakes in the kitchen. The most global one - I didn’t think through the initial location of the main communications (water, electricity), so I had to order furniture and do the layout after the fact. As a result, between hob and the worktop is the sink. It is very inconvenient when you cook - there are too many body movements. First, the food is washed, and then you need to leave the sink to clean and cut it. After this, you again need to go to the stove, bypassing the sink. It's terribly inconvenient.
conclusions
Many problems arose from my self-repair, against the background of which all my saving of money and pride in the fact that I did most of the work on my own faded. I would like to recommend contacting specialists who have extensive practical experience in repair work. Better yet, hire a designer in the first place. A professional will always tell you, not only in what color scheme it is worth finishing a specific room, but it will also offer best option floor coverings, the location of sockets and switches, and will also give a mass practical advice. Some simple processes can be done independently - there is nothing particularly complicated in painting pipes or screeding a floor, but wiring engineering communications and redevelopment should still be entrusted to specialists, so as not to suffer from inconvenience later and not to invest additional money on remodeling.
The competition “My Housing” continues! The winner of the first stage has already been sent a coffee maker, and the editors are receiving new stories. The author of another story is a young Minsk resident. Having spent all the money on building an apartment, he decided to do the renovation himself, although he had an idea about it only from programs like “The Housing Question.” “Judge for yourself what I have done. But the taste and color, as they say... The main thing is that my girlfriend liked it.”, writes bender80.
Despite my “golden” parents, I somehow decided that it was time to move out. The question is where. I didn’t have any grandparents who inherited an apartment. I don’t have the slightest desire to pay a lot of money to some “uncle” for rented housing. That's when I started thinking about my apartment. As soon as I went to real estate websites, my ardor immediately cooled. The apartment on the secondary market plus renovations amounted to such a sum that this option was rejected immediately. I was not in need and did not apply to get into the housing cooperative, so there was only one option left - shared construction.
But the prices for new buildings were also high, and I couldn’t afford a big loan. But I was lucky. I found one ad: “Apartments in an ecologically clean area, price from $820”. I estimated the area of the apartment and the price per meter - it turned out to be about 33,000 USD. e. It seems not bad!
The next day I called the agency, where my ardor calmed down a little. It turned out that the price was indicated for a 3-room apartment, and the one-room apartment cost 980 USD. e. for a “square”. But the most interesting thing is that the house turned out to be 300 meters from my parents’ apartment, in my area, where I grew up, went to school, and everything was familiar, sweet and dear to me.
There was no money for full prepayment, and at that time there were only two apartments available. On family council it was decided that we had to take it and take it immediately, there might not be another chance. The process of collecting money has begun. I sold my car within a day and, taking into account savings, it came out to something like 23,000 USD. e. About 10,000 USD. That is, parents gave and relatives lent for the remaining 7,000 USD. That is, I had to take out a loan at extortionate 17%.
So, the amount was collected, the developer got everything he wanted, and honestly earned his money. Six months later, I held the treasured keys in my hands and, with a sparkle in my eyes, walked up to my 10th floor (the elevator had not yet been connected).
Let me make a reservation right away: I have nothing to do with repairs, construction, or any engineering or technical professions at all, and I only had an idea of how to do repairs from gears like “ Housing problem" and " School of Repair ". Considering the lack of money with which to hire workers, since all income was spent on paying off debts, paying off the loan (which at that time was already considered to be 30%, and by the end of the year at 52%) and purchasing building materials, I decided to do everything with your own hands.
What did we have at the beginning? "Odnushka" with concrete walls: room of 17 sq. m, kitchen - 9 sq. m, combined bathroom - 4.5 sq. m, entrance door, door to the kitchen, toilet, rotary tap in the bathroom with external pipeline, glazed loggia and gas stove in the kitchen.


I decided not to bother with the front door, since thieves have nothing special to take from me, and besides, I agreed with my neighbor to install good door into the vestibule.
I immediately started doing the dirty work. I moved several switches, since they were inconveniently positioned, and installed an outlet in the bathroom. Global electrical work such as replacing wiring, lowering sockets and switches to European standards was not undertaken, since this is considered a redevelopment, and the game for the first apartment was not worth the candle. In the bathroom, I hid the open part of the pipeline in a groove and made wiring for 2 taps - separately for the bathroom, separately for the sink. Also from plumbing work I had to change the heated towel rail - it did not stand up to any criticism, and at the same time I got the opportunity to disconnect it from the general riser. This is all the work that hired craftsmen did for me; they cost me about 200 USD. e.
Then he rolled up his sleeves and got to work with his own hands. It was lucky that the house was assembled to surprisingly high quality; there were no large differences in level or blocked walls and corners. I started priming and puttying from the walls, and not from the ceiling, contrary to the recommendations of the repairmen, but not contrary to common sense. Since I had no experience in this matter, I decided to practice my skills on the walls, because they would still end up under the wallpaper or hidden behind the furniture, and on the ceiling any flaws would be immediately visible in full view.
This work turned out to be not so much hard as long. The fact is that I immediately tried to achieve perfect smoothness, without thinking that all the small flaws would be removed during subsequent sanding. After several weeks of my efforts, the walls surrendered to the mercy of the winner, and I moved on to the ceiling.
I wanted to paint the ceiling. I found the technology on the Internet, all that remains is to bring it to life. The experience of puttying had already been worked out on the walls, and the sticker of fiberglass (aka “cobweb”) did not cause any particular difficulties, I just had to call a second person for help. Despite the fact that the area of the ceiling was significantly smaller than the area of the walls, it took quite a lot of time: two layers of putty, a “cobweb”, three layers of primer, plus sanding, gluing the baseboard, painting in two layers and technological breaks for drying took a total of about a month (worked only on weekends and for a few hours in the evening on weekdays).
The next stage is tiling the kitchen floor. The tiles were purchased in advance, while the house was still under construction, and all this time they were waiting in the wings in the garage. I already had masonry experience - as much as 7 square meters. m on the parents' balcony! No problem, I figured it out. In 2 weekends the tiles were laid and the seams were grouted.
Another weekend was spent trying to figure out how to tile the bathroom. The fact is that I didn’t initially intend to tile the walls, and the tiles for the floor were purchased six months ago. Luckily, I was able to find the same collection, but it had 2 types of background tiles and 4 types of different borders and patterned tiles. So, the whole weekend was spent trying to figure out exactly how to arrange them and calculate how much to buy. To do this, I had to draw all 6 walls of my bathroom in Photoshop and lay out all the tiles on them individually. Long and tedious? Yes, I don't argue. But the easiest way to do something is to do it the best way you can. But I found out how many tiles I needed, and I had a drawing that was very helpful for further installation.

The tiles were counted and purchased with a reserve for the unexpected, and I locked myself in the bathroom, and my parents, who had been itching to help with something for several months, were finally allowed into the apartment. And I gave them this opportunity. They started wallpapering the walls.
The work began in full swing. I didn’t see how the walls were pasted, I only heard comments made to each other, coming from behind the door with enviable frequency. I plunged headlong into the cladding. The floor didn’t cause any problems, it’s not that big in area, and the kitchen was too busy. Wall cladding also turned out to be a solvable matter. The hardest part was to draw a horizontal line around the perimeter of the entire bathroom. The hydraulic level came to the rescue!
Cladding technique vertical walls, I think we still need to describe it, at least in a few words, maybe it will be useful to someone. After the horizon was drawn, a strip was attached along the entire perimeter, on which the first row of tiles lay. Thanks to the lath, the tiles did not slide down - this is firstly, and secondly - the horizontal seams on all the walls were at the same level.

The real stumbling block was the screen under the bathroom. I didn’t know what to do with him. Of course, it was possible to buy ready-made plastic or metal, but they appearance left much to be desired. Lay it with bricks and then tile it? Yes, it will be beautiful and in the same style. What if there is an accident and you have to climb to drain siphon or sewer pipe? What then? Break up the masonry? To be honest, I got the idea from a neighbor. He stuck it on furniture board tile, attached legs to it and made such a screen. Appearance - like monolithic wall, but if necessary, it can be dismantled in a few minutes. I brought my own rational grain into the idea and made the screen as follows. I attached height-adjustable legs to a wooden frame and covered it with moisture-resistant plasterboard. The latter was treated with a moisture-resistant primer, and the tiles were glued on top with liquid nails. As operating experience has shown, my technology turned out to be more practical, because the neighbor’s furniture board began to pick up moisture, became deformed and half of the tiles cracked. My design is like new. The tiles took another three weekends, plus the time I worked in the evenings.
When I fussed the last seam and looked at my handiwork, I realized that in such a bathroom, the ceiling made of siding, which I was thinking about at the beginning, would look at least ridiculous. I wanted a normal ceiling, preferably made of plasterboard, with built-in lamps. To begin with, the Internet helps me. Half the night flew by unnoticed, but in the morning I had calculations about what I needed to buy, and my meager vocabulary was replenished with new words: ceiling profile, guide profile, suspension, “crab”, etc. I already spoke in the store with the seller in the same language and I didn’t make big eyes when I heard these terms. The most fun was dragging 2.5-meter sheets of drywall up the stairs to the 10th floor.
The drywall was purchased, naturally, moisture-resistant, and, naturally, it was treated with both putty and moisture-resistant primer. At the same time as the ceiling, a stand was also made between the toilet and the bathroom. But that's a different story. A lot of time and nerves were spent on it, because the parts were ordered from three different places, glass shelves were redone, because in the workshop, you see, they forgot to sandblast. But all's well that ends well. A few more weekends passed - and the ceiling and stand were ready.


By that time I was also ready - ready to send everything to hell. And the renovation, and the apartment, and all together! After all, for more than three months I saw nothing but work and repairs...
I didn’t show up there at all for two weeks. By the end of the third week, my hands were itching again. After all, there were essentially mere trifles left - to lay the laminate flooring, screw on the baseboards and mount the portal to the room. Here my father helped me, who had already laid laminate flooring in his apartment.
Arrangement soon began. The chest of drawers arrived and was assembled, and a wardrobe was ordered. At first I was going to make the cabinet myself, but I changed my mind. This is not putty that can be lubricated. Here, if you cut something wrong, you can’t sew it back on. That's why I ordered it from the company. L-shaped wardrobe, on the long side - rods for long and short clothes, mezzanines and a shelf for shoes, on the short side - shelves and a mirror swing door. They did it two days earlier than they promised and assembled it perfectly. There is nothing to complain about.


Snuck up so unnoticed New Year. On January 3, the elevator was connected, and on January 5, I already spent the night in my apartment!


After moving in, the only major investment was the kitchen. I didn’t want to build a very expensive one, because I view my home as a step to something more suitable for family life. Therefore, I don’t see the point of spending a lot of money. The kitchen was only suitable for a corner kitchen. I went to ask the price. The stores only had kitchens in a row, and corner ones to order cost good money. Therefore, a compromise option was chosen. I bought a regular kitchen for Chipboard sawing I ordered parts for another cabinet, changed the tabletop and through simple combinations, saying “Sim-salabim Rahat ibn Lukum” turned an ordinary kitchen into a corner one. By the way, for a kitchen with exactly the same facades, one of the companies asked for three times more money than I got.
Wallpaper - 250 USD e.;
tiles - 450 USD e.;
putties, primers, glue, paint, drywall, ceiling skirting boards, profiles, small tools (spatulas, rollers, etc.) - 1000 USD. e.;
wardrobe - 650 USD;
kitchen with new countertop and cabinet parts + sink + faucet - 600 USD. e.;
counter in the bathroom (pipe, glass and wooden shelves, fastenings) - 80 USD. e.;
chest of drawers - 100 USD e.;
bathroom (faucets, heated towel rail, shelf with mirror, bedside table with sink) - 450 USD. e.;
door to the bathroom - 10 c.u. e.;
portal to the room - 130 USD e.
Total: about 4000 USD. e. and 5 months of work on weekends and free evenings ( exact figure Unfortunately, I cannot give it. Although all the receipts have been preserved, due to the constant change in the exchange rate in 2011, it is adequate to convert everything into currency. e. is not possible).
At the end of my story, I want to say: don’t be afraid to do anything yourself. The eyes are afraid, but the hands are doing. All technologies and even videos can be found online. The main thing is to get it good tool. IN panel house You definitely need a hammer drill for laminate and parquet board A jigsaw will come in handy; for tiles, in my opinion, it is better to use a tile cutter rather than a grinder (less dust, dirt and noise), and a screwdriver will never be superfluous. In any case, you will not do everything, but you will certainly do a lot better than some worker, because you will do it for yourself, and therefore conscientiously.
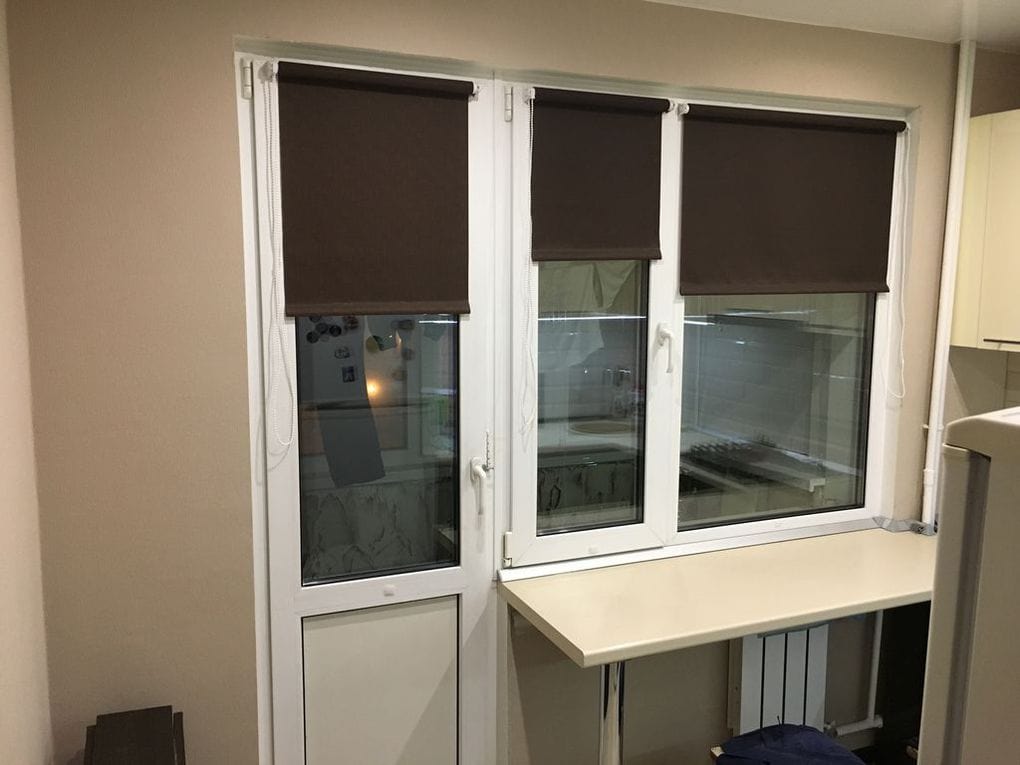
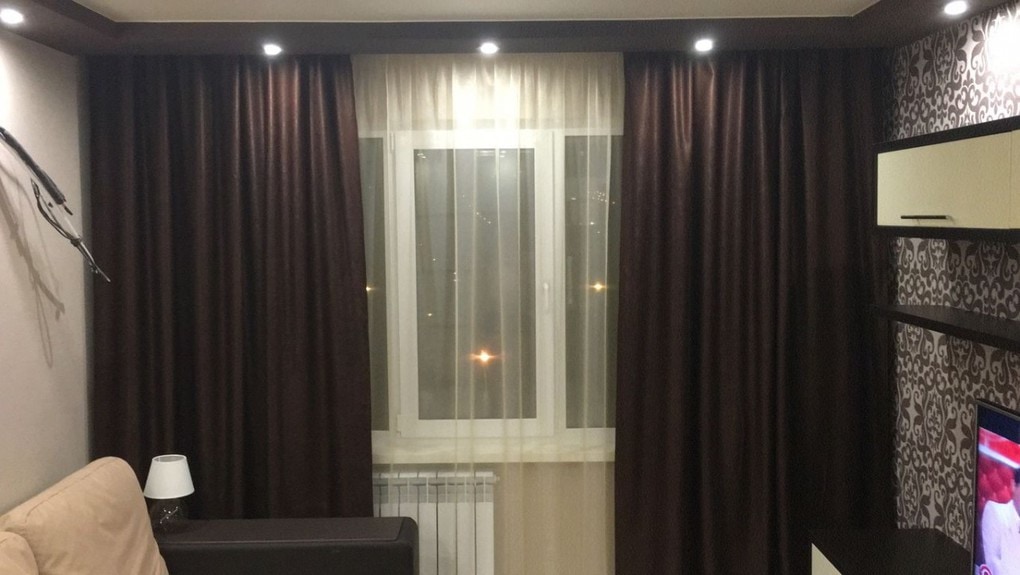
P.S. No curtains in the room? So what. Maybe a little uncomfortable, but I like the rays of the sun that wake me up in the morning.
P.P.S. And don't ask questions about the cat. I don’t like cats (or maybe I just don’t know how to cook them :)).
From the editor. We are waiting for your stories about your apartments and houses on [email protected] .
4 years after the completion of the renovation, when passions have subsided, strength and nerve cells have been restored, I can calmly show and talk about personal experience renovating your apartment. The renovation began in October...
4 years after the completion of the renovation, when passions subsided, strength and nerve cells were restored, I can calmly show and talk about my personal experience of renovating my apartment.
The renovation began in October 2008, we moved in at the end of December 2008 with one unrenovated room, we moved in without installed doors and no ceilings. The renovation was completed over the course of a year, and it was completed.
We didn’t have a designer, we came up with everything ourselves, and did the repairs ourselves (they hired us for several jobs that we couldn’t do ourselves), although we weren’t builders by profession.
Brick-block-panel 17 storey house BS-17 series. Two-room apartment, 59 square meters without loggias, separate bathroom, all load-bearing walls, two loggias. In picture No. 2.
They didn’t invite designers, they came up with everything themselves. And although in general they did it quite thoughtfully, some mistakes could not be avoided. For example, we wanted to install the front door from the NEMAN company, with good class protection, thousands for 55 Russian rubles (at 2008 prices), but its production and installation took a month. We couldn't wait a month because we just took a vacation to do the renovations. The door to the apartment was just made of cardboard, it didn’t close, it was impossible to leave building materials, and we quickly ordered a simple one in 3 days metal door, with regular black dermantine, for 9 thousand, temporarily. So she stayed with us. Everything temporary often becomes permanent.
Of the mistakes I can definitely name the choice acrylic bathtub with jacuzzi. A Jacuzzi is evil for the owner. Keeping the system of tubes clean, in which water stagnates and dirt and germs collect, is problematic. Take a bath with a jacuzzi - please, just please spend half an hour first rinsing the system with bleach or Domestos, then rinsing and rinsing. So much water, so much time. No, I will NEVER buy a jacuzzi again. And the bathtub is just a simple cast iron one.
From our right decisions I can note a well-planned and thought-out electrical and plumbing system. I had to change all the windows and radiators in the house, initially installed windows they blew it out, the batteries did not heat well. Over time, all the neighbors came to the same conclusion, and almost all the radiators and windows in the house were changed. We thought out places for air conditioners in advance and did the wiring. We installed air conditioners in the fall of 2009, and in the summer of 2010, in the heat and fires, we were very happy.
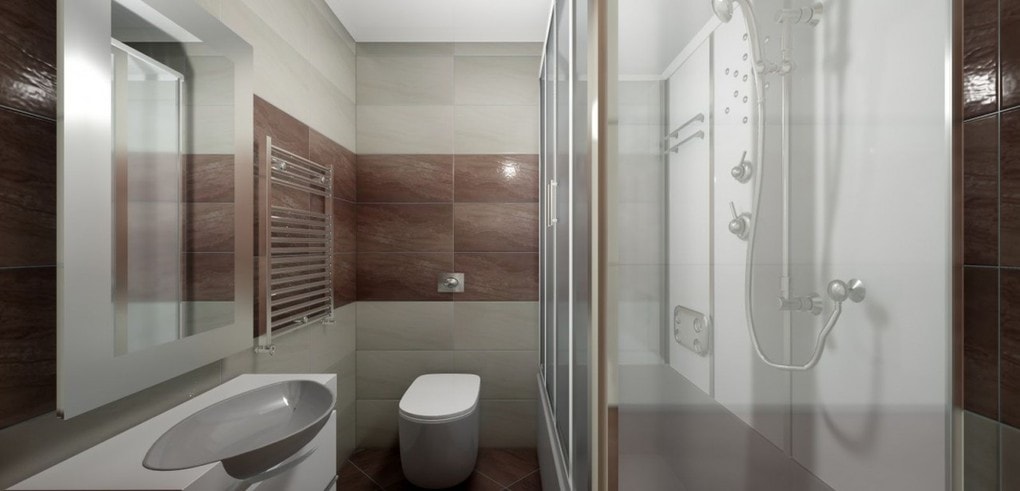
The ceilings are stretched, made in France, in the kitchen and toilet they are glossy white, in other places - matte white. There is class 33 laminate on the floor, tiles in the kitchen, tiles in the bathroom and toilet. We have heated floors under the tiles. Yes, heated floors are great, they appreciated it when a small child appeared.
My husband and my father did the work. They are both jacks of all trades. We did the electrical and plumbing ourselves. The electrical acceptance inspector highly praised the quality. The batteries were fixed for us by a local plumber, Armen. The walls were leveled and plastered by two Tajiks, Gena and Sasha:) By the way, I also had a moment with them, like “Our Russia” in real life. The guys from the company installed the ceilings for us.
We didn’t have any problems with suppliers. They delivered and installed the windows on time (and we did not order them right away, but in parts, there was not enough money), they delivered and stretched the ceilings within the agreed time frame and on the dates we needed. Everything was normal with the Tajik workers. By the way, I will call them again to plaster the new apartment, it was these Gena and Sasha who did excellent plaster for us, and, not knowing Russian well, Gena clearly explained to me that we must follow the technology and let the walls dry, otherwise “it will be bad, owner.”
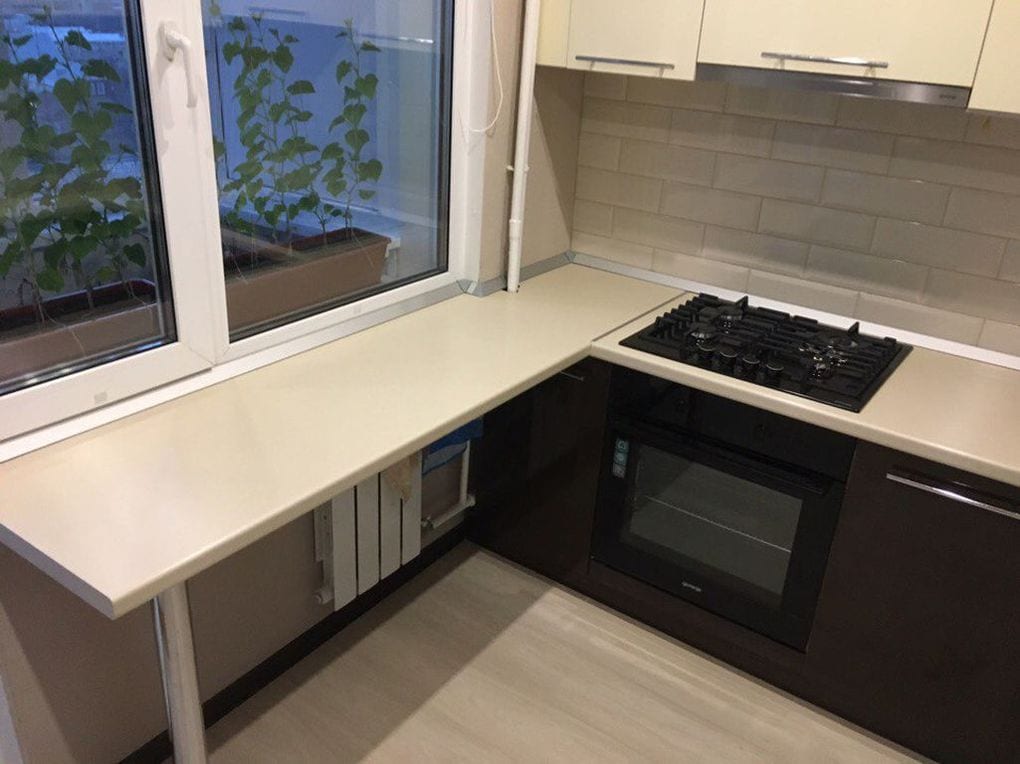
We combined the loggia with the kitchen. I agreed on the redevelopment project before the renovation began. All the calculations were made, the project included calculations of the thickness and materials for insulation, and now we have no problems with the dew point and so on. The house provides for single glazing of the loggias, and it was done. There is no gas in the house, only electric. The wall between the loggia and the kitchen was made of foam blocks; it did not reach the floor by 2 cm; the gap was foamed and plastered. Therefore, the wall was completely demolished. The result was a forge of about 15 sq.m. instead of 9 sq.m. We had to move the battery and turned it towards the loggia. We insulated the loggia, installed heated flooring in the loggia area, and heated flooring in the kitchen area. They hung an extra one electric battery just in case. It turned out well. Warm, light, and spacious.
Wallpaper was hung in the bedroom and living room. The rest was painted. The furniture was taken from IKEA. The kitchen turned out to be parallel.
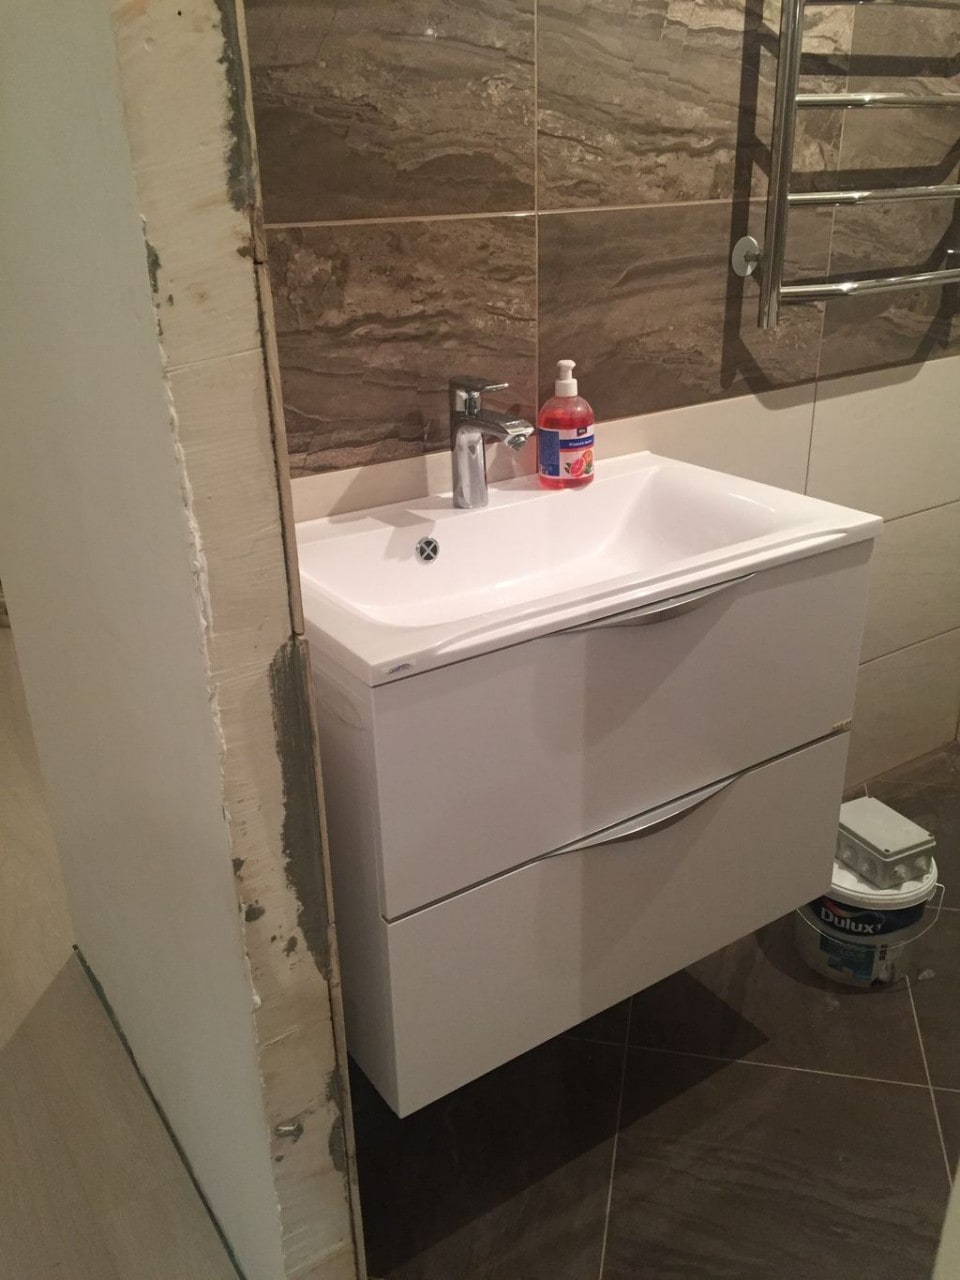
They installed Bamboo tiles in the bathroom; I saw other options on the website.
We will do the next renovation in our new apartment according to a design project. I'm already cooking technical task. I came to the conclusion that saving on a designer leads to unnecessary headaches and unnecessary costs later, after the renovation, when you start arranging furniture; Without a design project, it’s difficult to navigate a building materials store. In fact, the designer has to do the work himself. But as a non-professional, it’s much more difficult. You can argue a lot about who the designers are and who is a professional and who is an amateur, but personally I will go by my instinct. The result is important to me. I think asking designers for free advice is simply unscrupulous or a desire to get a free ride, because people work and need to feed their families. I’ll order a project, and I really want something in the Russian style or with a stylization of the Russian style, however, I don’t know how this can be done, because I have never seen such projects from anyone.
The photographs were not taken for magazines, but in an ordinary residential setting, if it offends anyone, I'm sorry.

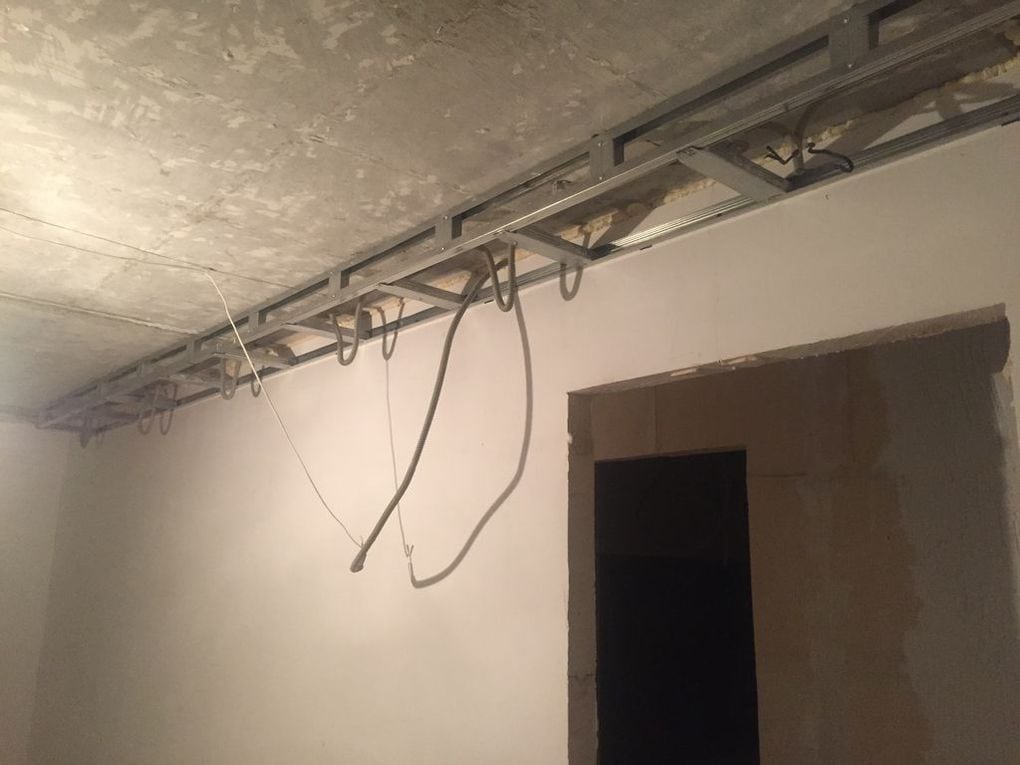
Start of renovation: rough work. Grilling, electrical, screed, plumbing. The wiring was run along the ceiling. If something needs to be replaced, we will remove it. suspended ceiling and replace it. The neighbors put the wiring tightly into the floor screed, in our opinion, this was risky, especially since for the first two years we had voltage surges in our sockets from 110V to 330V, we measured them ourselves. Then we saw that the corrugations in which the wires were laid along the floor were simply broken during repairs by the workers’ feet, and they did not fill the wires in the corrugation, but simply the wires in the broken corrugation. Due to power surges, our microwave burned out, and our neighbors’ refrigerators and TVs burned out. Some neighbors saved on electricity, installed Russian automatic machines, which burned out a month after moving in, and sat without electricity for a month. We didn’t save money, we paid straight away for expensive machines and haven’t regretted it yet.


In the photo there is a toilet, we have done waterproofing, a toilet on the installation, installation under the sink, structures for drywall are already ready.

Cardboard labels were attached to the wires to avoid confusion.

Even if you don’t have money for an air conditioner, I strongly recommend preparing the grooves and wiring in advance. Then it will be dirty and expensive.

It took us almost 1 week to finish the walls. continuous operation and about a dozen diamond discs, since the walls were simply tooth-breaking and could not be torn through.

This is what the apartment looked like at the beginning of the renovation.

We bought a 50 liter boiler and actually lived with it for the first year, hot water did not have.
They even made extra plumbing. Faced a problem rusty water(lots of iron). If we were doing it now, we would immediately plan convenient hatches for large filters.

Kitchen with a wall already demolished. The redevelopment has been approved.

Kitchen before the wall was demolished. I suggested taking out only the window and door, but my husband was more radical - they took out the entire wall.


Hallway. View from the bedroom.

My husband assembled such a structure for plumbing and hung it in the toilet, behind a large hatch. The photo shows the prepared workpiece. Then they brought her to polypropylene pipes from different consumers (bathtub, sinks, washing machine).

The bedroom stood for about a year without renovation, simply covered with polyethylene.

View of the hallway from the hall. Entrance door-- cardboard, on the wall there is a temporary panel for 2 sockets (electrical entrance to the apartment).

Hallway. The space was expanded with mirrors.

Kitchen. View from the hallway. To the right of the entrance is a large refrigerator and freezer and storage cupboards.

Kitchen. Working surface. The walls are painted with kitchen and bath paint, Sultan color. The paint apron lasts for 4 years. My husband promised that if I really needed it, he would lay out a tile apron for me. He’s not posting it yet because it’s not necessary.
More photos of the 2013 kitchen. It’s a normal work environment, we have a heated floor, for drawing I spread oilcloth on the floor and give paints to the child. We bought a couple of chairs with a black and white floral print, hung a couple of African-inspired paintings, and put down oilcloth in cheerful colors. There are usually two bears sitting on the sofa, a red one and a white one (in the photo they are lying around).


They put restraints on the furniture because of the small child.

As I wrote, the kitchen is parallel. Now I see that magnets on the refrigerator and bags spoil the appearance. I'll try to solve this problem. It's useful to look at yourself from the outside. On the refrigerator and freezer, under the cabinets, there are children's paints, paper, pencils, plasticine, in general, what children need every day. The location was chosen historically, it happened during the operation of the apartment and it took root. Doesn't look very good, I should think about a few boxes.


Hall. Sofa from IKEA. This is what the room looked like at the beginning of our stay.

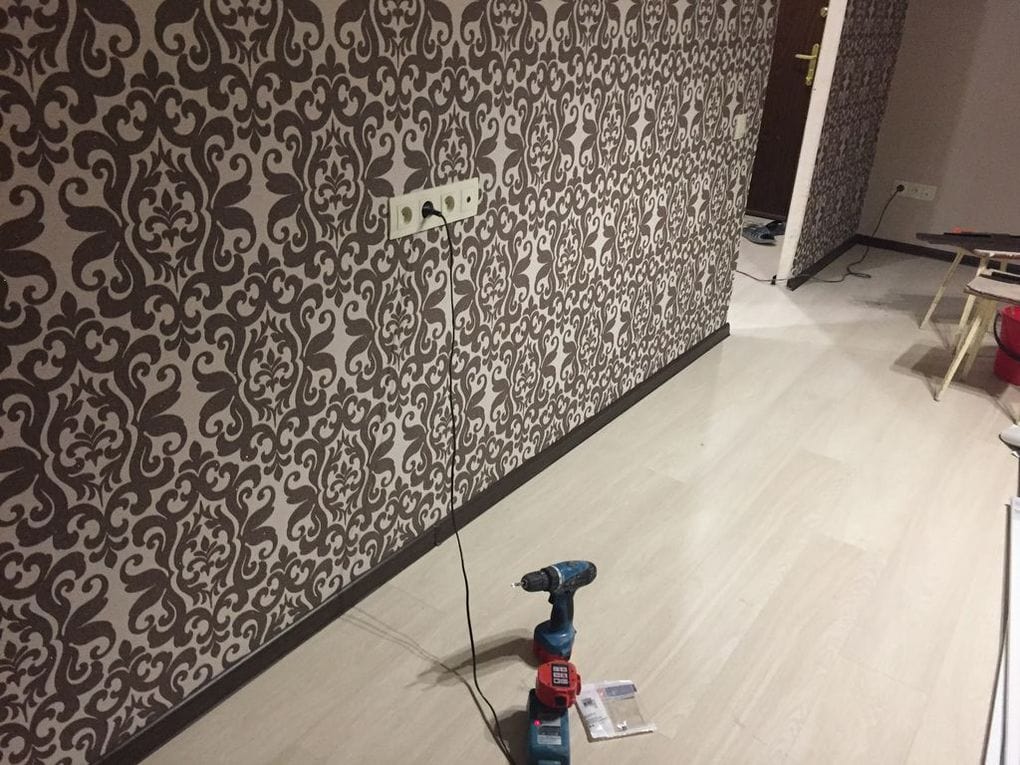
Hall. We already live as a family. Wallpaper Zambaito Marazzi.

Bedroom. Renovation in progress.

Bedroom. The loggia is also undergoing renovations. The loggia was covered with plastic panels.

And we completely took out this wall in the kitchen. All around the perimeter.

View from the entrance to the hallway, part of the hall is visible. The walls were immediately prepared for paint. Paint colors sea wave, took it to Leroy Merlin. When painting, at first it was a terrible dark blue glossy color, a neighbor looked in and was horrified, we were scared too, but the paint dried and became a noble matte Blue colour. It's very refreshing when you walk out into the hallway. Over time, I put light green flower pots on the chest of drawers, it turned out fresh.


Bedroom. IKEA wardrobe.

Toilet. As you can see, there are no tiles on the walls. The walls are painted. Warm floor under bamboo tiles.

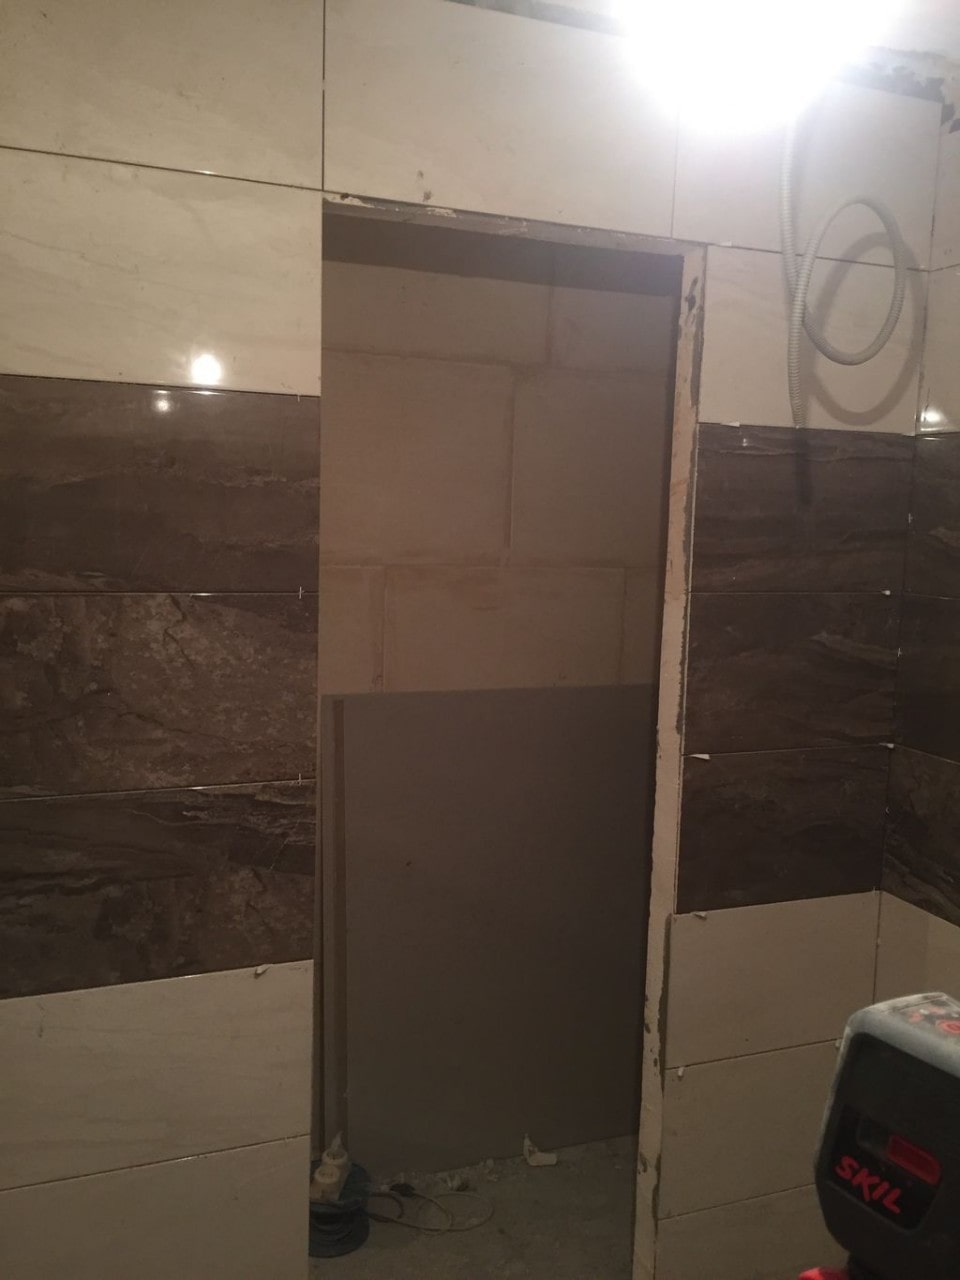
I have several problems in the bathroom. Firstly, the edge between the bathtub and the wall began to move away. This can be seen in the photo. We don’t know how to seal it now, we did it conscientiously, very carefully. Secondly, we will need to photograph several imperfections that we simply do not know how to fix. Place a piece of broken tile in hard to reach place, but it’s also in plain sight, near the bathroom sink. And there is a gap, about 10 cm, between the bathtub and the wall near the end of the bathtub. There, too, my husband has lost his mind and doesn’t know what to do.
I am adding new photos at the request of participants.
Bathroom. We don’t know how to seal the opening between the wall and the bathroom now.

I took a special photo with hanging laundry to make it clear that the dryer above the bathtub is a very convenient thing.
Background. This is my first home of my own, as well as my first experience of such work (for the most part), but I wanted to do everything exactly the way I had long wanted. Naturally, I don’t swim in rivers of gold, so in many ways I was limited by the budget. All the work, with the exception of the ceilings, balcony glazing, replacement of radiators and riser, was done by myself, in some places a friend helped with screed and putty and Good friends with hard work. The whole process lasted just over six months, mostly due to lack of funding and time, because... I did everything exclusively on weekends or after work.
The apartment is an ordinary one-room apartment in an old panel house. There were no photographs of the original view, but to understand, I will say that the renovation was done there about 20 years ago - classic, Soviet :)
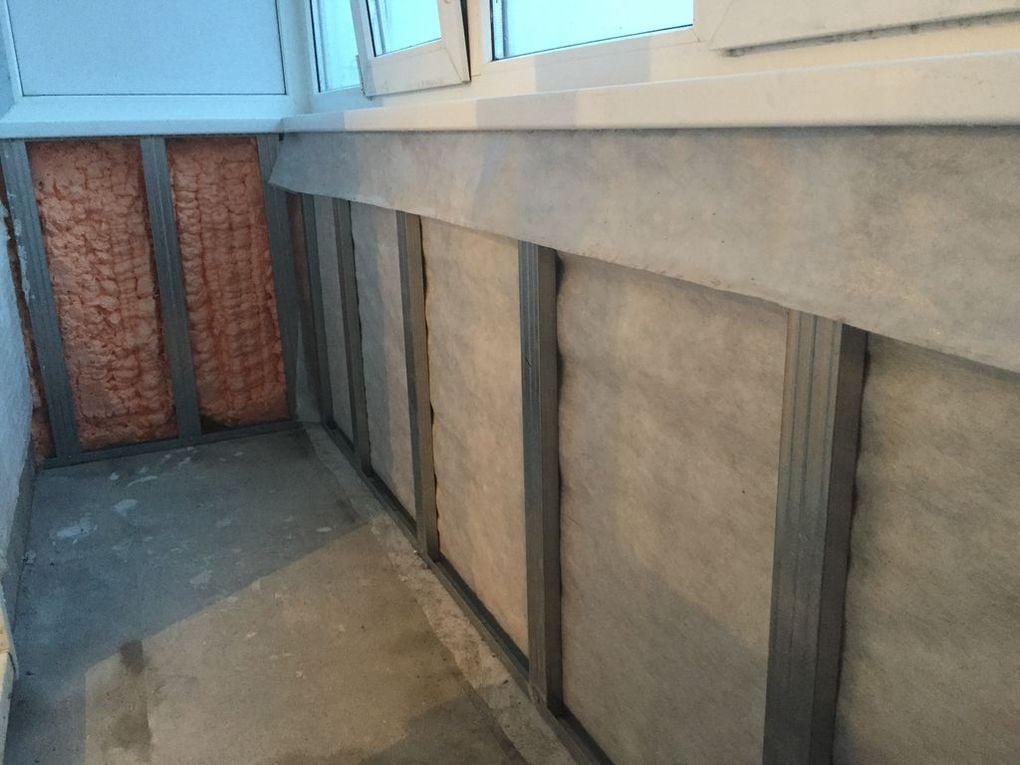
I started by glazing the balcony, which had been open since the house was built more than 30 years ago.

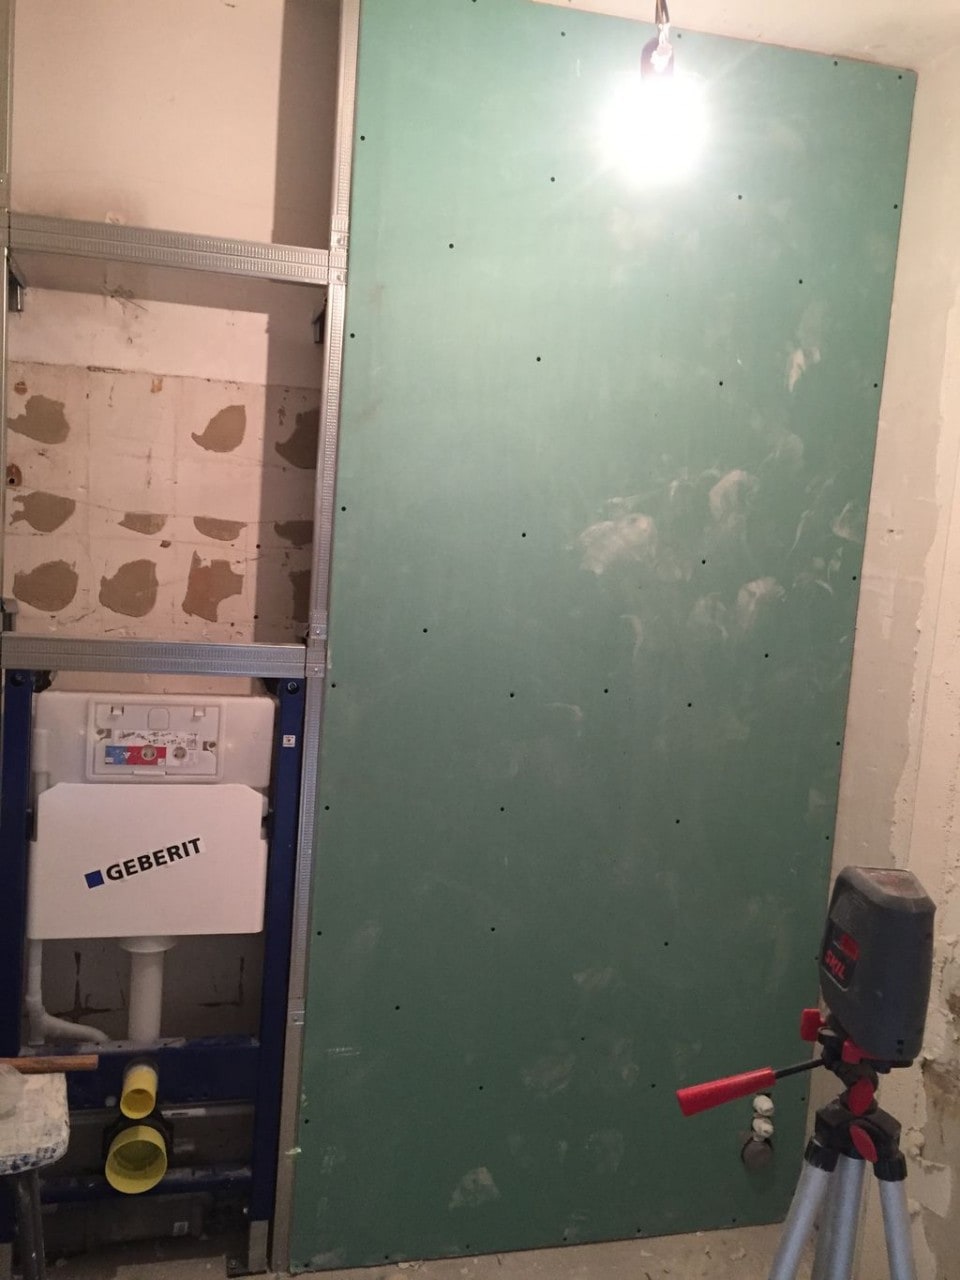
The plan was to move the wall in the bathroom, because... It was planned to install an installation and a shower cabin, which did not fit in this option.

Next, the valiant plumbers replaced my same-age radiator in the kitchen, an old cast-iron tee and part of the sewer riser; They cut off the rotten pipe of the “towel” and replaced it with polypropylene with taps and a jumper. In addition, according to my idea, the connection to the hot water and hot water risers was moved from the bathroom to the kitchen side.


I did the plumbing myself, so I left part of the plaster box of the bathroom to recess the pipes, because... I absolutely did not want to make boxes. Washing machine will stand in the dressing room, so there will be additional ducts and cold water. Along the way, my relatives and I tore off several layers of wallpaper :)


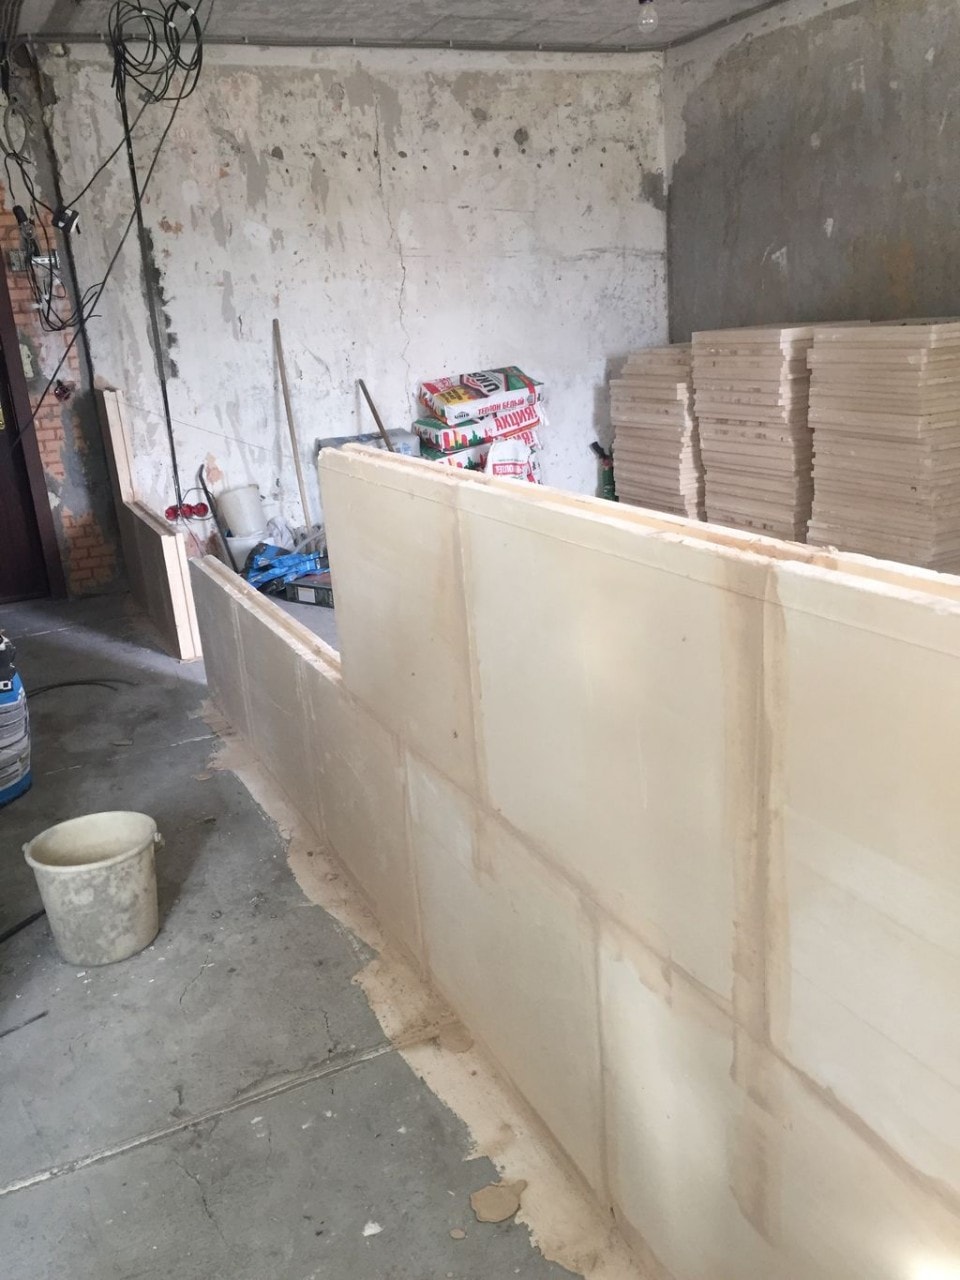
Initially, interior partition, made from plaster shit and sticks, they wanted to simply putty, however, due to the fact that it was semicircular, crumbled and, as it turned out later, stood diagonally :), they decided to dismantle it and install a new one. I chose solid PGP as the material for all the walls.

It’s still a mystery to me why part of the floor was wooden, because there was an opening in the slab in this place (by the way, maybe someone knows?). This pit was filled with CPS with expanded clay.
By the way, my relatives’ concrete mixer, which was given to me during the pouring process, was very helpful.

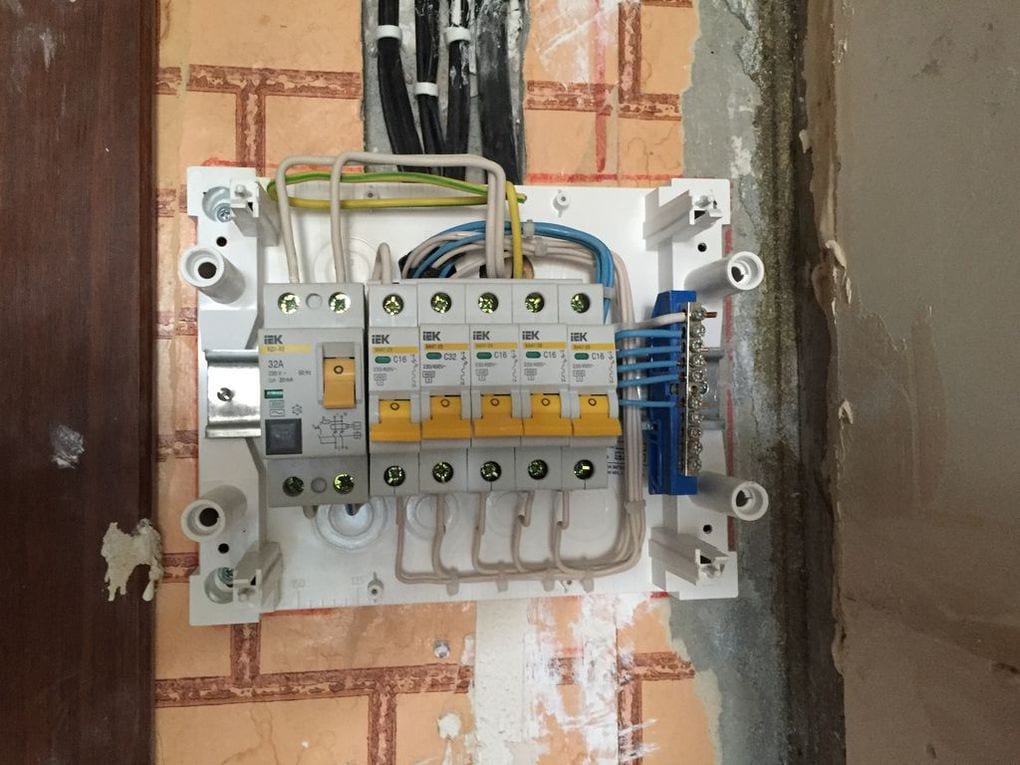
Then I took up electrical work. It was decided not to leave any aluminum wire, so I even pulled the input wire from the panel, replacing the input machine and the meter. Vending machines will be installed inside the apartment, divided into groups.


A! The brave guys came and famously hollowed out the wall for the air conditioner route.

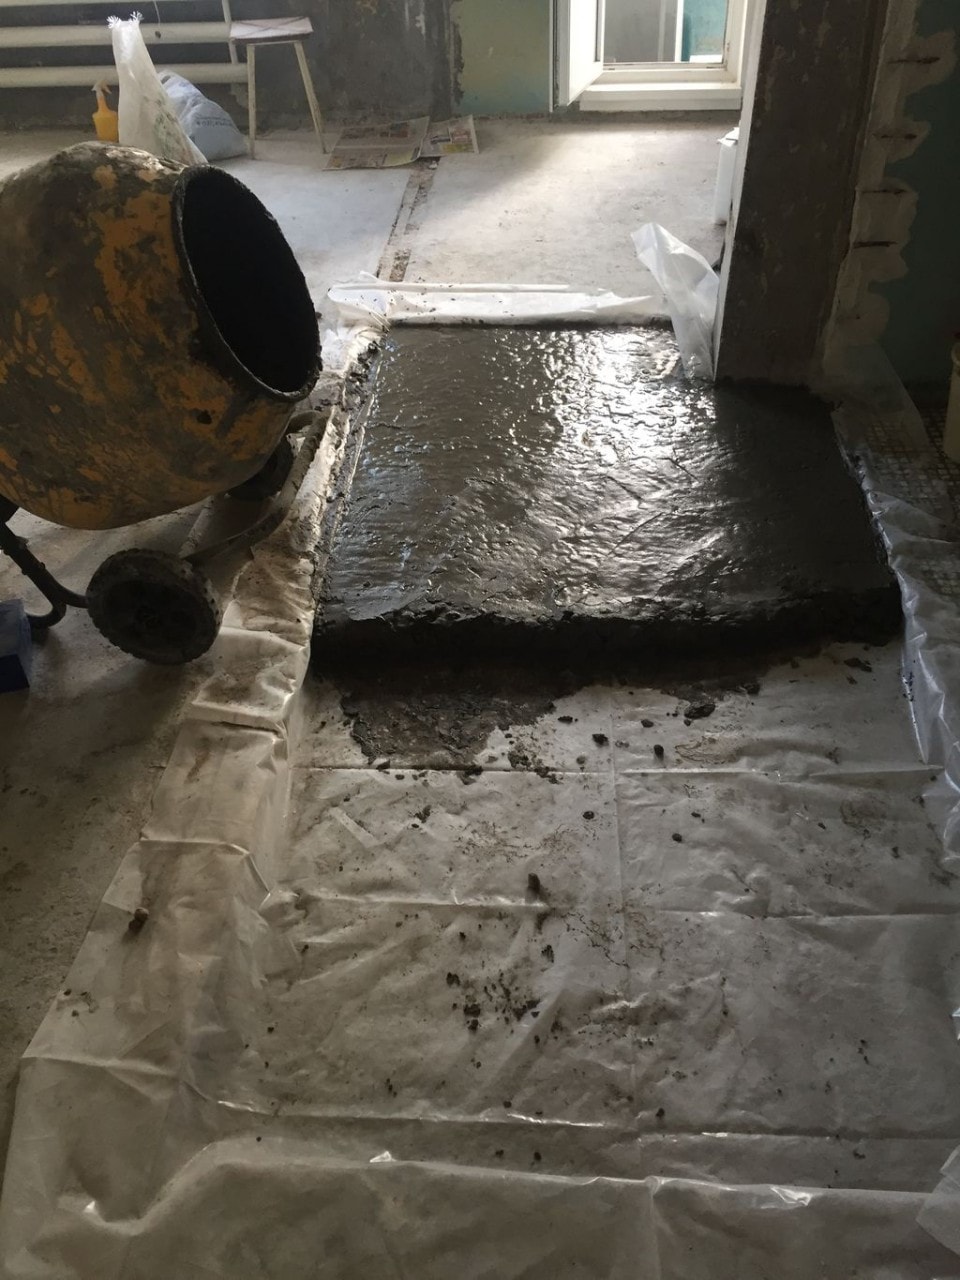
Afterwards, the long and painful process of pouring the screed began, which involved many times more material than planned (~53 bags of TsPS). The maximum difference over the entire length of the apartment was about 6 cm. Expanded clay filled most of the balcony to lighten the load.


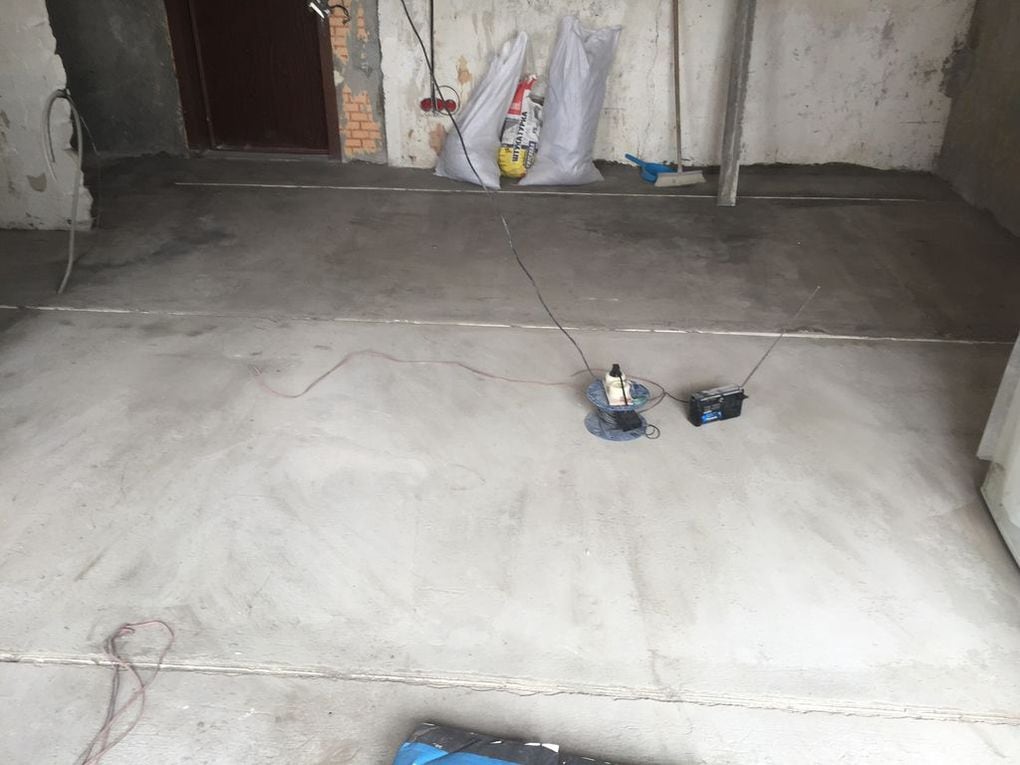
After the screed had completely dried, I began to build the partitions. It’s an exciting activity, but only until the moment when you start throwing the slabs onto the last row alone. Naturally, the slabs were attached to the floor, ceiling and walls through a row.
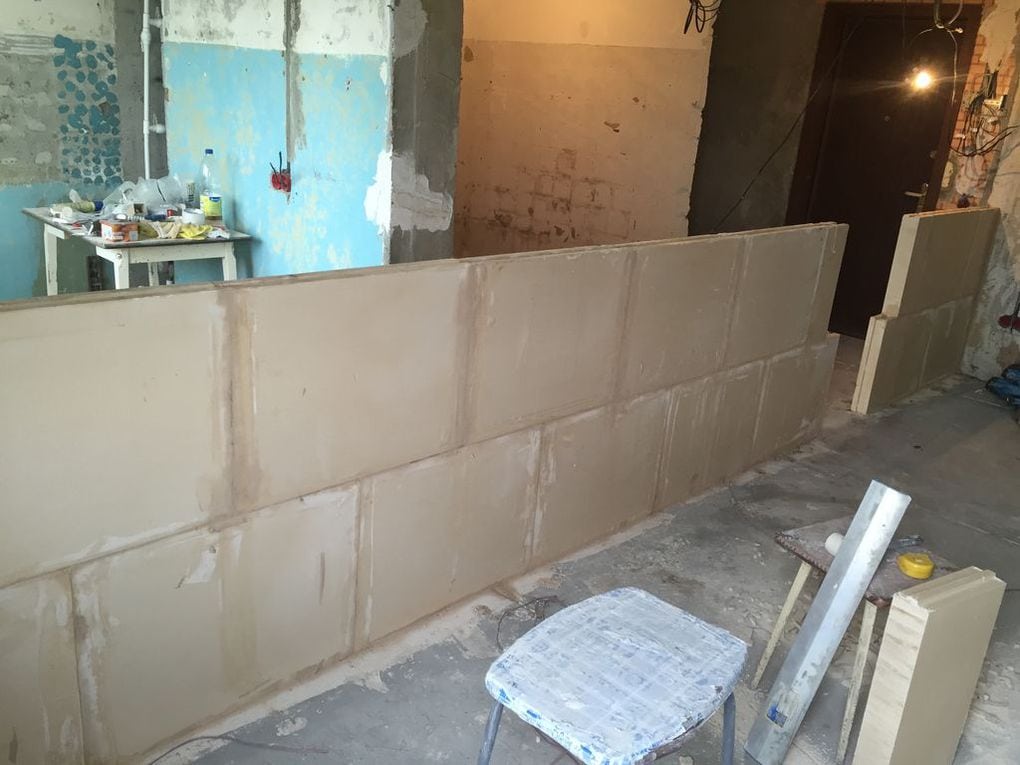


It's time for installation. I decided to attach it to load-bearing wall, so there were holes in the plaster box.


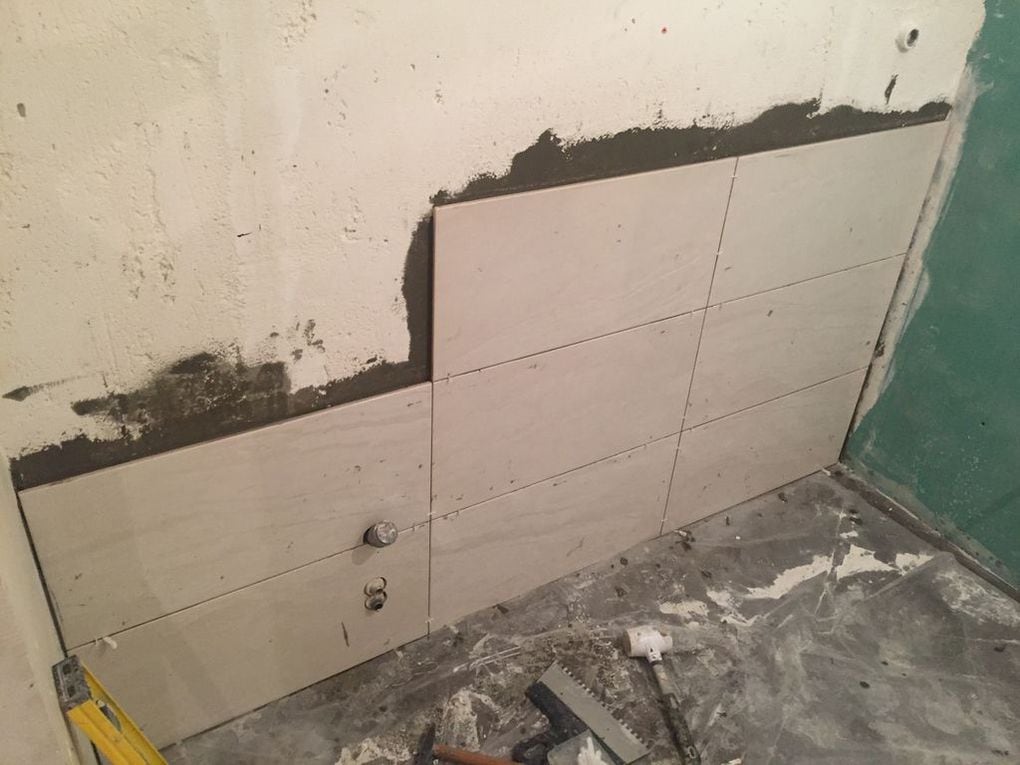
We installed beacons in the bathroom. Not only are the walls fundamentally uneven, but the box itself is uneven. I began to assemble the frame and cover one of the walls with plasterboard.


A little more about wiring. I am categorically against junction boxes covered with putty and/or wallpaper, but running a separate cable to each consumer is at least not economical. Therefore, all the switching was done in socket boxes using copper/tinned sleeves, pressed in with pliers and covered in two layers of heat shrink. If there were a lot of connections, I used socket boxes of increased depth. With this installation method, cable consumption does not increase significantly, but access to all connections is provided.

Temporarily installed a heated towel rail to secure the pipes before laying the tiles.

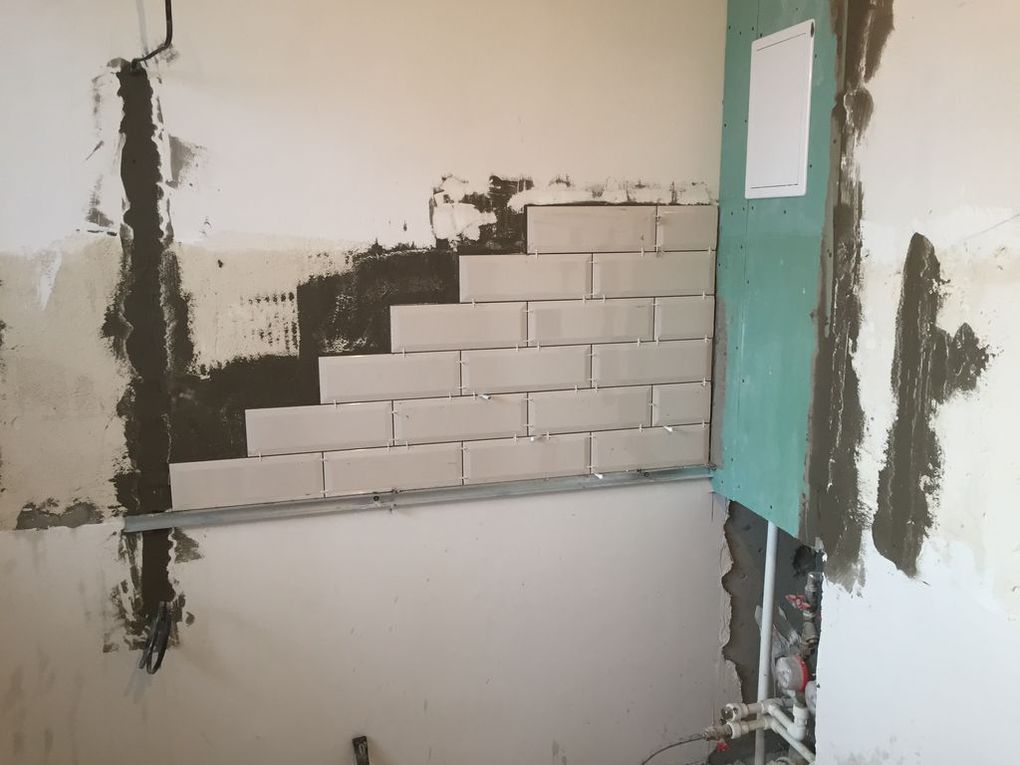
The walls in the bathroom and kitchen were covered with plaster. Then, putty in two layers and install the shield.

After a vacation at the seaside, I took up laying tiles. The project was made for me in the same place where I bought it. Still, I don’t like the diagonal layout...


In the process, I again deviated from the original plans and replaced the bulky radiator in the hall.

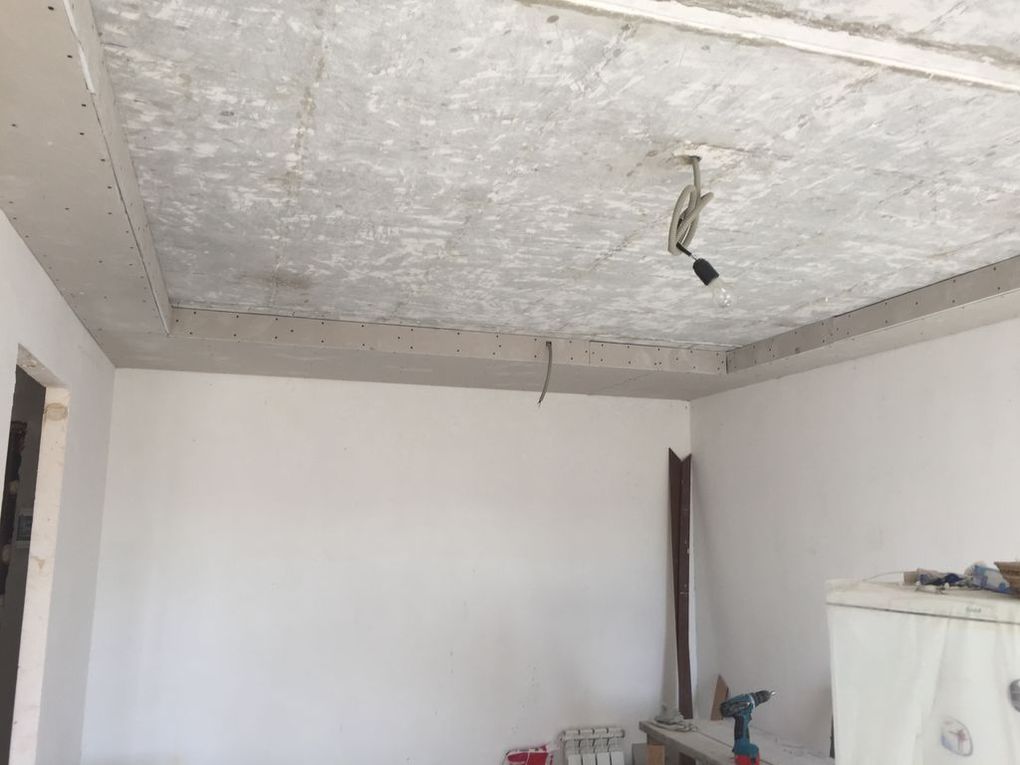
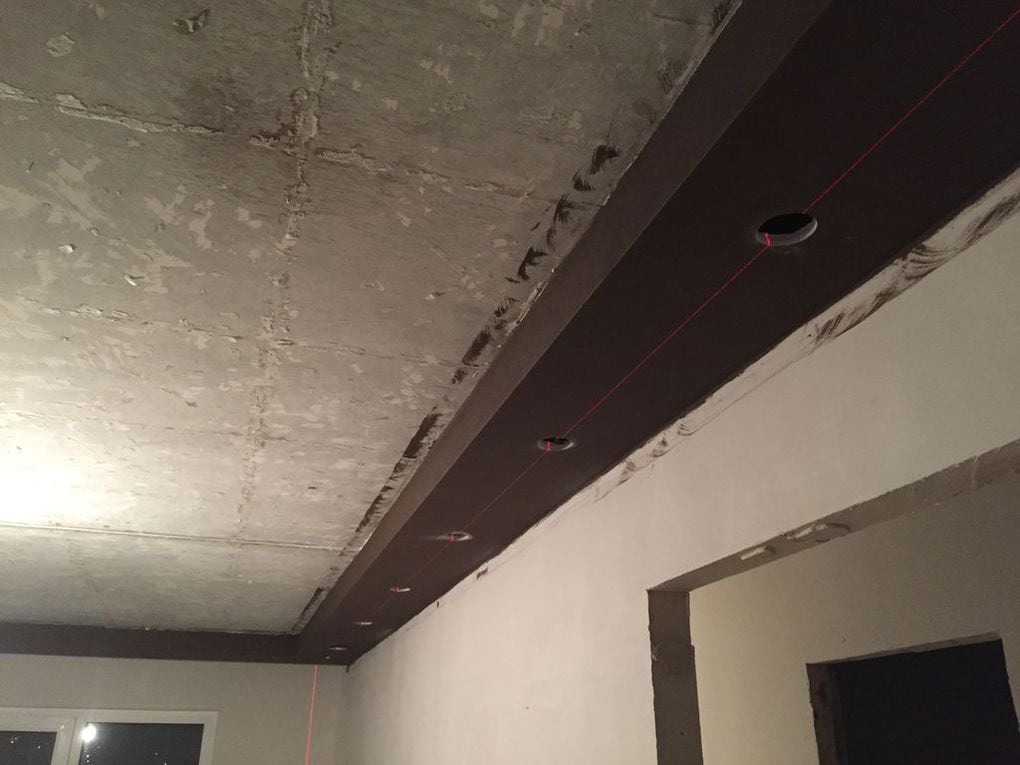
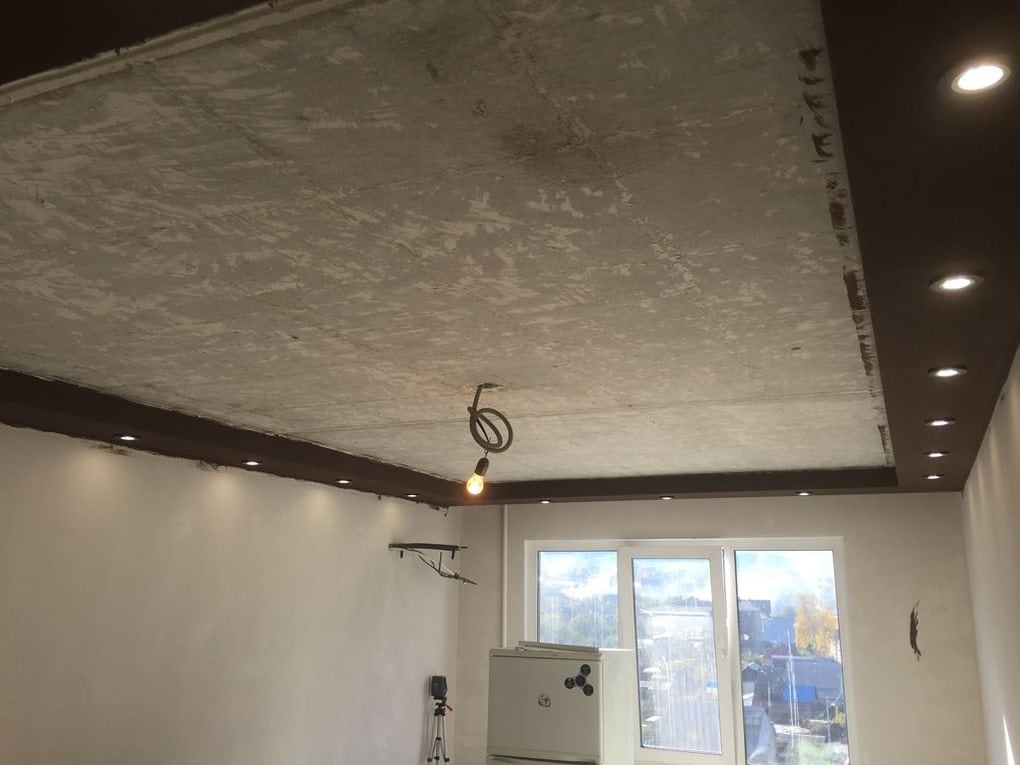
The next step was to make the wiring for the lamps and begin to assemble the plasterboard structure on the ceiling.

It came to this working wall in the kitchen.

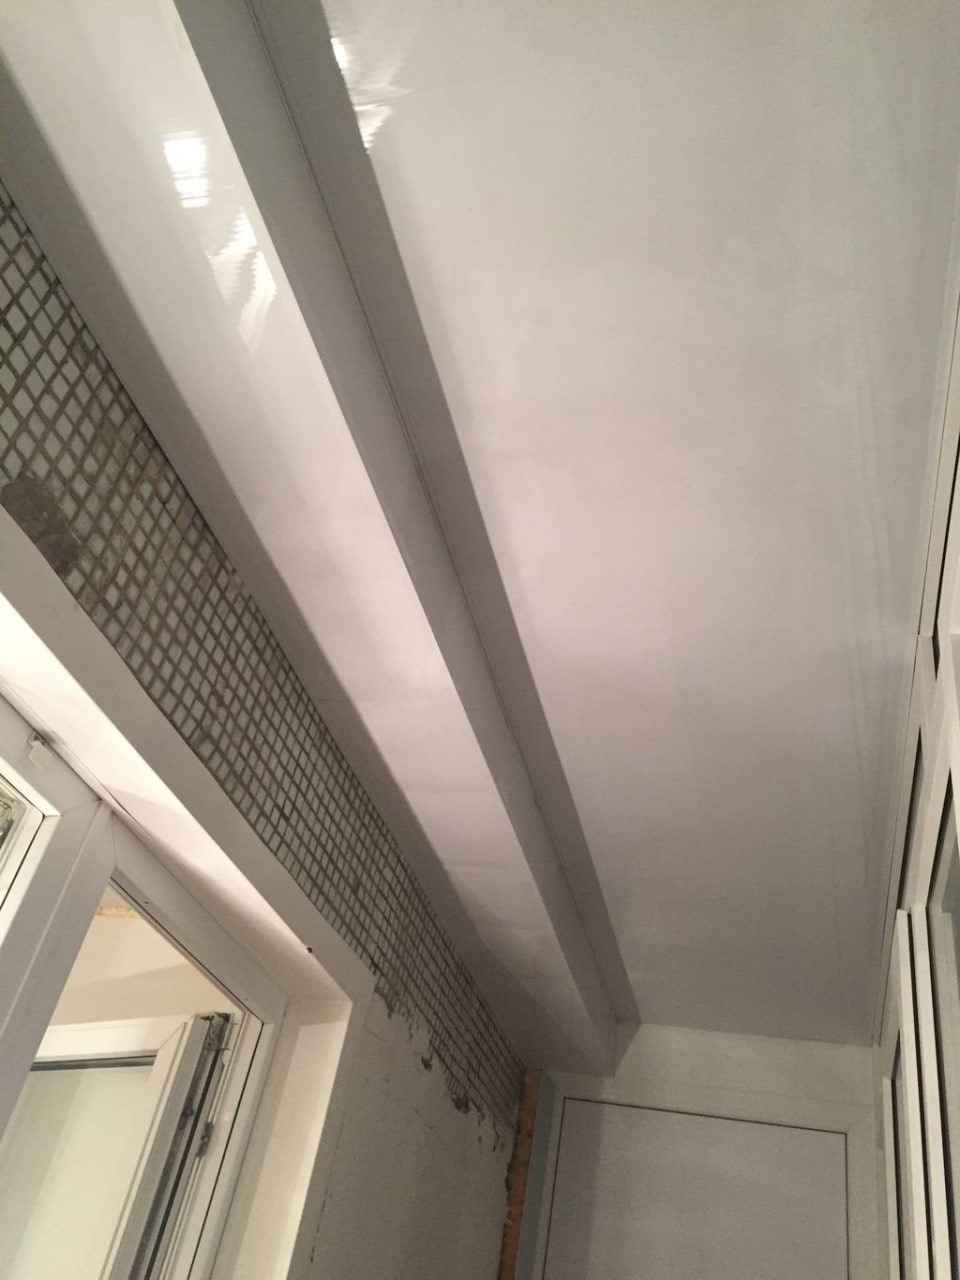
Next comes some insulation and finishing of the balcony.


The plasterboard structure is plastered, covered with fiberglass and painted. Before tinting, I was afraid to choose this one dark color, but everything turned out exactly the way I wanted. After drying, I cut out the holes and mounted the lamps.


Finally it's time for the laminate! I laid it down quite quickly and for the first time I began to take off my shoes before entering :) By the way, I laid it down without seams, because it’s ugly. All clearances have been observed, six months have passed - the flight is normal.


Then he started gluing the wallpaper, Artem made a signature decorative plaster on the balcony.


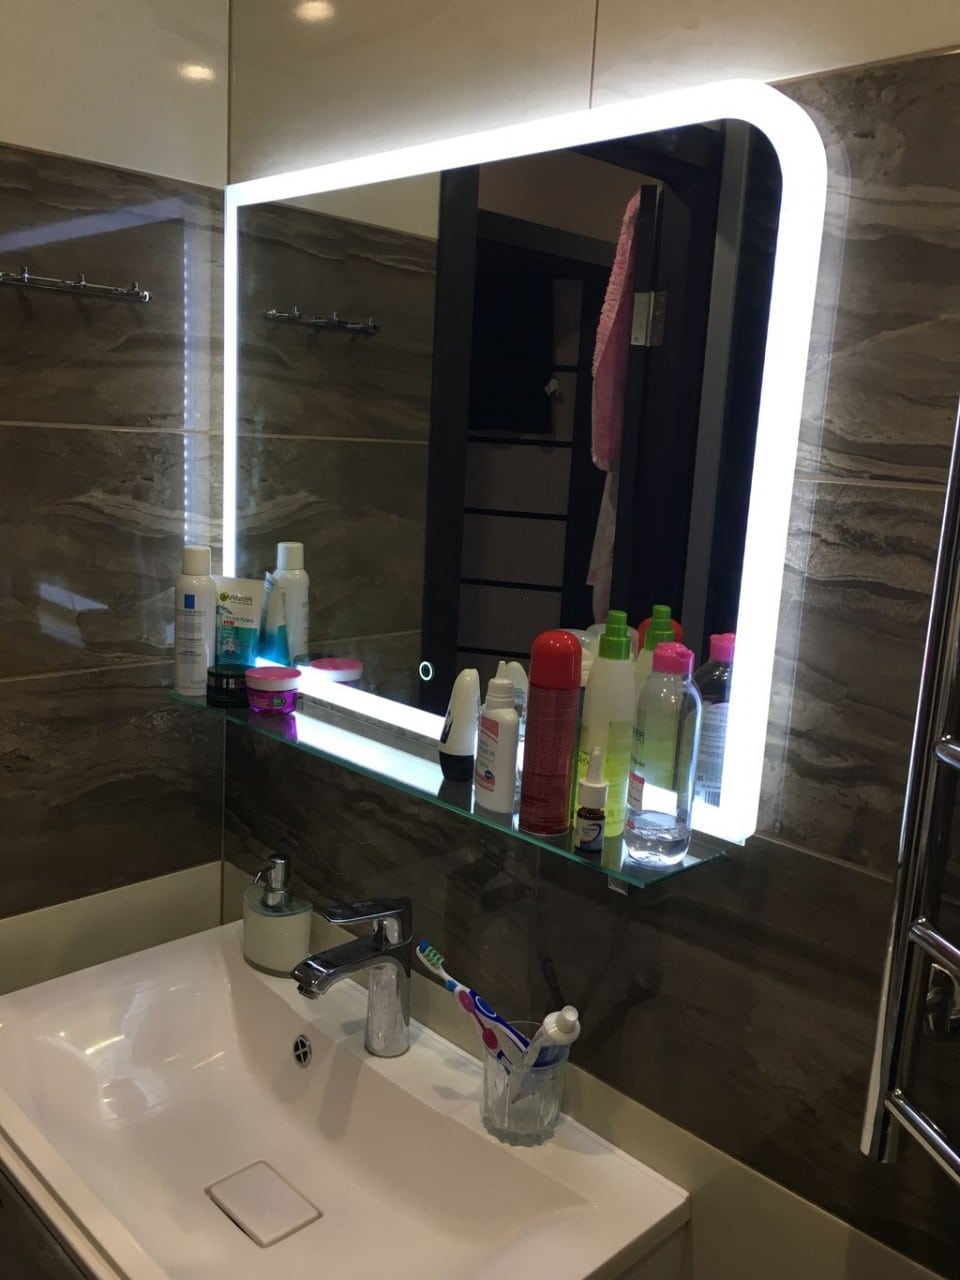
A small addition to the bathroom: I hung a cabinet, a towel and a toilet.
The final version of the balcony decoration. In the photo it looks like a daub, but in real life it’s very, very good.


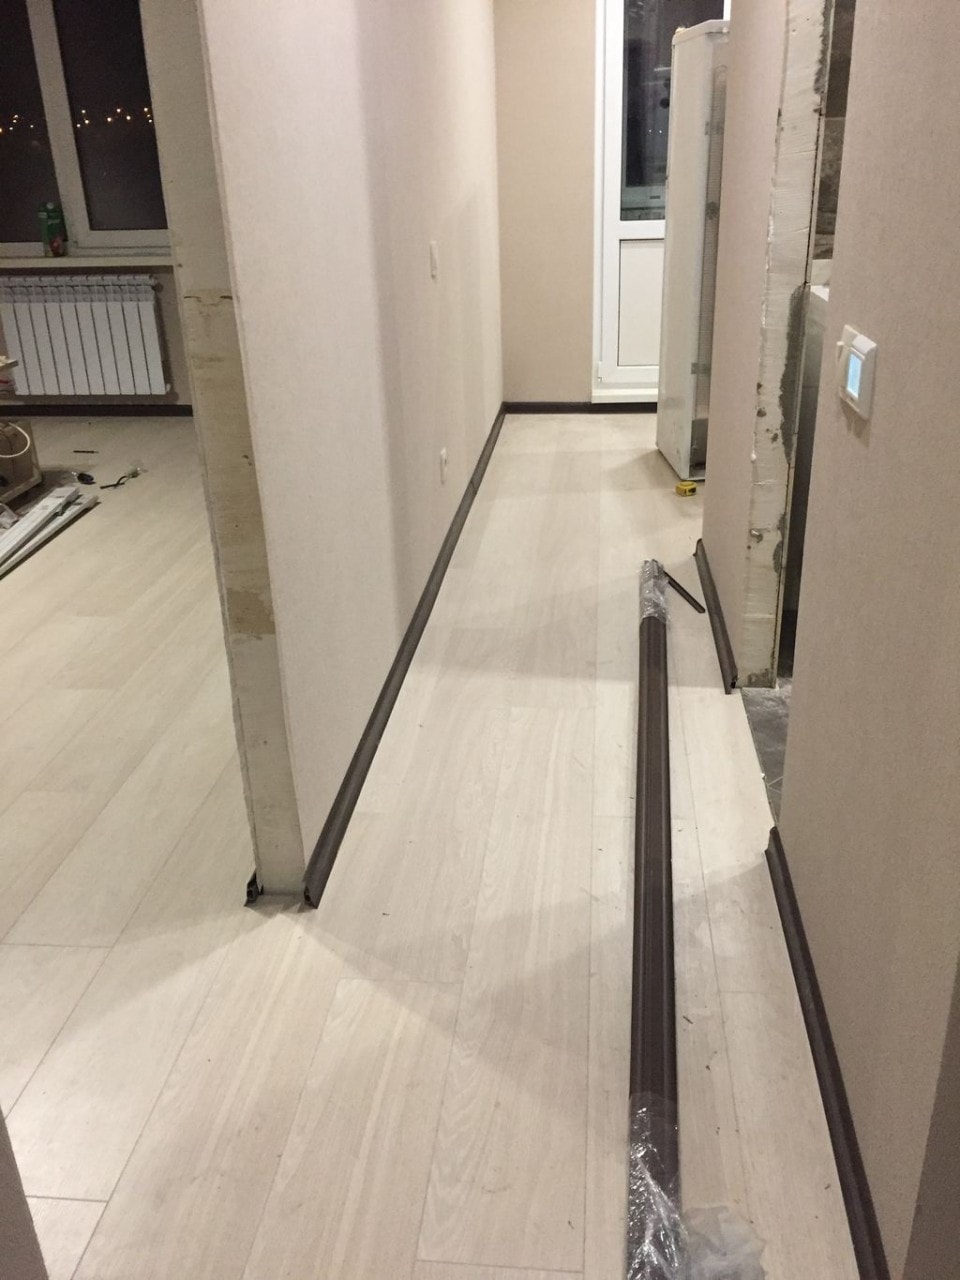
Attaching skirting boards after everything else is a pleasure.
The furniture arrived here. This is worth a separate story, but in short, they only took 3 days to assemble it, then I waited a long time for them to fix all the mistakes and waited only after meeting with them in court.


With a shower cabin for a long time had sex. Firstly, the drain hole was in opposite side from entering the sewer. Therefore, it was necessary to change the support studs in order to raise the cabin and provide a normal slope for draining. Secondly, after I lifted it, it turned out that now it almost rests on the ceiling, and the lid is installed last and only after all communications are connected to it :) But everything ended quite successfully.


Actually, in this form I have already moved and started settling into the apartment.
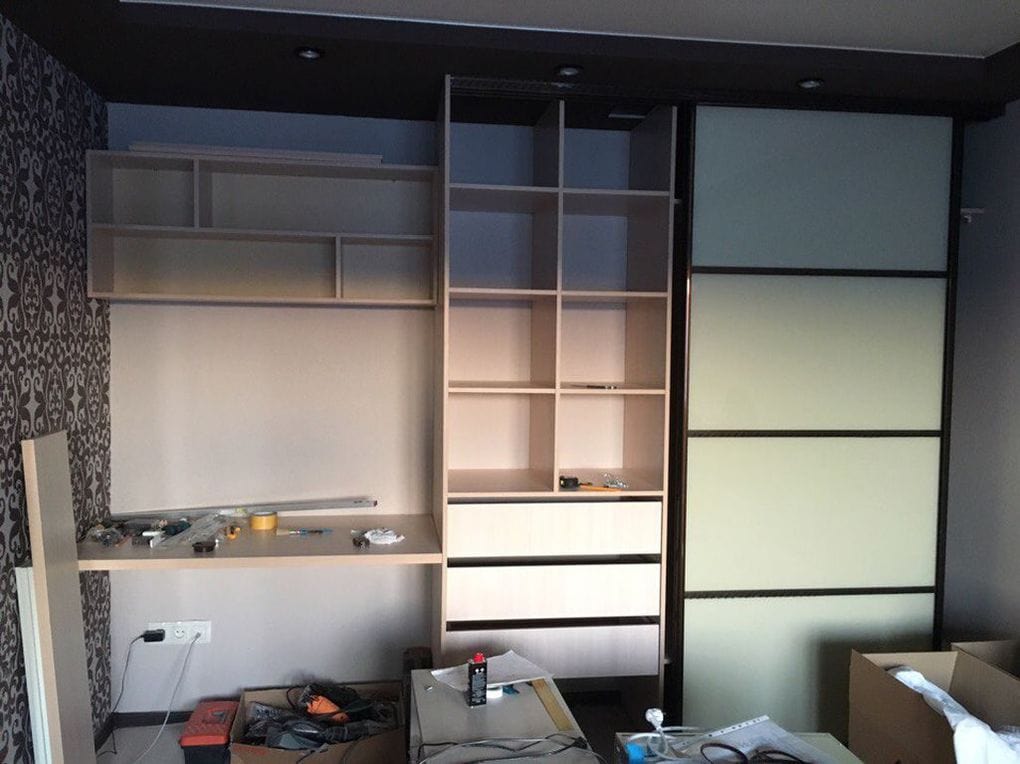
By the way, having found out the prices for wardrobe systems I became a bit of an ass and decided to do it myself.
I drew up a project, gave the guys in the furniture shop the specifications for cutting, and after a couple of weeks I picked up a bunch of pieces of wood cut to size. After assembly it turned out exactly what I wanted. In the future, all this will be closed with compartment doors.
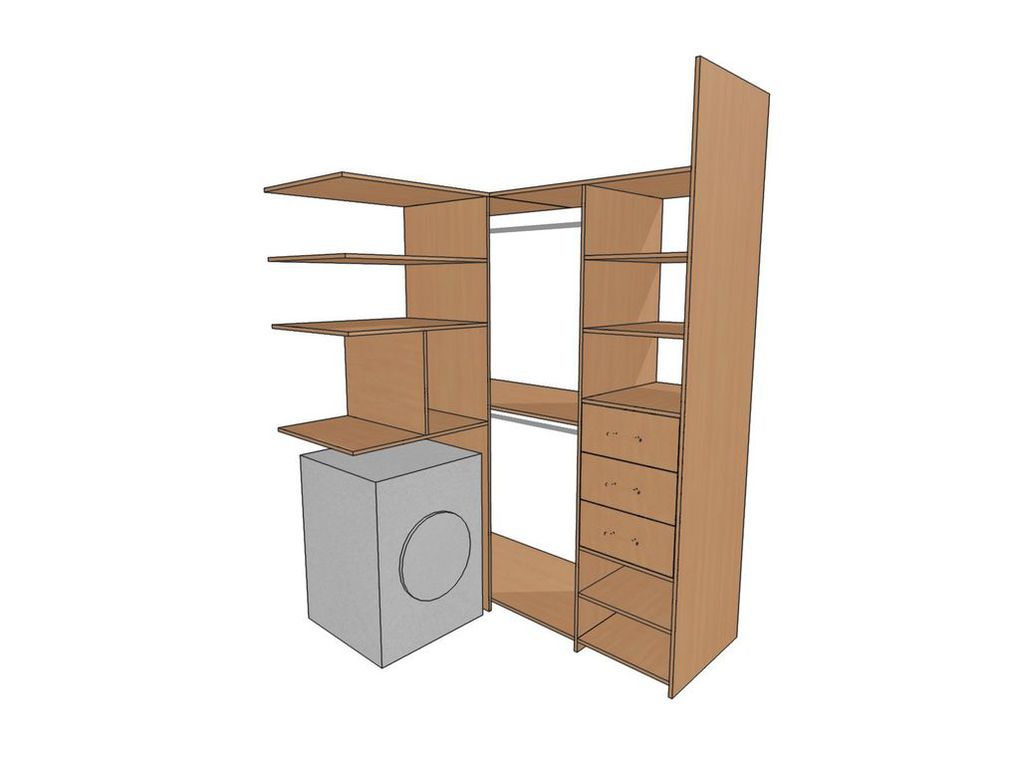

Using the same scheme, I assembled a shoe rack for myself in the hallway.


And finally, a few photos of the resulting interior.


That's all for now :)
It seems like I didn't miss anything, except that I didn't find some photos.
I tried to calculate the budget, it turned out to be approximately 240 thousand for materials, work and some equipment. All the furniture cost 130 thousand, equipment another 60.
Thanks everyone, I'm done)
Z.Y. I’m not a builder by profession at all :) IT specialist and general manager.


