How to repair ceramic tiles on the floor. Repair of ceramic tile floors. The tile is firmly stuck to the base
Tile covering sometimes requires repairs on the floor and walls. The tiles, depending on the strength class and quality of installation, are exposed to varying degrees of influence. Some fragments do not hold up and cracks and chips appear on the surface. To eliminate such shortcomings, it is important to know the repair rules and why this or that problem arose. Let's look at what factors lead to damage and how to repair the coating yourself.
Cracks or chips in tiles are more likely to occur due to pinpoint impacts
Causes of defects
First, you need to understand one part of the question: why do flaws appear on tiles? There are many explanations for this.
At first glance, there is practically no load on the finishing of vertical surfaces. Nevertheless, cracks on it are not uncommon. The reasons are:
- targeted impacts on the coating;
- mobile base, for example wood;
- hanging heavy furniture on the walls;
- damage to tiles during drilling or other types of work;
- blows with opposite side walls;
- changes in temperature and humidity;
- microcracks in the coating.
To find out why tiles in the bathroom are cracking, first of all, let’s pay attention to the microclimate in the room.
Regarding gender, its condition is influenced by the above factors.

Floor coverings often need repairs
Cracks appear due to the fall of a heavy object or the load from furniture. Point exposure is especially dangerous. Low class tiles increase the risk of surface damage even in everyday use. Let us separately highlight the quality of installation. If there are voids in the solution or the surface has unevenness, in the future, when such a tile is loaded, it will break and the fragment will need to be replaced. Repairing tiles in the bathroom is often associated with a violation of installation technology on such capricious surfaces as wood or plasterboard. Wood expands when humidity increases, so technological gaps are left, the seams are made larger, and elastic glue is used.
If it was not possible to avoid repairs, carry out them efficiently so as not to encounter similar problems again.
Necessary tools and materials, masking defects
Do-it-yourself ceramic tile repair on walls or floors is done using ordinary tools. You will need a chisel, a flat screwdriver and a grinder to dismantling works. Remove remaining glue with sandpaper. To repair a small chipped tile on the floor with your own hands, use regular grout. You will also need glue if the cracks require replacing the element, a notched trowel, a level and a mallet. Read on for instructions on how to repair tiles yourself.
If the damage is minor, restoration of the coating without compromising its integrity is suitable. In other words, small cracks or chips along the edges of the tile are hidden without replacing the element.

The most simple ways masking defects - grout and self-adhesive film
The easiest way to repair a chip is with a fugue. A mixture is selected so that it does not differ from the general background in tone and structure. If you want to use white mastic on a colored background, then adjust the width of the seam. Please note that a single wide joint will spoil the overall impression of the coating. To repair a chip with grout, simply apply a wet paste over the flaw and smooth out the seam. After drying, the plane is brought to perfection.
Small cracks in tiles can also be hidden using. The best option– use of self-adhesive film. Another way is to cover the flaw with some kind of accessory, for example, a towel holder. If the material cracks further, it is better to immediately glue a new one.
Replacing a fragment
The most effective repair ceramic tiles- This complete dismantling damaged part. This method is used if local restoration of damage is impossible.
Replacing tiles on a wall or floor is done as follows:
- Cleaning seams. This work is carried out carefully so as not to touch adjacent parts. If the cracks cover the entire tile, you can use a grinder.
- Removing tiles. Pry the element and force it away from the surface.
- Stripping the glue. Remove old mortar from the base of the floor and walls as far as possible.
- Inspect adjacent elements. If the tile laid nearby is damaged or the quality of the masonry has been compromised, it is better to remove it and re-lay it.
- Installation of tiles. Fastening is done with glue. It is more convenient to apply it to the tile itself. Make sure it is level with the rest of the coating.
- Grouting joints. Be sure to seal the joints. Select the material as you would for other tiles. If this is not possible, it is recommended to completely renew the seams.

Sometimes it becomes necessary to change the design of old ceramic tiles in the bathroom without carrying out a major renovation. It happens that the pattern on the tile has faded due to limescale, and defects in the form of small potholes or cracks appeared on individual elements of the coating. They also resort to decorating the cladding when it is necessary to change the style of the interior. You can update the tiles in the bathroom without changing them yourself in several ways.
Damaged cladding is corrected by partial replacement tiles Contrasting tiles or decor are glued to the vacant space.
Dismantling begins with opening the seams. To do this, the tiles are outlined along the contour with something sharp. Then the ceramic tiles are pryed with a chisel. After this, the wall is cleaned of the old mortar and glued necessary element. Don't apply a lot of glue. The tiles should not rise above the rest of the cladding.
You can update your bathroom even more simple method- using vinyl stickers. This method is less labor intensive. It is recommended to stick stickers on walls, because there they will not be subject to mechanical stress.
The tiles are also decorated using contour paints. The simplest option is to apply dot painting or depict geometric shapes. The bathroom walls are also being completely repainted.
Vinyl tile stickers
Decorating tiles with stickers does not require much time. Damaged tiles are not reconstructed beforehand. Vinyl stickers will hide chips and cracks.
To decorate your bathroom, you should use stickers that are resistant to moisture, steam and cleaning agents. It is not necessary to cover the entire cladding with them. You can update old tiles in the bathroom using stickers by arranging them in a checkerboard pattern. To do this, you should choose stickers of the same size as the tile.

Another option for updating the cladding with stickers is creating decorative panels. They are placed above the sink or in the central part of the wall. You can buy a ready-made panel or assemble it from individual small stickers yourself. The second option is more preferable when creating large compositions.

Found on sale self-adhesive film for the bathroom in rolls. It is a little more difficult to work with than small stickers, as bubbles and folds may occur during decoration. Therefore, when gluing the film, you need to stretch it well. If bubbles do form, they can be pierced with a needle.
Applying patterns
The pattern on the tiles should be chosen taking into account the design of the room. For the bathroom modern style will fit geometric patterns. They are easily applied using stencils that are glued to the tile. In this case, you should use spray paint. It is convenient to spray on a stencil.
Working with tiles comes down to the following principle:
- Repairing defects.
- Preparing the base.
- Painting.
- Application of a protective composition.
Before decorating the tiles, you need to repair all chips and cracks. It is best to use putty for wet areas. Restoring the tiles is a mandatory step, since the paint will highlight existing defects.
Potholes and cracks in old tiles are repaired using a small spatula. The dried putty is rubbed down to make the surface of the tile more uniform.

Before applying the designs, the tiles must be thoroughly washed. After drying, it is degreased with acetone. If ceramic paint is used to draw patterns, the tiles should not be treated with fine-grained sandpaper and a special primer. Similar decorative compositions fits perfectly on smooth substrates. When using all other types of paints, it is worth increasing the adhesion of the tiles.

To apply a picture, you can also use improvised means, such as masking tape. It is used to apply a pattern of triangles. This modern solution suitable for square tiles. The location of the triangles needs to be thought out in advance. The easiest way is to make a sketch on paper.
To apply the pattern, you need to divide the tile in half diagonally. Thin tape is glued around the desired triangle. Then the figure is carefully painted over with a small brush.

Instead of patterns, you can resort to continuous painting of the tiles. This is the most universal option for decorative cladding, since plain tiles will fit into any style.
Complete painting without removing
With continuous painting, the entire surface of the cladding is treated, including the seams between the tiles. The work is carried out with a roller and brushes. The paint is applied in a thin layer. Particular attention is paid to the seams. They are carefully painted over with a brush.

It is not possible to update bathroom tiles with solid paint everywhere. It is better not to touch areas of the cladding that are often exposed to steam. After some time, the paint in these places begins to peel off and come off the tile.
The tiles are painted near the sink, toilet and on the floor. The walls around the bathroom, if desired, are finished with panels that are resistant to steam. They are mounted on top of the old tiles. Before finishing, the walls are cleaned and degreased. Then special glue or liquid nails are applied pointwise to them. The panels should be pressed firmly against the wall so that they adhere well to the tiles.

With the help of continuous painting they zone the space. For example, you can make the shower walls a contrasting shade. Another option is the distribution of color accents. The space in this case should catch your eye immediately upon entering the bathroom. You can paint the wall near the washbasin a different color.
Basic Rules
Before carrying out work, all cladding must be cleaned of dirt, otherwise the paint will lie unevenly on the surface of the tile. To combat dirt, it is recommended to use abrasive cleaning agents.
The tiles must be treated with fine-grained sandpaper and an adhesive primer. This will increase the adhesion of paint to smooth tiles in the bathroom. When processing, special attention should be paid to the seams between the tiles.
It is worth using paint intended for ceramics or earthenware. Latex and alkyd compounds have proven themselves well. Should be painted small area facing, located in an inconspicuous place, and then check the durability of the coating.

You should start painting only a day after applying the primer. During this time, the product will dry accurately and form a durable film.
The paint is applied in several layers. This will result in a more uniform and durable coating. The previous coat of paint must be completely dry.
Required Tools
To update the tile you will need the following tools:
- Sandpaper.
- Sponge.
- Masking tape.
- Covering film.
- Roller with small pile.
- Brushes.

Do-it-yourself volumetric decor
Helpful tools to update bathroom tiles include beads, small shells and pebbles. Decorative elements stick on the tile. They should be small so as not to fall off. Better position volumetric decor in places that are slightly dirty, because textured elements are more difficult to wash.

Renewing seams
It is not necessary to update old tiles. You can give the cladding a fresher look by cleaning the grout. Over time, the seams darken, change color and become dirty. This is due to high humidity in the bathroom. You can deal with darkening of light-colored grout using various means. To restore color, it is recommended to use special pencils or markers. You can also restore the grout using paint. For cement mixtures Fuga Fresca from Mapei will do. The advantage of this paint is its wide range of colors.
Smooth surfaces of pavements and squares in cities, glossy walls of bathrooms, durable floors and a traditional “apron” in the kitchen - all this would be impossible without tiles, reliable and practical building material. It withstands atmospheric street disasters well, and serves as a traditional element decor. We are accustomed to the fact that ceramic, paving and tile products last for decades, however, even they are subject to wear and tear. various kinds damage.
Working with tiles requires a certain skill, experience and skill; a professional can easily lay and repair them. Are construction tricks available to the average person who wants to make a replacement or partial repair with their own hands? tile covering in my house? At a minimum, such opportunities will save a considerable amount, and a positive result will also bring moral satisfaction.
Problems with tiles: can they be avoided?
Just recently we were admiring the result of a bathroom renovation, but today some of the tiles have fallen off and several more have cracked - a picture familiar to many. Let's try to figure out what mistakes the workers or the apartment owners themselves made, and for example, let's take a wall covered with tiles and subject to repair.
Most of the reasons are hidden during the installation process, let’s name the main ones:
- insufficient initial treatment of walls;
- violation of laying technology, resulting in the gradual formation of cracks and chips;
- improperly prepared tile adhesive;
- failure to maintain the tightness of the tile covering (poor quality of seams), as a result of which the adhesive base is destroyed.
There are other unfavorable reasons that influence the rapid wear of the material. For example, paving slabs It is constantly exposed to changes in temperature, exposure to moisture, and experiences increased loads - it is not surprising that some of its elements become unusable over time and must be replaced.
Repairs can be avoided only when the whole line rules for installation, operation and careful care.
Types of tile and ceramic repairs
What kind of metamorphoses do not occur with a beautiful glossy or matte finish during the service. It's covered greasy spots and streaks, a network of cracks appears, tiles split in the corners, or even fly off completely. Sometimes black gaps appear in the place of once beautifully designed seams, and hidden holes for fastenings are located under removed cabinets. Let's look at several types repair work which can be done independently using available tools.
Masking cracks and chips
It happens that one big crack or a scratch spoils the whole picture, this is especially noticeable on a matte plain surface. The easiest way is to dismantle the damaged element and replace it with a new, spare one. But what to do if there are no tiles left after laying, and the store has run out of the product from the required series? We will try to do without drastic changes, but simply make the crack unnoticeable.
We act according to plan:
1) We prepare a simple material - cement and water - and make a solution from it, but not thick, more familiar, but quite liquid. No other components need to be added.
2) If the scratch is shallow, cover it with the resulting liquid and try to rub the solution into the crack (you can use a piece of cloth). After drying, add the next portion of the solution and rub in again - until the indentation disappears.
3) If the treated area stands out from the rest of the surface, select the paint of the desired shade and carefully apply it to it, trying not to go beyond the boundaries. IN construction stores There is a useful service - the ability to select and produce paint of the required color.
Gluing fallen tiles
It often happens that one element falls off, but quite often a violation of the tightness of the coating leads to total peeling off according to the “domino principle” - the tiles begin to separate from the wall one after another, individually or in entire layers. If the surface is not damaged and the product has retained its integrity, there is a chance to put it back in place without any problems.
Before laying work, it is necessary to dismantle unstable elements, that is, carefully separate all tiles that partially move away from the wall or sway when pressed.
An important stage is preparing the wall and base for installation. Pieces of old adhesive solution it is necessary to completely remove and clean the surface as thoroughly as possible. Dust, grains of cement, and any contaminants will interfere with adhesion. After cleaning, moisten the surface of the base with water.

What types of mortar or adhesive are used to attach tiles to the wall?
- Special tile adhesive: dry mixtures are sold in a large assortment in the store.
- Cement mortar is not enough effective remedy, we use it as a last resort.
- Silicone based sealant. The white substance has suitable properties.
- Liquid glass (or liquid nails).
- Zinc white. They are applied to a base pre-treated with drying oil.
It should be remembered that due to the thick layer of adhesive, the newly laid tile will protrude above the rest of the surface. To prevent this from happening, the place where the glue is applied must be deepened a few millimeters. A notched trowel, the tiler's main tool, is necessary to evenly level the adhesive mortar.
Laying new tiles
Suppose the old tile has finally become unusable, but it is possible to replace it with a similar one. In this case, there is only one way out - carefully remove the damaged elements and glue new ones in their place.
In order not to spoil the neighboring ones, good tiles, first, take a spatula or a thin drill and clean the seams. Then in required element we drill holes, as a result it splits into several pieces, which are much easier to remove with a chisel. We do not make strong efforts to prevent flying fragments from touching neighboring elements.
We carefully clean the place where the old tiles were located, treat the base with a primer - for better adhesion. We look at how much glue is needed so that the new element aligns with the rest and does not protrude forward. Apply glue with a spatula and try to install the tile into the prepared nest as evenly as possible. While the glue has not dried, there is time to correct its position if it is laid unevenly. We wait until the glue has completely dried, and only then we process the seams.
When using low-quality grout, it breaks down over time, falls off, and unsightly gaps appear between the tiles. In addition, in a room with high performance humidity, for example, in the bathroom, black mold often appears in the area of the tile joints. You can act in different ways: either completely replace the grout, or partially repair only the affected areas.
We use the first method when it is necessary to renovate a fairly large area. The new grout will create a uniform finish and there will be no areas that differ in color. In a partial repair, it is quite possible that the part treated with new material will differ from the rest of the surface.
The operating procedure is as follows: first delete old grout, being careful not to damage the tile, then apply a new one. When removing, use a sharp object that is convenient for cleaning the seams. A tile-safe tool is any pointed object made of wood.
Returning shine to tiles
The surface of ceramic and tiles is quite resistant to dirt and chemical attack, so it literally looks brilliant for a long time. To improve it appearance To restore the shine, simply wipe with a damp cloth and a special detergent.
But sometimes you want to radically change the interior, for example, change the color of the walls. To do this, we use the usual method - painting. Before painting, sand the glossy surface of each color with fine sandpaper and degrease special means(acetone based) and primer so that the paint sticks better. Only after a series of preparatory work do we take the paint and apply it carefully using a roller.
In this way, you can paint not the entire wall, but selective elements, and also create patterns and ornaments directly on the old tiles. The result is completely new walls without construction intervention.
Before calling experts or planning complete replacement tiles, take a look: perhaps with a little effort you can fix some of the damage yourself and no major repairs will be required.
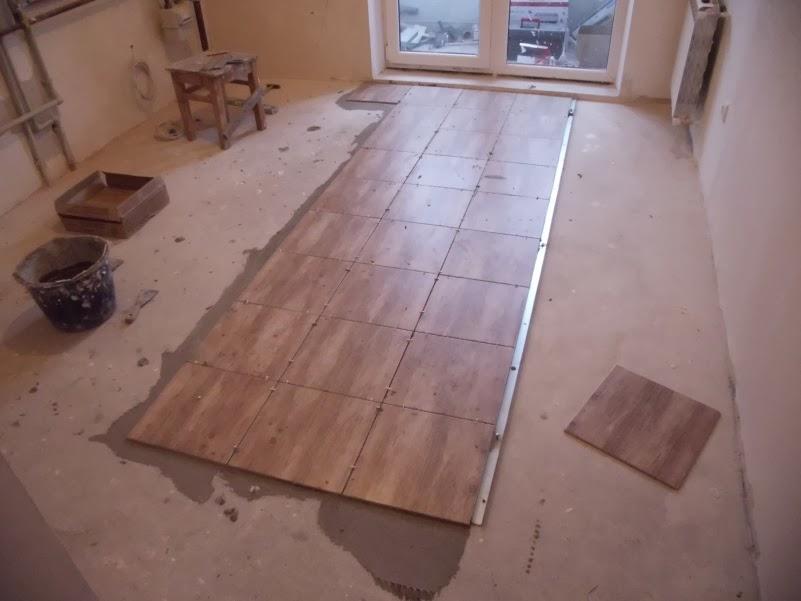
Tiled flooring sometimes requires repair. Even taking into account the fact that high-quality tile material is very dense, any careless handling can damage it, break it or deprive it of its former attractiveness. In this case, restoration of ceramic tiles will help out, so popular now due to the fact that it is often difficult to find a replacement for a damaged composition of tiles.
If you find one or more damaged tiles on the floor, you should not contact major renovation. You can replace cracked areas with your own hands without the help of specialists. Damage to floor tiles may include chips, cracks, or dull grout
Repair work begins by assessing the degree of damage flooring: If a third of the tiles are damaged, it is wiser to opt for a complete floor replacement.
Partial replacement of the canvas involves selection suitable tiles in case it was not prepared in advance.
Damaged areas can be removed:
- Sawing through the seams with a grinder and water;
- Cutting the seams with a drill having a thin drill bit;
- Removing tiles using a hammer drill;
- Combining options.
Afterwards the previous layer of glue is removed. Small chips are filled with cement paste. If there are significant cracks, the tiles are replaced. After removing the tiles, it is necessary to clear away the debris, prepare the base, lay a new coating and grout the seams.
If no obvious damage is found on the tiles, and only the seams are worn out, you can update them in different ways:
- Completely remove the old grout and re-grout the seams;
- Renew the coating using impregnation;
- Paint the seams with a special composition for masking seams;
- Use a marker.
If during partial cosmetic repairs you do not pay attention to the condition of the joints between the tiles, over time fungus or mold may appear between the tiles, which will completely ruin the appearance of the floor covering.
Shallow cracks: restoration of floor tiles
Floor tiles are often subject to damage and breakage. When using it, it is worth preventing situations with falling heavy objects, and if this happens, repairs are necessary as soon as possible to prevent the defect from spreading further.
When putting a rotary hammer or drill into operation, you should take into account that injury may occur. It is necessary to use the funds personal protection or contact specialists for repairs.
Cement mortar removes all defects well. The crack is filled with it, then grouting is carried out. Over the next three days, you need to moisten the surface for setting to occur. The place where the processing takes place should be covered with film.

If glue is used, you must:
- Remove dirt from each cracked tile with a damp cloth;
- Mix the tile adhesive by placing in it a portion of pigment with the same color as the surface shade;
- Fill the crack with the resulting composition;
- Cover the area to be treated with dry sawdust and leave for a day.
It should be remembered that for use in the kitchen or bathroom it is worth purchasing grout, glue and other components with a moisture-resistant structure.
How to repair a chip on a floor tile
Ceramic tiles have many advantages; they are very popular finishing material for bathroom, toilet, kitchen and other places. If the tiles are damaged due to careless handling, there is no need to be upset. By using special technologies You can get rid of chips on tiles yourself using a corrective composition.

The problem can be solved:
- Removing the damaged fragment;
- In the absence of withdrawal.
Removal is used if the tile is cracked due to mechanical stress. If there is a chip without cracks on the floor surface, dismantling is not required.
When dismantling, first the damaged fragment is carefully removed. In order not to spoil the adjacent tiles, it is necessary to clean them using sharp object each seam to the base, then tap the tile, lift the broken part with a spatula and remove it. If unsuccessful, you should moisten the tiles with soapy water. Water will get under the tile, be absorbed into the glue and the tile will be easier to remove.
When restoring a damaged fragment, you should take into account that you need to clean its back surface from adhesive base with a wet cloth or spatula.
Next, the fracture site is cleaned with sandpaper, and the pieces of tile are glued together with glue. When it dries, the back surface is covered with glue again. Afterwards, the place for the tile is prepared, cleaned of dust, glue is applied to the surface and the tile, and it is glued. The seam must be covered with grout.
Not an easy job: restoration of porcelain tiles
Chips on ceramic and porcelain tiles may occur due to impact. Damaged tiles can be replaced or there is an option to disguise the chip.

The work is carried out as follows:
- The chip is cleaned and degreased with acetone.
- To tint the glue, add a little dye and mix.
- The resulting composition is applied to the part that has broken off; no hardener is added.
- If the glue is close in color to the tile, it must be removed from the broken part, the chip is cleaned with acetone and dried.
- Hardener is added to the glue and mixed. The adhesive must be applied immediately before hardening occurs.
- The glue is smoothed over the surface of the chipped part, and the excess is removed.
If the polyester adhesive has a matte finish, it will require polishing after it has cured. manually using thick fabric or felt.
When matching the color of the adhesive to the color of the tile, you should not expect a complete match. A good result will be that the damaged area will not be visible.
Hard wax is also actively used for the restoration of ceramic tiles. It helps to cover up any chips that appear without any problems.
Replacing tiles with your own hands (video)
Holes in the tiles, chips and cracks do not decorate the coating in any way. That’s why, when you see something like this at home, you want to immediately repair the defect. Sealing tile cracks is creative process, which everyone can master. Tiles on the wall, floor and other places will look like new if you give them a little attention and effort, and then you won't need to spend a lot of money and completely replace them.
We all understand that if problems arise with the coating, it is better to replace it. But there are not always resources for this. There are quite a few cases when you can stretch it out for some time without replacement. When repairing tiles on the floor is justified, how and how to do it, we will discuss in the article.
Floor tiles most often come off unexpectedly. Yesterday everything was fine, but today problems appeared. It’s okay if the renovation was done recently. It’s clear that they did something wrong. What if the renovation is five, ten, fifteen years old and suddenly the tiles come off? Unfortunately, this also happens. If there has been a long period of time since the repair, such problems are usually caused by movements of the foundation. So, if long-laid tiles on the floor have become loose, this is a reason for concern and inspection of the foundation.
Why did the tile move/lift/loose? This question must be answered before starting recovery.
Why is it moving away?
There may be several reasons, mainly errors during installation, and also shifts in the foundation, which is not at all pleasing. What mistakes lead to the tiles coming off?

Why find out the reasons? Then, to correctly determine further actions. In some cases, it is enough to simply return the bounced tile to its place, in others more serious work is required.
What to do
If one fragment or several pieces nearby have come off, tile repair begins with removing the tile. First, remove the grout from the seams if it has not yet come off. Then carefully pry up the fragment of the coating and set it aside. What are we using? Depends on size. Small ones - up to 30 cm - you can try to lift with a screwdriver, spatula, spatula. You can insert two tools from different sides, trying to tear them off and move them, but it’s better not to use too much force.

There are more problems with large format floor tiles. It is necessary to gradually separate from one side or the other. If you have access, you can use a hammer drill. But do not break it, but rest the spatula near the edge of the tile and make a “diving” movement. Finally, the spatula pushes the tile upward. It may take two or three of these “dives.”
Next, let's examine the fragments. If the glue remains on the tile and there is bare screed underneath, there is most likely a problem with the base. Perhaps the dust was not removed, the primer was not used, or it was selected incorrectly. Let's consider the options.
- The base is strong and dense. It is necessary to check how firmly the neighboring fragments are held.
- If they come off easily, it is better to remove everything and re-install it. In this case, pay special attention to preparing the base and selecting a primer and glue brand. The primer is matched to the tile adhesive.
- If the tiles are only falling off in certain places, a crack may have formed. If this is the case, the crack in the screed must be cleared (as far as possible) and filled with epoxy. After, again, carry out preparatory work, after priming, lay the rebound tiles.
- The base crumbles, crumbles, cracks. The most difficult case. Everything will have to be redone. Remove everything down to the normal layer, fill in the screed and then follow the flow chart.
If the tile came off with virtually no glue, all of it remained on the floor. Only one or a few tiles are falling off, but not nearby, it looks like there was a violation of the installation deadlines. Any glue has a certain period when, after application, it retains its properties. When this period is missed, the tile does not stick well. It can hold out for a while, but sooner or later it will rebound.
 If the base crumbles, you will have to remove everything
 If the tiles without glue bounce off one by one, then either the composition was defective, or they decided to save money and applied adhesive composition too thin layer. This is one of the most unpleasant situations. In this case, tile repair involves complete removal and subsequent rework. It's good if you can remove it most coating without damage and there is at least a small reserve. If not, you will have to combine or completely change the tiles.
How and with what to glue
So, if the base is strong, the glue does not break down, terrible things no longer happen (one or several pieces fell off in different places and that’s it), repairing the tiles on the floor consists of gluing them back. First, let's try it on in place. If it sticks out a little, you need to remove a little of the adhesive solution. How much is a little? Depends on the glue you choose. Composition - any universal adhesive that is compatible with cement and ceramic tiles or porcelain stoneware, if we are talking about it. PVA, Moment and others are suitable. Possibly for sealant. He holds up well too.
When choosing glue, pay attention that it is not elastic. Once dry it should be stiff. Otherwise, conditions are created for cracks to appear.

How to remove a layer of tile adhesive? If you need to remove just a little, you can simply use a spatula or a block with sandpaper stretched over it. After work, do not forget to remove dust (with a vacuum cleaner). If you need to remove more (you decided to lay it on tile adhesive or sealant, or the glue turned out to be thick), then a chisel and a hammer will come in handy. To speed up the process, you can use a grinder with a concrete disc. But it will be very dusty, even if you wet the glue first.

To ensure that the glued tiles stick well, we carefully remove dust. If you decide to use PVA, you can prime it with diluted glue and water. For other formulations, read the instructions. We coat the back side with glue, put it in place, and align it in the same plane with the rest. We fix the position with crosses and place a load on top. That's it, the floor tile repair is complete. We are waiting for the glue to dry.
The tiles crumbled and cracked
Sometimes floor tiles the grout begins to crack and crumble, and the grout spills out of the seams. Moreover, the damage occurs in an area where people often walk. Often the corners begin to crumble, sometimes the middle is pressed through. All these are signs that the glue was not applied to the entire surface, but only in cakes. Accordingly, in places where there is no support under the ceramics, it bursts and cracks under load.

If one or two tiles burst/crack, you will have to tap everything. If there are still voids, it is better to fill them. This will be the repair of the floor tiles. If this is not done, there will be more cracked fragments. It's easier if there are voids around the edges. Then we clean the grout for the seams, take a large syringe, put tile adhesive in it (you can dilute it thinner) and squeeze it out until it comes out of the seams. When the glue dries, it will create a support for the edges. After a couple of weeks, you can return the grout to the seams.
We remove the squeezed out glue and wipe everything around clean. If the glue dries, it is very difficult to wash it off even from a smooth surface.
How to replace tiles if you don’t have a spare one
If the tile has crumbled or burst, in an amicable way, it must be replaced. Then the damaged fragments are removed, the glue is removed to the base (screed) and a new one is placed on the glue. Where can I get new tiles? It would be nice if you had it in stock. No? You can remove a couple of pieces under the cabinets, and put any in their place suitable size. Isn't that an option either? Then all that remains is to make “artistic inserts”. You select tiles of the same size, but the coloring looks better if they are completely different. For single-color tiles, you can take contrasting, bright, black, shiny, mirror ones. Moreover, if several tiles need to be replaced, it is not at all necessary that they be the same. Tile different colors might look more interesting. Then add the same colors in the design of the kitchen, bathroom, hallway - where you have problems with the coating.

If there are cracks, but overall integrity is preserved, and it is not so long before repairs with a planned replacement of the coating, you can use other methods. For example, restoring floor tiles without removing them using cement laitance. Cement (if the tile is light, preferably white) is diluted with water, stirred, and allowed to settle for a couple of minutes. Spray the tiles with water, then rub it well with a sponge. Wipe with a rag and leave to dry.
Restoration of porcelain stoneware, ceramic tiles
If you drop something heavy on porcelain stoneware or tiles, a chip or pothole will form. First you need to clean and sand the chipped area. Grind using a grinder with sandpaper attachments of different grains. There is no need to make it smooth - you need to have good adhesion. Clean the area from dust and degrease with acetone. Next you need to fill it with the repair compound:
- For tiles with a matte surface, polyester adhesive is suitable.
- For tiles with a glazed surface and porcelain stoneware, epoxy resin is more suitable.
There are two options. Disguise or play around. To implement the first option, you need to choose the color of the composition as close as possible to the original. The idea is controversial, it will not be possible to determine exactly. After all, it is difficult to predict how the color will change after drying. Even if the tone is close, the reflection of the light will most likely be different. This means that the repair site will be visible. If you are satisfied with this option, tile repair can be done this way.

For the second option, use your imagination. If you can’t hide it, you need to turn the flaw into a highlight. As an option, make the “patches” deliberately stand out. You can highlight it with color, or you can place an object in the recess and fill it with transparent epoxy. What it will be is your choice. Use your imagination. A couple of options to start with are coins, shells, glitter, rhinestones, crystals, a fake cockroach, butterflies and so on. Everything that comes to mind or that is in tune with the interior.
Restoration without removal: work order
A few simple rules that will help you do redecorating tiles on the floor are lighter. First, let's organize workplace. All repair compounds used are distinguished by the fact that they are very difficult to remove. Therefore, we protect the surfaces as much as possible. Cover with paper and film. Apply masking tape around the treated defect.
First, let's talk about how to add coloring pigments to glue. Find immediately suitable color the pigment will not work. Buy several from which you can get the desired shade. Mix the colors until the color is very close to your tile. The procedure for working with glue and color is as follows:

If you used polyester glue, after initial setting (read on the packaging, but approximately this is about half an hour), use felt or soft knitwear to polish the patch to the desired degree of gloss. Then we leave it to dry. To avoid accidentally stepping on it, fence off the area with something.


