Preparing gladioli for planting in spring - smart tips and tricks. When to take gladioli out of the refrigerator for germination, how to prepare and germinate Gladioli sprouted in February, what to do
Harvesting gladioli corms- one of important points in the life of gladioli. 40-50 days after flowering, the corms reach full maturity, which is approximately mid-September.At this time you need to start digging. You should not delay it, as cool and damp weather with sharp fluctuations in day and night temperatures contributes to the development of diseases.
Cleaning begins from those varieties that bloomed earlier. Plants grown from tubers are harvested last. It is better to dig up gladioli with a pitchfork - there is less risk of damage to the corms.
Buried plants pulled out of the ground by hand, carefully shaken off and placed on a tarpaulin or plastic film. Sick corms are immediately discarded and burned.
When harvesting, the stem is cut off under the base of the corm or leave a small stump (0.5-0.7 cm). Then dry for 1-3 days outdoors, placed in a sunny place in good weather.
To avoid fusarium, which very often affects gladioli, after digging or drying, the replacement corm is separated from the mother, cleaned of the roots, upper covering scales and the corms are separated. After digging it is easy to do; later there is a danger of damaging the future planting material. Then the corms for Pickle for 30-60 minutes in a dark solution of potassium permanganate and dry thoroughly.
For this placed in gauze or nylon bags and hung from the ceiling of the kitchen, where it is always warm and dry. First, they are kept for 2-3 weeks at a temperature of 25-30 degrees, then 3-4 weeks - at room temperature. The faster the corms are dried, the better they are stored in winter.
Children separated from the corm, together with the crumbled earth, are placed on plastic wrap and dried in the shade. Then, to sift out the remaining soil and reject the smallest tubers, from which weakened plants usually develop, they are passed through a sieve with 5 mm mesh.
Before storage inspect the planting material again. Sick corms are discarded, and diseased tissue is cut out from weakly affected ones and covered with brilliant green.
Store corms at a temperature of 5-7 degrees and relative humidity 70%. It is undesirable in cellars, the temperature there is too low. Until frost sets in, you can keep them on glassed-in loggias in paper bags or cardboard boxes, transferring it with newspapers, and then transferring it to the refrigerator, placing it in the fruit compartment.
Before putting into the refrigerator The corms are lightly dried and wrapped in newsprint. Several such packages are wrapped in more thick paper. 4-5 holes about 1 cm in size are made in it for ventilation. Place it in plastic bag, in the lower part of which 5-6 holes are also made. Once a month, the corms are inspected - the diseased ones are removed, the damp ones are dried.
If after digging It was not possible to separate the mother bulb from the replacement one and remove the roots; this can be done 5-7 days after complete drying.When cleaning, only the outermost covering scales are removed. There is no need to remove all the scales, as this will lead to the planting material being scattered.
Gladioli sprout, what to do in this case
It happens that early spring When the dormant period ends, the gladioli sprout - the roots develop, the buds wake up, the sprouts stretch out, but it is too early to plant them.When the roots have reached 2 mm, they are carefully broken off at the base, and the broken points are sprinkled with crushed coal. Sprouts more than 2.5 cm that have developed from buds are carefully cut out sharp knife. The sections are smeared with brilliant green and allowed to dry. Then finely crushed charcoal is rubbed into the wounds.
Removing roots and sprouts is a necessary measure. It allows you to avoid unnecessary waste nutrients, preserving them as much as possible in corms for spring planting.
N. Ya. Ippolitova, Candidate of Agricultural Sciences
About two to three months have passed since the gladiolus corms were stored for storage, so today is the time to look at how they are stored and whether signs of disease or thrips have appeared. In addition, the period of natural rest ends in January, which means that when improper storage corms can germinate.
Pathogenic fungi, thrips and other troubles

Inspection of the bulbs should be carried out several times during the winter.
Today you should carefully inspect the corms and if in any doubt, remove the outer scales and inspect the corms.
Corms affected by fusarium, sclerotinia and botrytis can dry out, and this is easy to notice, as they become light, “empty”.
Such corms (they are dry, wrinkled, brown-black inside) need to be urgently, immediately removed and, without any regret, thrown away. If burnt spots are noticeable on the scales, clean the corms from them.
If there are brown depressed spots, this is most likely due to bacteriosis - scab. Small stains can be cut out with a sharp knife, wiped with a solution of potassium permanganate and sprinkled with crushed coal (you can use an activated charcoal tablet). Don’t be upset, such corms can safely produce normal sprouts in the spring. But an operation to cut out brown putrefactive spots caused by Fusarium or botrytis will not help, since the hyphae of pathogenic fungi penetrate into the vessels of the plant and the infection will remain even if the rotten piece of the corm is cut out.
Therefore, it is better, no matter how offensive it may be, to immediately eliminate all corms affected by spots.
When corms are stored in warm conditions, thrips often begins to “work” - small insect, which safely falls under the scales of the corms.
In storage, thrips begin to suck the juices of the corms, their surface becomes rough. With severe damage, the corms dry out. But they can be treated with insecticides. Naphthalene helps a lot, which can be poured into a bag with corms and closed tightly for up to one month. And then you can destroy the thrips and save the corms until spring, and they can produce normally developed plants.
If the corms are stored, as they say, in bulk, that is, in several layers and the storage is humid, then penicillium mold may develop: bluish sporulation may form on the infected bulbs, and a “nest” of affected ones may form near one corm. They should also be destroyed, the rest should be dried and storage conditions should be improved (reduce humidity and temperature).
In January, before the buds begin to awaken, the baby tubers are heat treated to destroy the hyphae and spores of fungi and microbes. It has been established that when tubers are kept in water at a temperature of plus 53°C (for 30 minutes), the hyphae of pathogenic fungi die. Processing hot water at a temperature of plus 55°C leads to almost complete destruction Fusarium and botrytis spores, however, this temperature is not always harmless for gladiolus sprouts.
Therefore, it is better to use water at a temperature of 53°C and treat the tubers for 25-30 minutes. It is necessary to monitor the uniformity of water temperature. After heat treatment, the tubers must be quickly cooled in a flow cold water and dry, then place again in boxes or bags for storage until spring.
Gladioli bulbs sprouted early, what should I do?
This question can often be heard from “young” flower growers who are not yet fully familiar with the biology of this plant.
In fact, often already in March, early April, those stored in room conditions corms, rather long sprouts appear, although before planting them in open ground 1.5-2 months remain. This happens due to violation of storage conditions, namely due to increased humidity.
The dormant period of gladiolus consists of a period of natural dormancy and a longer period of forced dormancy. During the period of natural dormancy, the corm cannot germinate, even if it finds itself in favorable conditions for this. But the time of natural rest is short and different varieties equals 35-40 days. The corm can then germinate if the conditions are right for growth, namely enough heat and moisture.
When stored correctly, when the temperature does not exceed 5-10°C, and relative humidity air is 60-70%, the corms are in forced rest and do not germinate, since there are no conditions for growth. But when stored in conditions unsuitable for this, when high temperature And high humidity growth processes begin, basically the sprout greatly lengthens, while roots are not formed. This depletes the corm; when planted in the ground, it may not form inflorescences. What to do?
Some, having seen large sprouts, decide that such a corm should be planted in the ground as soon as possible, but with a lack of lighting and nutrition, the plants develop poorly and, as a rule, do not form flowers.
In order to detect trouble in time, it is necessary to regularly and quite often, especially closer to spring, examine the stored corms. If the growth of sprouts is detected, you must immediately spread the corms in a dry, warm place and dry them for 3-5 days, and then place them in a place where the temperature is 2-7 ° C with low air humidity. 15-20 days before planting, namely from mid-April, the temperature in the storage is increased to 12-15°C, which promotes the process of preparing the corms for the formation of tubercles and germination.
Until spring, inspection of corms must be repeated two or three times. We repeat: all diseased corms must be removed immediately.
|
Gladioli - garden decoration. It is best to prepare gladioli for sowing in March.
Despite the fact that these flowers are usually prepared for sowing in March or April, and planted in the first half of May, it happens that the bulbs sprouted already in March. Experienced gardeners know that this is common for gladiolus if the corms are kept at room temperature.
Why do flowers begin to sprout prematurely?
This happens if the storage conditions of the bulbs are violated. If you store gladioli bulbs at room temperature and high humidity, they will begin to germinate as early as March.
During the period of natural and forced dormancy, the bulb cannot germinate. Natural dormancy lasts about 40 days. During this time, the corm will not germinate, even with favorable conditions. But after natural dormancy this can happen, therefore, to prevent the flowers from germinating ahead of time, the bulbs need to be immersed in forced dormancy. Bulbs should be stored at a temperature not exceeding 10 °C and 60-70% humidity.
If the storage conditions of the bulbs are violated, they germinate, while only the sprout lengthens, and the roots do not develop. This is harmful to the plant as it depletes it.
What to do with early germination? You cannot plant the bulb in the ground. There is still little light and nutrition, the plants will grow poorly and will not form flowers at all.

To avoid early germination, closer to spring you need to inspect the planting material more often. If there are sprouts there, they need to be dried in a warm place for 2-3 days, and then removed to a place where the temperature is not higher than 5 °C. 2 weeks before planting, the bulbs can be moved to more comfortable conditions - 15 °C. This will prepare them for germination.
If you can't wait to drop off
Some sprouted bulbs, already peeled, can be planted in peat pots. Using them, you won’t have to replant, since the flowers don’t really like it. However, the plants will require additional care - there is very little natural light, and the plants are sun-loving. The place for pots with bulbs should be cool and well lit. There is no need to overdo it with watering, otherwise the leaves will stretch out greatly, which can lead to breakage after planting in open ground. It is also worth considering that such early gladioli will not bloom this year.
After planting in open ground, it is advisable to cover young gladioli from the sun and wind. You can grow gladioli in tubs at the dacha or on the balcony in flowerpots.

Is it possible to grow flowers by March?
It is possible, but this process is very complicated and requires a well-equipped place. In order for gladioli to grow in winter and delight them with their flowering in March, they need good lighting, comfortable temperature, humidity and constant ventilation. In an apartment, it is almost impossible to achieve all the conditions for growing gladioli at a time when in nature they are still supposed to be at rest. This requires a special greenhouse with lamps, heating, constant humidity and ventilation. Often, by March, gladioli are grown exclusively for sale, and not for their own pleasure. The process itself is labor-intensive.

It is difficult to prepare the material for planting. To get beautiful bouquets from gladioli in March, corms need to be dug up in the first half of September and planted by early December. Since natural light not enough, it is necessary to additionally use artificial. It is turned on no earlier than a week after the bulbs have finally sprouted.
How to plant gladioli correctly (video)
Preparing bulbs and soil for planting
Whatever the decision about which month to grow gladioli, several conditions must be met when preparing the bulbs for planting:
- A month before planting, you need to bring the material home.
- Gladioli bulbs must be cleared of scales. Diseased bulbs are thrown away, but if the lesion is small, you can cut it out. The cut area is lubricated with brilliant green.
- Peeled bulbs cannot be planted immediately. You need to keep them in boxes in the light until they germinate. After this, the sprouted corms of the plant are planted in a pot.

The soil should be thoroughly prepared before planting gladioli. Good choice places and lands - collateral successful cultivation gladioli. What should I do?
- Choose a well-lit place.
- Dig up the beds for future crops and clear them of weeds in the fall. The digging depth is about half a meter. In the spring you don’t need to be so zealous; you can dig not so deep.
- You can add fertilizers to the soil, such as phosphorus or potassium. Add lime to acidic soil or dolomite flour. IN clay soil add peat mixed with sand. You can fertilize gladioli with humus, but you cannot add fresh organic matter, as this harms the plant.
- Gladioli should not be planted after root crops, as there may be a risk of wireworm infection.
- It is best if melons, legumes, strawberries, and garlic previously grew at the site where gladioli will be planted. Dahlias and zinnias are also safe neighbors, since they do not share diseases with gladioli.
How to properly store gladioli (video)
Planting bulbs
Optimal width beds - 1 m. Planting depth depends on the soil. The heavier the soil, the less deeply you need to plant gladioli bulbs. Smaller bulbs also need to be planted at shallower depths. Typically the depth varies from 8 to 15 cm.
In one row, the distance between plantings is 15 cm, and between rows - 25 cm.
Before planting the bulbs, the furrow should be well watered and the bottom should be covered with a 1 cm layer of sand.

Gladioli feel good if planted in moss.
Moss has the ability to retain water, this will help prevent plants from drying out during drought.
Feeding with humus should be introduced when the seedlings grow at least 10 cm.
If all conditions for planting are met, the soil is properly prepared, then gladioli will bloom in right time and will produce good bulbs for sowing next year.
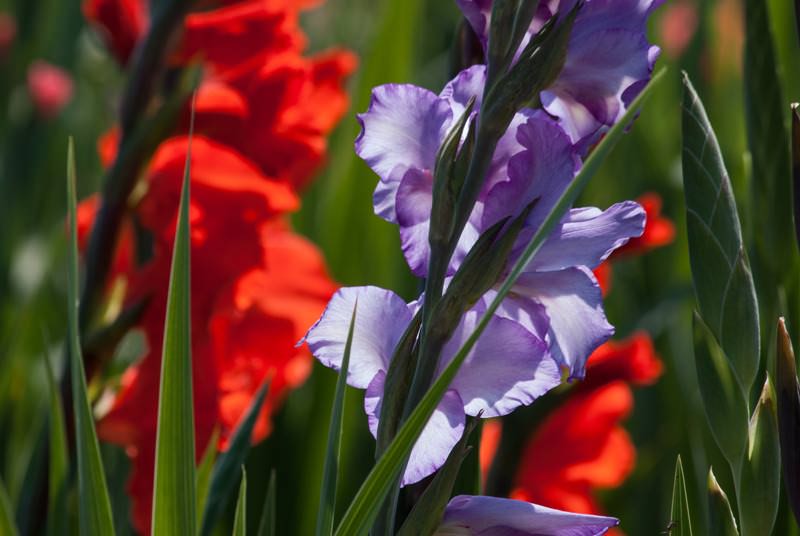
In summer garden plots decorated with bright arrows of gladioli. These perennial flowers are loved by gardeners for their beauty and variety of varieties. Professionals know how important it is to properly prepare gladioli for planting after winter. This lays the foundations for the successful development of plants and their abundant flowering. Properly treated bulbs, once planted in the ground, will have the opportunity to realize their growth potential. At the appointed time, gladioli will delight you with a tall, stately stem, powerful spike, and luxurious bright flowers.
When to germinate gladioli in spring
Gladioli should be taken out of the refrigerator for germination 2 - 3 weeks before planting in open ground, when the soil warms up to 10 ° C. Compliance with this condition will avoid the following problems:
- Soil that is too warm is not sufficiently moist, which can cause plants to develop weak root systems.
- Planting in cold soil will result in developmental anomalies and low disease resistance.
In different regions, the soil warms up differently, so the preparation of gladioli bulbs for planting in the spring begins at different times:
- in Moscow and the Moscow region - preparation of gladioli for planting begins in April;
- in St. Petersburg and the region - events begin in mid-June;
- V Middle lane Russia - gladioli are prepared for planting in the second ten days of May;
- in the Russian non-black earth region - preparation of gladioli is carried out from the first days of April;
- V Southern regions– planting starts from mid-March to mid-April;
- in the regions of Western and Eastern Siberia and the Urals - from mid-April.
If these terms are observed, the peak of flowering will occur at the beginning of September. It should be taken into account that small specimens germinate before large ones, so preparing them is much easier. According to the time of flowering, all varieties are divided into early (blooming 70 days after planting), medium (80 days), late (90 days).
Selecting bulbs for planting
For the winter, gladioli are stored in a fairly humid (optimal humidity level should be 60 - 70%), cool ( comfortable temperature will be at 8 – 10 °C) and a dark place. Most good options- cellar or refrigerator. It is impossible to say in advance whether the planting material will survive the winter. Any accidental failure can lead to its damage:
- too dry air will lead to gradual drying out of the bulbs;
- Overheating can cause premature germination.
Important! If all conditions proper storage observe carefully, then most gladioli will successfully survive the long winter.
Preparing gladioli bulbs for planting in the spring is easy. You need to start by selecting healthy specimens. They are examined and healthy ones are separated from damaged ones. Those that can be treated are put aside, and those that are sick are burned.
When choosing bulbs for planting, pay attention to their size. Preparation begins with healthy and undamaged specimens with a diameter of 2 - 4 cm, with one powerful sprout. Such gladioli are the most viable. In addition, after winter they produce many “babies”, which, after preparation, are planted in the ground. Dark spots on the surface, a dry and wrinkled shell indicates their non-viability.
An important point in preparing bulbs for planting is sorting them by size. Large specimens produce powerful shoots after winter, which drown out the weaker ones. Therefore, it is not recommended to plant them together.
Preparing gladioli bulbs for germination
In most regions, gladioli begin to germinate in April in order to plant them in open ground in May. From right actions Preparing the plants determines whether they will be well received, whether they will develop normally, and whether they will produce viable planting material.
Preparing bulbs for germination after winter takes place in several stages:
- release from scales, facilitating germination;
- dressing to destroy pests and fungi living on flowers after winter;
- saturation with necessary microelements for better growth;
- treatment of damage to stop further spread of infection.
Cleansing from scales
Cleansing from scales - necessary condition preparing gladioli for planting after winter. Scales are dead, modified leaves that protect the bulb from adverse weather conditions. In the spring, it is necessary to clean the gladioli so that nothing interferes with the growth of the bud. They do this very carefully, trying not to damage the growth point.

By removing the scales, you can evaluate how the planting material has been preserved after winter. You should be alert to the presence of areas of rot on the surface, traces of damage by insects (thrips or aphids). If the damage after winter is not great, such specimens are planted, having previously been prepared and treated.
Etching
Before planting gladioli bulbs in the spring, dressing should be done. This eliminates fungal and bacterial microorganisms and insects invisible to the eye.
General disinfection after winter is carried out using fungicides. The drugs “Maxim”, “Fundazol”, “ Bordeaux liquid" From traditional methods A solution of potassium permanganate is effective. Its concentration depends on the condition of the bulbs. If they are still sleeping, the solution can be made saturated. For sprouted flowers, prepare a weak, pink solution. The planting material is kept in potassium permanganate for 3 hours, after which it is washed in running water.
For treatment against insect pests, insecticides “Aktara”, “Karbofos”, “Dichlorvos” are used.
Important! You should strictly monitor compliance with the processing times specified in the instructions for use. Overexposed gladioli can develop a serious disease - hard rot.
Saturation with microelements
Fertilizing is another procedure that allows you to fully prepare plants for planting. In this case, the germination time of gladioli in the spring will be significantly reduced. Introduction minerals lay the foundations for good immunity, ensure proper development, and help prepare abundant flowering.
The solution for the first feeding is prepared as follows:
- For 10 liters of water take 1 gram of potassium permanganate, 10 g boric acid, 20 g ammonium nitrate, magnesium and zinc sulfate;
- make a solution copper sulfate(20 g per liter of water);
- connect together.
Gladioli are kept in the nutrient mixture for 12 hours (for this procedure, only enamel or plastic dishes are used).
To prepare gladioli for planting after winter, growth stimulants are also used to help form a strong root system and promote good germination. The recipes are:
- the corms are kept for 2 hours in a container with a 0.2% solution of sodium humate;
- prepare a solution of “Epin” (2.5 ml per 5 liters of water) and pour it into the bulbs for 5 hours;
- keep the bulbs in a solution of copper sulfate (5 g per liter of water) for 9 hours.
After such treatments, gladioli are poured with a weak solution of potassium permanganate for half an hour.
Damage Treatment
After removing the scales, minor damage may appear on the gladioli. These are signs of scab or fusarium. When preparing plants for planting, the spots are cut out with a sharp knife and the cut areas are treated with brilliant green or powder. activated carbon. After disinfection, dry the injured tissue in air to form a protective film.
Important! Before preparing a new onion, the knife is disinfected in alcohol or a solution of potassium permanganate.
Treatment of affected areas is not always successful. After the procedure, pathogenic microorganisms may remain on the corm, since it is quite difficult to determine the amount of damage by eye.
If the bulb has sprouted in several places after winter, it is cut into pieces and the cut areas are disinfected. After such preparation, each slice is planted as an independent plant.
You can learn how to prepare gladioli for planting in the spring by watching this useful video:
Germinating gladioli bulbs before planting
In order to speed up the flowering period, gladioli should be germinated before planting. This recommendation is especially relevant for northern regions, where summer is much shorter. Without preliminary preparation, they can safely plant only early varieties, giving color in the first half of summer or in its middle.
2 - 3 weeks before planting, gladioli are taken out after winter storage and laid out for germination. By the time of planting, white root tubercles and strong sprouts up to 3 cm high should have formed. Bulbs that have not sprouted after winter are thrown away or burned, the rest are prepared for planting in open ground.

On dry paper or cloth
The method of germination on dry paper or fabric is used when the planting date is still quite far away.
Having taken out the gladioli for germination after winter, they are dried in air. Then dry sheets of paper or fabric are laid on the bottom of the container, the prepared planting material is laid out in one layer, leaving a small distance between adjacent specimens. The box is placed in a warm room, away from artificial heat sources. Gladioli need moderate humidity, diffuse lighting. In such conditions, germination will not be rapid, and the roots will be protected from rot.
In the sawdust
For quick germination, wet sawdust is used. A moist, breathable environment is ideal for the formation of a healthy root system and rapid rooting of plants when planted in open ground.
First they carry out preliminary preparation sawdust They are soaked twice in boiling water to remove resinous substances, squeezed out, allowed to cool, and transferred to a container for germination. Gladioli are placed on sawdust with the bottom down and slightly buried.
What to do if gladioli sprouted in February
In winter, you need to periodically remove gladioli from the refrigerator and inspect them. In case of violation temperature regime growth processes in them can begin ahead of schedule - in January-February. In this case, proceed with the flowers as follows:
- With significant germination, a potted growing option is optimal.
- If the gladioli have not sprouted much, then change the storage conditions in order to temporarily suppress the growth processes.
Growing gladioli in pots
Gladioli are urgently prepared for winter planting in pots without additional germination. Drainage must be placed at the bottom, the rest of the space is filled with soil for indoor flowers. Plants are buried in the ground up to the root collar and watered moderately. After winter, with the onset of warmth, flower pots are taken out into the fresh air.
Changing storage conditions
Preparation of winter-sprouted gladioli involves drying and laying out for further storage in a dry room, at a temperature from +1 °C to +5 °C. Flowers begin to be prepared 15 - 20 days before the planting date. in the usual way. Such plants usually bloom half a month earlier after winter.
Conclusion
It is necessary to prepare gladioli for planting after winter. This makes it possible to achieve long-term flowering and avoid many troubles: poor germination, lack of budding, high incidence. The preparation and germination procedure is simple, but the gardener is required to pay attention, accuracy, and follow recommendations, including compliance with temperature and humidity conditions.
The thaw that suddenly arrived in February made many gardeners worry. Tubers of dahlias and bulbs of gladioli, sensing spring, began to wake up ahead of time and sprout. Agronomist Boris Alekseev tells how to return them to a dormant state.
GLADIOLUS
If they began to germinate in February-March, it means that they either belong to early flowering hybrids, or were stored too late. warm conditions. Ideally, gladioli are taken out of storage and peeled only on April 10-15. At the same time, once in the light and warmth, the late-flowering hybrids begin to wake up, and the early-flowering ones discover the presence of arrows up to 5 mm high, breaking through from the first days of April.
Solution. In the case when the sprouts have emerged a month and a half ahead of time, there is only one thing left to do - move the bulbs to a cooler place than where they were lying until now, with an air temperature no higher than 3-4 degrees. For example, on the bottom shelf of the refrigerator. If you see that the sprouts have stopped growing, then everything is fine. The bulbs can be left there until mid-April, so that they can be planted in open ground in the first ten days of May.
DAHLIA
 What to do with them depends on the size and general condition of the root tubers.
Big, healthy and juicy
They, unlike gladioli, in which it is under no circumstances possible to check the sprouts that have broken through, have “seven lives,” that is, new ones grow in place of broken ones.
Solution. Therefore, now it is better to remove the sprouts on large specimens so that they do not draw moisture from the root tubers, depleting and drying them. After which it is necessary to create cooler storage conditions for the dahlias until April, when they can begin to germinate.
Small, weak and frail
Such root tubers require other ways of saving them from drying out.
Solution 1 . Meaning this method saving the root tuber lies in planting. We cut it by a third and disinfect the cut with charcoal, iodine or brilliant green. We fill the pot with soil, but no more than half the height, and plant the prepared tuber in it.
When the bud, which initially does not exceed a height of 1-2 cm, begins to grow, the soil will have to be constantly added little by little. If this is not done, then the roots that appear above the tuber simply will not grow or will turn out to be weak and short, which will affect the condition of the new nest that dahlias form on top of the old one.
Solution 2. The essence of this method of nursing is cuttings . It is possible when a weak tuber has enough strength to produce 3-4 sprouts at once, with the help of which you can both preserve this variety and rejuvenate the tuber itself.
Holding the sprout as close to the place of regrowth as possible, we break it off, dip the cut into “kornevin” so that the drug does not get on the bark, and plant it in a pot with a light sandy soil, eliminating soaking. All that remains is to water the cutting, cover it with a transparent cup to create a humid environment inside, and wait for it to take root. Usually this happens easily and quickly, so that by the time it is transplanted into the ground, the plant already reaches 3-5 cm and has 2-4 leaves.