Inserting interior doors with your own hands. Do-it-yourself installation of interior doors. Work with construction foam.
Install interior doors not as difficult as it might seem at first glance. If the master has at least a little experience working with doors, then this is a big plus. The only thing that is better to entrust to a specialist is the insertion of fittings. Incorrectly installed fittings can ruin the entire result of the work.
Stages
Installation of interior doors occurs in several stages:
Installation and fastening of the box in the opening
When the wall in which the external door is located is brittle or weak, the reinforcement must be strengthened reinforced concrete beam or a metal frame so that it cannot be moved along with the wall part. Therefore, the jambs are assembled with special glued anchors, which are placed in pre-prepared grooves. If during the repair of the insulation we move the door a little towards the insulation, we will get a better thermal effect - the wall around the frame will be less damp. In these places, installed in the insulating layer, for safety reasons the anchors must be welded to the metal door frame.
- Installation of the box.
- Installation of canvas.
- Installation of additional elements.
Preliminary stage
The technology for installing interior doors is quite simple. However, before starting work, there is one important step that cannot be skipped. This is the door selection stage.
Remember to always follow the manufacturer's instructions when installing the door - deviations from these may void the warranty agreement! There are also some basic rules. Before installing the door, make sure that the door frame is set up correctly - that the blinds and individual element levels are maintained. To fix the door frame, you need to use elements specially designed for this purpose - resistant to lateral loads. The depth at which anchors or expansion shafts enter the wall must be compared to the material from which the wall was constructed.
The final result largely depends on how responsibly you approach your choice.
- The first thing to do is go around the shops. You shouldn't take the first option you come across. If we are talking about online stores, then you need to carefully check the characteristics of the designs.
- The door leaf should fit the frame perfectly in size. All characteristics of the door must be known in advance. You can't do this without measurements.
- Sometimes very cheap options appear in stores. After purchase, the owner may discover that the box or accessories are not included. You have to spend time and select the remaining parts. It's not always possible to do it right. Therefore, there is no need to look at door designs that are too cheap. As a last resort, you must first clarify the presence of certain parts in the kit.
Materials and tools
Materials and tools for installation must be prepared in advance. Tools you will need:
This necessary element for the door. We recommend installing a door frame. The door frame should be harmonious with the collar fabric, so before purchasing, carefully measure the door and consider the choice yourself suitable model for us. There are two main types of frames: fixed and adjustable, which allow them to fit the width of the wall.
Assembly of frame preparation
Doors must be installed in rooms with finished walls and floors, so before we start work, we must first prepare the door. If there are loose pieces of the wall, you need to remove them, large cavities for makeup with solution, small ones but fill with foam. The surface of the leveled wall must be completely dry; it is not recommended to install frames only on new masonry or a plastered wall.
- wood hacksaw;
- screwdriver;
- level.
Materials you need to purchase:
- polyurethane foam (cylinder);
- self-tapping screws;
- wedges
Assembly and installation of the box

Once the door has been purchased, you can begin to work. At the first stage, the box is assembled.
Tools and accessories for frame assembly
Final installation and sealing of the door frame
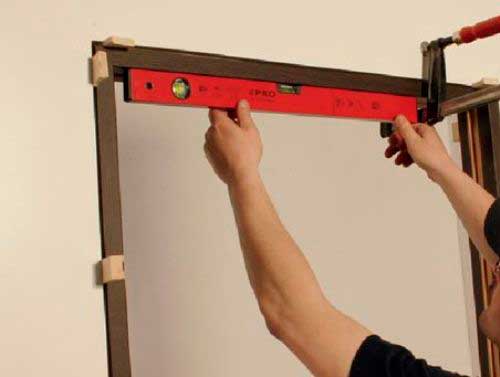
At the next stage of installation, we remove the door leaf and make the final correction of the door frame in doorway. We do this with wooden wedges and adjustable spacers using a level. We recommend installing four posts, which ensures that the distance between the side frame beams remains the same along the entire length. Gap between door frame and the wall should be filled with low friction foam. Before sealing, it is important to remember to tape the frame, which will protect it from possible dirt.Assembling the box is a simple process. The only thing you need to remember is that it is necessary to trim off the frame frames in order to establish a gap between the door leaf and the floor. For ordinary apartments, the gap is set to about 10 mm.
After the gap is established, the racks are connected using self-tapping screws. After assembly, the stage of installing the box in the opening begins.
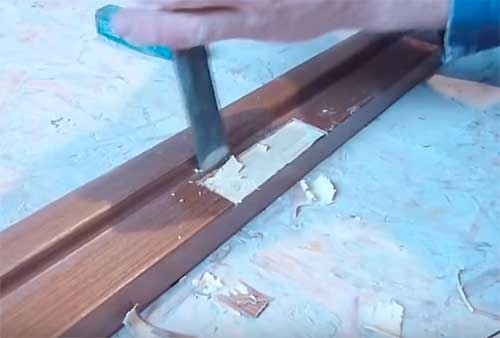
We distribute the foam evenly and accurately, the end of the tube should reach the middle of the gap between the frame and the wall. Only after the foam has completely cured, which lasts from two to four hours, can the wedges, spacers and door leaf installation be removed and the protective tape carefully removed. Excess foam is removed with a knife, cutting it evenly with the edge of the frame.
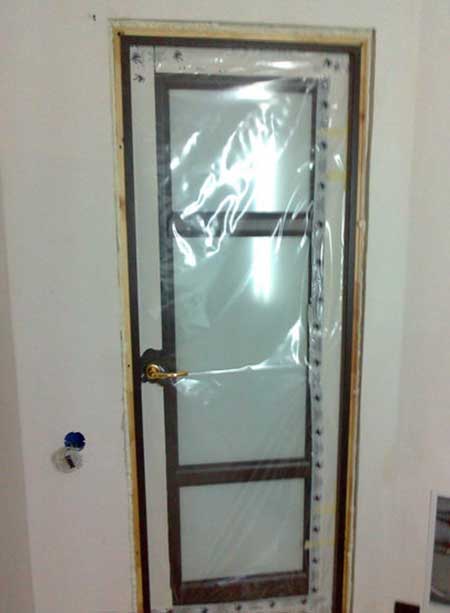
An elegantly finished frame stood
For the wall beams of the main frame, we glue strips that hide the screws and add aesthetics appearance frames You can use wood glue or silicone glue for this purpose, although it is not required. For wet floors or walls, it is necessary to protect the edges of the jambs immediately adjacent to the floor or wall from water and moisture. Silicone that matches the color in the decor of the door frame will be irreplaceable. After assembly, a gap remains between the frame and the wall with visible, dried polyurethane foam. It can be easily disguised with finishing stripes.
It is advisable that the opening be pre-treated. To do this, check the verticality of the walls, as well as the height and width of the opening.
The box is installed using a level and wedges. The level checks the position of the structure in the opening. The procedure is as follows:
- The box is fixed in the opening with wedges at the top and bottom.
- First, the door must be fixed with wedges from below, before checking the position of the structure in two dimensions with a level.
- The average gap between the frame and the opening on all sides should be about 10 mm.

Adjustable frame - perfectly matched
After installing the adjustable frame and removing the spacers and threshold strips, we begin installing the adjustable element. It must be pre-cut in advance, matching its width with the thickness of the wall. To obtain right size adjustable element, we cut off the selected sections in a row. In an adjustable panel of the appropriate size, drill the holes necessary for subsequent installation using screws. We then connect the side trim on top with plastic connectors and metal fasteners.
The door leaf is hung on hinges. At this time, the box is secured only with spacers and wedges.
You should not foam the door frame before hanging the door leaf. The point is that you still need to make sure that the door in this position will not open on its own.
After the canvas is hung, you can foam the gap between the box and the opening.
Types of interior doors
These prefabricated strips should be combined with a pre-cut adjustable panel. We put it all on a wall base unit and connected it to wooden screws. Then, in the holes for fastening the nut, in the groove with the groove, we fix the gasket. Finally, we attach masking strips to the base elements. You can now install the door leaf on its hinges.
What to avoid, the most common mistakes made when assembling a door frame
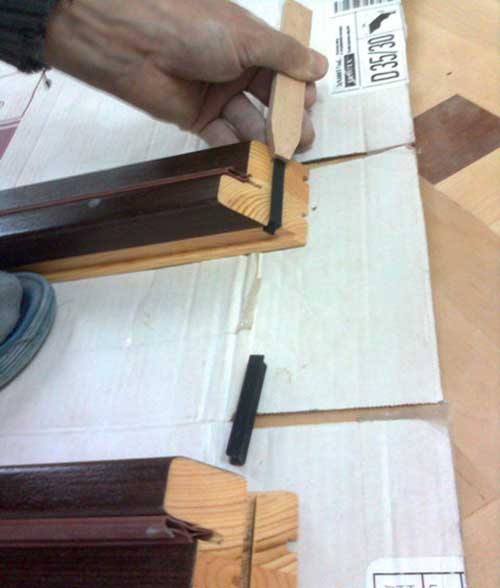
It is unacceptable to insert the jamb into the wall and fix it without pins using the same mounting foam. Particular care should also be taken when folding the frame to maintain the angles between the side beams and the top beams. We place the frame elements on a clean and dry support - preferably use cardboard or a piece of carpeting as a primer. Also, remember that each mounting frame comes with assembly instructions that will make it easier for us to complete the job. Assembly door jamb is not difficult and can be done independently using tools that we all have in our home workshop.
It is necessary to ensure that the foam does not get on the surface of the door. The composition of the polyurethane foam can easily damage the surface, so you should work carefully.

Now you need to install the additional element.
- The additional strip is measured to fit the distance from the edge of the box to the edge of the wall.
- Using a hacksaw, it is cut along the edge.
- The additional element is mounted in the groove and foamed. Foaming is done at several points.
Platbands

Following several simple rules, make sure the frame assembly is professional and durable. How to install an external door? Well installed external entrance doors effectively keep not only the unpleasant cold outside the building, but also uninvited guests. Combining aesthetics with the appearance of a home also enriches its body. Regardless of whether you choose a door in the simplest model or more advanced design, correct assembly counted.
Correct installation of external entrance doors will provide us with convenient, uninterrupted operation and high aesthetics of installation. Without good door installation, the door will also not be properly insulated as specified by the break-in manufacturer. The apparent savings we may make at this stage of investment by deciding on an unrealistic installation can quickly turn into a serious expense if, for example, the door leaks or the burglar lock does not work properly.
After the additional element is installed, you need to wait for the foam to dry. When working with polyurethane foam, you must remember about its expansion properties. The substance should always be applied in measured doses.
The next stage after installing the additional strip is the platbands.
- To install platbands, you need to determine their size.
- After this, the platbands are sawed off using a hacksaw.
- Holes for nails are drilled.
- The casing is fixed.
If the casing has a beak, then it is attached to liquid nails. There is no need to file it down.
Preparing the opening for installation
The installation of an external entrance door must be carried out professional team locksmiths, preferably recommended by the product manufacturer. Among others, you can find reliable experts in the field of door joinery assembly. Via the website search engine: Always follow the manufacturer's instructions included with the door for installation. In addition to these guidelines, there are also general principles construction and assembly that every professional installer should know. So what does the installation look like?
Types of interior doors

Today in stores you can find doors from natural wood, glass, plastic, metal and composites. Mixed designs are also found.
Usually the choice is made taking into account the design of the room and this the right approach. However, it is necessary to consider all the main varieties of these structures in order to know their advantages and weaknesses, as well as the subtleties of care.
The first step is to prepare the threshold assembly. To ensure that the installation is tight and "warm", care must be taken to ensure that the outside and inside of the concrete floor are properly separated by thermal and waterproofing layer to ensure sufficient heat transfer coefficient. The next step is to insert the jamb into the hole and correct position- in single-layer walls the frame is mounted half the thickness of the wall, as close as possible to the outer edge of the wall, and in three-layer walls in the thermal insulation layer.
In the case of entry doors, it is very important to have proper insulation on the wall joinery. Therefore the so-called. warm layered installation. Using this method, the frame is covered with strips: vapor-tight on the inside and vapor-permeable on the outside before being inserted into the jamb. Unless otherwise specified by the manufacturer, the door is secured with a hole in the hole so that it is fixed vertically and horizontally and then secured using stabilizing elements.
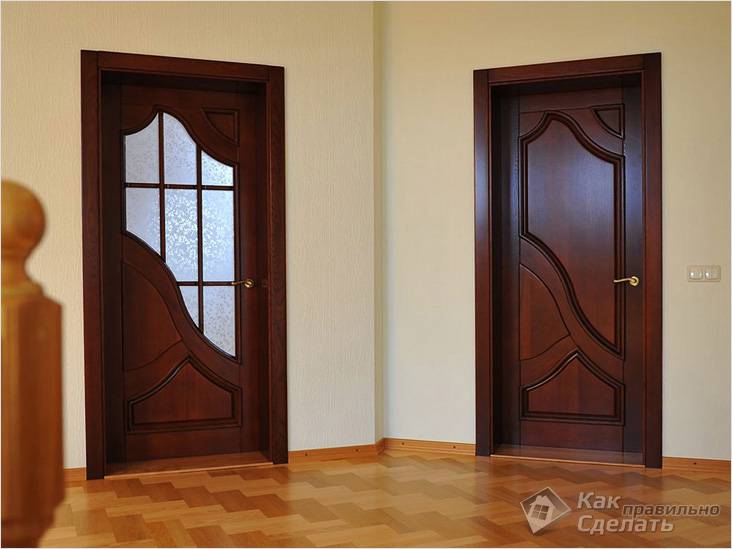
- Paneled from hard wood. Such designs are very durable and prestigious. Moreover, they are very expensive. The most common paneled doors are made of oak and walnut. Designs are made either using glue or without it. The last type is the most durable. Caring for such a door is necessary, as with any natural surfaces. The door must be protected from moisture and high temperatures. It is recommended to wipe them with a napkin. The use of abrasives is prohibited.
- Paneled from soft wood. Ideal for country houses and cottages. IN ordinary apartments These doors don't look very appropriate. They are more suitable for country style. Caring for such structures is the same as for hardwood doors.
- Paneled combined doors. These structures are made of veneer. Valuable breeds they contain little wood. Therefore, such doors are quite inexpensive. Their service life, however, is shorter than that of solid wood structures. However, they can last about 50 years, which is also very good. No special care is required for veneer doors; this is their advantage.
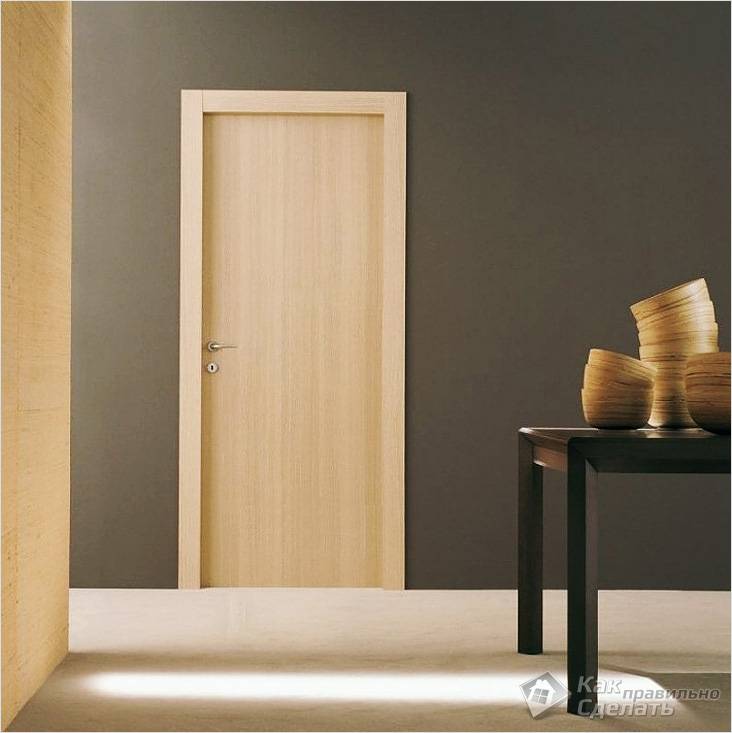
- Panel structures. The advantage of panel doors is that they are inexpensive and do not require special care, are easily replaceable, have a presentable appearance. In addition, they are well decorated and fit into any interior. About 85–90% of all doors are panel doors. This design can be glazed, decorated natural veneer or artificial materials. Panel doors - best option for most apartments and offices.
The next step is to suspend the sash on the pre-assembled jamb, checking the alignment and function: the door should open and close without any resistance, and the gap between the sash and the frame should be equal to the entire circumference. If the setting is correct, we check the operation of the locks and anti-slip locks, then remove the sash and continue to secure the jamb in the wall. We install strips inside the door frame. - All these operations must be carried out in accordance with the manufacturer's instructions.
The next step is to glue the vapor barrier to the outer wall and fill the gap with polyurethane foam. You have to do it carefully so that it is not too much, adds Zdzislaw Maliszewski. Once the seal has completely cured, the vapor barrier is glued to the inside of the wall and then treated. The final stage is to install signs, handles and inserts and check the functioning of the door. Required if necessary necessary adjustment door hinges- in high-quality products, their positioning can be adjusted in three positions.
Video: instructions for installing interior doors
Photo


Good assembly is one of the most important factors, affecting the long-term and trouble-free use of external entrance doors. Installation that does not comply with building codes may result in warping structural elements frame or sash, blocked fittings or even serious damage to the door.
They have an aluminum door leaf with an invisible wing profile and a solid polyurethane foam filling. The function of a thermal barrier is performed by a wing frame profile made of carbon fiber composites and fiberglass. The 111 mm aluminum door frame is equipped with a thermal barrier filled with polyurethane foam. Door with triple sealing surface. Glazed models feature 3 or 4 watt insulated glass with safety glass for exterior and interior use.


Caring for interior doors
It is also different elegant design and the ability to match their vision for the garage door. Additionally, it provides proper ventilation to avoid moisture associated with temperature differences. Items intended for warm installation, available on every construction site, their installation must comply with the principle: the inner layer is vapor barrier, the middle layer is thermal insulation, the outer layer is vapor permeable. Everything is according to the principle: the inside is denser than the outside.
Assembly and installation of the door frame
Company offer - interior door; Entrance doors, technical doors, external doors, wooden windows, door frames, door strips and skylights, as well as blinds and door frames. They can be extended with side lighting and top lighting. This unique collection combines good style and excellent specifications. The design is based on a system of thermally insulated aluminum sections, which is one of the most technologically advanced door systems.


Scheme


Greetings to all home craftsmen! If you are confident in your work hand saw and power tools, then installing interior doors yourself will not be difficult for you. And we’ll talk about how to do this correctly later in the article.
Required tools and materials
To install an interior door, we need to prepare the following:
- building level (laser or alcohol), tape measure and pencil;
- a hacksaw for wood with a fine tooth, a miter box, an electric drill with drills for wood and concrete;
- screwdriver + galvanized screws, hammer and finishing nails;
- a chisel or milling cutter to select recesses for fittings and a plane;
- polyurethane foam, wooden blocks for spacers and wedges from scraps of lumber.

Preparatory stage
Before purchasing a door with a frame, take measurements doorways. The width and height of the box should be slightly smaller, otherwise you will be faced with the need to expand the openings in the walls, which is very troublesome and costly. The gap between the door frame and the opening in the wall should be from 10 to 40 mm - subsequently it will be filled with polyurethane foam.

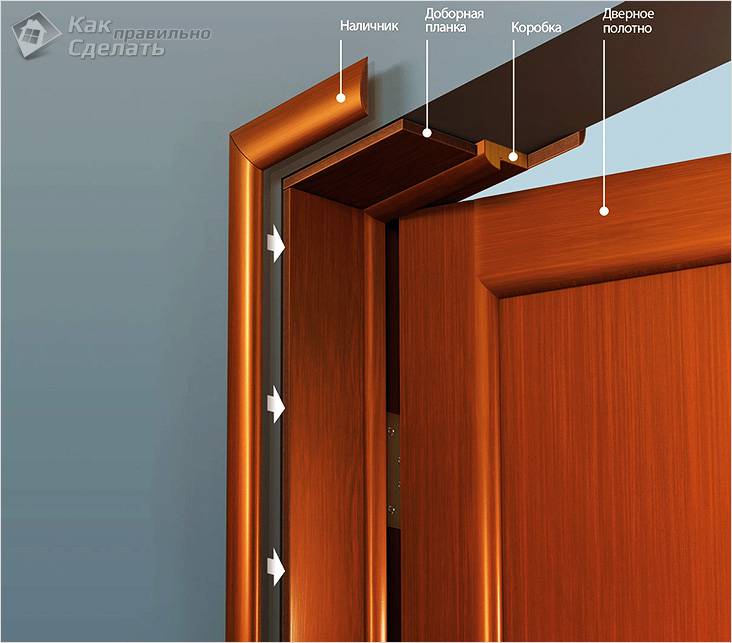
If the depth of the opening exceeds the dimensions of the shaped timber that makes up the door frame, the remaining gap will have to be closed in the future decorative finishing. The easiest way is to use a special strip - an extension made in color door design. In this case, it is recommended to purchase a door frame with a special longitudinal groove for installing the extension; this will significantly simplify installation.

Door frame assembly
First of all, it is necessary to release the door frame elements from the packaging, being careful not to damage their external decorative coating. Box can be supplied:
- fully assembled and ready for installation;
- in the form of ready-to-assemble elements;
- in the form of a figured beam, from which it is required to make a structure to fit the size of the door leaf.

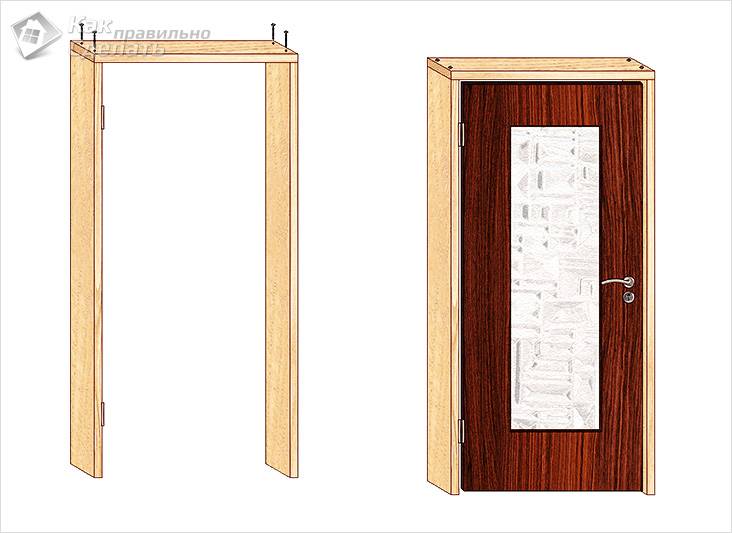
If the box consists of elements sawn to size (loop and trim beams, ceiling strip), it needs to be assembled. Using a wooden peg, knock out the plastic plugs from the top ends of the posts with a hammer.
Then connect the edges of the lintel strip to the top edges vertical racks, insert previously knocked out ones into the formed holes. plastic parts. In order not to spoil the appearance of the box, tamp the inserted element through a wooden spacer.

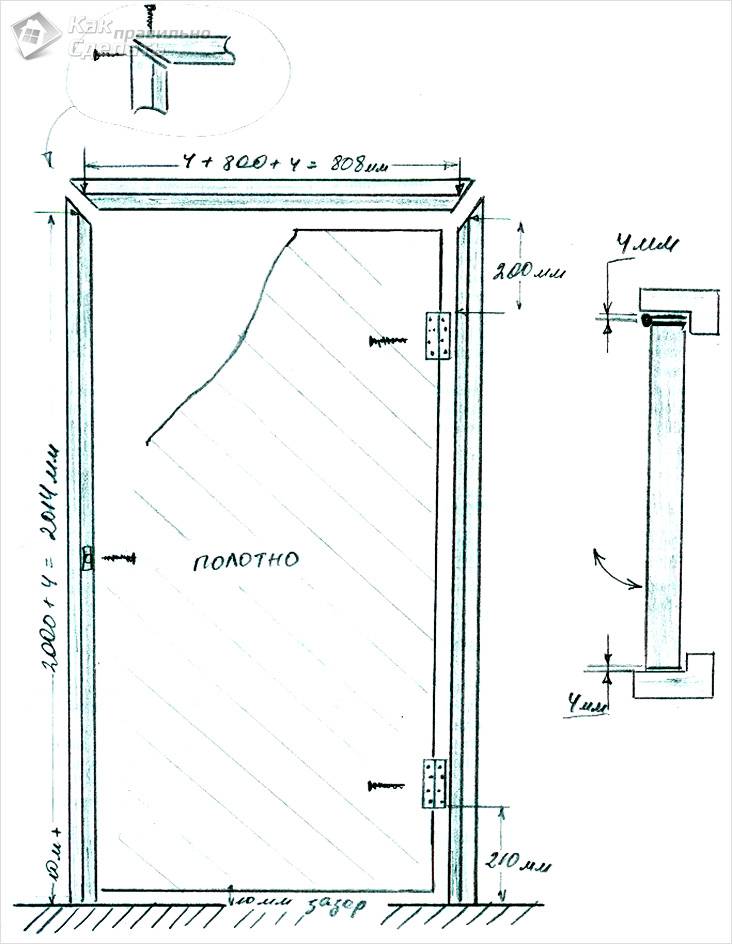
Making a box from timber yourself requires multiple measurements (use only one tape measure!) and accurate calculations. The dimensions of the box are selected in such a way that there is a gap of 3 mm between the door leaf and the frame around the entire perimeter. The frame elements are fastened using galvanized self-tapping screws, which are installed on the back side of the beam in contact with the doorway.
Experienced House master, using a miter box, will be able to accurately saw down the upper edges of the racks and ends horizontal bar at an angle of 45 degrees. To fasten each such connection, two self-tapping screws are screwed into pre-punched holes perpendicular to the oblique cut: top part horizontal element and into the side of the rack.

If you are not confident in your skill, make a U-shaped frame from rectangular pieces of timber - the top one should rest on the ends of the racks. To make the cuts perfectly even, use a miter box. Both ends of the horizontal element are attached with two self-tapping screws to the upper edges of the racks.

Place in the resulting frame door leaf, check the width of the gaps. Measure the opening in the wall and determine at what distance from the edge of the canvas the lower parts of the racks, which should rest on the floor during installation, should be sawed off. There should be a gap of 8 - 15 mm under the door.

If you intend to install a threshold, prepare this element - its length must exactly correspond to the distance between the frame posts. The threshold is inserted between the posts and fastened on each side with two self-tapping screws, which enter into its ends through the vertical frame element. The gap between the door leaf and the threshold should be 3 mm.

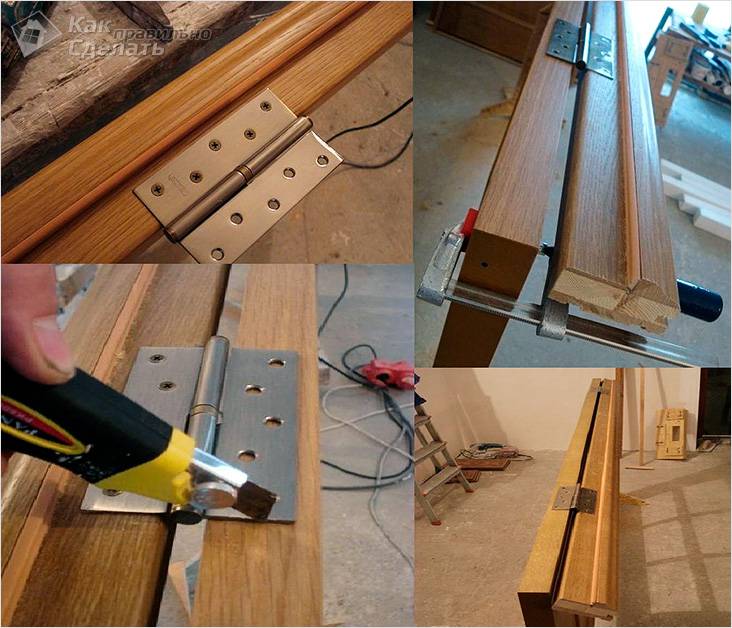
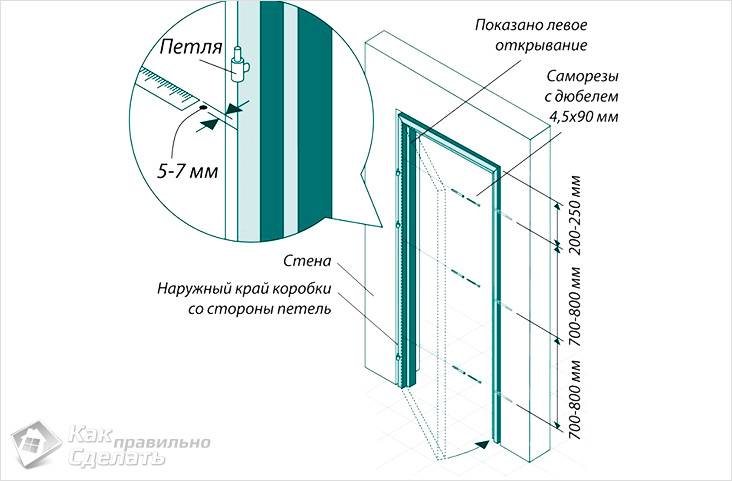
Mark the location of the door hinges and remove a layer equal to the width of the hinges, so that they are attached flush. If it is not possible to use a specialized tool (cutter), the recesses for the hinges are made using a chisel. It is important to act extremely carefully so as not to damage the outer decorative layer of the door structure. The hinges are installed 20-25 cm from the top and bottom edges.
Door installation
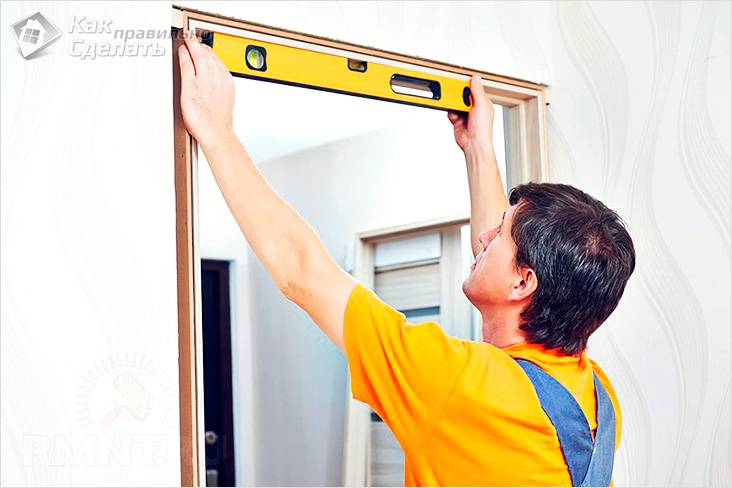
The assembled door frame should be installed level in the opening, strictly vertically. Using wooden wedges, hammered, the box is fixed in the opening. If the design does not provide a threshold, take care of horizontal struts that will prevent the U-shaped door frame from deforming - bars cut to the size of the internal width of the frame are used as spacers.
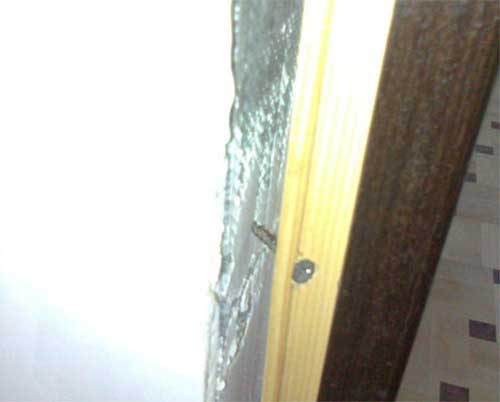
Framed with wood drills various diameters holes are made for fasteners - under the head, which should be hidden hidden, and under the body of the fastener. Then suitable drill holes are made in wall structure. To install the door frame, it is enough to use three anchors; their installation locations are hidden under the reverse lock bar on one side, under the hinge flags on the other. To attach the frame to concrete, dowel nails are required to install the door in plasterboard partition with wooden mortgages, sufficiently powerful self-tapping screws are needed.
The gap between the box and the opening is foamed. It’s most convenient to use polyurethane foam with a dispenser and fill the voids with small portions of foam - in this case you won’t have to cut off the excess, reducing the risk of accidentally staining the outside of the box with foam. When the bulk of the foam has set, the spacer wedges should be removed and the places where they are installed should be foamed.

When installing a box with an extension, the decorative strip is inserted into a special longitudinal groove in the frame and attached with glue. If the structure of the beam does not provide a groove and it is not possible to cut it, attach the strips to the back side of the frame elements before installing the box. For this, small galvanized self-tapping screws are used, installed flush, the fastening pitch is about 60 cm.

After polyurethane foam frozen around the frame, you can carefully remove the spacers and hang the door. Check how it closes and opens; if necessary, adjust the installation of the hinges if they are excessively recessed or protruding beyond the plane.
On final stage platbands are installed. Cuts at an angle of 45 degrees are made using a miter box. TO door frame platbands are nailed with finishing nails or nails without heads. To avoid damaging trims made of MDF and other fragile materials, drill holes in them for fasteners. Fill the joints of the trim strips and the fastening points with mastic to match the color of the door structure.
Video on the topic “how to install an interior door with your own hands”:


