DIY sticker butterflies. How to make butterflies on the wall with your own hands. Master class from vinyl records
Content
You can update your bedroom, give it some romance or freshen up the nursery, or decorate it for the holiday with the help of butterflies on the wall. Decorating with butterflies gives the room a coziness, a feeling of celebration and does not require large expenses. There are a lot of options for decorating walls, and in this article we will look at the most popular and original ones.
Paper butterflies-beauties
The easiest and most economical option is to make paper butterflies on the wall using any paper you can get your hands on. We will need:
- colored paper or self-adhesive film;
- cardboard;
- scissors;
- tape or glue;
- pen or pencil.
We will apply a stencil on the cardboard; you can create several different in style and size.
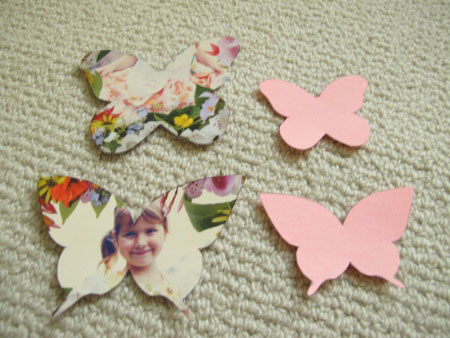
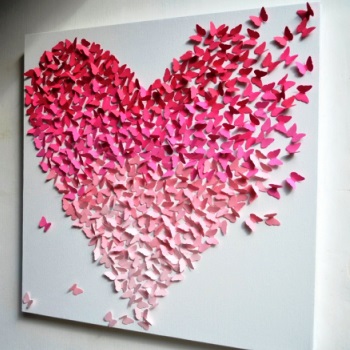
Now, using a stencil, transfer the outlines onto colored paper or sticky film. You can glue beauties from plain paper with tape, glue, or attach them with needles. Distribute them in a chaotic manner or use them to form a heart or the same butterfly.

Butterflies on the wall in the photo in the shape of a heart:
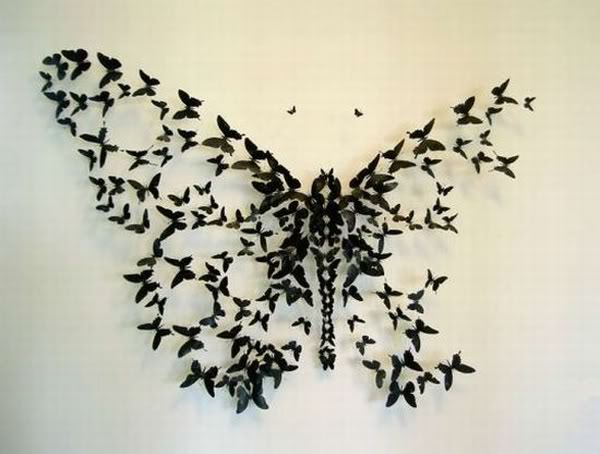
By the way, to make the wall panel look most original, cut out not symmetrical, but slightly uneven marigolds, i.e. nothing bad will happen if the wings on both sides are slightly different, in general, if there is some asymmetry.
In general, for applications in the form of these wonderful insects, you can use everything that comes to hand: printing paper, wallpaper scraps, fabric, plastic bottles, tin cans, colored cardboard and even vinyl records.
Decorative butterflies made from plates
There are probably old records lying around the house that you certainly won’t listen to, or ones that are no longer possible to listen to due to their old age. So these will make excellent wall moths.
To do this, you will again need butterfly stencils for the wall, plates, chalk, sharp scissors, and an oven.
Using the template, transfer the contours of the moth onto the plate, touching its center.

The plate should be placed on foil, placed on a baking sheet and placed in a preheated oven on the top rack. Very quickly the plate will become pliable, then you need to take it out and try to quickly cut the workpiece.
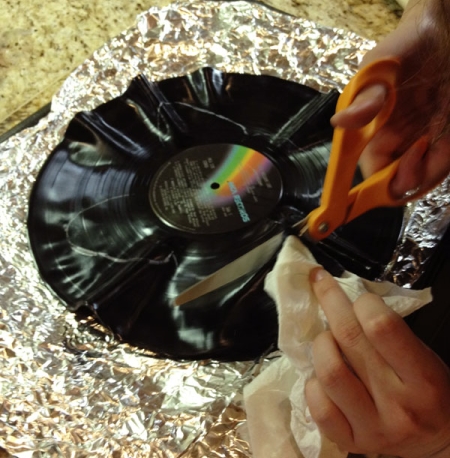
Now the wings need to be slightly bent, and now the blank for wall decor is ready. Make as many of these beauties as possible various sizes and distribute around the room.
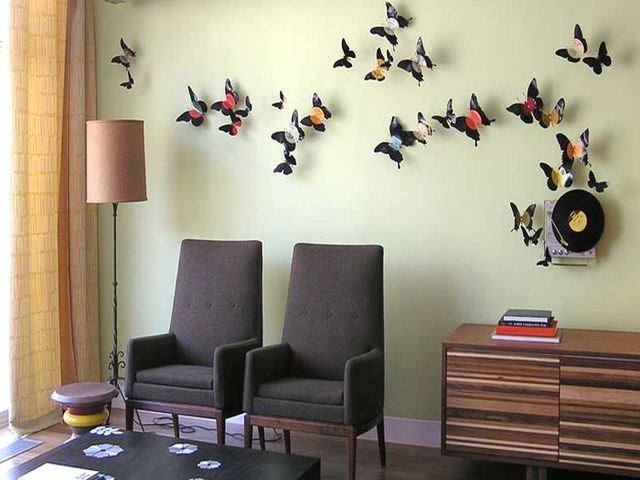
Retro wall with butterflies
Paper fluttering from old books and newspapers will fit chicly into the retro interior. What you will need:
- old books and newspapers;
- scissors;
- glue;
- white paint;
- photo frames of different shapes.
From old issues and books you need to cut out blanks of different shapes and different sizes. Then several blanks of different shapes need to be glued together with little bodies to get this composition:

The prepared frames need to be painted in white and place it on the wall. And place the moth in the frames. It looks very cozy and stylish.

Nylon tights will help you
What just doesn’t go into use folk art. So the butterflies in the interior can also be made from multi-colored tights. What is needed for this:
- wire;
- tights;
- needle nose pliers;
- beads for decoration.
As you may have guessed, you need to create the frame of the future swallowtail from wire. Now this frame needs to be covered with a piece of tights. Make sure that the frame does not fall apart, tighten the material tightly. When the base is ready, you can stick beads on it or decorate it with fabric paints.

For the composition, you need to make at least 15, or even 20, such swallowtails. You can take children's nylon tights and any other suitable transparent fabric, the main thing is that it can be easily tightened.

Butterflies made of clay or plaster
You can make butterflies on the wall with your own hands from ordinary polymer clay, which is sold in a craft store. Plaster of Paris will also work.
Take the clay, roll it out slightly, not too thin, but not too thick, so that the moths look graceful. Now use a baking mold to mold the blanks. You also need to make a hole in them so that you can hang them later. We send the blanks to the oven to simmer.

When all the beauties are ready, you need to thread them decorative tape or any suitable rope and place it in the interior. Pushpins are also suitable for these purposes.
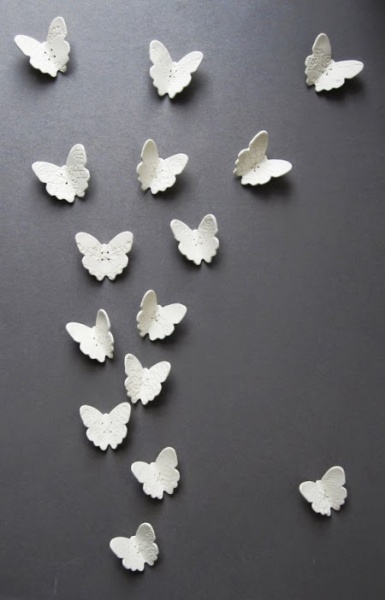
Glowing butterflies
How to decorate a room with glowing fireflies? Prepare the following materials:
- special phosphor paint;
- stencils for butterflies on the wall;
- sponge;
- brush.
Prepare several stencils. Let each have its own example.

Now the stencil needs to be attached to the wall with glue. And then you need to apply paint using a sponge.

You can apply several colors at once to get a 3D effect.

Arrange natural beauties randomly, as if they were a flock of fireflies that had just taken off. This decor will fit wonderfully into a children's room, especially for the youngest children, who will look at everything around them with joy and interest.

Openwork butterflies
Openwork and perforated paper butterflies look gorgeous. And they're pretty easy to make.
To make the workpiece neat and elegant, it is better to print the stencil in advance.
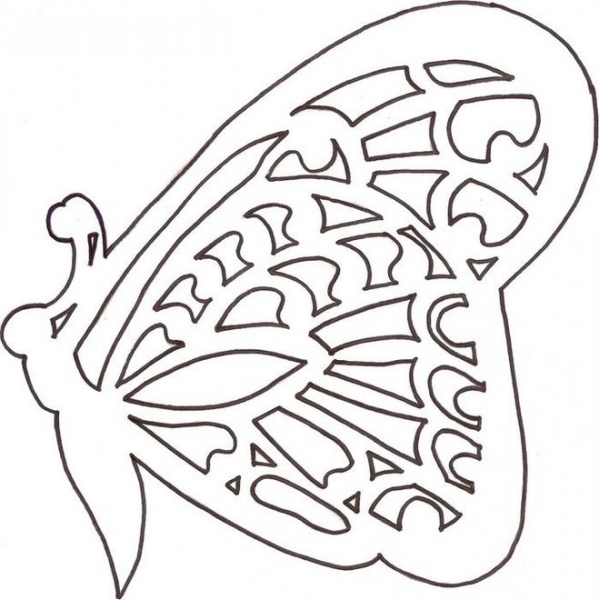
Now prepare the basis for the future openwork - photo paper, colored double-sided paper or bright leaves from glossy magazines will do.
A sheet of paper should be folded in half and placed on some kind of stand, maybe on plywood. Better secure it with tape to prevent fidgeting.
Now you need to attach your template and carefully, using a pencil, transfer the contours onto paper.
Then, using a utility knife, carefully cut out the openwork wings. Then, using nail scissors, cut out the openwork itself.
The more blanks of different sizes you cut out, the more amazing and impressive the panel will look in the interior. In addition, you can decorate the wall with butterflies, either plain or multi-colored, bright, cheerful.

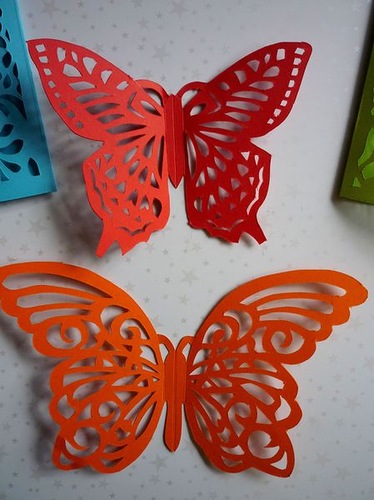
Volumetric panel of butterflies on the wall
Another technique for 3D butterflies on the wall. To work, we will need the usual set: glossy multi-colored paper, old magazines, scissors, stencil, glue or double-sided tape, foam rubber will do.
First you need to cut the magazine sheets into strips. The stripes should be the same width as the future insects.

Let there be stripes different widths, so that the templates do not turn out the same.
Now, using a stencil, draw the contours of the butterflies to cut them out of the prepared paper.
In order for the composition to truly create a 3D effect, on the workpiece, with reverse side, you can stick a piece of foam rubber.

Now you can safely glue your bright insects to the wallpaper or you can make a composition in a frame.
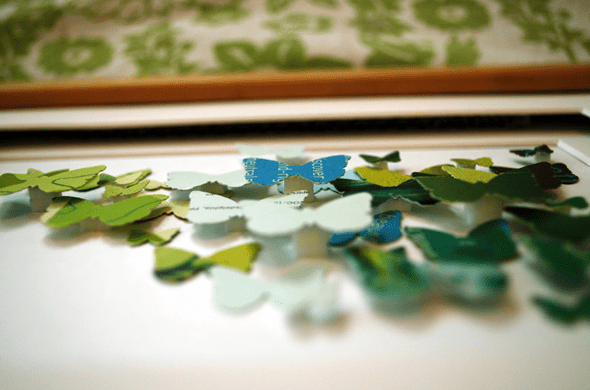
It is believed that butterflies should be literally in every home and in every room, because they bring positive energy and put you in a positive mood. But, as with everything, the main thing is not to overdo it; try to create different compositions in advance so that they look harmonious and impressive. For example, a tree with butterflies:


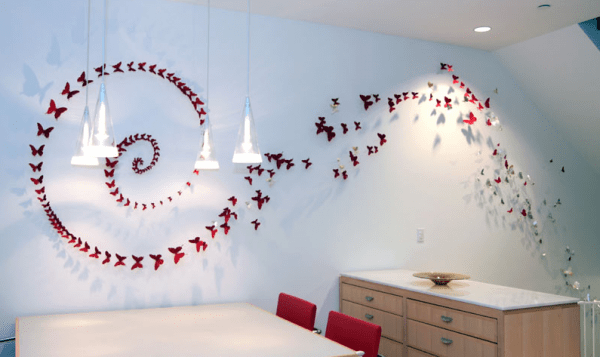
Or moving from one wall to another and to the ceiling:

By the way, with the help of this technique they make a conditional division of the room into different zones: It comes out very original and inexpensive.
Don't forget about origami
Origami can be a successful way to decorate the interior with butterflies; this art should not be dismissed. The main thing is to master the creation technique and that’s it, consider it beautiful and original wall you already have. We offer the following butterfly patterns:

These beauties can be immediately glued to the wall using tape, or you can make a hole in each one, thread a thread and make a floating composition. Place the beauties at different levels and distances, then the composition will seem more voluminous.
By the way, a similar composition can be created from openwork. You already know how to make them. There is nothing complicated about this, connect the butterflies as if you were decorating curtains from threads. You can also use a wooden ring, to which you need to tie strings with pre-attached decorations, you will get a kind of chandelier.
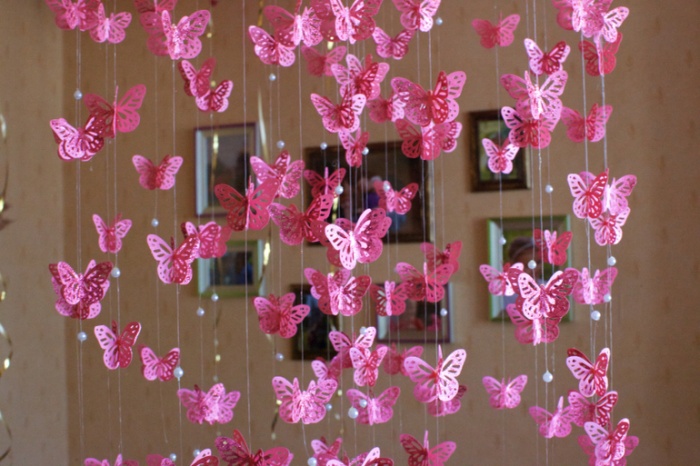

When decorating the interior, do not focus only on the wall, because the decor can be placed on the ceiling, on furniture, along the stairs, on mirrors, curtains, windows and even on the floor.
Remember the combination of colors in interior design: if the room is designed in pastel colors, then butterflies can play the role of a bright spot, but if the interior is rich, “active,” then monochromatic, perhaps even muted tones, will do. Cabbage pots of the same color look very stylish in combination with some decorative elements or furniture.

They also look wonderful in a children’s room, and it doesn’t matter whether the room is a girl’s or a boy’s. Believe me, everyone loves butterflies. It will be especially nice if you involve the children themselves in creating the decor. It's an amazing time.

Mobile made of tin butterflies
A unique mobile of cabbage bowls made from tin cans will look impressive.
So, using a stencil or by eye, if you have filled your hand, try to evenly cut out the beauties from tin cans. Then each workpiece must be attached to a wire, which, in turn, must be secured to the wall. The effect will be amazing when, from a light breeze, the butterflies will flutter as if alive. A little advice, instead of a tin can, you can use foil or you can combine these two materials.

And this is what a whole panel looks like - decorating the walls with butterflies:

For more clear example, we invite you to watch a video master class on creating these charmers and an equally charming applique on the wall from blanks:
Post Views: 1,029
Decorative items and compositions play an important role in creating a cozy atmosphere. But not always and not everyone may have enough money to adequately decorate their home with expensive decorations. Creating such interior items with your own hands often becomes the best way out from the situation, besides, such needlework brings a lot of pleasure - both in the process and in the end result. Today, moths and butterflies have become a popular type of home decoration. These creatures fluttering along the walls can evoke a lot of positive emotions, reminiscent of beautiful sunny days. We will devote our article to an overview of the various possibilities for decorating walls with butterflies yourself, and will also consider methods for making them.
Wall compositions from butterflies
Butterflies in the interior of a particular room can be presented in different ways: they are placed in the form of panels, scattered in chaotic or ordered compositions, used to decorate certain areas (for example, around lamps, artificial trees, etc.) or painted on the walls, often using glowing colors. One has only to look at the photo of a beautiful panel in the form of a scarlet heart made of butterflies, and you will immediately want to place this romantic composition in your bedroom.
The advantage of moth decor is its ability to complement the interior of any room, regardless of its functional purpose and present style. It is important to choose the right color scheme so that it matches overall design. For example, on beige wall Red or green moths will look great, and black ones on white. In the children's room you can create multi-colored pictures of butterflies fluttering merrily over the crib, and in the living room you can decorate an empty wall with a swirl of plain butterflies.
Glowing moths created using special paints look incredibly beautiful. In the evening they become original decoration rooms, enlivening it and filling it with mystery.


DIY butterflies on the wall: manufacturing methods
If you decide to decorate your apartment with such decorations yourself, we suggest you familiarize yourself with the various methods of making butterflies. Although the work will require some expense, time and perseverance, the result, believe me, will undoubtedly please you. To make the composition look more natural, it is better to make moths of different shapes and sizes for it, using templates that you can draw yourself or take ready-made ones from the Internet.
How to make butterflies from paper and cardboard
The easiest way to make paper butterflies. To do this, you can take white sheets and decorate the winged beauties at your discretion, or get a set of colored paper. The advantage of this material is that it is easy to work with, so it is quite possible to involve a child in the production by decorating, for example, a panel of butterflies in a nursery. In addition to paper, you will need supplies such as scissors, templates, pencils, and PVA glue (for bulky items).
There are two ways to make a paper butterfly. The first is to take a ready-made template and use it to transfer the outline of the moth onto a sheet of paper and cut it out using scissors. The second method is simpler. First, cut out a square (rectangle) from paper, fold it in half, apply a half butterfly template to the fold line, trace it with a pencil and cut it out. Then we unfold it and get a beautiful moth. The advantage of butterflies cut out of paper is their airiness - if a slight draft blows, their wings will move as if they were real.
You can make the butterfly wings more elegant by cutting out pre-drawn ones using nail scissors or a stationery knife. internal parts. To make a lush butterfly, cut out two identical paper blanks different colors or the same, and then glued together. In this case, the lower plane - the base - can be simple, and the upper one can be decorated with patterns or cutouts. Double-sided tape is used for fastening.
The cardboard butterfly is also cut out in two ways - using a full or half-template. You can use not only ordinary colored cardboard as a base - multi-colored moths cut out from old postcards and magazines look beautiful.


Corrugated paper butterflies
One of the successful ways to make a three-dimensional butterfly is to use corrugated paper. To do this, you additionally need to prepare a needle and thread. On sale you can find material of various variegated colors and create a real colored butterfly cloud.
First you need to cut out a strip of paper measuring 7x10 cm (you can use other sizes depending on the desired size of the butterfly). Using a needle and thread, we form an accordion in the central part and tighten it, as shown in the photo. We fold the resulting side panels, connect them and, slightly stretching them to the sides, get rid of the folds - we have two wings, which now need to be given a beautiful wavy shape. You need to cut out two wings at the same time, not forgetting to also select areas for the antennae. In this case, templates are not needed - you can give the shape at your discretion.
At the final stage, we unfold and straighten the workpiece, and twist the antennae with our fingers. The butterfly is ready!


Paper origami butterfly
A beautiful, voluminous butterfly can be made using the origami technique. Making it is a little more difficult than in previous cases, however, when you make a couple of these beauties, things will go much faster. Beginners need to use schemes for such work, of which there are quite a lot on the World Wide Web, and be patient and persevering. The art of origami does not stand still, constantly evolving, so there are various ways to fold butterflies - from simple to modular, capable of moving wings, etc. Since we are learning how to make an origami butterfly for wall decor, you can use a simplified technique.
First you need to cut out a paper square, bend it along possible diagonals and twice through the center. Opposite sides fold it, and bend the lower corner tops, turn them over - you get a double triangle. We bend its tip so that the tip is located above the entire part, after which we wrap it and fold it in half along the central guide. On final stage fold the part twice. When making a voluminous butterfly in this way, you do not need to intensively smooth out the folds.


Making butterflies from fabric
Knowing the origami technique, you can make a magnificent butterfly from fabric. To do this, you will need two rectangular pieces of different fabrics of the same size. We sew them together along the perimeter - we get a base fabric, from which, following step by step diagram, presented below, we form the product. To fix all the necessary folds and the final structure, use an iron. Butterflies made of fabric will be an excellent decoration for the room. You can use materials in your work various colors and structures including tulle and lace.


Butterflies from tin cans
If you still have empty drink cans, do not rush to throw them in the trash bin - they may become excellent material for making shiny winged beauties. Use scissors to cut top part and the bottom of the jar, cut it in half, obtaining a base sheet. Next, we will use the template and apply the image of the moth to the surface, cut it out, giving the edges a wavy appearance. To prevent the wings from curling, you can give them a corrugated finish by making longitudinal indentations with the blunt side of a knife or scissors. The resulting blank is decorated using multi-colored markers.

DIY glowing butterflies
Glowing moths look amazing and excellent in the interior, capable of charming with their mystery in dark time days. In this case, their images will be applied to the wall using phosphor paints. To get the glow effect, you need to make sure that there is some kind of light source next to the decor.
So, for work you will need paints of different colors, a sponge, a brush, spray glue and stencils. First, we prepare stencils of future moths from cardboard and glue them to the wall. We wrap a piece of sponge to a brush and use this simple tool to decorate the butterflies. To better understand which paints will look best, it is better to carry out work in twilight. After application, you need to wait a quarter of an hour and remove the stencils. The paints will dry completely in two hours, after which you need to trace the contours with a pencil. To “revive” the composition, you can apply additional strokes of paint near the wings. The decor is ready. Let's turn off the lights and admire the beauty of our glowing, fluttering moths.


Butterflies on the wall - decor photo
In conclusion, we suggest visiting our photo gallery. Here we have tried to collect best examples decorating the apartment with compositions of butterflies. We hope these creative works will bring you a lot of fun and inspire you to create your own wall decorations. Enjoy watching!
If you don't have money right now new renovation, but you want to decorate your apartment, this can be done with the help of homemade panels, stencils or other accessories. In this article we will tell you how you can decorate your walls with your own hands, decorating them with butterflies, as in the photo. It won't take much time, but the effect will be very beautiful, it will look especially good in a bedroom or nursery.
This type of decor involves applying drawings to the walls. Stencils can be either drawn by hand or printed using special blanks and then cut out. In fact, there are many ways to decorate an interior using a stencil. Let's talk about the main options.
Thanks to lighting and loose mounting, a volume effect is created
It turns out especially beautiful if the butterflies are of different sizes and are not placed chaotically, but in the form of a pattern, or are used to zone a room. In the video you can see examples of the use of butterflies in the interior:
Let's start production
First of all, you need to decide on the form of the future application. If you are bad at drawing, it doesn’t matter – you can download and print ready-made examples stencils with butterflies. Of course, they also buy ready-made stickers, but we do everything ourselves, so even if you don’t have a printer, you can order a stencil print from a photo workshop. Well, if you -
If you are a born designer, you can easily draw butterflies on paper yourself.
Butterfly stencils (click to enlarge): 


Advice! If you need large drawings, you need to look for them in vector format, then after printing, stretched pixels will not be visible.
Then we’ll decide on the color – make monochromatic silhouettes, or paint them. If you choose too many colors to paint your wings, the result may turn out to be motley and disappoint you. Try to choose colors that match your interior, while the decorations should be contrasting so as not to blend into the background.
Manufacturing methods and materials
You can decorate walls from almost any available material. The most popular methods are:
- Paper. Most affordable way. You can print it out, decorate it yourself, and cut out any curls the easiest way. The main advantage is low price material. The paper is easily attached to the wall in any way, and the wings of the butterflies move well from the air currents. If you get tired of decorating the walls with butterflies, you can easily remove it without regretting the time and money spent.
- Cardboard. Decorations cut from it will be many times stronger than paper ones. It is more difficult to cut out the curves, but the cardboard will be able to take the desired shape of the wings. If you wet it and put it under a press, then after drying the cardboard will retain this shape. Some butterflies with raised wings can be made this way.
- Self-adhesive film. You can find thick polyethylene or vinyl film in a variety of colors with a glossy finish.
Advice! To achieve the desired effect, you can combine various ways. Use decor different colors and size, from different materials, mix with other pictures. For example, butterflies will look great in combination with flowers, dragonflies, birds, and grass.

- Textile. Perfect if you want to decorate curtains or walls with a soft finish.

- Tough. Original butterflies are made from tin. If you want to surprise your guests, make butterflies from this material. When cutting, be careful not to cut your fingers. If you have small children, place the butterflies out of their reach.

- Wallpaper. If you are sure that such a pattern will not get boring, then you can purchase wallpaper with butterflies for the walls. This option is perfect for the corridor, hallway, kitchen, nursery, bedroom. If you decide to use this method, read our article about.
- Dye. Having made a stencil, you can easily paint the design on the wall. The disadvantage is that you will only get a monotonous silhouette.

- A chandelier with butterflies is also a good option, which looks very impressive due to the lighting. You can make it yourself from a lampshade from old lamp. First paint it in suitable color, and then glue butterflies that you can color acrylic paints, add LEDs and rhinestones to them. Thin chains and wire decorated with beads are also used for fastening.
- Origami butterflies. In this case, you do not need to cut out paper, but you need to be able to assemble origami. It's not very difficult, the main thing is to do one thing, and the rest will go automatically. The main advantage of this option is that you can make a three-dimensional composition.

How to decorate walls with glowing butterflies
To decorate the walls with glowing butterflies you will need stencils, fluorescent paint(several colors), brushes and glue. After securing the stencils to the wall with glue, apply paint. We wait for it to dry completely, remove the stencils, turn off the light and admire the glowing butterflies! 
Butterfly decoration in the form of a painting
If you are hesitant to glue or paint butterflies on the walls, the ideal solution is to place butterflies in the form of a painting. Butterflies are cut out of any material convenient for you and hung on the wall in a frame. If the painting is under glass, dust will not settle on the butterflies and the fragile elements of the crafts will not be damaged. 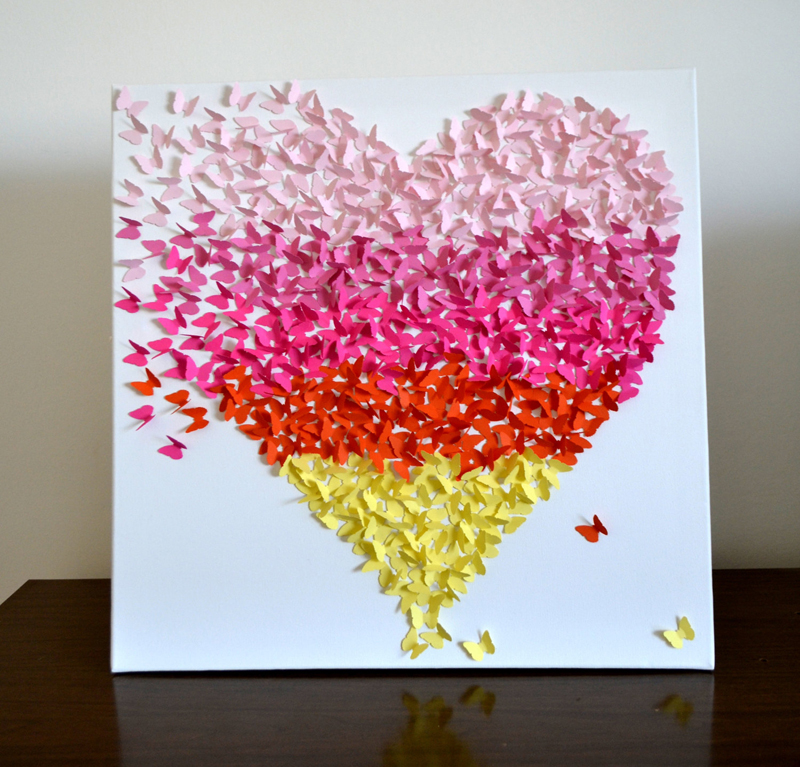
Forming a general composition

To get the maximum effect, you need to choose optimal location butterflies on the wall. This can be done in many ways: in the form of a swirl, a heart, a flower, a tree, at the head of the bed, or in a random pattern in suitable places. To accurately repeat the desired contour, first make a barely noticeable marking on the wall with a pencil, which you can then erase.
Attaching the decoration

To securely secure the decoration elements, you can use one of the methods.
- Glue using regular PVA or wallpaper glue. It's important not to let it get dirty front part. The easiest and most affordable way. To make the wings flutter from the air, glue the butterflies to a small piece of foam.
- Pin mounting is suitable for fixing to plastic panels, wallpaper and fabric. Once removed, the pins will leave almost no trace.
- Hang on threads, chains, wire. This method is best used for mounting on a ceiling or chandelier.
- Attach with double-sided tape.
Let's sum it up
As you can see, butterflies on the wall can be an excellent decor that will add romance and spring mood to the house. This way you can pleasantly surprise your other half while enjoying the process. Choose the most best option for yourself, and start making!
To make the interior comfortable, you need to pay more attention to details. One of these details may be the presence of wall butterflies. They are a symbol of lightness and are associated with summer season, when it’s warm and sunny outside, so if a person wants to provide real comfort in his home, then butterflies created with his own hands or purchased in a store will be an ideal option.
In the interior
Butterflies in the interior are presented in the form of a panel, which is made from a variety of sheet material, and then mounted in an elegant applique on one wall or several at once. There are many options for materials for creating butterflies, as well as many variations in how to hang them; it is the combination of these factors that affects exactly how the presented decorative element will look in the interior.
Butterflies can be mounted on the wall, either in any form or create a single three-dimensional picture.
Attention! If you make this decorative element with your own hands, it is recommended to select a lighter material, then when the wind blows, the butterflies will rustle their wings, creating the effect of being ready to fly up.
What style are they suitable for?
The presented decorative element is suitable for decorating almost any style, but they look especially bright if you have the following room design styles:
- Provence;
- hi-tech;
- modern;
- minimalism;
- classic.
The main thing is to ensure that the color of the butterflies matches the overall color scheme interior design, because otherwise the decoration will turn out to be ridiculous and tasteless. But it is desirable that the butterflies differ in color by at least 1-2 tones, since otherwise they will simply merge with the walls.
The following combination will be organic:
- red and green on a beige wall;
- Yellow, brown and black on a gray or white wall;
- rich blues or reds on a pink wall.
Preparing for work
To create a picture of paper moths, you need to carefully consider the future composition, and then begin preparing stencils. If your own imagination does not suggest any ideas, then you can find photographs of compositions with wall butterflies on the Internet. The image of a whirlwind or simply a scattering of moths in suitable places is popular.
Having decided on the future composition, you need to select the material from which they will be made. decorative elements, and create a stencil. When you are away from home necessary materials, you will have to visit any stationery store or arts and crafts store.
Moths are created on plain paper or vinyl film using stencils. It is advisable to purchase several stencils, then when mounted on the wall, the butterflies will differ not only in size, but also in appearance, which will look more original.
What material should I use?
You can cut moths from almost all materials:
- paper;
- cardboard;
- vinyl film;
- textile.
All presented materials are characterized by a number of advantages and disadvantages.
Paper
The presented material is suitable for people who are encountering interior decoration with butterflies for the first time, since paper is the easiest way to create beautiful butterflies. Due to the low cost of the material, you don’t have to worry about how much paper it will take to cut out butterflies. You can opt for colored paper, which can be purchased at any stationery store.
If a person prefers variety, then you don’t have to stop at just one color and cut out moths from glossy magazines you’ve read a long time ago. As a result, the home owners will become the owners of a decoration consisting of butterflies of different colors.
You can attach butterflies from this material in any way. The big advantage is that when the moths are fully glued, they will not stand out much above the wall surface, but if you glue only the central part of each individual butterfly, then you can make them sway in the wind.
Cardboard
Moths made from cardboard will be several times stronger and more reliable than paper ones. When cutting out such butterflies, you will have to put in a little more effort, but you have the opportunity to shape them the way you want, since the cardboard easily takes the shape and retains it forever.
You can bend the wings of insects or make them rounded. To carry out these actions, you need to slightly wet the cardboard and, using a weight, bend it in the desired way. Once completely dry, the cardboard will forever remain in the desired form.
Difficulties may arise when attaching cardboard decorative elements, since they will have to be secured more securely.
Vinyl film
Vinyl film, which is a self-adhesive material, is simply ideal for creating decorative moths. The film is glossy and colorful, as a result of which the moths are not only characterized by quite bright colors, but also shimmer in the light.
Cutting butterflies from such material is quite easy, and attaching the resulting butterfly to the wall is even easier, since you only need to remove it from the film protective layer, and then glue it in the desired place. If the apartment owners want the moth to move its wings, then the protective layer must be removed only in the center, in the form of a thin vertical strip.
Textile
The fabric is ideal material to create butterflies if the walls are decorated with liquid plain wallpaper, drapery or any fabric that is soft to the touch. Moths cut from the specified material will only complement the interior, adding coziness to the room.
How to attach?
In order for the created moths to stay firmly on the wall and not fall off the next day, it is important to be especially careful when selecting a fastening method; there are several of them.
Glue
Using glue to attach butterflies to the wall, the apartment owner can be sure that the described decorative elements will hold tightly. You can use any glue, either in the form of a pencil or PVA. The main thing is to make sure that you do not use a very large amount of glue, as it will protrude beyond the edges of the moths and ruin them appearance, leaving marks on the wallpaper.
Glue is considered in a simple way fastening the presented decorative elements to the wall.
Pins
To attach the butterflies you created yourself, you can use pins of different sizes and shapes. At the same time, to add butterflies to a picture of butterflies held together with pins, the pins should be selected with some kind of beautiful head or decorated with different pearls. Pins are suitable in cases where the walls are finished plastic panels, regular or cork wood, as well as plasterboard.
If wallpaper was used as wall decoration, then you can perform a slightly different action. Using pliers or pliers, bend the end of the pin 1-2 centimeters at an angle of 90 degrees. Having completed these steps, the bent end of the pin is placed under the wallpaper, thus securing the moth.
Attention! To connect a pin and a butterfly, use Moment glue.
Foam plastic
Take a small piece of polystyrene foam and, using glue, connect it to the butterfly on one side and to the wall on the other. This mounting option is quite unreliable, since foam plastic is not a strong enough material and if it breaks, it will be very difficult to separate the remaining part from the wall.
Threads
Using thin threads or fishing line, the moths are suspended from the ceiling or chandelier by a cornice. This method of fastening makes it possible to create a three-dimensional picture.
Wall decoration with glowing butterflies
To create this type of design, the butterfly should be attached to a white wall, and a table lamp should be located nearby.
For this decoration option you will need the following components:
- stencils;
- phosphor paint (preferably several colors at once);
- pencil;
- several sponges;
- palette and brushes;
- glue (recommended in spray form).
After preparing all the described things, you need to perform the following steps:
- Initially, you need to make several stencils, which are attached to the wall with glue.
- The sponges are cut into several parts, each of which is attached to the handle of the brush.
- If it was decided to use paint of several colors, then each color is separately prepared on the palette, and then applied one by one to the stencils already attached to the wall.
- Once the paint is completely dry, remove the stencils, turn off the lights, and then enjoy unusual appearance glowing butterflies.
Attention! To analyze whether the paint is applied correctly, it is recommended to carry out the described actions in dim light.
Master class step by step
Those people who have decided to make their own butterflies for wall decoration should familiarize themselves with several master classes on how to create them.
Moths made of colored paper
To create butterflies from colored paper you will need the following materials:
- thick colored paper;
- printer;
- sheets of white paper (from which templates will be created);
- cardboard (the density is chosen so that it can be bent);
- a simple pencil;
- scissors;
- glue.
Having prepared the presented components, you can proceed to creating:
- You need to print several templates and then cut them out of paper. If you use pictures of different sizes, the final result will be more interesting.
- The cut out templates are applied to cardboard, outlined with a simple pencil, and then cut out. If possible, the templates can be immediately printed on cardboard.
- The templates are traced on the back of colored paper and then cut out. It is recommended to create more instances. Each specimen is bent in half, this is necessary to provide the moths with the effect of fluttering wings.
- A small amount of glue is applied to the fold of each butterfly, and then the blanks are attached to the wall. The central part of the moth needs to be lightly pressed against the wall with your finger, this is required so that the moths do not lag behind.
Attention! To make the butterflies more realistic, they should be placed on the wall in such a way that they appear to be flying in one direction.
Origami
Enough original solution will decorate a wall using moths made using the origami technique.
To make such a moth you will need the following components:
- paper (sheet from a book or newspaper);
- paint - used to darken the edges of the wings;
- thin wire;
- pliers;
- a simple pencil, ruler and scissors.
Having prepared all these things, you can move on to creating butterflies:
- A square measuring 4*4 is cut out of a book or newspaper sheet (it is allowed to use a square measuring 5*5).
- The paper is folded in half twice.
- After this, the square is folded diagonally in two directions.
- The paper is folded inward, resulting in a triangle.
- The two tips of the top layer of the triangle are bent towards the apex.
- The triangle is turned over to the side, while the bottom corner needs to be bent up so that it extends beyond the moth.
- The formed triangle is bent to the other side and glued to the base.
- The edges of the wings are darkened.
- A bird with bent wings is created from wire.
- The butterfly unfolds with a small triangle upward, its wings are bent and given a realistic shape.
- The wire is dipped in glue and attached in the form of tendrils.
The made butterfly can be attached to the wall in any of the following ways.
From vinyl records
Making butterflies from vinyl records is not difficult if you follow the plan. You need to prepare a number of components:
- unwanted vinyl records;
- black and white chalk (can be replaced with colored pencils - you will need any two colors);
- moth patterns;
- scissors.
Having prepared auxiliary elements You can proceed directly to making butterflies:
- The middle of the template is marked on the vinyl record. The outline is outlined on the vinyl record with white chalk, and on the sticker located in the center of the record with black chalk.
- You need to take a baking sheet, put foil on it, and then place a vinyl record on the foil. The oven is preheated to 400 degrees and a baking sheet is placed at the top of the oven. The plate must be removed as soon as it begins to deform - after approximately 45 seconds.
- Using sharp scissors you need to cut out the butterfly. If during this action the plate begins to harden again, it must be placed back in the oven to soften. Vinyl cools quickly, so you need to cut out the moth not only carefully, but also at a fast pace. It is possible that you will have to warm up the record several times.
- Once you are able to cut out the butterfly, you need to carefully bend its wings.
After completing these steps, the butterfly can be attached to the wall.

From clay
Making moths from polymer clay is popular.
You will need the following components:
- butterfly baking dish;
- polymer clay (2.5 butterflies require 60 grams of material);
- white thread - the moth will hang from it.
Having selected all the components, you need to follow this plan for creating a butterfly:
- Using a baking mold, blanks are cut out of polymer clay, using a needle to make 4 holes in the center of the blank. The wings of moths bend over different angles, and they are located in glass form for baking. The clay is baked in the oven for 15 minutes, the temperature is selected as indicated on the clay packaging.
- If after baking the moths you need to enlarge the holes in the center, you can take sharp knife and carefully enlarge the holes. You can also use sandpaper and carefully sand the edges of the product. If desired, the finished figures can be opened.
- The thread is threaded crosswise through the holes and tied at the back with a knot. You need to pierce a pushpin through the created knot and attach the butterfly to the wall.
Such butterflies, looking quite unusual, give the interior a certain elegance.
From the pages of a book
From the pages of an old book you can make not just individual moths, but a whole wreath of them.
To do this you need to prepare the following elements:
- an old book (if you don’t have one, you can use unnecessary magazines or newspapers);
- thin branches (a willow branch will do);
- three wire hangers;
- hot glue;
- decorative elements in the form of beads, seed beads, shells and pearls;
- several twines;
- scissors;
- simple pencil.
Having prepared these elements, you can proceed directly to creating a wreath:
- You can use a ready-made stencil and simply trace it on the page of the book, or you can draw the moths yourself. In the second case, you need to fold a book page in half, draw half a butterfly on it, and then cut it out.
- You need to collect willow branches and soak them in water, this will make the branches softer and prevent them from breaking during bending.
- At the same time, you need to bend a wire hanger into a ring and wrap it with twigs, which should be pressed tightly one to one. The wreath is left to dry. After the wreath has dried, the twigs are secured with hot glue.
- To create antennae and bodies for butterflies, you need to take several beads and two pieces of string. Using hot glue, the beads are fastened to one another; while the glue is still warm, you need to insert two pieces of string into the hole. After this, the body is glued to a piece of paper. You need to make sure that the wings are slightly bent - this will provide a fluttering effect.
- You need to beautifully place the moths on the wreath and attach them with hot glue.
The wreath can be placed not only on the wall, but also on the chest of drawers.
If the presented method of creating moths from book pages seems too complicated, then you can use another method. To do this you will need the following elements:
- old book;
- adhesive;
- scissors;
- photo frames of different sizes;
- white paint.
Having prepared these elements, you can start creating moths:
- The frames are painted white (the paint color can be changed if desired).
- Butterflies of different sizes are cut out from an old book.
- The butterflies are glued together, the middle one is glued to the center of the largest butterfly, and the small one is glued to the center of the middle one.
- Butterflies are placed in photo frames and then on the wall.
It won’t be difficult to create a room decoration consisting of butterflies on your own; the main thing is to rely on your strength and start making simple decorative elements, for example, butterflies from colored paper. And those people who are fond of origami should definitely decorate their apartment with moths made using this technique.
Today there are many options for decorating a living space. And if the decor is created according to all the rules and with soul, then the entire interior takes on a harmonious, holistic and complete appearance.
Butterflies are considered popular elements of modern decor. And this is understandable, because they, being symbols of summer, lightness and beauty, create a festive and at the same time cozy atmosphere in the room. In addition, creating decorative elements in the form of butterflies is not at all difficult and does not require a lot of money.
Butterflies in residential premises for various purposes
Children's room
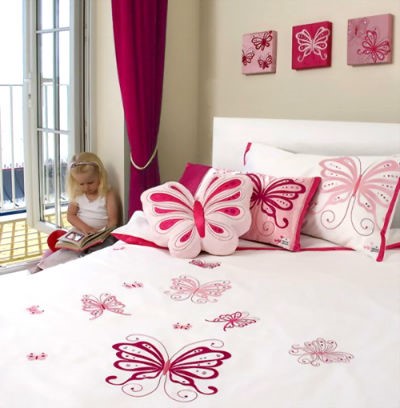
Decorative butterflies will look great in a girl’s nursery. Multi-colored beauties surrounding the little princess will contribute to the development of her imagination, and will also relieve her of negative emotions and impressions. They can be located on wall panel, bed linen, ceiling. They can be made in the form of drawings, stickers, paper applications and even made of plaster.
Living room
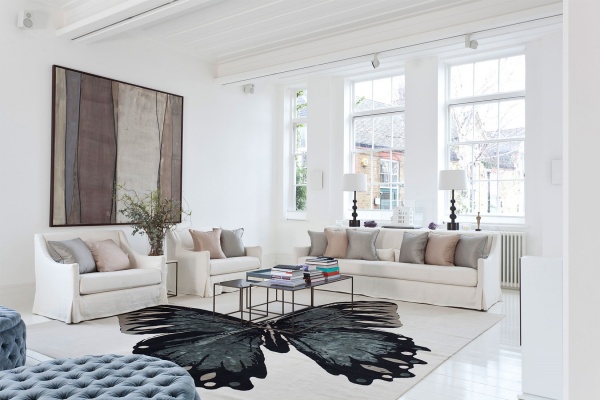
In this room, a large number of butterflies will be unnecessary. Therefore, you should limit yourself to placing only a few elements with this type of decor here. So, you can buy a stylish floor carpet with the image of a large butterfly, or a cozy blanket decorated with them; these cute insects can also be depicted on curtains or walls. This decor will undoubtedly help create a warm and cozy atmosphere in this room.

Bedroom
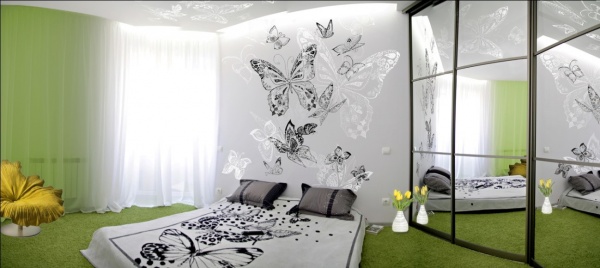
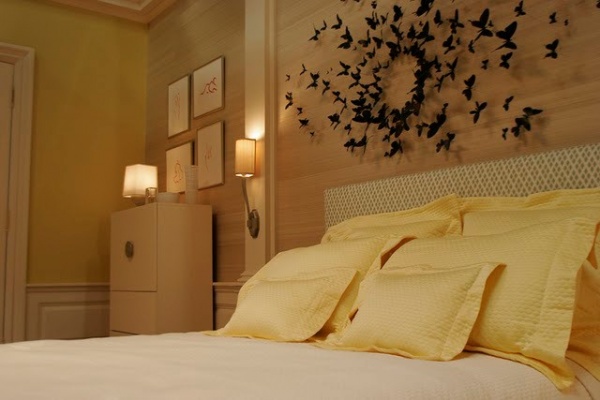
Images of butterflies in the bedroom will help get rid of autumn-winter depression. After all, when you fall asleep and wake up, you will always see these cute creatures, and a smile will involuntarily illuminate your face. In the bedroom, made in classic style, butterflies will look wonderful as images on the doors of a glass wardrobe, bed linen or wallpaper. Patterns of light wings at the head of the bed or their three-dimensional models made of vinyl films or cardboard look original.
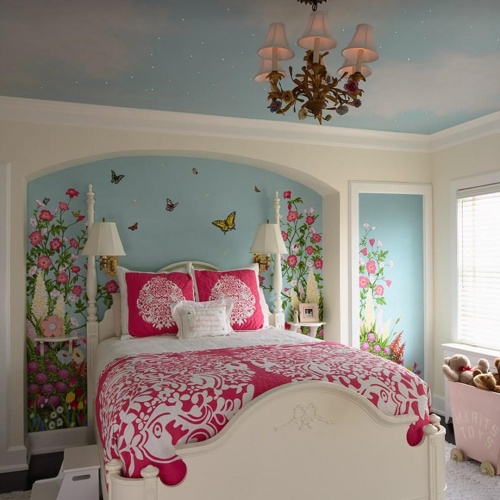
Kitchen
In the kitchen, butterflies look great on dishes or walls. If there is large windows, then you can place stickers on them in the form of these fluttering insects or decorate the curtains with butterflies-clothespins. There are many original options decoration, for example, creating multi-colored butterflies from pasta, wine corks or tin cans.
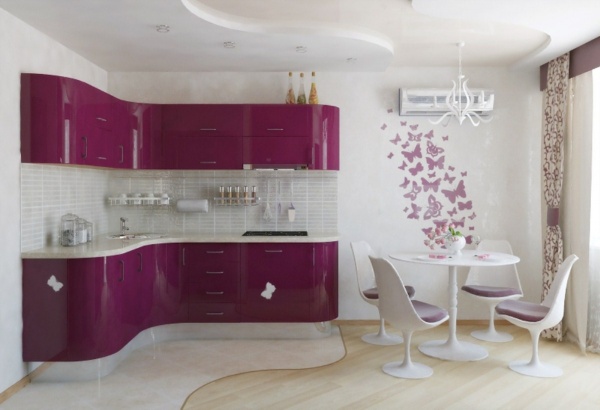
Ways to decorate the interior with butterflies
Wallpaper
Probably the most primitive option would be to use wallpaper depicting these beautiful creatures. This wallpaper can be used to cover all walls. But a room in which the main surface of the walls will be monochromatic, and in several places strips of wallpaper with images of butterflies will be glued, or only one of the four walls will be completely covered with them, will look more interesting.
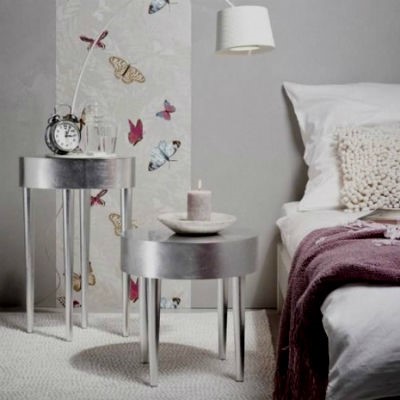
Stencils
You can draw butterflies on the wall using a stencil purchased at a specialty store or made by yourself. With its help, butterflies can get absolutely any color and position themselves the way you want. This decoration option is well suited for use in a children's room.
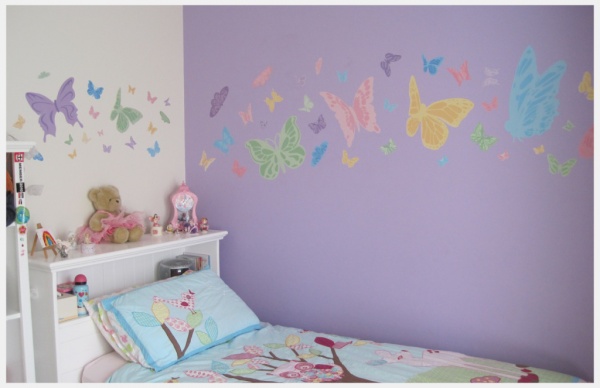
Stickers
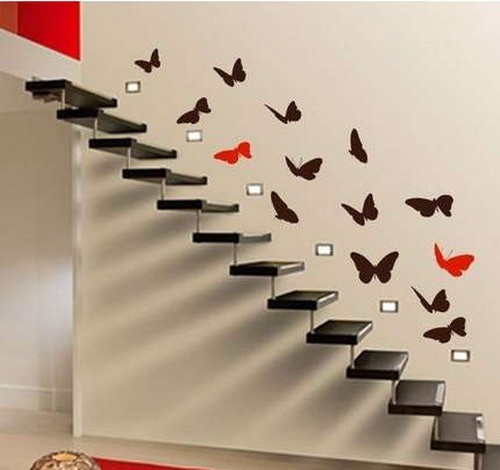
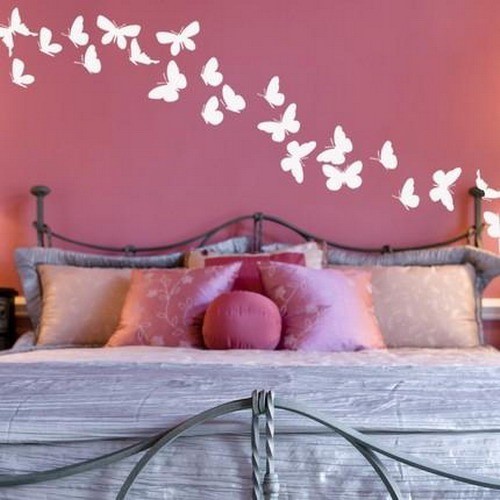
Butterflies are always associated with flight, so pasted in an ascending line above the bed or on the wall parallel to the stairs they will look not only very cute, but also harmonious.
Paintings
You can decorate the walls with paintings depicting winged beauties. You can find a huge variety of such paintings on store shelves. But it is much more interesting to create your own exclusive work of art.
In order to create a three-dimensional picture with butterflies you will need:
- colorful magazine;
- stencils in the form of butterflies of different sizes;
- double-sided tape;
- plain cardboard or thick paper;
- scissors;
- photo frame
First you need to cut the brightest pages from the magazine into strips.
Then, applying stencils to them, you need to cut out butterflies that have different sizes. There can be any number of them, the main thing is that they all fit into the photo frame and do not overlap each other. Then we place the resulting products on the cardboard on which they will be attached, but do not glue them until a perfect composition is obtained. To make the product more harmonious, achieve a gradual color transition. When the composition is complete, you can proceed to gluing.
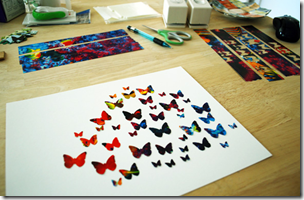
Each butterfly needs to be glued with a piece of tape. It is better to use adhesive tape with a foam base. If you only have flat tape, you can put foam rubber between two pieces of it.

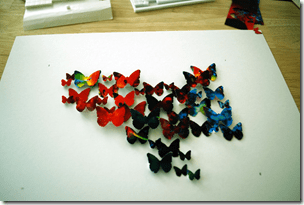
The completed product is placed in a frame. The picture is ready.
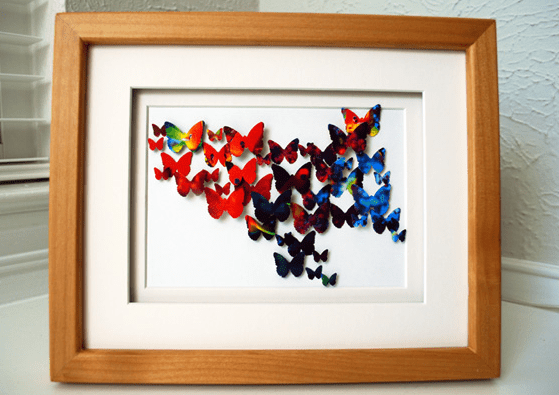
Advice ! Such a painting, made by yourself, can decorate not only your interior, but also become a wonderful gift for your friends.
Butterflies from improvised means
Butterflies for interior decoration can be created from seemingly unnecessary and useless things.
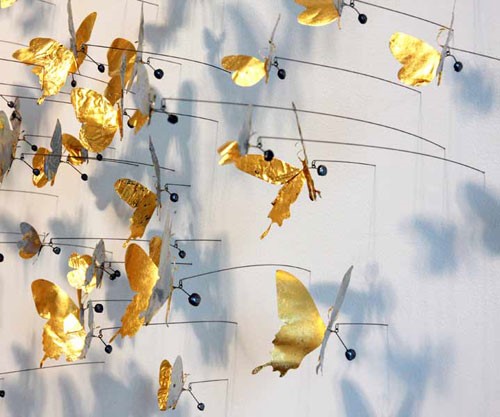
For example, you can cut them out of empty tin cans and attach them to the wall with thin wires to get a kind of mobile that will sway at the slightest movement of air, and the butterflies located on it will come to life.
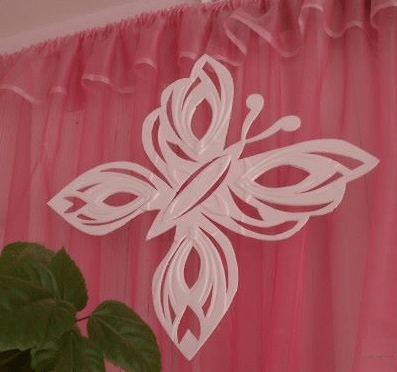
Volumetric butterflies can be created from foam. To do this, a design is applied to the foam plastic, then it is cut out, painted with acrylic paints and attached with tape to the wall or interior items.
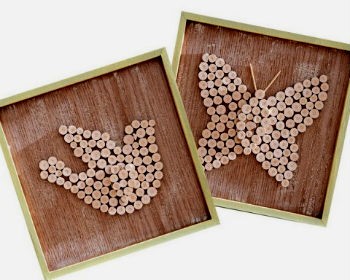
Even from burlap and wine corks you can make an original decorative panel depicting these cute insects.
Decoration of interior items
Butterflies can be located not only on the walls of the room, but also on windows, furniture, chandeliers, household appliances and other interior items.
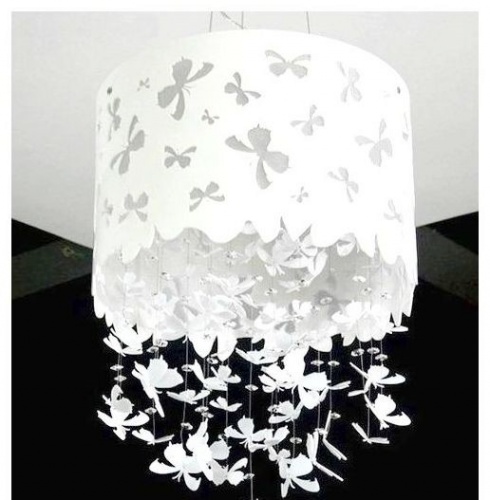
Butterflies attached to a fabric lampshade will look great in a vintage, minimalist or shabby chic interior.
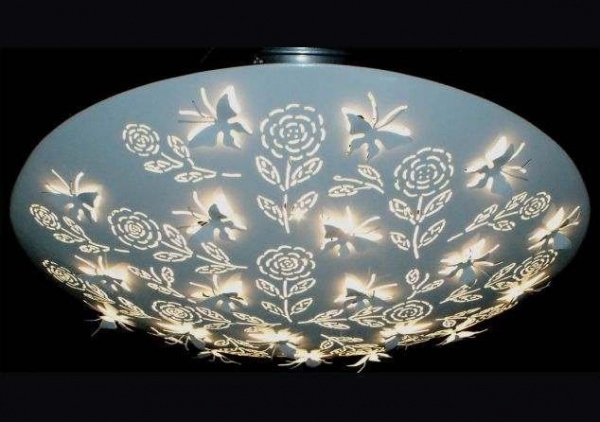
Butterflies can have any color, the main thing is that it is in harmony with the surrounding design.
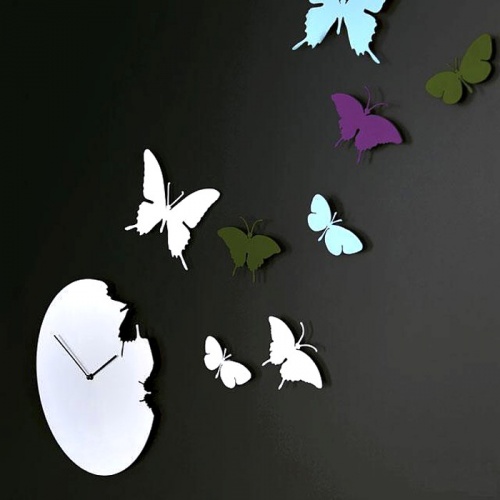
Watches made in the shape of these fluttering creatures, or with their image on the dial, will teach you to appreciate time.
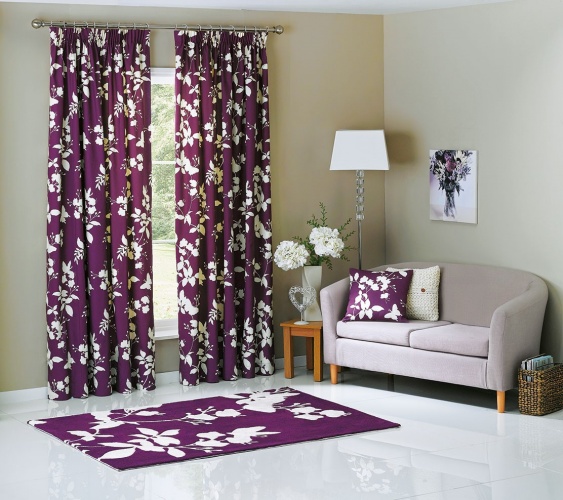
You can decorate a room not only with hanging butterflies. They can also be shown on sofa cushions, lampshade, even the carpet on the floor can be made in the shape of a butterfly.
Furniture can also have the shape of the wings of this insect, for example, the head of a bed, table legs or hinged cabinet doors.
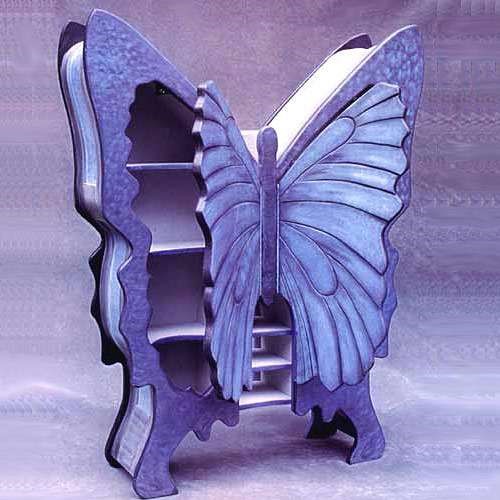
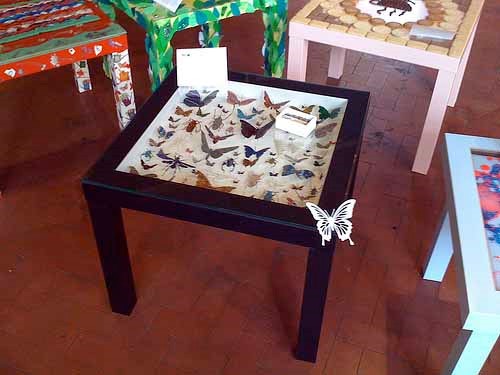
Butterflies can also live on a table: printed on the tabletop or table legs, in addition, they can be placed under glass lid table, which looks very original.
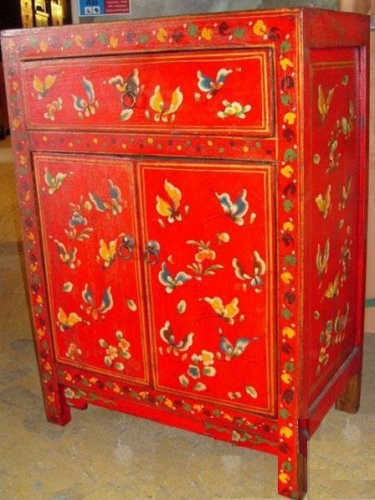
Of course, you will have to pay a lot of money for such an interior detail. But you can also save money by decorating furniture using the decoupage technique. For this you only need: a suitable theme, PVA glue, scissors, brushes and varnish.
Decorating the ceiling and windows
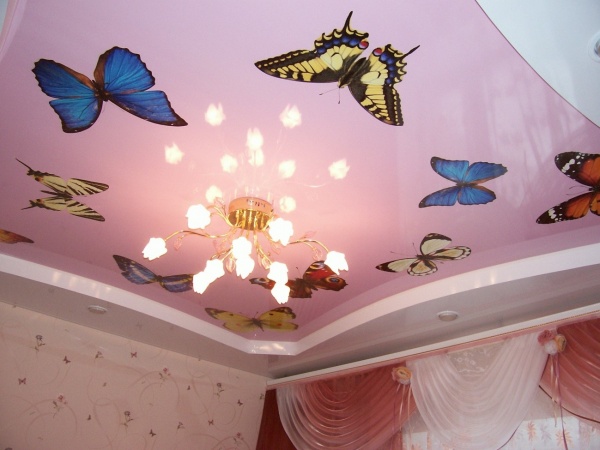
Butterflies on the ceiling can change the perception of the interior of a room. Their images can be made plain or colored, matte or glossy, alone or in the form of a whole swarm flying into the light emitted by a chandelier. To do this, you only need to acquire a fairly large stencil, and the larger its size, the more original the decor will look.
Using stencils, stickers or stained glass paints, you can depict an original composition on the windows. If this image is translucent, then the light from the street passing through it will create a special magical atmosphere in the room. Using this method, you can also decorate glass doors.
Interesting ideas for decorating the interior with butterflies are shown in the following video:
What Feng Shui says about butterflies
Many people associate these gentle creatures with carefreeness, well-being and, of course, sensuality. The Chinese, in general, call this beautiful insect a talisman of joy and say that where a butterfly lives, love lives. Therefore, lonely people who are in search of their soulmate simply need to decorate the interior with these cute creatures. And then, a romantic meeting will not keep you waiting, and newly emerging feelings will quickly develop into true love. They will strengthen the already decorated butterflies family relationships. Try relaxing on pillows or bedding with their image and the result will surprise you.
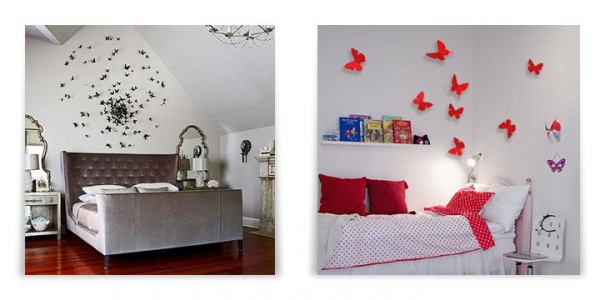
According to Feng Shui, butterflies should be placed in such a way that it looks as natural as possible. They should have a variety of sizes and be located randomly. They should not be lined up in rows or columns. A wonderful decor option that matches Feng Shui would be a panel located at the head of the bed.
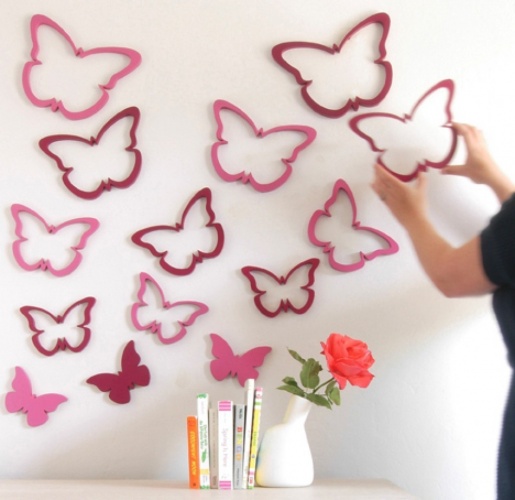
Decoration rules
About the fact that butterflies have become popular and fashionable option decor is not worth mentioning. But, as with everything, you need to know when to stop, otherwise your home risks looking like a motley summer lawn, where only a cow with a bell will be missing.
Be careful with small details so as not to accidentally create the impression of many small bugs crawling around your apartment.
If you use bright decorative elements, then the walls should be plain and painted in discreet colors. This also applies to cases where the interior contains furniture with upholstery that has a pronounced pattern.
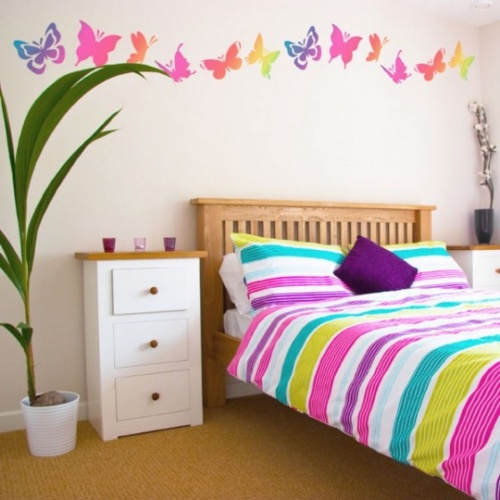
But if the furniture is monochromatic and made in soothing colors, then this, on the contrary, will emphasize the originality of the design of the walls, floor or ceiling.
As can be seen from the above, despite the fact that the technique of decorating the interior with butterflies is far from new, it does not lose its popularity. Butterflies can add lightness and individuality to an interior made in absolutely any style: from strict classicism to high-tech. Translucent beauties will help drive out melancholy and loneliness from the darkest room and fill it with warmth, light and joy. Place them in your apartment and you will see how your life will change for the better!


