Wood burning. Wood burning for beginners. Wood burning Wood burning beautiful works
Today more and more more people different ages enjoys wood burning. This type of needlework is widely available and requires a minimum of basic skills and maximum care when working. Wood burning is called "pyrography", the design is applied to wooden surface using a special electric burner, which can be purchased at special craft stores. You can come up with designs for wood burning yourself, or you can find ready-made templates and sketches on the Internet.
Material selection
The best material is a board made of alder, birch or linden. The wood should be soft and light, especially if this is your first work. Beginners also use regular plywood. Before applying the design, such a board must be sanded with sandpaper. Or you can do everything on a cutting board that will be ready.
Sketches can be drawn on the board by hand, or they can be translated using carbon paper or a stencil.
How to apply a drawing
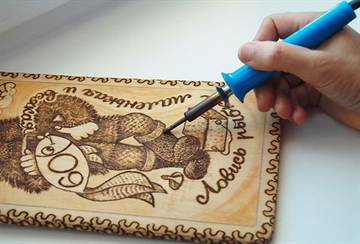
Make sure the board is dry before burning. Place connection points on the pencil-translated drawing and only then draw lines. To obtain a thin line, the electric burner should be moved quickly, and vice versa, if you want to get a thicker line, move the tool pen more slowly.
There is no need to press hard on the electric burner when applying a design. When the line is completed, the pen must be torn off sharply.
First, the outer contour is burned out, then gradually you can move on to internal details, to the center. It is best to burn in parts, that is, you need to give the newly burned elements the opportunity to cool. So work a little on one area, then leave it and move on to another, and so on until the whole job is completed.
After burning, the surface should cool slightly, then carefully, so as not to damage the strokes and lines, especially small ones, you need to sand the board with fine sandpaper. You can paint with watercolors or oil paints only when the work has cooled completely. After painting, the work must be waxed, that is, subjected to a wax finish. Thanks to waxing, the design acquires a soft shine and preserves the natural color of the wood and the richness of the colors.
Examples for inspiration
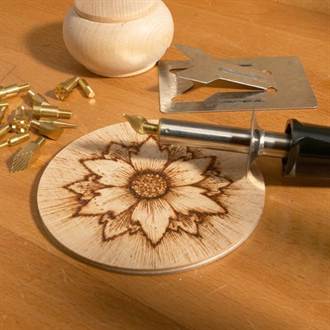
Patterns for wood burning can be very diverse: animals, flowers, ethnic ornaments, nature, and so on. They can be used to decorate cutting boards, as pictures in the home, or as gifts for family and friends.
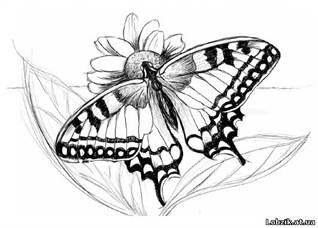
For beginners, it would be best to choose simple drawings as in the photo:


Children can also do pyrography, of course, under close supervision, because they need to work with a hot electric burner. For little craftsmen there are also interesting, beautiful and easy drawing schemes:


Do this interesting view needlework is quite simple, the main thing is not to be afraid and follow your imagination. Happy creativity!
Video on the topic of the article
And in order to become more familiar with the topic, you can watch specially selected video materials on this topic.
- " onclick="window.open(this.href," win2 return false >Print
Wood burning

Among the many artistic crafts associated with woodworking, a special place occupies decorative burning. One of the popular crafts, deeply connected with the traditions of Russian folk art, burning developed in parallel with carving, turning, mosaics and wood painting, often complementing these types of art or acting independently.
 In the old days they used for burning metal rods, the ends of which were heated red-hot over a fire or used metal stamps with a relief pattern engraved based on folk carvings.
Nowadays, many burning methods are used: pyrotype (hot printing), pyrography (hot drawing), burning in hot sand or on an open flame, in the sun with a magnifying glass, burning with acids, friction on a lathe.

Burnout - this is one of the types decorative finishing wood surface. It is used in the manufacture of souvenirs, furniture and various small wood products. The best material for burning - plywood, linden and alder blanks.
Before burning, the surface is sanded with sandpaper.
The drawing is transferred to the part via carbon paper.

Burn out the drawing using electric burner(see picture).
It consists of a step-down transformer (up to 6-12 volts), an electrical cord and a handle with a pin, the tip of which is made of nichrome wire.
 Its working part is feather
or pin
(bent wire, heated electric shock) - secured in a plastic handle. The wire pin allows you to burn out the most complex subjects and achieve great variety in the technical execution of the design.
Its working part is feather
or pin
(bent wire, heated electric shock) - secured in a plastic handle. The wire pin allows you to burn out the most complex subjects and achieve great variety in the technical execution of the design.
Wire pins of various shapes are made from nichrome and vehral wire.

Making them is very simple: cut the wire into pieces and use pliers to give the desired shape.

The surface that comes into contact with the wood is carefully sanded with emery cloth.

The pins are attached to the handle in different ways, depending on the design - with small bolts, a clamping screw and other methods. In all cases, the pin must be secured firmly and firmly.
Before burning, the surface is scraped and cleaned with emery cloth, then polished with chalk powder and water. After sanding, the wood is coated with light furniture varnish and sanded again. To protect your work from contamination, you need to stick a sheet of tissue paper with a pattern on it on the surface of the board. Then you can start burning. As individual parts of the design are burned out, remove the pasted paper. This removes dirt along with the paper.

A pen with a heating pen is taken in the right hand like a pencil. The device is included in electrical network and the switch (see figure) set the required degree of incandescence of the pen. They begin to work when the pen warms up to a dark red color.
When burning, you need to sit straight, right hand should lie stably on the table (see fig.). After 10 - 15 minutes of operation, the electric burner is turned off for 2 - 3 minutes to cool.
You can only burn dry wood.

On the drawn drawing, dots are first placed, then lines are drawn. To obtain a fine line, the burner pen should be moved quickly.
A thick line is obtained by moving the pen slowly. At the end of the line, the pen must be quickly lifted from the drawing. The pen should be moved without pressure.
The drawing is first burned along the outer contour, and then moves on to the internal lines and dots.

By changing the heat of the pin, giving it a different inclination, you can achieve deeply saturated lines and barely noticeable strokes, while the intensity of the color of the line also changes from dark brown to light yellowish-brown tones.
You cannot push the pin with special effort or hesitantly slow down its movement along the pattern.

If the edges of the burnt grooves are charred, then, apparently, the movement of the pin was too slow or the pin was excessively overheated.
You can cool the tip of the pin by touching it to marble tiles or by holding the pin in a vertical position for a while.
Burning is carried out immediately to different parts drawing. They temporarily leave one area, move on to another, and then return to the first.

This is necessary to prevent intermediate burns that occur from the strong heating of nearby parts of the wood. Therefore, you should not immediately burn several almost touching lines or strokes; before burning a new stroke, you need to let the adjacent one cool down.
When burning curved lines or dots, the pin is held perpendicular to the surface of the board, and when burning straight lines, it is held obliquely, like a pencil when drawing.
If necessary burn (shade) a relatively large area, first burned circuit (outline), and then a tourniquet is made inside it with the wide side of the pin. When processing the background, you can use various techniques: apply vertical wide lines and strokes, dots of various sizes, or, using curly tips, cover the surface with squares, triangles and other shapes.
Having finished burning the design, the surface is thoroughly cleaned with the smallest sandpaper. Sanding must be done carefully, but carefully, so as not to damage small strokes and lines and not to round the edges of the protrusions.
A burnt pattern can be paint watercolor or oil paints. painting , as a kind of decorative technique, complements the burnt product, making it bright and elegant.
For painting on wood you will need high quality watercolor or oil paints and a sufficient set of soft round and flat brushes.
The best finishing of burnt and then painted works must be recognized waxing .
The wax finish gives the design a matte silky shine and preserves the natural color of the wood; waxing does not affect the paint layer at all, and the applied color retains its tone and saturation.
You can turn on the electric burner only with the permission of the teacher.
When working, do not press the pen too hard. At the end of the line, the pen must be sharply torn away from the drawing.
You should not lean close to the burning area. Protect your hands and clothing from the touch of a hot pen.
After finishing work, the electric burner must be disconnected from the electrical network.
Wood burning, also known as pyrography, is gaining increasing popularity among people of all groups and ages. And this is understandable, because pyrography is not only an exciting activity, during which imagination and skill develop, but also wonderful gift for family and friends in handmade style. Wood burning is accessible not only to experienced wood burning gurus, but also to beginners. We will tell you in more detail below how to burn wood correctly with your own hands for beginners.
How to choose the right burning tool for beginners
The first step in mastering the art of burning is to purchase a burning device, ideally if such a device will be powered by electricity. You also need small planks or pieces of plywood, cut to the desired shape. You don’t have to cut them yourself; it’s enough to purchase several options in specialized stores. By the way, they also sell wooden figurines of various sizes and shapes, ready-made boards in frames, with sketches printed on them from the most basic to incredibly complex images.

When choosing a burning device, many people wonder whether it is possible to burn wood with a soldering iron? Our answer is, of course you can! This is the easiest way to burn wood patterns at home, accessible to everyone. The only difficulty in finger burning is that you need to use soldering irons different diameters. But if you decide to purchase a specialized device for wood burning, rather than a soldering iron, remember that for beginner burners, the ideal option would be a pen-shaped burner, with which you will simply draw according to a template. Such a tool is usually accompanied by brackets and pins, which are placed at the base of the burner handle; they then form lines of patterns of different thickness and color.
The wood burner should be heated to the maximum immediately before work, this will be indicated by the tip being hot to a dark red color. Carrying out wood burning comes down to constantly changing the inclination and heat, and sometimes the size of the pen, which allows you to achieve various depths burnt line, which means it will differ in color. Shades of different line depths range from light brown to rich dark brown.
How to burn wood for beginners with a job description
Choose wooden base and sketches for the first works:- At first, it is better to choose boards made of soft, light, homogeneous wood, which must be sanded for a perfectly even and smooth state. Birch, linden, alder, and poplar trees are rich in such wood. It is easier to burn on such blanks and there is no need to adapt to the structure of the wood. Typically, newbie burners use plywood, which is easier to process, commercially available and quite budget material. Once you get the hang of it and learn how to work with wood, you can start working on wood with a heterogeneous structure, which will help focus attention on certain details such as clouds, water, trees, or, for example, stripes on the skin of a zebra and tiger.
- The design for burning can be drawn by hand with a simple pencil or transferred to a board using carbon paper. The disadvantage of this method is that the lines drawn using carbon paper blur when heated and are difficult to erase if necessary. Ideal option for transferring drawings onto the board, use black graphite paper for light wood and white graphite paper for drawing on very dark or pre-burnt wood. In addition, you can glue tissue paper with a pattern onto wood and burn an image onto it, without the surface of the board getting dirty, and the paper will melt when heated. Using a burning device you can burn out various pictures, inscriptions, patterns, logos.
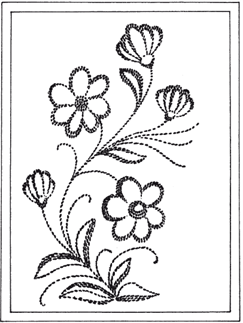
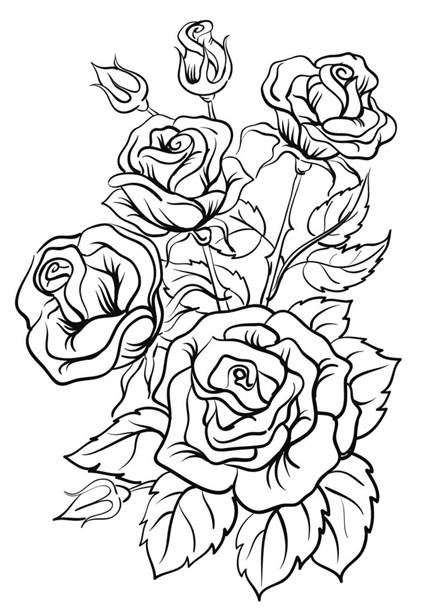
- Beginners should not choose complex drawings and patterns at first; first, it is better to get their hands on simple, medium-sized images made up of a miniature number of lines and strokes. The photo below shows several sketch options for beginner wood burners.
We invite you to get acquainted with three famous world pyrograph artists who are fluent in the art of wood burning.
Consider Julie Bender's sepia-toned pyrography

Using the art of wood burning, Julie conveys the smallest strokes of animals in such a surreal way that you feel as if you are drowning in a variety of palettes of tones and midtones. Each detail of her burnt paintings is made with microscopic ultra-fine shading and play of light rays. To create one such painting, it takes her more than one day; the master requires not only talent, perseverance and several years of experience, but also a love for such art as pyrography.
First, Julie watches the animals for a long time, absorbs every feature and shadow on their skin as they move, and then, inspired, makes sketches on a carefully polished wooden board from maple or thick paper for watercolor using a simple pencil. Maple has a creamy tint and slight graininess, which allows you to give the future painting a sepia color. Then, using burner tips of different sizes and shapes, he carefully works out every highlight of light, every shadow and stroke of the animal’s fur. One painting of hers, the size of a notebook sheet, sometimes takes up to several months of work! This is what it means to love your work and receive a well-deserved reward for it; the cost of one fiery work can reach 4 thousand dollars.
Learning beautiful wood burning from LeRoc

The famous South African artist, using fire and available tools, can burn portraits of people, animals, equipment, and trees. He uses a soldering iron as his main tool; previously, the favorite method of burning was the flame of a lighter, nails and pliers. The pyrographer dedicates all his works to connoisseurs of nature and graffiti, because in his opinion they are components of each other.
Looking at pyrography on surfboards by Peter Walker

Peter Walker is a famous Australian pyrographer who burns his work onto surfboards. Hollow planks of wood are cut from fast-growing trees, each plank is finished by hand, sometimes with other designers involved. Peter performs burning using laser technology.
Video on the topic of the article
We bring to your attention several video clips that will clearly show how to learn how to burn a variety of pictures and ornaments at home.
Wood burning is an art that first appeared at the end of the last century in the Russian capital. At first, this technique was used to make nesting dolls. Subsequently, this method was called pyrography.
A little history
The first devices that were designed for burning turned out to be imperfect. They ran on gasoline, which heated a platinum needle. In order to maintain a constant temperature, the person doing the burning had to constantly pump gasoline using a foot pedal. Although the process turned out to be labor-intensive, pyrography became more and more popular every day.
The technique was mainly used for making nesting dolls; it was only many years later that designs for wood burning became more varied and beautiful. As nesting dolls became more and more popular, labor-intensive pyrography had to be abandoned, and painting took its place. But they didn’t forget about burning, and now this technique was used to decorate boxes, caskets and other wooden objects.
Modern device

Wood burning for beginners has become a very simple and accessible technique after it was invented electrical appliance. Now it could be used to decorate items made of leather, bones, paper and other materials.
The simplest electric burner includes: a step-down transformer, a rheostat, handles and replaceable filaments, which are also called pins. Professionals recommend replacing the rheostat with a laboratory transformer, which makes it possible to obtain high-quality burning of different tones.
Wood burning at home involves the use of a factory-made school device. This electric burner is mainly used for contour and tonal drawings.
Wood burning for beginners
In order not to be disappointed in your skills and pyrography in general the first time, you need to know all the intricacies of this type of needlework. For the painting you need to take soft wood hardwood, for example, aspen, linden, poplar, etc. It is also worth considering the fact that some types of wood can ignite at a temperature of about 150 degrees, while others can withstand about 250 degrees. Therefore it is better to choose soft material, so the firing process will be easier and faster.
If you want to make a more complex design, then you should use it. In addition, you need to take into account that in order to keep the surface of the wood clean and neat, you can use the method used by real masters. To begin with, the pictures for wood burning are transferred to Then, using glue made from starch or flour, glue it onto the wood itself. The burning process itself must be carried out on tissue paper. When the painting is finished, the paper is carefully removed.

You need to start mastering the pyrography technique with some kind of easy and uncomplicated design that does not require complex pins. This concept means brackets different sizes made from which can be in diameter from 0.3 to 1.5 mm. To make a pin, you need to cut the wire and use pliers or round nose pliers to give it the desired shape. To make it more rigid, the wire must first be hammered. Although you can keep things simple and buy a set of different pins in a specialized store.
Important aspects
- Wood burning should begin after the pin is hot and a small tongue of flame is visible from it, which should not be accompanied by smoke. In this case, you can conclude that the gasoline is of high quality, the device works perfectly and the temperature for burning is optimal.
- If the flame goes out and you smell something burning, the vent is most likely clogged.
- When the tip of the pin heats up unevenly, this indicates that the gasoline you are using is of poor quality or the spirit lamp is not heated enough.
- If you had to take a long break during operation and the tip has cooled down, you should not heat it up again by blowing in air saturated with gasoline vapor, as this may lead to clogging.
- It is very important to clean the pin from slag during the burning period, as it will work poorly, cool down, and the design will ultimately turn out bad and sloppy. You cannot clean it with a knife or other metal object, as this can damage and ruin the pin.

Burning techniques
You must understand that you cannot erase the burner lines like a pencil, so there should be no errors or blots in your work. To avoid such problems, it is recommended to attach the wood at an angle. The hand in which you will hold the burner must have good support. In this case, you will be able to draw straight lines and they will not go to the side. In addition, it is recommended to complete the entire drawing in one sitting. If you don’t have that much time, then at least make a background first and then after a certain period of time.
Wood burning: important rules
To get a beautiful and vibrant drawing, it is recommended to use lines of different thicknesses and shades. The first aspect depends on the speed of movement of the hot pin, that is, the faster you move the device, the thinner the line will be, and vice versa. To regulate the shade, it is necessary to control the supplied air and the temperature of the tip: the larger it is, the darker the line. To quickly cool the pin, you need to touch it to a cold stone surface, for example, it could be marble, brick or granite. The wood burning device should be used like a pencil, that is, it should move easily, without any pushing or braking.

You need to be especially careful at the beginning and end of the line, as you can ruin the drawing. At an angle, strokes should be started from the top and should not be burned to the full depth at once. To begin with, it is recommended to work with a chisel and only then finish everything with a pin. To make strokes, the device must be placed flat. In order to decorate the background, you can use pins with curly tips.
There are various ways decoration surfaces of wood, one of the simplest and most effective is pyrography, or wood burning.
Any wood product can be made beautiful and unique by adding just a few contrasting touches.
It is not difficult to become a master of creating masterpieces using the burning technique. To do this, you don’t need to purchase expensive equipment, just buy or make a wood burner.
It's really simple - to create a beautiful and original item, you don’t even need artistic talent; any images can be downloaded from the Internet or purchased an album of drawings in a store.
Methods for creating images
The principle of creating a pattern by burning is that part of the wood is charred and darkened, thereby standing out in contrast against the general light background. Working with a very thin tool, you can paint pictures on wood.
There are various technologies pyrography, many of them are complex and require special equipment. Among others:
- open flame treatment;
- firing using a clay stencil;
- burning with hot sand;
- friction burning on a lathe.
These are quite complex techniques, but an electric device is best suited for creating pyrography masterpieces at home. In the device of such a wood burner high temperature The sting is created by the flow of electric current through it.
Industry produces various models burners, so it’s easy for a novice master to choose suitable tool. In addition, if you have the skills to work with a soldering iron, you can assemble such a device yourself.
Types of burners
Choosing a burner is a responsible matter. The quality of the resulting products largely depends on its characteristics. Both professional wood artists and beginning craftsmen use two main types of burning devices. These are devices with a wire tip and models with a solid tip.
With hard pen
This device is in many ways reminiscent of a regular soldering iron. Its working part is a sting that heats up nichrome wire, hidden under a metal casing. Unlike a soldering iron, a burner is equipped with removable attachments of various geometries. Depending on the price of the device, their number can reach 20 or more pieces.
The abundance of attachments allows you to make strokes different widths and shapes, and by combining them, create unique images. Wood burners with a hard pen are characterized by low price, high durability, and ease of use. As disadvantages, it is worth mentioning the heating time (5 minutes or more), as well as the bulky design with a long handle, which complicates the performance of delicate work.
With wire pen
In burner devices with a wire pen, the heating wire itself is the working tool. The current is supplied directly to the pen, so the instrument is ready for use almost the moment it is turned on. Devices of the middle and highest price categories have a power regulator, which allows you to select the optimal thermal mode for any type of work. The small thickness of the wire used and its bend create a small contact patch with the material, which allows you to easily perform the most delicate work.
The disadvantages of this type of burner include the relatively high price and difficult repairs.
Separately, it is worth noting the string cutter-burner. This is a device that allows you to cut parts from a thin board or sheet material wood based.
How to work correctly
It is easy to notice that the working tool of a wood burner resembles an ordinary pencil, and therefore the technique of working with it is not much different from ordinary drawing. It’s just important not to forget that the “pencil” is very hot.
The entire work process can be represented in a few simple steps.
Preparation
You need to choose a board on which the drawing will be applied. Its surface should be flat and smooth. To level the wood, it is scraped and treated with sandpaper.
A good material for burning, especially for a beginner, is plywood. It is cheaper, its surface is almost ready for work, you just need to smooth it with sandpaper.
Drawing
For those who have drawing skills, it is not difficult to cope with such work; moreover, craftsmen can do without a sketch, working straight away with a burner. For beginners, we can advise you to select a suitable picture on the Internet, print it and transfer it to work surface. Here, old time-tested copy paper will come in handy; you can scale the image using the square transfer method.
For a novice master, it is worth choosing simple drawings that are not replete with small details. In addition, it is better to immediately make something concrete, not some abstract board, but, for example, a plywood stand for a microwave oven, which can be decorated with floral patterns.
Burnout
Using the heated tip of the burner, they begin to apply a pattern along pre-designated lines. The handle of the instrument is held like a regular pencil.
Drawing begins with the outer contours. Straight lines are performed with quick movements without pressure. It’s not difficult to make an accent or draw a thick line; you just need to slightly reduce the speed of the burner’s movement. In curved areas, you must hold the tool perpendicular to the surface of the board, avoiding excessive pressure.
Pay attention! If there are several closely spaced lines, you should not try to draw them as quickly as possible; the wood must cool, otherwise the spaces between them may burn out.
The shade of the line can be changed within a fairly wide range. This is easy to achieve by changing the temperature of the tip, the shape of the working tool (in the case of replaceable attachments) and the angle of inclination.
Final processing
The completely finished image is processed with fine-grained sandpaper. Then they are coated with a layer of furniture varnish and, if desired, partially or completely painted.
The simplest homemade burner
To decorate a small board with pyrography or just try your hand at something new, you don’t have to buy a professional machine.
From a soldering iron or radio components
You can make your own wood burner using a soldering iron. To do this, it is better to choose a model with a replaceable tip. Nozzles with the required profile can be easily made from a copper or brass rod.
A practically professional burning device can be made according to a circuit with current regulation in the primary winding. To work, you will need very few parts: a transformer, several resistors, capacitors and dinistors. The circuit is not particularly complicated, however, manufacturing the device will require knowledge and skills in working with a soldering iron.
Mini burner
If soldering radio components does not appeal or you simply don’t have time, you can make a device of the simplest configuration. To make a mini-burner you will need:
- unnecessary power supply (charger) from a mobile phone;
- syringe needle;
- sewing needle;
- material for the handle (wooden skewer or brush handle);
- soldering iron and solder;
- shoe thread;
- electrical tape or heat shrink tubing.
The process of making a burner is not particularly complicated. You should start by preparing a syringe needle. The plastic part is bitten off from it; it is not needed in this device.
Both needles are attached to a wooden handle diametrically opposite. The easiest way is to secure them with threads. The sewing needle is carefully bent to such an extent that its point barely touches the point of the hollow syringe needle.
The plug is cut off from the old power supply; it is also not needed. The ends of the wires are stripped. The wires are soldered to the needles. Polarity doesn't matter. At this point, the production of a homemade wood burner is almost complete.
As the final touch it is necessary to give the product an attractive appearance and create conditions for convenient operation. The wire is wound to the handle. This can be done using the same thick thread. This design will be convenient and reliable, however, it is worth strengthening the thread with glue, and after it hardens, put heat shrink on the handle or wrap electrical tape.
Pay attention! Heating of the tip occurs almost instantly. The principle of operation of the device is extremely simple: resistance arises between the needles and the needle from the syringe (due to the fact that it is thin-walled) becomes hot.
Perhaps you won’t be able to make a picture with such a burner (insufficient power, not the most convenient tip), but you can practice and decorate, for example, cutting board it will be possible with ease.
CNC burner
The burner will help add originality to the interior and diversify it with products self made, but not only. You can make good money by making paintings created by fire. Landscapes, decorative panels, portraits, household items and kitchen utensils with burning elements are in consistently high demand.
The use of modern technologies will significantly simplify the creation of masterpieces using the burning method. Computer-controlled machines have long become commonplace in wood and metalworking shops. There are similar solutions and for pyrography. Such a burner can be connected to a personal computer, transfer the required image to it, and it will do the rest itself.
To make your own CNC wood burner, you will need significantly more knowledge and materials. Typically, such machines are purchased for production purposes. But for those who want to assemble the device themselves, you can use a laser for burning.
In general, there are two directions in the development of CNC burners. They differ in the main working tool.
Laser burner
As the name itself suggests, the main part of the machine is the laser. It is from this that its main advantages emerge:
- high accuracy of drawing due to a small contact patch;
- versatility, the machine can be used when working with wood, leather, films, paper;
- The burner is immune to changes in temperature and humidity.
Disadvantages include the low speed of the laser burner and difficulties in drawing halftones. In addition, the cost of such devices is high.
Burner with nichrome thread
The working part of this device is nichrome thread incandescence Actually, this is a unit transformed from an ordinary wood burner into a more functional and modern device. Its advantages:
- saturation of the picture;
- the machine works on wood and leather;
- high speed;
- lack of graininess characteristic of a laser device;
- no harmful radiation.
With all the visible advantages, there are also some disadvantages. This burner is sensitive to the microclimate of the room. The slightest change in the basic indicators will entail a decrease in the temperature of the tip, as a result, a decrease in the contrast of the pattern. In addition, the working tool has an extremely low service life.
Pyrography as an art appeared in the 18th century, and since then its popularity has only grown. Classic multiplied by modern technologies, gives excellent results. Burning is worth adding to your list of hobbies, no matter how the work is organized. You can buy a simple device, you can make a wood burner with your own hands, the main thing is that the result is pleasing and the process brings pleasure.


