How to build a raft (most common types). Build a wooden raft How to build a raft from 200 liter barrels
Probably every person made in USSR had a childhood dream of making a raft and sailing to distant places. Dreams come true! We tried it and it worked!
There were many projects on exactly how to build a raft, what size it was and what it was made of. After much discussion, it was decided that the base of the raft would be car cameras large radius, their number depended on size.
In fact, it turned out that buying inexpensive cameras is not an easy task, the most profitable and quick option there were much smaller cameras than expected R16. The cameras turned out to be Chinese and the seller honestly warned us that they would not stick properly. But we decided to take a risk.
Considering that 8 people were going to sail on the raft (in fact it turned out to be 6) + things + food + the weight of the wooden flooring, the carrying capacity of the cylinders should have been at least 800 kg, but we took it with a reserve - 43 cameras, which corresponded to a carrying capacity of 1200 kg.
The cameras were supposed to be covered wooden shield, assembled from boards, size 4x6 meters. But here, too, circumstances intervened: at the sawmill, we managed to buy boards only 4 meters long. So it was decided to make the raft square 4x4 meters.

This is how the design turned out.
Let's look at the main points in more detail.
The raft was assembled directly on the river bank.

First we use car compressor 43 cameras started downloading.

The compressor did not like this task and refused to work halfway. We had to urgently resuscitate him because... the frog pump, which was supposed to swim with us, could not pump the chambers to the required state, which affected the size. If in case of repair this would be acceptable, then I didn’t want to start the journey with under-inflated inner tubes.

In the end, we won the compressor and, applying wet rags to it to cool it, we pumped up all the chambers.

They brought the purchased boards and beams, the length, as I already said, is 4 meters.

Let's try out how it will be.

The assembled raft frame with the first layer of chambers. For the frame, timber 100x50 and 200x50 was used.
40 cameras were used, 3 were taken as spare parts.

We stuffed 25 mm boards on top. I would like the gaps between the boards to be much smaller, but we didn’t calculate the number of boards when purchasing, so we decided not to bother with the purchase again. They lowered the raft into the water.

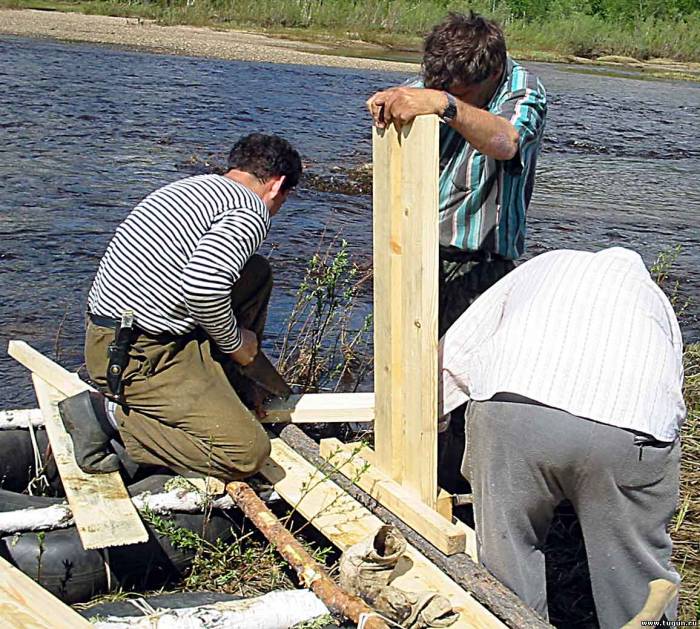
Beginning of construction of supports for the awning.

50x50 mm timber was used for supports. The height of the side supports is 2 meters, the central one is 2.5 meters (in the photo they are just making it). Initially, the awning was intended to be used only as a roof, but in the end it was also used as a sail, I will talk about this below.
All wooden structures fastened together with screw nails.

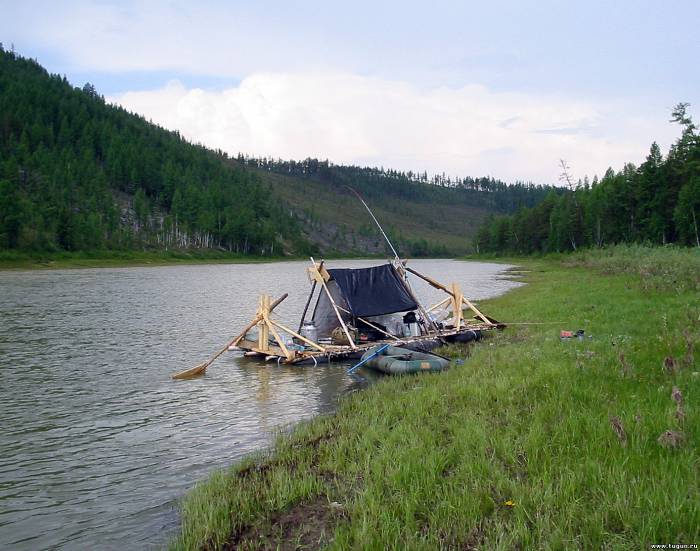
The raft was named “Gena” - as they say in the well-known cartoon about Cheburashka: “Because it is green and flat.” The construction took 1 day (we started early in the morning and hit the road in the evening).
In this photo, it is ready to sail; all that remains is to firmly secure the rubber boat with ropes along one of its sides.
Why the boat was needed is an interesting question, the correct answer would be: it was safer for us. In fact, it turned out to be very useful: they dumped all the shmurdyak into it, which was only needed for spending the night, clothes and tents, in the evening we fished from it, when we needed to be in the village, but it was not possible to properly land on the raft on the shore, messengers were sent by boat .
All things, sleeping bags, first aid kit and other things that were wet were packed in specially sewn hermetic bags. Cereals, salt, sugar, etc. poured into plastic bottles. Documents, phones, cameras and other equipment were stored in a separate hermetic bag, which “if anything” was supposed to be dropped first.
In the center of the raft there were a pile of essentials and some food in a large bag. It didn’t look aesthetically pleasing at all, but overall it turned out to be comfortable.
Foam was spread on the boards i.e. At night we slept on them in tents, during the day they moved to the raft.
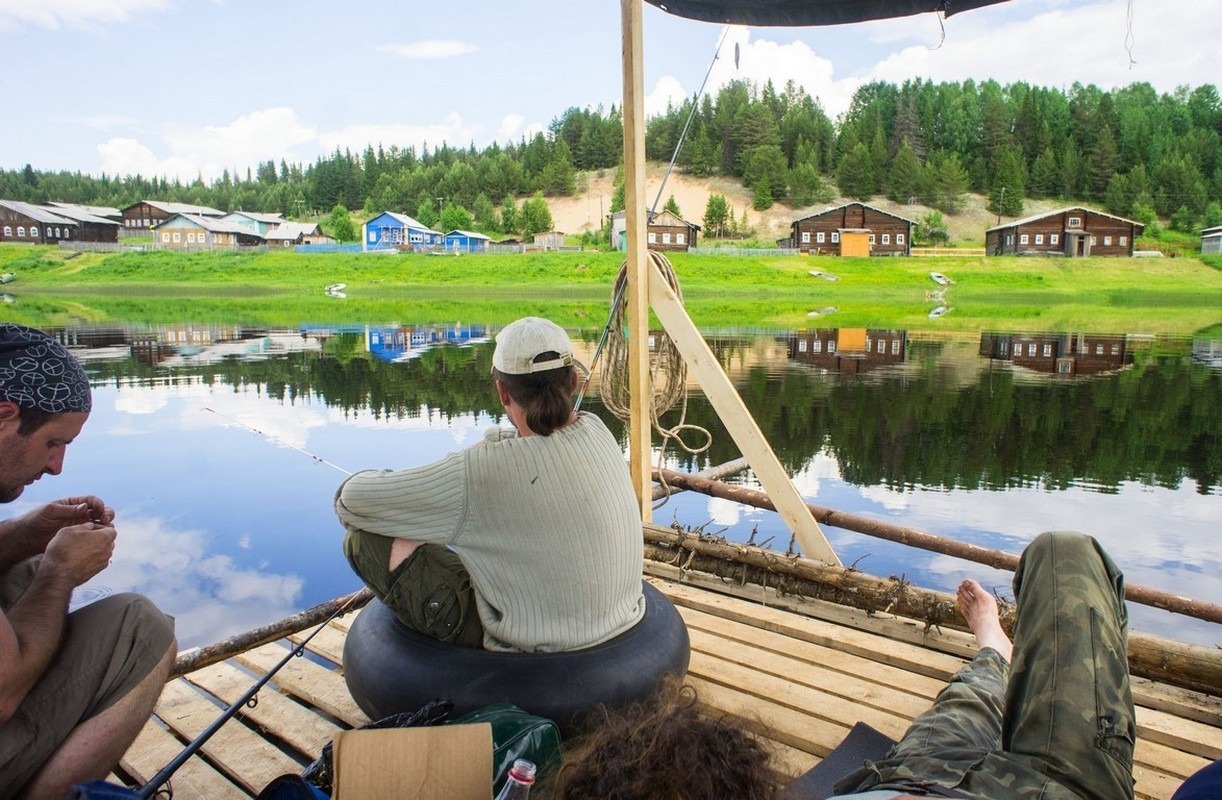
Spare tubes turned out to be successful seats, although one of them was soon used for its intended purpose - it went under the corner of the raft, on which both (2 layers) of the tubes burst.
At night we landed on the shore and set up camp there, but in the morning you won’t have enough tea for the whole day and you won’t be able to go to the toilet.

Everything was simple with the kitchen: a barbecue was rigidly fixed on two elongated boards above the water. Firewood was collected on the shore, sawed and chopped while moving. For ignition, so as not to fool around, we used dry fuel tablets.

The toilet is more difficult: under the oar you can see two shortened boards - this is the coveted point.
There are beams on both sides that you can hold on to. An opaque reinforced film was thrown over the rope, behind which the man did his business. Initially, the idea was to make something like a permanent screen out of film, but it did not always create the necessary windage, then they wanted to attach it to the rope with clothespins, but in the end they simply held it with their hands.
During the voyage, many things had their regular places. So the ax was drowned on the very first evening, and the new one they got was tied and left to live near the firewood. A pot with bowls and spoons was hung on a nail near the barbecue, and dishwashing liquid along with a sponge was inserted into a tape pocket near the food.

Regular place for fishing rods.

Solar battery. It was supposed to be used to charge phones and camera batteries, but in reality there was no connection, we only took a few pictures, and it wasn’t really needed.

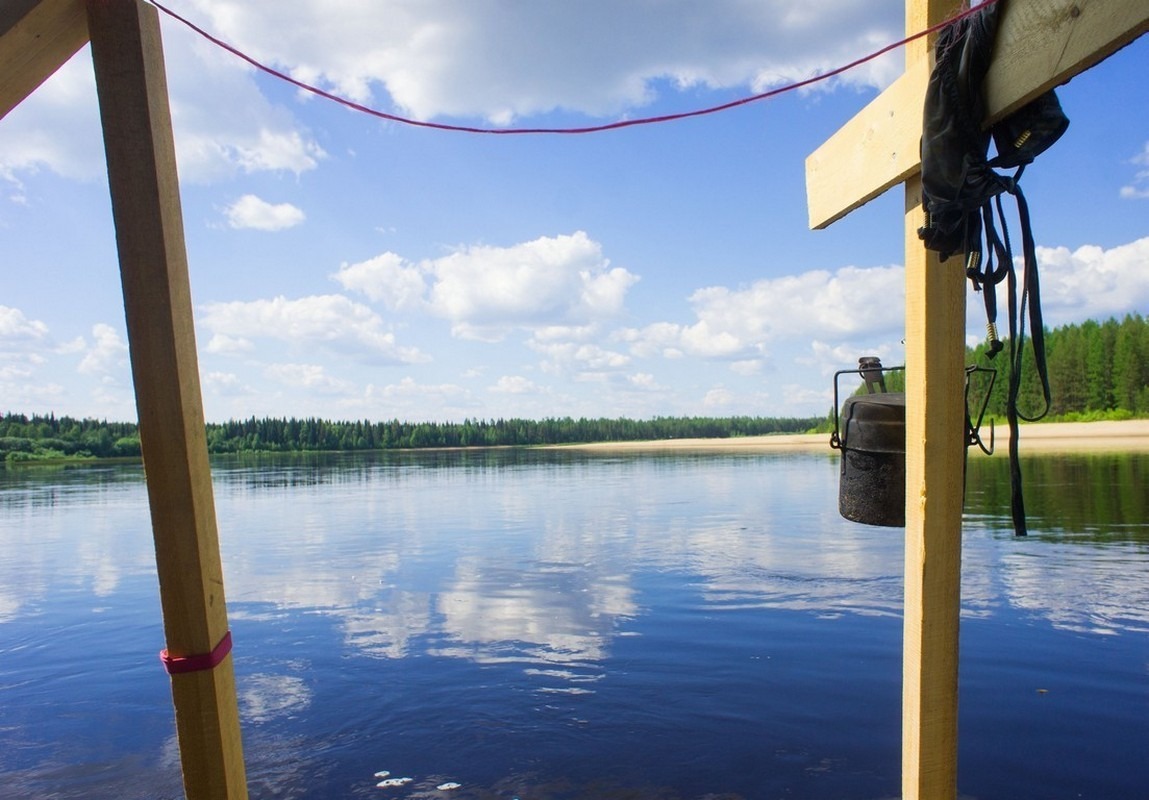
Cooling of liquids.

On the central support on a nail hung all sorts of necessities that I didn’t want to get wet and drown, but they were needed during the sailing process. The main thing is Garmin, which runs on batteries; we used it to find out where we were, how fast we were moving and what to expect ahead.
All that remains to be said is about handling.
In general, everything affects the raft: wind, current, how many people are crowded on one side, which side the raft is turned, etc. etc.
At first there were 2 controls: an oar and a cue.

The oars were boat oars and there were only 2 of them; if they knew that they would be the most effective during maneuvers, they would have taken 4. The rowing process is not the easiest task.
A cue is a long pole (we had about 2 meters) with which you can push off from the bottom in shallow water. At first we had 4 of them, then one was sunk, another was used for a sail. Unfortunately, not a single photo of the cue was preserved - everyone was busy at those moments.
On the third day of the journey, a fair wind blew and another way to control the raft was revealed to us - a sail.

The length of the awning was enough not only to serve as a roof, but also to cover one of the sides. By long games A movement strategy was developed using ropes, sticks and an awning. The sail was turned with its feet, pulled up with ropes, and when unnecessary, it was rolled up and tied to the supports. If the wind was headwind, it was necessary to fold not only the sail, but also the “roof”.
Thanks to the sail, the raft acquired an additional letter in the name “Gena-M” (which means Gena - modified) and developed a speed of just over 6 km/h with a river flow speed of 2.3 km/h, although this happened infrequently. Mostly we moved at a speed of 3-4 km/h.
The Mezen River along which we sailed is replete with sandbanks. At first, we thought that we would constantly fly into them and pull off the raft, tearing the cameras. As a result, we ran aground literally a couple of times.

When the bottom was very close, they jumped off the raft and pushed or pulled it to the depth on a rope.
Gena-M served us faithfully for 6 days and 130 kilometers, during this period the edges of 2 boards broke off, the tent-sail structure became a little loose and for various reasons about 10 inner tubes ran out (more precisely, they didn’t count). All this had no effect on buoyancy.
How the design could be improved:
- The possibility of putting reinforced film under the cylinders was discussed in order to protect the cylinders from snags and abrasion on the shallows; in fact, this turned out to be not necessary, but putting the same film between wooden flooring and some cylinders wouldn't hurt. This would protect the cylinders from friction on the boards, save a number of small objects from drowning, and protect the cylinders from sharp objects and sparks from the grill.
- Our assumption that in the middle of a wide river there would be no mosquitoes, horse flies and midges turned out to be incorrect. As soon as we approached the shore, the insects happily attacked us, and then we floated on the raft together. This problem could be partially solved by placing a large mosquito tent in the center of the raft. How much windage such a tent would create is an open question.
/ How to build a raft
When the idea itself settled in my head and the first wave of euphoria subsided, it became clear that there was a lot of work to be done before the raft safely set sail on its first voyage. There were no professional raft designers or even carpenters among us. We had never really been involved in the construction of rafts or boats before. But amateurs with a broad outlook can do a lot. The main thing is to have a desire. In addition, as you know, Noah’s Ark was also built by amateurs, and the Titanic was the work of professionals. And we got down to business.
About that how to make a raft we could talk for hours. There were a million ideas that, of course, contradicted each other. We had to choose the only solution that suited us best.
The all-wooden raft was immediately abandoned. A log raft is common on northern rivers. But in the south there is not enough dry, suitable forest to properly make a large wooden raft. Considering the experience of other homemade raft builders, we thought about the following options:
- Foam raft. You can make two “skis” out of boards and fill them with dense foam. One of best designs for a motor raft, as it handles well.
- A raft of chambers. Large automobile inner tubes are placed under the frame of the raft; the stronger, the better. If the camera bursts, it is easy to seal it in the field rafting conditions.
- Bottle raft. This is perhaps the most popular raft design, and the cheapest of all. First you need to collect many hundreds and thousands of empty plastic bottles. The bottles are then stuffed into plastic bags (rotproof). Next, the bags with bottles are secured under the raft.
- A raft made of barrels (or other plastic sealed containers). Plastic cubes, canisters and so on. It is more difficult to secure, but you can achieve a high landing of the raft above the water. You can also make a raft from metal barrels.
- Rare and exotic types of rafts. For example, a raft made of plastic unsealed boxes filled with polystyrene foam and polyurethane foam.
There are also special “pontoons” on sale, that is, composite plastic containers for pontoon structures. It is easy to assemble a plastic raft from such cube pontoons, but such pontoons are unreasonably expensive.
We thought and argued and decided make a raft on barrels. Empty plastic “Euro-barrels” of 227 liters were selected. They are sealed, with two holes with screw-on plugs. Moderately rigid to keep its shape under load, and moderately flexible so as not to make holes when the raft hits a stone or snag.
The lower deck was raised above the water by half a meter so that the waves would not overwhelm us, but would peacefully break against the barrels below the deck of the raft, without creating discomfort. In general, when designing and drawing drawings of the raft, the words “comfort” and “reliability” were heard often. After all, we wanted to live on the raft, not survive, and there was a small child among us.
The incredible had to happen for the raft to “throw” or go to the bottom. The reserve of stability was such that even if everyone crowded together on one edge, collecting all their belongings nearby and adding a ton of something else to them, the raft could not capsize spontaneously. Even in strong winds and waves. The buoyancy reserve also suggested a calm continuation of the rafting along the Don under a terrible set of circumstances. The barrels could become leaky and fill with water, become loose and jump out from under the raft, or the barrels could simply flatten. Of course, several pieces at a time and, as luck would have it, one side at a time. Of course, it’s easy to flaunt now, but the facts are as follows: there was no overkill, they didn’t go down.
How to make a small raft
We had just decided on the design and materials when the first beta version was suddenly released. About six barrels, single-deck floating jetty. The only difference between such a pier and a raft is that the raft is made for rafting on rivers, and the pier must remain in place. By the way, this didn’t stop us from swimming on it a little...
Main characteristics of the pier:
- working title: " Youth",
- own weight of the structure: 480 kg,
- maximum load capacity: 1,543 kg,
- deck area: 8 m².
The prototype of the future “big” raft was made on occasion: one of the participants wished to sponsor the construction of a pontoon raft-pier on the river near his country plot.
They built it vigorously, with the help of a certified architect and her husband, a generalist. They started at noon, and by the evening of the same day they were nailing down the last board of the deck. And they got pleasure from the fact that the calculations turned out to be correct: the pontoon behaved as planned. And the next day we took the oars from the boat and tried to float on a raft along the river. There is almost no current in this place, we just crossed the river on a raft and came back, jumping a little into the water along the way - we liked everything! If you built a raft with your own hands, you can have some fun, because everything turned out as planned!
This circumstance completely freed our hands, and we continued to create. But for now only mentally.
How to make a big raft
For a large raft, 22 barrels were already required. The barrels were attached to the raft in two rows, 11 pieces in each. To get something like a catamaran with two skis, which is good both in terms of handling and weight distribution. By the way, as experience has shown, such a structure is easy to refloat, and for the middle reaches of the Don this is important.
Each barrel was in its own compartment, delimited by two beams and two crossbars. The weight of the raft pressed on the barrels from above, and the water pushed up from below. In addition, the barrels were pulled with slings to the frame bars.
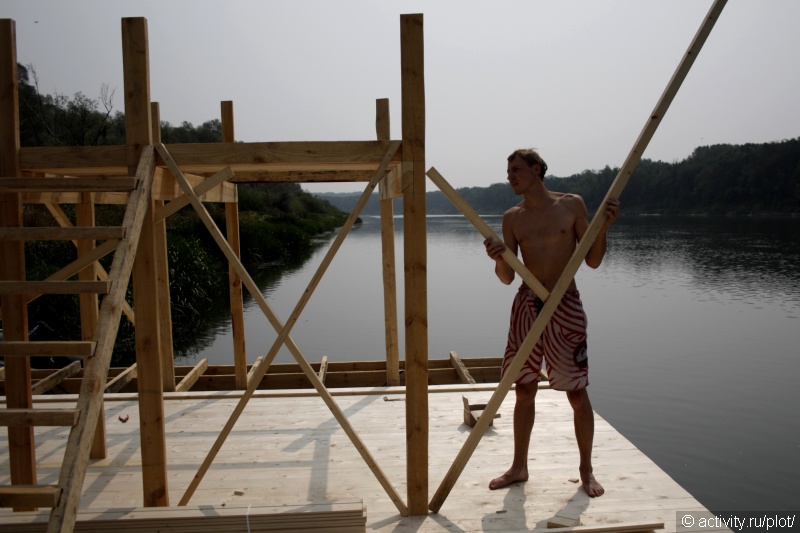
The basis of the construction of a raft made of barrels is a frame made of beams and boards on which the lower deck is laid. The upper deck (a la Sun Deck) also rests on the frame with its posts.
The structure is largely supported by its own weight. The individual elements are connected to each other through grooves.
Or “grooves”, as we now affectionately call them. The fact is that during the construction of the raft, when a whole hundred grooves had already been sawed, cut, hollowed out, and they still did not end, the stock of abusive words addressed to the grooves dried up. And from that moment we began to love them dearly.
In the drawings the raft looks like this:

One barrel has been removed - this makes the details of the raft look clearer in the drawing.
Nails are also widely used in making a raft, and we also practiced a lot in hammering them. Nails are generally indispensable in many endeavors. They played the role of hooks in the kitchen of the raft during the trip, and were nailed to the deck of the tent with the same nails.
It’s good that we managed to build the raft without using screws or self-tapping screws. It takes a very long time to tighten hundreds of screws with your own hands, but taking a screwdriver or drill with you is difficult. extra hassle with electricity. Plus, nails are simply cheaper.
How to control a raft when rafting
For a long time we could not decide how the raft would be propelled and how it would be controlled. The options of having some kind of mover constantly making noise nearby were not suitable. The classic version with ridges somehow didn’t work (although another traditional version control the raft - poles - we used). As a result, we agreed that we would simply float downstream on a raft how it floats. And if necessary, pull the raft with a motor boat. At the same time, we were not sure that a light boat would be able to tow a multi-ton raft, the size of which would be comparable to a two- or three-room apartment.
It's a pity, but many beautiful and almost unrealistic propulsion options were left overboard. One such option is a giant fishtail. In miniature it looks like this:
But what are we all about theory! Finally the day came when we left for the place building a raft, that is, a slipway. Practice has begun. Construction materials arrived, their piles grew and grew. We began to “recycle” them, and the piles began, albeit slowly, to decrease.
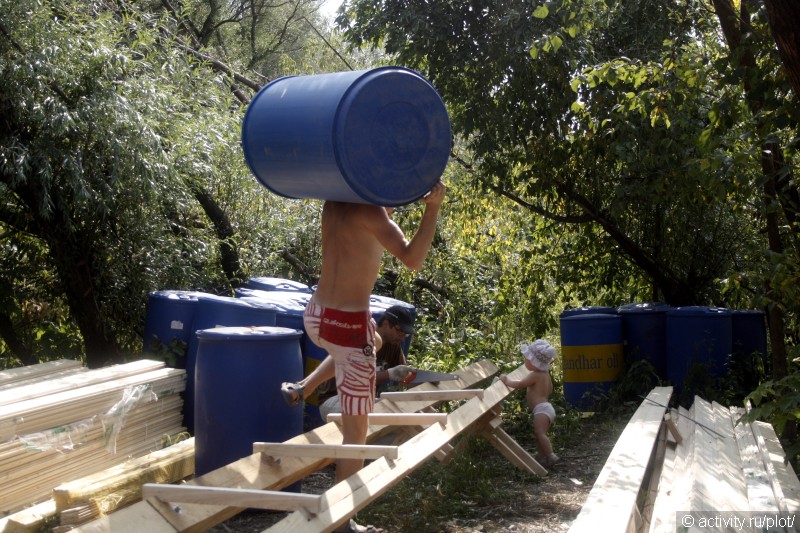
There was a lot of work. The first days we lived on the shore. They marked, sawed timber and boards, made grooves, sealed the plugs of the barrels. It was not intended to launch the raft at once, as with a pontoon. The structure was too massive, several tons - You can’t lift the raft with your own hands. Parts of the future raft were carried by hand into the water, where the installation of the huge structure continued. It was even easier to work in water: remember how hot this summer was?

On the third day of making the raft, the flooring of the lower deck finally began to appear. And ours active life began to gradually move from the shore to the raft. I already wanted to spend the night on it, drink tea, fish and just sit, dangling my legs in the water.
The incident stuck in my head. We built the raft not in a remote place, but not far from the village. Of course, the locals were very interested in what kind of raft we were making here. We even had regular spectators who tracked the progress of the work almost every day and made constructive suggestions to the raft project. There were also local boys constantly hanging around, who didn’t ask questions, but were simply happy and, probably, envied us in some way. One day, when we had already covered part of the deck, one of the boys suddenly asked: “Can I jump from your raft?”
It was probably at that moment that it became clear to me that the idea with the raft was not in vain. Not one, but several boys jumped into the water from the raft, actively exploiting our creation. What a thrill it was just to see their sparkling eyes!
After another couple of days of work, a second deck and a staircase leading to it grew above the water.
It became clear that raft trip- not far off. The next day they finished laying the lower deck, built part of the partitions and prepared to set sail the next day. The tents began to crawl from the shore to the raft in the evening.
The next morning, having laid the second deck, we began to load. All things, tents, as well as tools and remaining building materials were moved onto the raft. It took a long time to collect the accumulated construction waste, intending to use it for firewood for the samovar and barbecue. The shore was empty, we pushed off, and the Don slowly carried us south...
Rafting days
Now our main occupation has become, as someone accurately noted, “drinking the beauty of the Don.” Sailing sedately on a raft along the river. Enjoy the tranquility of the river, gaze at the slowly changing landscapes of the Don, smile in response to the horns of larger boats and ships passing by. Rafting down the Don is not uncommon, we also met homemade rafts quietly floating along the river. Sometimes it is very important not to rush anywhere. Swim, fish, sunbathe, talk about the most important things and nothing else...
But the work didn't end there. It’s just that further arrangement of the raft took place “on the fly”. It's like renovating an apartment - it's impossible to finish. Now the pace has become completely different. We were no longer in a hurry, but worked for our own pleasure, in our free time. So, during rafting, several more partitions appeared on the raft to visually separate the space and as protection from the wind. The kitchen (that is, the galley) was equipped, and an almost unshakable table was built for the wardroom. A hammock is hung, protected from the sun and “with a view.” A semi-automatic ladder was created to climb onto the raft from the water after swimming. On the second deck, rails were stretched and a flag was hoisted...
Enough with the arrangement, it’s time to look at the results of your labor!

The story about construction could end here (we will admire the photo of the raft in other chapters). But some will be interested in the dry numbers of the project. So, the characteristics of the raft with the working title " Four and a half tons".
- Gross design weight: 4,500 kg, including
- dead weight of the raft: 3,711 kg, .
Side height (distance from the top of the deck to the surface of the water) at the design payload: 0.39 m.
Landing at design payload: 0.46 m.
Maximum raft carrying capacity (maximum payload): 5,382 kg. At the same time gross weight of the raft would become terrifying: more than 9 tons!
- Raft dimensions
Dmitry Chuverin.
Why spend a lot of money on purchasing a motor boat if you can make a raft for river rafting from improvised materials? This is a reliable, wave-resistant craft, used not only for rafting, but also for crossing. Its buoyancy and strength make it suitable for rafting on taiga rivers with natural rapids and fast currents. The disadvantages of the raft include low speed and low maneuverability, and it cannot be used when rafting on water bodies with impassable debris. Wooden rafts are the most common, but they can also be made from other materials that everyone has on hand.
How to build a raft for river rafting
The most reliable raft for rafting on a choppy taiga river is made of wood. To make it you will need from four to ten logs, depending on the size of the craft and the number of people designed for the crossing. The logs must be the same size. To tie them together, you need to prepare six poles, longer than the width of the logs folded together. The poles are attached to a bundle of logs above and below them, perpendicular to them. The ends of the poles are tied with strong rope on the sides to hold the logs together more tightly. If there is no rope, and the raft is assembled in survival conditions, you can use wire, bast, or plants suitable for tying instead.
 How to build a raft for rafting
 A raised platform should be created on top of the stacked poles to keep clothes and shoes dry, as well as to create thermal insulation. At home, a platform can be made from boards, attaching them with a screwdriver, but if construction is carried out in an emergency, you can inspect the area for any wood, floating driftwood, or bark that can be laid on top of the logs. To make the raft easier to control, you can attach a pole perpendicular to the base on which to place the sail. For comfort, it is better to make a frame of bars on which to attach a canopy that protects from the sun, wind and rain.
When it is not possible to use logs, any materials that have the ability to float on water are used.
For example, for crossing to warm time year, you can partially float on the water with the help of a bundle of reeds, reeds, stuffed with straw. If you can find a tire or inner tube on the shore, you can build something like a boat for one person, wrapping them in a raincoat-tent.
How to build a raft from plastic bottles
 How to build a raft from plastic bottles
 Plastic bottles, like floats, can keep different numbers of people afloat; this ability must be supported by a reliable frame. There are three ways to build a raft from plastic bottles:
The easiest option is to use plastic bottles and tape.
The bottles need to be prepared - washed, dried and screwed on tightly with a lid so that they are filled with air. The bottles are held together with tape, 3-4 pieces each, and there should be from 30 to 50 such blanks. These pieces are then simply tied together to form a raft. Of course, a raft made from plastic bottles made in this way may not withstand serious tests, but it is quite suitable as a means of recreation on calm water.

Catamaran made from bottles.
A raft made of plastic bottles, reminiscent of a catamaran, is made on the basis of the frame from an old cot. It must be completely free of tissue, various fastenings. Attached to the four corners of this frame are wooden boxes, inside which plastic bottles are placed in a vertical position and secured with tape or rope. The boxes are attached to the corners of the frame with clamps, cables, ropes and other fastening elements. A wooden seating strip is installed in the middle of the frame.
The most reliable bottle raft is made as follows: the bottles are tightly closed with lids and placed inside plastic bags. The more bags made, the better, this will give more stability to the craft. The bags are tied well with ropes. A frame is formed from wooden boards: they are tied together and fastened with nails to form a lattice. Bags with bottles are attached to this frame, and the raft is ready.
How to build a raft from barrels
 How to build a raft from barrels
 To build a raft from barrels, you will need more expensive material than bottles, but this design allows you to achieve a higher landing above the water. To build a small raft from barrels, six 200-liter plastic containers are enough; to make a large raft, you will need about 20 barrels. They are airtight, plastic, but at the same time very durable. The tanks are located parallel to each other, like the pontoons of a catamaran. For the frame, a frame is made of beams with transverse crossbars, and each barrel is located, as it were, in its own compartment, which is limited by two crossbars and two beams. The barrels are attached to the frame with slings.
A deck of planks is laid on top of the frame. On a large raft, you can build an upper deck for relaxation from barrels. She's going out wooden racks, which are attached to the main deck with grooves. Because the weight finished design quite impressive, the production of the raft is best transferred to a place near the shore in the water. Large raft made of barrels - good remedy for a relaxing holiday on the water, which can be equipped with a kitchen, tents for overnight stays, shelter from rain and wind, etc.
By the way, with the help plastic barrels It is possible to make not only a mobile watercraft, but also a stationary pier on the river bank.
How to build a rafting raft from inner tubes
 How to build a raft with your own hands
 You can make a raft with your own hands from a pontoon like an inner tube. It is much lighter than a wooden raft or a raft made from barrels, which is convenient when making and being forced to carry it across the shoal. To build a raft designed for six people, it is necessary to take eight chambers from heavy vehicles, for example, KAMAZ, ZIL, MAZ. They are laid out parallel to each other in two rows and fastened with strong nylon rope. The choice of fasteners in favor of nylon thread is explained by the fact that it does not collapse or stretch from prolonged exposure to water.
 How to build a raft from inner tubes
 Cameras are placed on top square beams, two for each row of cameras, are similarly attached to them. Boards are attached to the beams to form a deck. It must be taken into account that the length of the boards should be such that they extend beyond the edges of the auto cameras by about half a meter. This is necessary so that when obstacles arise in the water, they bump into the boards and not the cameras to avoid damage.
In addition, the protruding edges of the deck leave room for the manufacture of various fastenings for a canopy, sail, rowing seats, and others. A canopy is necessary not only for shelter from wind and rain, but also for drying clothes, and in windy weather it can serve as a sail. It is better to make the canopy foldable so that it can be removed in a headwind for easy rowing. To be on the safe side, when going on a long trip on the water, you need to have a spare tube and pump with you.
Make a simple raft for your camping trip!
We all love adventure, we are always looking for new experiences and something memorable. Build a raft and ride it down the river - that's real adventure! There are many options for how you can make a raft, there are a lot of materials, all that remains to be done is to start building it, so let's not delay a minute - let's get started!
How to build a raft with your own hands?
First of all- let's decide what our raft will be made of? The simplest and most common option is plastic bottles. They will be a good basis and with enough quantity, the raft will never sink. Depending on the frame and the number of bottles, the raft will withstand different quantities people. For example:
How to make a raft from plastic bottles?
Option #1.
It will require:
Plastic bottles
. Scotch
1.
We prepare the bottles; they should be empty and have a very tight lid.
2
. We take 3-4 bottles and wrap them with tape. We make 30-50 pieces of such blanks.
3
. Then we tie these blanks together with tape in the form of a raft.
Option #2.

You will need:
Plastic bottles
. Cot
. Rope
. Beer boxes
. Scotch
1
. The frame of an old cot is ideal for constructing a simple raft structure, so that's what we'll use. It should be completely freed from all fastenings, fabrics and other things.
2.
Bottles should be placed in beer boxes and the lids should be screwed on tightly. Let's fix them there with the help of a rope.
3.
The last step is to connect the frame to the drawers. We can use clamps, cable, rope and other elements for fastening.
For ease of movement, you can attach it to the frame wooden board, which you can sit on.
Option #3.

This is the hardest to work with, but the best quality option. For such a raft you need the following materials:
Wooden boards
. Cellophane bags
. Plastic bottles
. Rope
Let's get started!
1.
We close the empty plastic bottles tightly with lids and fill them or bags. The more bags there are, the better the raft will stay on the water.
2.
We tie the bags with bottles well with rope.
3.
We construct the frame of the raft from boards. We make a net out of them, fastening them together with rope or nails.
4
. We attach the bags to the structure.

Such a raft can support several people. You can even travel on it!
VIDEO. How to make a raft yourself?
If you are small but friendly company If you are planning a long rafting trip along the middle Siberian river and cannot find the necessary watercraft for this, try to consider the option of building a raft from car inner tubes.
The best option, of course, would be to deliver you and the cargo directly to the river, but a raft made from inner tubes can be carried to the site, correctly distributing the weight among travelers and taking the minimum required for construction. And this:
1. ZIL, GAZ, MAZ, Kamaz cameras - 6 or 8 pieces, depending on their availability, the number of rafters and the weight of the luggage.
2. Pump for chambers.
3. Nails from 100 to 200 mm.
4. Axe.
5. Hacksaw.
6. A roll of keeper tape.
7. Two blades for rowing, 200-250 mm wide, 500-600 mm long (best made of thick plywood, but can be made from wide inch boards).
I remember in 1991, Serb and I and six schoolchildren carried materials for the construction of an 8-chamber raft ten kilometers away. At the same time, Seryoga and I, as the eldest, in addition to our things, carried two ZIL cameras, the rest was distributed among the boys . And it’s okay, we went in quietly, because, as the old proverb says, “the eyes are afraid, but the hands are active.”
By the way, we simply begged for cameras at the plant, went to the right people- KAMAZ drivers, mechanics and supervisors. They glued the ones with holes themselves, fortunately little pressure was needed. Then we pumped it up and checked it, in general, over the winter we collected materials for the raft without any problems or material costs.
The most pleasant thing about rafting, of course, is a canopy to protect people and things from rain, which will also serve as a drying rack. Some of the most simple materials for canopy - toast polyethylene film or tarpaulin. But keep in mind that you will have to pay for the acquired comfort with a small minus - the windage of the vessel. On reaches in the rain and headwind, you will not raft, but stand still or climb up the river, so get ready to row against the wind. But in the canopy-sail there is also positive points- tailwind and the ability to control the drift alone.
The next nice addition to the raft could be a deck made of boards or plywood. In the minimum case, we would use poles and spruce branches for flooring. But, whatever one may say, there will be in the raft large gaps, where during the rafting many small, but necessary little things(from lighters, spoons and knives to caught fish). But with tightly packed flooring this will not happen.
One day, we dropped onto a river in a passing military UAZ. The driver, a major, asked us about all the plans for building a raft and rafting, and told us one military secret. If, he says, you swim to the first reach and go a hundred meters into the forest, you will find there a toilet made of boards. And it was done by prisoners. Of course, we didn’t believe the major and even quietly giggled at his words, but we didn’t finish building the raft. We inflated the cameras, made a frame and swam to the reach. All the way we neighed like horses at the driver's joke. When we actually came across a toilet in the taiga, some of us were dumbfounded, and the rest were taken aback. There's not a soul around, no buildings, and there's a toilet on top of you! Without thinking twice, we dismantled it and put together a luxurious deck for ourselves, without a single crack:
In general, you can make a lot of useful things on a raft for a comfortable rafting, for example, a metal or stone hearth for a fire, a bench or lighting... Let's leave room for your design imagination and finally, let's start building the raft.
skeleton
We choose a free place for construction on the river bank with adjacent young forest for harvesting poles. Then it is necessary to correctly distribute responsibilities between the builders. The main thing at the beginning is to pump up the inner tubes and cut down the poles - the skeleton of our ship. Download as many cameras manually or foot pump- a very monotonous and labor-intensive task. It's good if there is a compressor nearby. If not, then the pumpers and preparers need to be changed periodically.
Finished car cameras are laid out according to the following scheme:

Fig.1
Please note that when pumping, the diameter of the chamber increases by about one and a half times. And one more thing. Often it is not possible to assemble inner tubes of the same size, in which case large ones are placed closer to the middle of the raft and if they do not fit in size, then when inflated they are compressed into an oval, for which they are tied with a keeper tape of the required length.

For the frame, longitudinal and transverse poles are cut so that their size protrudes slightly beyond the dimensions. In the future, it will be convenient to grab them to moor the raft to the shore, refloat it or tow it.

Fig.2
The transverse poles are laid down, the longitudinal ones are placed on top, and the upper transverse ones are placed in front and behind the longitudinal ones for subsequent fastening of the ridge.

We carefully fasten the frame with nails and keeper tape, then tie it to the cameras in the most critical places.

The base of our raft is ready. In principle, we can already cut down the poles and hit the road, but we will continue the construction.
Podgrebica
The rower serves to transmit rowing force to the raft. Accordingly, the main requirement for it is strength. Also important is the energy intensity of the stroke, which is achieved optimal location and row the stroke of the handle.
The following diagrams show options for making a ridge from planed bars

Fig.3
And from the poles.

Fig.4
Racks (1) are nailed to the upper and lower outermost transverse poles with the distance between them necessary for rowing (8-10 cm). In this case, the ridge (5) should pass freely, but without gaps, between the posts (see Fig. 4).
Then the racks are strengthened first with longitudinal jibs (3), and then with transverse ones (4). The jibs are attached with nails to the posts and frame of the raft.
For rowing (5), take a pair of strong, even poles from 3.5 m to 4.5 m long with a top diameter of at least 50 mm. Next, a cushion (2) under the ridge is nailed horizontally to the posts and longitudinal jibs. The height to which the cushion is nailed is best determined by installing the row between the posts so that the rower can comfortably hold it at waist or chest level.

Row pads must be made at the bow and stern of the raft. In some construction options, the bow ridge is not on the edge, but a little deeper, at the level of the second cross member. This is done for more serious rafting along rapids and the edge of the raft acts as a bumper. But at the same time we have a serious reduction in the size of the canopy.

Fig.5
The blade (8), lower (7) and upper (6) supports are attached to the ridge (5) with nails in one plane. The lower support is designed to prevent the rowing from slipping into the water, and the upper one so that the blade is in a vertical position. For more comfortable grip with your hands, you can make a handle by cutting off the thick end of the row with an ax.

Deck
We make the deck from materials prepared for this purpose. In the case of using poles, spruce branches are collected in parallel with the preparation of poles, which are then evenly laid out on top of the flooring.
Canopy
Building a canopy will not take much time and effort. First, a frame is made from thin poles, then the top is tied with keeper tape and the entire structure is covered with material.

It is advisable to provide the ability to quickly assemble (roll up) and install the awning.

So, our raft is ready. All that remains is to name the ship, launch it and celebrate the completion of such a big undertaking. Believe me, rafting on a raft made by yourself will give you a lot of pleasure.
P.S. For those who did not fall asleep while reading, here are some surviving photos from our rafting trips.

1989 or 1990. At the mouth of the Dry Pit.

Serb, me and Vovochka on an 8-chamber raft (3 variants of chamber arrangement). They even lowered the gangplank to the shore for the sake of order.

The seven of us rafted on this raft for about 200 km.

6-chamber raft. The four of us rafted very comfortably. In the photo, Arishonok and I are eating blueberries.

Me, Serb and Andryukha are swimming, diving and swimming around the raft. It's very interesting to play catch and hide and seek. You dive under the camera - and you're in the house.

I'm at the helm of a 6-chamber raft.

The most responsible rowers Serb and Gray are rowing in a dangerous area.

Serb and I are supervising the construction of a raft of poles.

For some reason we nicknamed the towed boat “consumer” in childhood.

Launching an 8-chamber raft (2 chamber arrangement options)

It’s not for nothing that this part was called a pillow.

Why should we build a raft...

Final stop. The raft is being dismantled.
Happy sailing and fair wind!


